Top products from r/voroncorexy
We found 26 product mentions on r/voroncorexy. We ranked the 61 resulting products by number of redditors who mentioned them. Here are the top 20.
1. BIQU PC4-M10 Male Straight Pneumatic PEFE Tube Push for E3D-V6 Fitting Connector Bowden Extruder 3D Printer (Pack of 10pcs)
Sentiment score: 1
Number of reviews: 3
10 x PC4-M10 pneumatic male straight quick connector for E3D-V6 long-distance bowden extruder 3D printerPTFE Tubing Outer Diameter: 4 mm. Thread: 6mmThe upper part(black) can be inserted 4mm PTFE tube and self-lockingMade of high quality stainless steel, oxidation resistant and rust resistant, incre...
 Show Reddit reviews
2. MG Chemicals 824 99.9% Isopropyl Alcohol Electronics Cleaner, 15.9 oz Aerosol Spray, Clear
Sentiment score: 1
Number of reviews: 2
Dissolves light oils and residues on electronic devices and equipmentA pure IPA, CARB compliant solutionModerate evaporation rateEffective flux removerFood safe – Registered with NSF for use in and around food processing establishments
 Show Reddit reviews
3. Igus RJZM-02-08 DryLin R Thin Walled Standard Clearance Linear Bearing, 8 mm Nominal Size
Sentiment score: 0
Number of reviews: 2
Closed, anodized aluminum adapterDimensions equivalent to the standard for recirculating ball bearingsSecured by press fit in a recommended housing boreRecommended housing bore H7 for steel housings or K7 for aluminum
 Show Reddit reviews
4. ZITRADES Ethernet Shield W5100 Development boardor for Arduino UNO Mega 2560 1280 328 UNR by ZITRADES
Sentiment score: 0
Number of reviews: 2
1. Based on the W5100Based on the Wiznet W5100 allows an Arduino board to connect to the internet.2. Has a standard RJ-45 connection, with an integrated line transformer and Power over Ethernet enabled.3. Can use to store files for serving over the network.4. Compatible with the for Arduino Duemilan...
 Show Reddit reviews
5. Super Lube Synthetic Multi-Purpose Grease, 3 Oz.
Sentiment score: 0
Number of reviews: 2
Patented synthetic NLGI grade 2 heavy-duty, multipurpose lubricantDielectric, Food Grade, CleanNSF Rating H-1, safe for incidental food contactWill not drip, run or evaporate
 Show Reddit reviews
6. Plano 3213 Pocket-Pack 2 Sided Satchel
Sentiment score: 0
Number of reviews: 1
Tested for durabilityMade in the USAMade using the highest quality componentsGray Metallic/Blue13 compartmentsGray Metallic/Blue13 compartments
 Show Reddit reviews
7. Music Wire Compression Spring, Steel, Inch, 0.18" OD, 0.02" Wire Size (Pack of 10)
Sentiment score: 1
Number of reviews: 1
Highly magnetic steel music wire for greater strength than stainless steel or copper wireSpring ends are closed and ground flat (squared) for efficient force transfer and reduced possibility of tanglingLoad capacity of 2.29 poundsMaximum operating temperature of 250 degrees F (121 degrees C)Dry to t...
 Show Reddit reviews
8. 1.25" Dia Sorbothane Hemisphere Rubber Bumper Non-Skid Feet with Adhesive (8, 50 Duro)
Sentiment score: 0
Number of reviews: 1
SORBOTHANE FEET: We created these adhesive-backed Sorbothane rubber bumpers in order to isolate vibration, attenuate shock, and damp unwanted noise. These vibration isolation and gripper pads can be incredibly helpful, especially in the case of sensitive equipment. These isolators are made of Sorbot...
 Show Reddit reviews
9. Omron G3NA-210B-DC5-24 Solid State Relay, Zero Cross Function, Yellow Indicator, Phototriac Coupler Isolation, 10 A Rated Load Current, 24 to 240 VAC Rated Load Voltage, 5 to 24 VDC Input Voltage
Sentiment score: 0
Number of reviews: 1
Solid state relays for high-speed switching in low current applicationsScrew terminals for connecting to contactsNoise suppression activated when the load current rises suddenlyYellow operation indicator alerts users to operating statusUL listed for safety, CSA certified for quality assurance, and R...
 Show Reddit reviews
10. Engineer Inc PA-20 Precise Universal Wire Terminal Crimping Tool
Sentiment score: -1
Number of reviews: 1
Excellent for use on Molex, Tyco, JST, and many more terminals and connectorsDie width range from 1.6mm - 2.3mmSemi-soft elastomer grips provide a good comfortable feelFor use on most terminals and connectors in the #18 - #28 AWG rangeHigh quality precision crimping tool made in Japan
 Show Reddit reviews
11. Engineers Precision Crimping Pliers Pa-09
Sentiment score: 1
Number of reviews: 1
Brand New Product
 Show Reddit reviews
12. 1200W 12V Hotplug Acc Pwr Spply Kit
Sentiment score: 1
Number of reviews: 1
Hp 1200w Ac Power Supply
 Show Reddit reviews
13. Belkin 250-Foot Cat5e PVC Stranded UTP Bulk Networking Cable (Gray)
Sentiment score: 0
Number of reviews: 1
Category 5e performance rated for any 10Base-T and 100Base-T NetworksEasily create your own custom length cablesWhite conductor has color band for easy pair identificationPowerSum testedStandards Compliance: ISO/IEC 11801; TIA/EIA-568-B.2Conductor Size: 24AWG x 4pairs. Conductor Construction: Bare S...
 Show Reddit reviews
14. FYSETC 3D Printer Build Plate Heatbed Spring Steel Sheet 300x300mm/11.8 x 11.8 inch Printing Hotbed Parts with Circular Magnets Platform for CR-10 10S Tevo Tornado Lulzbot Taz 6 TronXY MP Make
Sentiment score: 1
Number of reviews: 1
It is a must 3D Printer part for DIY or replace a new CR 10 Tevo Tornado Lulzbot Taz 6 TronXY MP Make printer hot bed build surface.Spring Steel Sheet Size: 300X300X3mm/ 11.8"X11.8"X0.1"; Gift: one piece PEI, size: 305X305 mm( you can use scissors to cut any size), no more shovel, easy to remove the...
 Show Reddit reviews
15. Greenlee 1360 Wire Ferrule Crimper, 1300 Series, 22-10 AWG
Sentiment score: 1
Number of reviews: 1
Tool and die 1360, die only 2095Crimps 22-10 AWG insulated and non-insulated wire ferrules22-10 AWG stranded wireCrimps sizes 22-20, 18-16, 14-12 and 10For insulated and non-insulated wire ferrules and for DIN or US types
 Show Reddit reviews
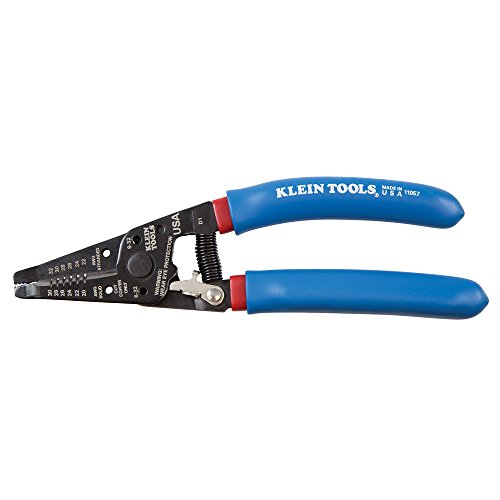
16. Klein Tools 11057 Wire Cutter / Wire Stripper, Heavy Duty Wire Cutter Stripper for 20-30 AWG Solid Wire and 22-32 AWG Stranded Wire
Sentiment score: 1
Number of reviews: 1
Cuts, strips and loops 20-30 AWG Solid and 22-32 AWG Stranded wirePrecision ground stripping holesStrong-gripping serrated nose for easy bending, shaping, and pulling of wireHoles for looping and bending wireCleanly shears 6-32 and 8-32 screwsCoil spring provides fast self-opening actionEasy-to-read...
 Show Reddit reviews
17. Heatshield Products 340020 Thermaflect Tape 1-1/2" Wide x 20' Heat Shield Tape
Sentiment score: 1
Number of reviews: 1
Continuous operating reflective temperature of 1100 degree Fahrenheit, 2000 degree Fahrenheit intermittentCapable of reducing up to 90 percentage of radiant heatAdhesive backing sticks to almost any clean surfaceHelps shield fuel lines, brake lines, wire looms and more from radiant heat
 Show Reddit reviews
18. Acetal Dowel Pin, Plain Finish, Standard, 0.187" Nominal Diameter, +/-0.005" Diameter Tolerance, 0.375" Length (Pack of 100)
Sentiment score: 1
Number of reviews: 1
Smooth finish and flat endsNonmarring plastic with low moisture absorption
 Show Reddit reviews
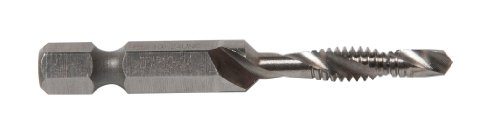
19. Greenlee Drill/Tap/Countersink, Hss, 10-24, DTAP10-24
Sentiment score: 0
Number of reviews: 1
Complete hole drilling, tapping, deburring and countersinking in one operation with power drill saves labor and timeBack tapered beyond tap to prevent thread damage from over-drillingDeburr/Countersink also provided on bit beyond back taperMade from Hardened high-speed steel vs carbon steel for long...
 Show Reddit reviews
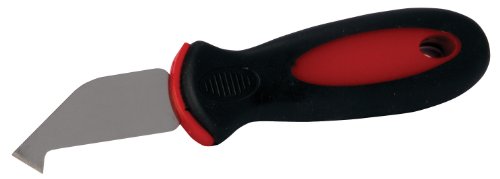
Don't know if there is a good list, though a few things are mentioned at the bottom of the unofficial V2 BOM. but I'll do my best to say what I used for my V2:
Metric Hex screw drivers: I picked up bondhus 10686 for this build, and it served me well.
Ferrule crimper: Something similar to this ( Mine is actually This guy here., but I'm sure I didn't pay anywhere near that much)
wire stripper: something else I've had forever, but something along these lines
un-insulated terminal crimper: Engineer PA-09 served me very well
Insulated terminal crimper: something else I've had far too long to have the branding. Mine look a lot like these though.
And then it's down to really normal stuff, that you probably already have around: normal screw drivers (mostly phillips), precision screw drivers, scissors, box cutter.
You're bound to want a multimeter for something, at some point.
Oh. And I cut my plexiglas panels on the table saw, since I have one. That's certainly not necessary though. Lots of people doing just fine with scribe cutters like this
You'll notice I didn't include any drill bits or taps. Sorry, I went with the pre-cut, pre-tapped Misumi framing, so I didn't DO any cutting or tapping. I can tell you though, if you're tapping your own, all your taps will be for M5 x 0.8 threaded screws.
Very nice and clean!
Before you heat the bed and set the adhesive, I'd peel it off, clean everything with isopropyl alcohol (the good industrial stuff) and attempt to re-adhere the PEI. If you got yours from Amazon, you should have spare sheets of it.
I rolled on 3M onto the bed first, using an empty wine bottle to drive the bubbles out. Then I trimmed the adhesive and carefully peeled off the other side. Next, I bowed the PEI a bit, lined up the 2 corners, and started rolling it on, using a bottle as a pressure roller. Worked out pretty good.
Also...
http://imgur.com/FgHEkyF
Many options here!
Personally I've used this heat shield tape which is meant for reflecting heat but only ever took it to about 70C. Don't know if it'll unglue at 100C. Did a pretty decent job, making my bed heat up faster and stay warm longer while cycling the heater less. I also used this tape on my hot end before the silicone condoms were out but the heat was softening the adhesive, and I had to use kapton tape to secure it. Also worked reasonably well.
I probably bought them from AliExpress since they're cheaper there but you can easily find them on amazon if you want them sooner than later, ebay, or pretty much anywhere that sells printer parts.. easy way is to search 'e3d v6 push fitting' or 'e3d v6 Bowden fitting'.. just remember you'll need to have m3 bolts that are a little longer and you need to print the part they screw into that's in the voron1.5 extras folder IIRC
BTW the extra driver is used for the second extruder, both Z motors are driven in parallel from a single driver (half the current to both motors). Of course you could also use a single-stepper Z axis, which I recommend.
You will likely not be able to control the extra fans (hotend and electronics box) with the Printrboard, but they could be wired always on. On a stock VORON with RAMPS the hotend fan only runs when the hotend is >50C and the electronics box fan runs only when the printer is being used.
I guess it could work but with a cheapo RAMPS + Arduino kit for $40, it might be worth just skipping the Printrboard.
Got my spring steel from Amazon. My PEI also came from Amazon, but I wanted to get it from a seller with more hits than misses.
You might be asking the wrong guy here, but having used Flashforge, Raise3d and E3d v6 hotends previously, the mosquito is far and away my darling favorite. I don't know if it's "worth it" but I would not print without it at this point.
Have you played around much with different springs as far as how much force is needed? For example, would this spring be close enough to work? It's the same dimensions, but a bit stronger spring force. My concern is finding the balance between spring force here vs. not compressing the bed level springs when probing.
An ATX power supply would work fine, but might I suggest you check one of these out.
https://www.amazon.com/gp/aw/d/B001LK8TCO/ref=psdcmw_1161760_t3_B007JNUSJY
If I'm not mistaken it's a 1U server power supply. More wattage than you'll ever use and probably more reliable than a cheap knockoff supply. You can read a bit more about modifying it here. Basically just applying a dummy load, just like with an ATX power supply.
In the latest version you only need 1 to hold the ramps case door shut. I already had them on hand and I don't believe Bolt Depot sales those so they aren't included.
Hardware wise you'll still need the 3/16" steel dowels, Acetal dowels, neoprene washers, and springs from either McMaster or some other source.
If you are like me and addicted to 2 day prime shipping:
https://www.amazon.com/gp/product/B009YCHRZG/
https://www.amazon.com/gp/product/B000N5XF54/
https://www.amazon.com/gp/product/B005KSQDKS/ - cut these to the right length
https://www.amazon.com/gp/product/B005KV0MFW/ - cut these to the right length
You are still on your own to find the neoprene washers. I happen to have some 60A neoprene sheeting on hand that I cut to create dampening squares.
Also these are a suitable replacement for 92470A056 - https://www.amazon.com/gp/product/B00YBMROKC/ I believe RCF said he was switching to a similar screw in the kits.
you can also find the omron ssr on amazon
https://www.amazon.com/gp/product/B003B316N8/ref=oh_aui_detailpage_o01_s00?ie=UTF8&psc=1
I got really tired of those all plastic ones and picked up these off of Amazon.
https://www.amazon.com/gp/aw/d/B01IB81IHG/ref=yo_ii_img?ie=UTF8&psc=1
They are spring loaded too, so no need for clips or anything to keep the bowden nice and tight in there.
I got mine from here:
https://www.amazon.co.uk/gp/product/B00QZ7YGFW
Here is the mobile version of your link
IIRC, Super Lube is the Voron-approved grease.
You know, I have a shitload of M3-M5 nuts and bolts but very few screws that fit electronics. I guess now that I am a budding maker I need to remedy this lack. I've got 50 #1 screws coming to address the issue ;) I keep my hardware in several of these boxes. I will be printing some cases soon.
I used this tapping bit and this cutting oil and they worked marvelously.
And to re-state the re-stated: Take your time.
It's a ramps board, here's the exact board (including stepper drivers):
https://www.amazon.com/gp/product/B019TNELNU/ref=oh_aui_search_detailpage?ie=UTF8&psc=1
> stepper drivers, microstepping, steps per mm.
I don't have the setup for steps/mm but what would that have to do with thermal runaway?
> Have you tried swapping hotends/ changing to single?
it's happening on both hotends, so swapping hotends won't make a difference.
> What message you see on screen when it happens
The message on the screen is what's in the title,t hat there was a thermal runaway.
> does the printer restart itself?
The firmware isn't programmed to restart itself after a thermal runaway. You need to hard reboot it.
> Does it happen always at the same time/when?
Not that I have noticed.
> Edit: Do you print from SD card or through the cable?
Cable via octoprint.
these (https://www.amazon.com/Engineer-PA-20-Universal-Terminal-Crimping/dp/B002AVVO7U) changed my view on the connectors. Those big stupid ratcheting ones are useless.