 Reddit reviews 8-in. Dia-Sharp Bench Stone Coarse Sharpener
We found 22 Reddit comments about 8-in. Dia-Sharp Bench Stone Coarse Sharpener. Here are the top ones, ranked by their Reddit score.
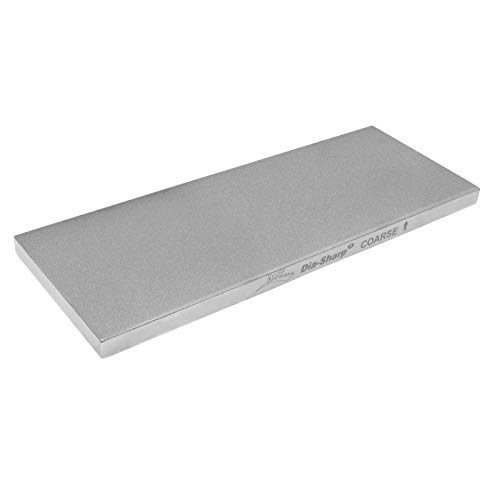
Details: Full length: 8-inch, width: 3-inch, weight: 2.45 lbs. Includes non-skid rubber feet.Coarse Style: Coarse (45 microns/ 325 mesh) use to quickly transform dull edges to cutting condition.This ultra-hard diamond surface sharpener comes highly recommended and produces a sharp edge with few a easy strokes. One advantage of this sharpener is that there is no need to add oil or water to the surface, making it easy to operate in all conditions.Sharpening surface accommodates range of edges from large knives to small pointed toolsCoarse diamond to transform a dull edgeSharpens knives faster than conventional stones with DMT's monocrystalline diamond surfaceNo oil is needed--sharpen dry or with waterDurable construction will provide years of consistent performance and reliable serviceDMT micronized monocrystalline diamond surface is super abrasive and reliable to provide long lasting performance. The monocrystalline structure offers greater sharpening speed and our diamond uniformity prevents the surface from breaking apart.DMT a U.S manufactured brand, is committed to fit your specific needs and ensure great initial results. Our brand is focused on providing ongoing education, tutorials, video demonstrations and much more for success with all our products.
Here's a copy-paste I put together that might be useful.
Equipment Essentials
Honing Supplies for Restoring a Few Straights
To hone:
First, you need to flatten your stone, making sure you've removed the top 1/64th or so of stone material to reach the true grits (the top is a bit rough on Nortons especially).Make sure your stone is perfectly flat. Use the DMT or the sandpaper I described above for this.
Next, clean your SR in soap/warm water. Dry it, and put a piece of electrical tape along the spine and fold it over (like a book binding) if you'd like (not necessary, and I don't do this, but some prefer the look of the end product).
I like to clear the edge of possible errand burs before I hone, so I drag the shaving edge against my thumbnail or a glass bottle. These burs can cause issues, and may make for a rough feeling edge. I've found that this is a good way to remove them. It may be unnecessary for some/most blades, but it's part of my bevel setting routine, and by doing this, I've notice good things and increased consistency when I hone.
Now, to hone. You're going to get your razor sharp in these stages:
Setting the bevel:
While all steps are important, this step is foundational. Place your razor on your bevel setting stone, keeping the razor spine and edge completely flat on the surface togehter. Do tiny circle strokes (circular motion down the hone) so you do about 30-40 tiny circles as you move own the bottom hone. Repeat on the other side of the razor, moving up the hone in the opposite direction (and counter-wise circle direction). Now do 15 x strokes. This is a set.
Repeat doing these sets until you can shave hair on your arm or leg by very slowly grazing over the tops of the hair - it should catch and cut with a bit of a tug.
It will take many many of these sets with a 4k stone, and less with a 1K.
Once you can shave hair on your arm or leg all along the bevel (toe to heel) with uniform sharpness and cutting, you may be set. Do another 10 or so x-strokes, very lightly, very perfectly as a final sharpening for your bevel. See if this helps your edge.
Once you're happy with your bevel, strop it and shave. If it's painful, it's likely your bevel isn't set. If it's decent, you're ready to move on.
Polishing the bevel
Now move up to polishing. On the 4K and do 35 light x strokes. Go to the 8K and do 35 light x-strokes. Repeat this back and forth going 4K 30, 8K 30. Now keep this up, decreasing the stroke number by 5. When you're at 10 strokes, just do 25 on the 8K.
Always check for sharpness along the edge by trimming a bit of arm hair. You'll learn a lot from an edge by doing this.
Following the grits up in this fashion should give you a fairly polished bevel. It's best to go higher than 8K with a high grit chinese hone from a woodworking store, or a naninwa 12k, but 8K will do for now.
Truing the edge:
Strop about 30 passes on your chromium oxide, clean the blade, and the perform 200 passes on leather - all spine leading, done very lightly.
The Shave
After all this, you should have a great edge. Give it a test shave and compare it to your pro honed blade.
While honing, you'll likely get frustrated, but keep at it! If you're getting aggressive with the razor, just give it a break, and come back later. If the shave is no good, post back here and we'll help you diagnose.
Some thoughts:
I tired to present information that's very searchable. Straight razor place has archived many of the ideas that I just presented. I highly recommend researching on your own and reaching a personal conclusion. What follows are my personal opinions.
This equipment I suggest is not necessarily the best, nor is it bad at all. It's great way to get started and find out what you like in a stone/routine. Some ideas to consider if you upgrade your set:
The back and forth honing I recommend is a honing series called pyramid honing, where you go between two different grit hones to ensure you don't form a wire edge or a bur. I like to recommend this for folks getting into honing since this is one of the most documented methods for get a razor to shave ready from a bevel set. A quick google search on pyramid honing will give you plenty of reading. I don't hone this way any more.
I highly recommend honing your razor as sharp as possible on one stone, strop as I've outlined, and give it a shave. For example, sharpen as much as you can at the 4K stage, and strop it 200 times. If it shaves ok, you're on the right track. If not, you've got more work to do at that level of stone. You'll be amazed that such a low grit can shave so well. If it's painful to shave after your lowest stone.... you're not done, and moving up the stones will not benefit your edge. Repeating this process of shaving up all the stone grits (4K, 8K, 12K) will help you get a feel for what honing at the different levels provide. Shaving off my 1K bevel provided me the biggest leap in edge quality while learning.
Don't limit your techniques. Once you can confidently bring a restored razor to shave with consistency, I'd recommend playing around and experimenting. Though this, I've developed some strokes that are critical to my routine, and used effectively with every blade I sharpen.
Diamond Machining Technology (DMT) makes 8" x 3" plates (example). Other companies do also (example). These are just wide enough for a #7 and #8 blade, I believe. But they are not cheap.
The inexpensive way if you're going to do just one stone is to get a scrap piece of granite from a home improvement store for a few dollars, and then get some 3M wet/dry sandpaper from an automotive store, from the bodywork section. You need the granite because it's a hard, super smooth surface and the sandpaper from an automotive store because it's made to work on metal versus the stuff at a hardware store which is made for woodworking.
Wet the sandpaper and lay it down on the granite and then start rubbing the barber's hone on the sandpaper. Start with something like 325 or 400 grit, then go to like 600 then 800 then 1000 grit progressively. The first step is the worst at you need to get the stone as perfectly flat as possible. Some people will tell you to put pencil marks on the stone in criss cross fashion and then keep rubbing the stone down until you take all the pencil marks off. Usually you can see with your own eye where the whorl marks are forming on the stone and where you are and are not hitting the sandpaper. Once you get the whole face flat with the 325 grit, switch up to the next grit and as you see finer and finer whorl marks, work up through the grits.
You should chamfer over the edges so they are smooth and round. I take a small square of sandpaper and hold it over the edge with two fingers and rub back and forth to round over the edge.
To keep my hones flat and clean from swarth I use a stone holder and DMT plates. I start with a Coarse which is 325 grit then use Fine (600 grit) and Extra Fine (1200 grit).
The Shaptons are harder and will dish much slower, but they will still dish. I use this mini DMT to clean off swarf (and as a nagura on muddy stones) and to even out the surface a bit which helps delay the need for flattening.
Eventually you will need to flatten though and for that I recommend a low grit DMT or an Atoma which can also double as a coarse stone.
This DMT 325/D8C is the "budget" option for standard lapping plates and works well but tends to stick to the Shaptons (flat surfaces with water creates a vacuum). This sticking problem can be annoying but really only affects the Shaptons and high grit stones, for anyone wondering.
This Atoma 400x is a hell of a lot better than the DMT at, well, everything but it's also more expensive. The Atoma's surface has diamonds in clumps with spacing in between which greatly mitigates the sticking issue.
Of course the whole glass + sandpaper or drywall screen works too but is less convenient, doesn't double as a coarse stone, and is more so a temporary solution.
For the Shapton Pros, don't go with anything below 300 as it will leave the surface very rough and scratched up.
If you're looking to sharpen your current razor specifically then I think you'd be better off starting with a higher-grit stone. Look at the "Chinese 12k" from Woodcraft, the Naniwa 12k (Amazon link), or any other whetstone rated at 10,000-grit or higher. You can also look at a strop made of leather or even balsa that has been treated with a fine abrasive like chromium oxide or diamond paste, but IMO a hone would be more effective for your scenario.
The Norton 4k/8k combo is good for a progression when sharpening a completely dull razor. A 12k should keep your edge proper for a long while before you'd need to go down to the 8k level, and I'd wager that your razor was probably sharpened to 12k and pastes when you first received it.
The Norton and Naniwa flattening stones have been known to wear rather quickly. The DMT Dia-Sharp coarse (Amazon) costs a bit more but is built to last and will always stay flat.
Make sure your hones are flat. Keep them wet when sharpening: the Norton needs to be soaked in water for at least 15 minutes before use, while the Naniwas can just be spritzed with some water when needed.
For my sharpened razors just starting to tug I progress backwards, meaning I'll start at the high grit and work my way down when needed: 12k almost always does the trick and I rarely go back down to 8k. For dull razors that I'm working on I'll go 1k > 4k > 8k > 12k, and I have a pasted strop that I finish with.
I think most people use the DMT plates. I have the D8C, which is 325 grit I think.
I'm a fan of this guy - https://www.amazon.com/DMT-D8F-Dia-Sharp-Continuous-Diamond/dp/B0001WP1L0
That one you linked is smaller than the normal stone shape which is bad for flattening. That said, I have the fine version of that and use it for touching up smaller knives and really like it.
Thank you so much for taking the time to write out all of that information. I'll try to find a cooking store around here and go ask about knives and maybe some cutting boards as well. :)
As for sharpening, do yourself a favor and throw away those auto sharpeners. They suck. They work for like 2-3 sharpenings then they don't do crap. (I'm talking about the ones with where you hold it on the counter and pull the blade through a "V" slot.)
Seriously though, go buy yourself some stones. They're not expensive and they'll last a lifetime.
I have this stone
https://www.amazon.ca/KING-1000-Grit-Combination-Waterstone/dp/B0000Y7LAS/ref=sr_1_16?s=hi&ie=UTF8&qid=1521472898&sr=1-16&keywords=combination
And this stone
https://www.amazon.ca/Japanese-King-Knife-Sharpener-Whetstone/dp/B003Q377K4/ref=sr_1_1?s=hi&ie=UTF8&qid=1521473012&sr=1-1&keywords=king+6000
They're like sandpaper. Start with the coarse stone and move your way up to the higher grits.
You don't have to be perfect when sharpening knives, but you DO have to be consistent. Your angle doesn't need to be perfect, you just need to have the SAME angle every time. I only got good at sharpening when I stopped TRYING to control the angle, and I just started trying doing the exact same motion over and over again. 15 passes on one side, then 15 on the other with the coarse stone. Eventually you'll feel a burr on the opposite side of the edge. At that point, you do 1-2 passes on the side with the burr. Then move up to the next grit. 15-20 passes here on one side, then the other, then move to the next grit. As for technique, I like the "push away" technique. Since knives have two sides, that generally means that on one side I'm pushing the knife INTO the stone, and on the other I'm pulling the knife across the stone. it doesn't matter, as long as you're consistent. (But be careful pushing the knife into the stone, you can and will cut a chunk off of the stone if you push too hard or get the angle wrong.)
Before you sharpen, fill the sink with water and let the stones sit in the water for 5 minutes. Keep them wet when you sharpen. (I usually will re-wet after 20 passes. It's less about keeping it wet and more about removing the steel/stone particles from the stone itself). (Some people like to use oil, I like to use water, it doesn't matter really.)
I will admit I had to do something like 80-100 passes (20 at a time) on EACH SIDE of my main chef's knife because it was dull as hell (because of sharpening with one of those auto sharpeners.), but in the end, it was the one to cut me :(
A couple of hints:
If you shine a light/the sun on the sharp edge of the blade, you should NOT see a bright reflection on the very sharp edge. If you see light reflecting, that means you have a flat/dull spot, and you should keep sharpening.
If you want to know if you have a decent angle or not, color the edge of your blade with permanent marker (don't worry, you can clean it off afterward with rubbing alcohol/nail polish remover (uh... be careful when you do that... that was how I got cut.)) Since the edge of your blade has ink on it, when you try to sharpen it, only the bit that you're grinding off will be shiny (since you removed that bit of ink). That way you can tell if the angle you're using is too shallow (not hitting the edge of the blade) or too steep (kinda... flattening the blade edge.) If you just do your best to match what was there (all of the ink on the edge surface is removed) you'll be fine. Again, not perfection, just consistency. Eventually you'll figure out what kind of edge you like (super sharp but not durable, or more shallow but more durable.) Also, certain steels like certain edges better. Nice steels tend to be able to hold a super sharp (shallow) edge for longer periods of time, where cheap steels will not be able to hold a super shallow edge at all, so you have to sharpen them with a steeper angle so that there is more "metal" on the edge. (With cheap steels, if you try to sharpen them super super sharp, the edge will just break off.)
Last hint. Eventually, if you use the stones enough. They'll get worn down. They will no longer be flat, and this is a problem. The way to fix it is to buy a diamond sharpening stone. Some people actually use these to sharpen knives, but I don't like them for that purpose. Now, these are more expensive than the stones themselves, but you probably won't need them for a while. Basically you just use them to flatten your stones. Just put them on top of the stone and rub back and forth. Eventually your stone will be flat and ready to sharpen again.
https://www.amazon.ca/DMT-D8C-Dia-Sharp-Continuous-Diamond/dp/B0001WP1L0/ref=sr_1_13?s=hi&ie=UTF8&qid=1521473952&sr=1-13&keywords=diamond+stone+sharpener
Anyway, if you do choose to try to use stones. Just keep trying. You won't do well on your first knife, or your second, or your third. Sharpen your shitty knives until you can do those well, then go after your nice knives. It took me probably 2 years of using the stones (probably every 3-4 months) to get to a point where I can say "yeah, those are sharp."
You can make a huge variety of joints with just a few tools. This is close to what my toolset looked like when I cut my first dovetails.
Note: None of these are affiliate links. I don't get paid if you buy these.
$28 Dozuki "Z" saw
I prefer western style saws (like the Veritas saw /u/jbaird recommended), but you will be able to cut very nice joints with this:
https://www.amazon.com/Z-saw-07029-Dozuki-Z-Saw/dp/B001DSY7G6/ref=sr_1_2?ie=UTF8&qid=1495827959&sr=8-2&keywords=japanese+saw+dovetail
$14 Empire combination square
https://www.amazon.com/Empire-Level-E280-Professional-Combination/dp/B000EU0ZB0/ref=sr_1_4?ie=UTF8&qid=1495828208&sr=8-4&keywords=combination+square
$10 pocket knife for laying down lines:
https://www.amazon.com/Stanley-10-049-Pocket-Knife-Rotating/dp/B00002X201/ref=sr_1_2?ie=UTF8&qid=1495828775&sr=8-2&keywords=stanley+knife
$24 marking gauge:
https://www.amazon.com/Crown-152M-Miniature-Rosewood-Mortice/dp/B001V9KOSM/ref=sr_1_1?ie=UTF8&qid=1495828829&sr=8-1&keywords=rosewood+gauge
$35 chisel:
https://www.amazon.com/gp/product/B004SG70L4/ref=oh_aui_search_detailpage?ie=UTF8&psc=1
You could also get:
$49 DMT coarse sharpening stone. Only sharpening stone you need. Get a strop eventually.
https://www.amazon.com/gp/product/B0001WP1L0/ref=oh_aui_search_detailpage?ie=UTF8&psc=1
$5 Stanley Coping saw. Will help you remove dovetail waste.
https://www.amazon.com/Stanley-15-106-8-Inch-Length-4-Inch/dp/B00009OYG2/ref=sr_1_1?ie=UTF8&qid=1495829310&sr=8-1&keywords=coping+saw
Provided you're gonna buy lumber that's already prepped, you should be good to go with the above. I'd suggest building things rather than 'practicing joinery'. You'll get plenty of joinery practice along the way :)
I have been doing woodworking for upwards of 40 years. I recently bought a course DMT diamond plate
http://www.amazon.com/DMT-D8C-Dia-Sharp-Continuous-Diamond/dp/B0001WP1L0/ref=sr_1_3?ie=UTF8&qid=1398809883&sr=8-3&keywords=DMT
some Norton water stones.
http://www.amazon.com/Norton-Japanese-Style-Combination-Waterstone-8-Inch/dp/B0006NFDPI/ref=sr_1_5?ie=UTF8&qid=1398809928&sr=8-5&keywords=waterstone
and
http://www.amazon.com/Norton-Japanese-Style-Combination-Waterstone-8-Inch/dp/B00067ZSM2/ref=sr_1_16?ie=UTF8&qid=1398809974&sr=8-16&keywords=waterstone
Along with a sharpening guide.
http://www.amazon.com/Robert-Larson-800-1800-Honing-Guide/dp/B000CFNCKS/ref=sr_1_2?ie=UTF8&qid=1398810023&sr=8-2&keywords=sharpening+guide
And could not be happier with the results.
The major purpose of the diamond plate is to keep the water stones flat.
Even if you go the sandpaper route make sure that you get a guide and when you get one get your bevel-T square and a protractor (from Rite Aid) to check that the distance for the stop blocks is correct.
Have you had any luck finding hones?
If it helps this is what i started with, as a cheap getting started set.
(DMT)http://www.amazon.com/gp/product/B0001WP1L0/ref=oh_aui_detailpage_o00_s00?ie=UTF8&psc=1
(1000)http://www.ebay.com.au/itm/Taidea-1000-Grit-Knife-Kitchen-Tool-Sharpener-Corundum-Sharpening-Stone-T0913W-/131025875380?pt=AU_Cutlery&hash=item1e81c031b4 (you can pretty much skip this if you get the one above)
(3000/8000)http://www.ebay.com.au/itm/TAIDEA-Tool-Knife-Sharpener-Sharpening-Stone-Whetstone-3000-8000-Grit-T0914W-/141431193126?pt=AU_Cutlery&hash=item20edf4be26
(12000)http://www.woodcraft.com/Product/144951/natural-water-stone-8-x-2-x-1.aspx (skip this if you get the one below)
(15000)http://www.ebay.com.au/itm/LARGE-8-x-3-V-FINE-15K-NATURAL-SHARPENING-STONE-HONE-RAZOR-KNIFE-CHISEL-/181547520228?pt=UK_Hand_Tools_Equipment&hash=item2a451350e4 I think this might be underrated for for its price, I can get HHT off this stone.
:D
500$ is an astronomical budget for beginner water stones, so let me just make sure that's out in the open.
Yes, 8k is on the high end of what you want to finish most kitchen knives on. Something along the lines of a Wusthof will retain a coarser edge more readily. Harder steels will generally retain a higher grit edge for longer. This is a gross over-simplification, but is sufficient for this conversation.
Since you want to go with splash and go and, from what I gather, this is intended to be a somewhat special gift for a special person... I'm going to forgo the budget options in the splash and go category, since I'm personally not a fan of them and wouldn't want them for myself.
All of that out of the way, you're going to want at bare minimum one medium grit stone (about 1k to 2k grit). If you have somewhat harder knives or if your skill is sufficient, you can make good use of a finishing stone for certain tasks (about 3k-8k is recommended for kitchen tasks, although you can go higher). You can make do without a flattening stone or plate for a little while, so you can view this piece as optional, but recommended since it will improve your mileage with your stones by keeping them flat and your angles consistent. Lastly, you might want a stone holder. These are generally adjustable rubber contraptions designed to keep the stone in one place while you're sharpening and help raise it off whatever surface you're sharpening on for comfort.
For a medium grit splash and go stone, the Naniwa Professional 1k would be my primary choice as a forever stone. You'd be hard-pressed to find any detractors for this stone among regulars on this sub or elsewhere. It's a great stone.
There are a few other options that I'd also recommend, but personally don't favor as highly as the Naniwa for the price. Those are the Shapton Pro 1k the Maido 2k and the Gesshin 1200 Splash and Go. Each of these stones will be splash and go, but will cut it slightly varying speeds, dish somewhat differently and feel a little bit different while using. Each of these are solid choices, but I have a preference to the Naniwa Pro.
For a finishing stone that is splash and go, I'd probably recommend the Gesshin 5k Splash and Go as my primary choice. The Naniwa Professional 5k is, like the rest of the line, an amazing stone in my opinion. The price is double that of the Gesshin, though, and I don't think it's worth dropping the money on as a first finishing stone regardless of budget; it's simply hard to justify that difference in price unless you're really discerning in what you want. I guess the Shapton Pro 5k deserves an honorable mention because it has a lot of fans. It's a little too glassy feeling for me and lacking in feedback so I wouldn't recommend it to a beginner sharpener.
For a flattening plate, I'd recommend either a DMT 325 diamond plate or an Atoma 140/400 grit diamond plate. The Atoma plates are constructed a little better in my opinion, but any of those plates will work for you as long as you keep its primary function to flattening your stones. The 140 Atoma will be the quickest at its job, but will leave somewhat deep scratches in your finishing stone so you'll want to smooth it out with your medium grit stone after lapping.
For a stone holder, you can honestly just stack some towels up or make your own out of some stuff around the house, but I like using a dedicated stone holder like this one.
That's about it. Keep in mind I kept my recommendations on the high end given the occasion seems to be special and your budget was fairly high to begin with. If you'd like some more budget recommendations just let me know.
If you do pursue diamond stones, here is a list of what I have.. I am not sure if this the be-all-end-all, and I can definitely recommend trying lots of things, because sharpening seems to be something so personal. Just wanted to collate in one place what I have settled on thus far.
This is one of the cheaper setups. I think it would be interesting to try ceramics at the top end, and better leather for a multi-strop setup.. Just ran out of funds after trying several failed other methods ;)
OP gave you some good advice about research. I'd add that if you can somehow find someone local who can show you what sharp really is, that would be a big bonus. I haven't found that person yet myself, because I am a hermit.
Stones:
Paddles:
Stropping:
Sandpaper:
Should be around $50 each, at least in the US.
https://www.amazon.com/gp/product/B0001WP1L0/ref=oh_aui_search_detailpage?ie=UTF8&psc=1
for example.
Dmt diamond plates in course, fine, and extra extra fine. Then nortons 4000/8000 water stone. Then leather strop with green compound.
Friend who got me into hand tools has this setup and helped me re grind my 1930s Stanley's I restored. I'm slowly building the exact same setup.
Heres the Amazon link for the course stone the fine and extra extra fine can be found via drop down menu.
heres the Amazon link for the water stone
It's a diamond plate I use for lapping because it stays perfectly flat and cuts very quickly. Here's one on Amazon also available at straight razor designs.
Unfortunately, I can't find a coarse DMT stone for anything less than $70 on Amazon, or a Spyderco medium for under $50. This is on the .ca site, not .com, as they won't ship to Canada.
I can find King water stones on Amazon, though not in the grit you talked about. There's a 1000/6000 for $36, and a 800/4000 for $47. While I like the price, I'm not sure if it's for me. It's not a ceramic water stone, so it might be softer than I'd like. I see it recommended a lot, so I will keep it in mind.
There are videos on how to deal with the curved leather knives, and I'll watch them closely when I get such a knife, but until then, most of my knives will likely be straight edged. I don't need to get them surgically sharp, but the sharper the knife is, the easier it is to finish the edge of the leather. If it's not sharp enough, fibers tend to stick out from the cut. 1000 should be plenty for right now, and if I need more, I'll look at one of the water stones, as the finer grits wear much more slowly anyway, and I don't have to concern myself with dishing as much.
Both the Kuromaku and Chosera seem to be pretty highly regarded, as I read in this sharpening blog. Shapton Glass was also highly regarded, but I decided against them because of the price. This is where I started getting confused by the Chosera. In the blog, the model number of the Chosera that he's talking about start with 'P' - for instance, the 1000 grit is P-310. Now, when looking them up on Amazon, I found one that looks like the one in the blog, it's that trademark green. However, the model number is SS-1000, and that sounds like the Super Stone series that Naniwa also has. Except that looking up the 1000 Super Stone gives me a model number of S-1000. So the Super Stone (two S's in the name) has one S in the model series, and the Chosera Professional has two S's? There's also more than just the standard and Professional series, there's a bunch of 'traditional' ones, and the super stones are still being sold, it looks like. It's all very confusing. I mean, the 1000 is $100 so I doubt I'd go for it anyway, but I have no idea how to honestly tell them apart. That's the main reason why I wanted to go with the Kuromaku. Way less confusion.
Also, I agree with you on the oil front. I considered the possibility because of the price, but I really don't want to have to deal with the mess.
Sorry, that should have been 800, 1,200 not 600, 1,000.
But the jump for me feels fine. I don't know maybe my frame of reference is off because I used to use my dad's stones and jumped from 1,200 to 12,000.
Backs are a bear depending on steal but again I haven't really felt that I was killing myself. Perhaps either the tool or the stone is out of flat making you work far harder to move up grits?
>Which lapping plate do you have
Atoma 400 from Hida tool, but also sold from Lee Velley
I was ready to throw some change at a diamond plate that would last. In my dad's setup, I was using a dmt duosharp. It worked fine though I was always questioning how flat it was being plastic and it doesn't have a lot of grit on it, so it's pretty warn these days. I was debating between the Atoma and the diasharp. I got the Atoma because I thought it would last longer. Don't know if that's the case or not.
Honestly the sandpaper method for corse work and flattening seems like a pretty cost effective way to go. I picked up a piece of granite counter top cheap for lapping plane bodies. Others say the float glass works good too. I'm sure it does.
https://www.amazon.com/DMT-D8C-Dia-Sharp-Continuous-Diamond/dp/B0001WP1L0/ref=sr_1_2?ie=UTF8&qid=1496436524&sr=8-2&keywords=flattening+plate
So would something like that be ideal?
Amazon sells 3" x 8" diamond stones.
edit: http://www.amazon.com/DMT-D8C-Dia-Sharp-Continuous-Diamond/dp/B0001WP1L0
I got mine from Amazon too: You can see the prices for the different grits here