 Reddit reviews QUANS 50W Ultra Violet UV LED Light for Curing Glue Blacklight Fishing Aquarium Glow in The Dark Special Effects, 110V US Plug (50 Watt)
We found 3 Reddit comments about QUANS 50W Ultra Violet UV LED Light for Curing Glue Blacklight Fishing Aquarium Glow in The Dark Special Effects, 110V US Plug (50 Watt). Here are the top ones, ranked by their Reddit score.
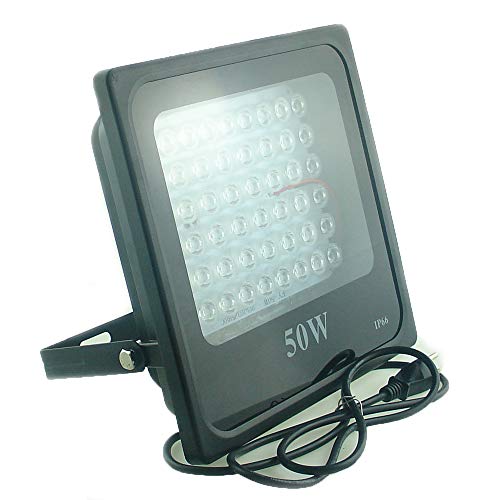
QUANS 50W UV Ultra Violet LED Flood LightWavelength 395nm to 400nm Great for Curing Glue, Plant Growth, Aquarium, Screen Printing, Fishing, Glow in the dark special effects, parties, art, painting, Halloween, Detecting Stain Pet Urine Scorpion, Money License Passport ID Card Authenticating, and similar applicationsFor illuminating most blacklight reactive pigments, paints and dyes, white color, plus many glow in the dark Glow in the dark special effects products.High efficiency, 45mil High Power LED Source, 120 Degree LENs, Low Power saving energy Extremely 50000 hours long life saving energy110VAC US Standard Plug with 4.6ft Wire. IP66 for Outdoor Indoor
The setup was STUPID easy. You attach the door knob, then just follow the instructions (videos are available online) to "level" it, which basically just involves: 1.) Putting a piece of paper on the screen. 2.) Pressing the "home" button. 3.) Lowering the platform a tiny bit at a time until there's "resistance" on the paper enough that you can't push it back in. 4.) Tighten the platform with the provided hex wrench. 5.) Hit the rezero button. Whole process takes maybe 60 seconds. What's more, it seems like once you've got it locked in, even removing and replacing the platform doesn't screw it up.
For tips:
1.) A lot of people bitch about the slicer software that comes with it, and say to use the ChiTuBox. I tried this, and it jacked up my first prints. I don't recommend it. I ended up going back and installing the software that comes with the Photon, and it's perfectly fine. It's not great at auto-strutting, but you can add struts manually to "low" spots.
2.) So far, the most reliable "auto-strut" settings I've found are 30% "light" struts. Literally ALL of my medium / heavy strutting (haven't gone above 30%) have failed and fallen into the vat. 30% light seems to pretty reliably do the trick, though.
3.) Obviously this is going to require some tweaking based on the temperature you keep the house, and which resin you use, but I'm sticking with the clearish green that comes with it. Go with a 4 layer base, at 50 seconds, then a 7.5 second "light" with a 3 second "off". Finally, the layer thickness is 0.025mm. Those are the settings I used for this model. Makes for a slow print, but clearly seems to get the job done. If your temperature is colder, you may have to go with a longer "off" and "light" setting.
4.) Definitely start with tiny test prints. Get some calipers to make sure everything is sizing correctly, and verify that the text is oriented correctly. I wasted a stupid amount of liquid trying to do a big print off the bat.
5.) Use some fingernail clippers/files/buffers to remove and then polish off the "nubs". If you break them off by hand, which is easy to do, they can "pit" your model. (The pits can be fixed by adding a tiny dab of glue and re-curing, but it's more hassle.) If you use a razor blade, you can cut the files/buffers into thin strips that allow you to do detail buffing work.
6.) EVERYONE online complains about the smell of the resin. Get yourself a good window fan (this is the exact one I bought) and put the printer in front of it with the fan blowing the air out the window and you practically won't notice it. Just make sure the rest of the window is covered well enough that sunlight doesn't shine through trying to cure any of your liquid.
7.) Their software will give you a print time estimate, but always seems to be short by roughly 25-35%. So if it says 6 hours, give yourself 7.5-8 hours for the print.
8.) Do... Not... Get... The... Resin... In... Your... Eyes. Wear glasses at the very least, but you should probably keep gloves on, too. I had washed my hands, and hours later touched the corner of my eye, and that burned like hell. I'd imagine even a small drip in the eyeball could cause ulcerations. Water doesn't seem to wash it off very well, either, so even flushing your eyes with water won't stop it immediately.
9.) If you have additional money to spend, buy a decently powerful blacklight, and cut a hole in a box big enough for it to shine into. Then line that box with aluminum foil. It's an extra one-time expense, but the hassle of waiting until you can get enough sunlight to give your models a good cure makes it well worth it (especially here in Virginia where all we're getting is rain, sleet and snow.)
10.) Again, if you've got the money to blow (bear in mind, I already had most of this gear due to other hobbies, so had accumulated it over time) an airbrush is a VERY nice-to-have. Putting on your primer coat with an airbrush will give you a MUCH better quality final product when you go to paint it. (I'll show pictures of this in a couple days.) Though now I'm probably getting more into "painting minis" tips than Photon printing tips...
11.) You can prevent resin overflow (and I don't know why this wasn't on a SINGLE video that I watched about the photon before buying it) by simply moving your platform to the "home" position before filling the vat, adding the resin, then raising it 10cm or so before starting up a print. If the resin over flows, it can destroy your LCD screen. And you'll be surprised how much resin the platform will displace when it lowers into the vat. If you put the platform into the vat (the home button) and THEN fill it with resin, you can be sure to never get an overflow.
Hrm. This list got longer than I expected. I'll let ya know if I come up with any others.
Someone on one of the Facebook groups sent me plans yesterday. It’s basically a wooden box 24”x 36”. You take the glass out of a poster frame and lay it on top. And then I will be using this: https://www.amazon.com/dp/B06XJZL97N/ref=cm_sw_r_cp_api_i_U3yTDbQRXJVBF
It should expose in 30 seconds or less, I still need to dial it in. You can even get the registration template from Ryonet to lay over the top of the glass and congratulations, you have a $500 exposure unit for about $85.
Try this I use it with a phu emultion 40 sec
https://www.amazon.com/gp/aw/d/B06XJZL97N/ref=ya_aw_oh_bia_dp?ie=UTF8&psc=1