 Reddit reviews TEMCo Hammer Lug Crimper Tool 5 Year Warranty
We found 7 Reddit comments about TEMCo Hammer Lug Crimper Tool 5 Year Warranty. Here are the top ones, ranked by their Reddit score.
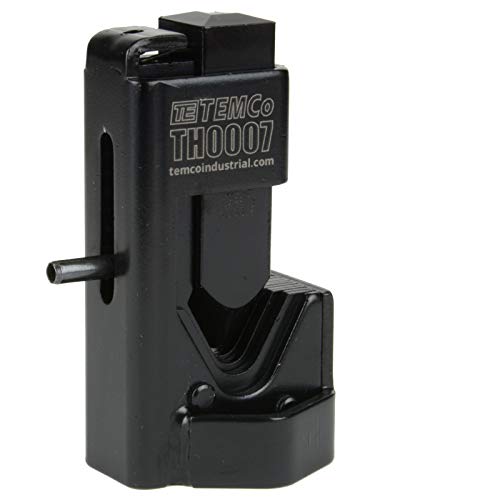
Manual Hammer Crimper: recommend 2-4 lb sledge hammer. Also works well in a shop vise.Crimping Type: Indent. Terminal Type: Uninsulated.Wire Gauge: 8 AWG, 6 AWG, 4 AWG, 2 AWG, 1 AWG, 1/0, 2/0, 3/0 and 4/0Ideal for Battery and Welding Cables.TEMCo Industrial's 1 Year Free Return and 5 Year Void-Free Warranty.
Are you pre-fabbing the cables or will you have to crimp them in place?
Impact crimpers actually work surprisingly well. I carried one for years to me out of jams where I didn't have a crimp kit on the truck.
Good grief. That's bad. Please at least tell me there are fuses in those power wires?
You need to rebuild all of that. I'd get a new stock terminal from the dealer or parts store and get that part unfucked.
Then get these items...
http://www.knukonceptz.com/mobile-audio/battery-terminals/sp/bassik-positive-battery-terminal/
http://www.knukonceptz.com/mobile-audio/battery-terminals/sp/top-post-adapter-positive/
http://www.knukonceptz.com/mobile-audio/installation-accessories/crimp-terminals/sp/knukonceptz-tinned-copper-4-gauge-crimp-ring-terminal-red/ (times two)
https://www.amazon.com/TEMCo-Hammer-Crimper-Tool-Warranty/dp/B00E1UUVT0
And you might need a new battery, too, if that post has gotten damaged too badly from the cheap aftermarket terminal and all the beating on it.
https://www.amazon.com/TEMCo-Hammer-Crimper-Tool-Warranty/dp/B00E1UUVT0/ref=pd_lpo_vtph_263_bs_t_1?_encoding=UTF8&psc=1&refRID=DQB3G8F11XRFHY09Y57W
I use something similar on SB175s and 4AWG wire
https://www.amazon.com/dp/B00E1UUVT0/ref=cm_sw_r_cp_apa_i_CUj8AbWK7YEM0
Have you wired... anything before? You'll need to be able to terminate wire to do it, but that's not too big a deal. There's also a bunch of different ways to go about it, depending on who you talk to. My preferred method goes something like this:
Acquire parts:
If you can't work out another good way to crimp the ends on, just pick up a crimp tool along with it.
Plan:
You need to create a circuit from the alternator to the house battery. Circuits are loops; in a DC circuit (as most are on a vehicle), the magic power fairies have to come from the power source via the positive terminal, through the thing they're powering, then return back to the negative terminal of the thing they came from. Most vehicles use the body and frame as the return path for the fairies. The devices' negative sides all connect to the body or frame, and so does the battery or batteries, so once they get to a device, they can always get back to where they came from, whether they came from the alternator (grounded through the engine block/bracket), starter battery, or house battery.
Next, you need to consider where each component will live. You need to connect positive to positive from starter to house battery, with all the other doo-dads in between. The fuse holders should be very close to their respective batteries. Like, less than a foot. I lay my starter battery's fuse right on top of the battery, so anyone working on the van later can't miss it, and should know to consider the rest of that circuit when appropriate. My starter battery's fuse is mounted right next to the battery. The placement of the isolator depends on what kind it is. If it's a manual type, you'll need to access it from within the cabin; I like to put my house battery and a manual isolator pretty close behind the driver's seat, so I can operate the switch from there or from within the cabin. If you go with an automatic jobber like the VSR I linked, that doesn't need accessed again except for troubleshooting, so it's common for it to be mounted near the starter battery in the engine bay. Either way, the wire will go from starter battery positive, through a fuse, through the isolator or VSR, through the house battery's fuse, to the house battery positive.
There's two types of connections to make with the linked items: "set screw" and "lug". The fuse holders I linked all use set screws, and everything else will use lugs. To make a lug connection, you strip back the wire jacket from the end of the wire just enough so the remaining copper strands fit into the sleeve (and only the sleeve) on the lug, then crimp it down. The lug then gets a bolt through it to make its connection. There is typically already a bolt on the starter battery terminal somewhere, and this is where it will go, though both batteries' terminals will vary in their format. You may need an extra doo-dad to make it right. For a set screw type connection, you strip back the wire jacket as before, back out the set screw, put the wire in its hole, then tighten it into place with the set screw.
Installation:
Snip off a foot of 4 Gauge wire, remove the fuse from the inline fuse holder, then set-screw the wire into one end. The other end of the wire gets a lug, and goes on the starter battery positive. From the other end of the fuse holder, route it to a VSR (if applicable; install its additional ground wire to one of its mounting screws, into the body), then on to the house battery location. Here, it will go through a manual isolator switch (if you don't choose the VSR), then through a fuse, and on to the house battery positive terminal. The negative terminal of the house battery gets connected to the van body or frame with a couple lugs on as short a wire as possible; a seat or seat belt hole is typically a good ground lug - just remove the bolt, add your lug with wire already crimped on, and reinstall the bolt.
Once all connections are made, you can go back and insert your fuses. If you chose the dual-battery switch, it has 3 lugs on it: a "common" lug, battery A, and battery B. The wire coming from the starter battery goes to battery A, the wire going to your house battery goes to battery B lug, and the common lug is for your load (aka, your devices). The switch has 4 positions: "A","B","Both", and "off". You can set it up other ways, but in this configuration, the first two select which battery power is drawn from for the devices connected to the "common" lug, the "both" setting literally chooses both, which means it also is the setting for charging your house battery, and "off" ensures the devices get no power from either battery, and that the batteries aren't connected to one another.
Manual isolator operation:
With the engine running, turn the simple isolator "on", or the dual-battery switch to "both". This connects the batteries, which connects the alternator to the house battery. If the alternator can charge it, it will (see "Caveats" below). When you stop running the engine, and want to run devices without draining the starter battery, turn the simple isolator "off", or set the dual-battery switch to "B". If you go with a VSR, this happens automagically for you, and you can forget I typed this paragraph.
Caveats:
The house battery isn't as close to the alternator as the starter battery. This introduces resistance to it, which comes with voltage drop. The alternator has a voltage regulator in/on/near it that senses the voltage of the battery (or batteries) it's connected to, and if that voltage is lower than its setting, it will kick on, and start charging, typically at or above 13.8V, maybe 14.1. An idle, full battery will read closer to 13V. A 12V battery is actually dead if it gets down to 12V; anything running on 12V accepts all these voltages, and so these systems are considered to run on "12V nominal", which is a range including all these. Anyways, from the perspective of the alternator or house battery, there is less voltage present on the far end than from the near end, due to the voltage drop over distance in the wire. So, the house battery never sees full charging voltage from the alternator, and therefor may never fill all the way up. Measure voltage at the starter battery while the engine's on and alternator's charging, then measure it again at the house battery. The difference between these two is your voltage drop, which should be in the 1-3% range. More or less, this is how short of full you can get your house battery only charging from the alternator.
If you choose a manual isolator, you will get the most charging output possible from your alternator, and you can throw the switch to "jump start" yourself if your starter battery should die, but you might forget to turn the switch one day, and accidentally drain your starter battery. I simply make checking the state of the switch part of my van start-up and shut-down routine, and have only had a problem once. If you instead go with an automatic isolator or VSR, you won't have to worry about this, but your charging rate will be limited by the rating of the device chosen, if its rating is below the alternator's rating.
Your power distribution to your loads still needs additional fusing. If you use the dual-battery switch, most loads should come off the common lug, through a fuse, and on to the devices. If not, then connect them from the starter battery, through a fuse, and on to the devices. Many people install a fuse block with multiple fused circuits to go to various devices; it needs a fuse in its feed that is as large as all the other fuses combined.
Wondering why I linked a triple-fuse holder? It's a neat sort of junction for the house battery's positive terminal, where everything connecting needs fused anyway, and these particular fuses can need to be quite large, though different sizes. 100A alternator charge, 50A+ load distribution, 30A+ solar charge, or the big ol' honkin inverter I tend to install on my builds.
Crimp tool
Id consider a mppt charger, I used bluesolar 100/30. A pure sine inverter. More solar. Cheap wire at lowes home depot down to 6 ga or use welder wire. Buy one of these for crimping wire lugs. Worth 15 or 20 dollars, nice crimp. https://www.amazon.com/TEMCo-Hammer-Crimper-Tool-Warranty/dp/B00E1UUVT0