Best lab stoppers according to redditors
We found 35 Reddit comments discussing the best lab stoppers. We ranked the 21 resulting products by number of redditors who mentioned them. Here are the top 20.
We found 35 Reddit comments discussing the best lab stoppers. We ranked the 21 resulting products by number of redditors who mentioned them. Here are the top 20.
![38mm Poly Seal Screw Caps (fits most 1/2 & 1 gallon jugs) [Bag of 12]](https://m.media-amazon.com/images/I/51MVML7elqL.jpg)


https://www.amazon.com/National-Scientific-C5000-54R-Silicone-Polypropylene/dp/B01MSDYEF0
​
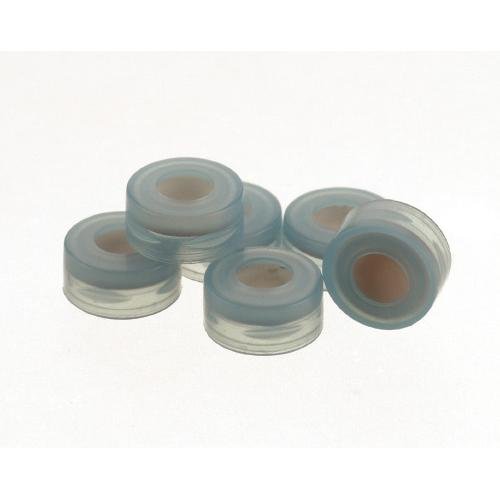
EDIT: 'screw cap' for vials.
https://www.amazon.com/gp/product/B072LN39VF/ref=ppx_yo_dt_b_asin_title_o04_s00?ie=UTF8&psc=1
Cork Borers and Bevel Gauge
Well you can't really infuse anything into the dry ice because the industrial systems used to produce it use multistage separation and cooling. You might be able to do a "soak", but what you will get is an outer coating of your liquid that is frozen around the dry ice pieces. Then you could throw these into your drinks and watch the fireworks go off. This will almost certainly have the exact same effect as if you had just thrown in dry ice pieces into the drink, since the coating will dissolve into the liquid faster than being attached to the CO2 gas. But if that's what you want I would break up everything into the sizes you want, throw them into a cooler (the dry ice will be your main source of temperature regulation, so make sure it is well insulated), and let it do its thing. Not sure how long these will last, so it would be best to make them within a couple hours of serving time
If what you are going for is to have the sublimating CO2 carry your flavor compounds into the air, you're going to have to go via a different route. A couple modernist restaurants do this type of thing, where they build a center piece and pour their aromatic liquid over it. This massively changes the perceived flavors (and adds a bit of showmanship to the dinner), since a good portion of taste is dependent on associated smells. Here is the Fat Duck doing it.
If you wanted the drink to carry the smoke, rather than a center piece, then you are going to need some custom glassware. Not sure what your budget is, but you could have something designed and made to suit your needs. If that seems a tad too much, I would build something from existing glassware. Take a normal glass and throw one of these short test tubes on the side, or get some plastic tubing and run it spiraling around the outside of the glass (just depends on your style and what you are going for). After that you can fill up the well with dry ice dust, and when you are ready to present pour in some aromatic liquid. You're going to want to make sure nothing comes out while your guests are drinking from their glass, so I would recommend a stopper of some sort that you have heavily perforated or something porous like a piece of sponge that you have cut to the right shape.
Not sure if this answers your question, but I tried to cover all possible bases. Best of luck with your cocktails!
I wouldn't drill the lid for a thermowell and ball lock port. There are a combo action of items on Amazon you could get and utilize the bung hole that already exists.
Homebrew #7 Stopper Thermowell
Stainless Carbonation Cap Counter
Home Brew Ohio Solid Rubber
Drill a 1/4" hole in the undrilled stopper for the carb cap and you have a ball lock connector.
The bung with the thermowell works great on my anvil fermenters.
I've seen many fastener sections, but I only remember ace having a cabinet full of rubber stoppers. Also, you can get pretty much anything on amazon.
http://www.amazon.com/United-Scientific-RSTPK1-Assortment-Assorted/dp/B00ES3UE9C/ref=sr_1_1?ie=UTF8&qid=1416158440&sr=8-1&keywords=assorted+rubber+stoppers&pebp=1416158442320
I've made some slight modifications to this, mostly to make it easier to follow. I've also included steps that should be quite obvious to someone who's done any homebrewing before, but I wish someone had told me when I first started.
I'd link to the original, for the sake of attribution, but the user who posted this deleted their account not long after I wrote everything down.
This will produce a sweet fruit-mead (or melomel). WARNING this will be far more alcoholic than it tastes, and should not be consumed if you've recently taken antibiotics, or suffered gastric distress, as the yeast culture will still be alive, and will happily colonize your intestines if your gut microbiome is too fucked up.
Equipment: Most of this stuff will be a good deal cheaper at your local homebrew store, but I've included amazon links (also to the yeast).
At least 2 (3 is better, for reasons we'll get to) 1-gallon jugs (I don't recommend scaling this up), glass preferred. Add an extra jug for each additional batch. This one includes a drilled stopper and airlock
Drilled stoppers (or carboy bungs) and airlocks, non-drilled rubber stoppers.
An autosiphon and food-safe tubing.
Food-safe sanitizing solution (I recommend StarSan).
An electric kettle with temperature selector is useful, but not needed.
If you want to bottle it rather than just keeping a jug in your fridge:
Empty beer or wine bottles (just save your empties), capping or corking equipment, caps or corks, and a bottling wand.
Ingredients:
2.5 lbs (1130g) honey, clover recommended.
A cup (approximately 250ml) or so of fruit (I recommend blackberries, and I strongly recommend against cherries, other recipes have worked for me, but this yields a very medical flavor with cherries).
1 packet Lalvin EC-1118 yeast (a champagne yeast notable for its hardiness, its ability to out-compete other microorganisms, and its high alcohol tolerance).
Optional: potassium sorbate (to reduce yeast activity when our ferment is done), pectic enzyme (aka pectinase - for aesthetic purposes). Both are also available in bulk.
Process:
Day 1:
Mix sanitizing solution with clean water at specified proportions in one of your jugs, filling the jug most of the way. Stopper it, shake it. Remove stopper, set it down wet-side-up (to keep it sterile), pour the fluid to another jug. There will be foam left behind, this is fine, don't bother to rinse it or anything. At low concentrations this stuff is totally fine to drink, and won't ruin your fermentation or flavor.
Add honey to jug, all of it.
If you have a kettle, and your jug is glass, heat water to around 160F (71 Celsius), pour a volume into your jug roughly equal to the amount of honey present. Fix sterile stopper to jug. Shake until honey and water are thoroughly combined. The heat will make it FAR easier to dissolve the honey. Set aside for an hour or so while it cools. Add clean water 'til mostly full, leaving some room for fruit and headspace.
If you're missing a kettle, or using a plastic jug, this is gonna be a little harder. Fill most of the way with clean water (I recommend using a filter) leaving some room for fruit and headspace. Fix sterile stopper, shake 'til honey and water are thoroughly combined. This will take a while, and you will need to shake VERY vigorously.
At this point, you should have a jug mostly-full of combined honey and water. To this, add fruit (inspecting thoroughly for mold, don't want to add that). Then dump in a single packet of the Lalvin EC-1118 yeast, don't bother rehydrating it first or anything, it'll be fine going straight in. Add pectic enzyme if you have it (this does nothing to the flavor, it just makes the end product less cloudy). Stopper it up, shake it again. This jug now contains your "must" (pre-ferment mead).
Pour some sterilizing fluid in a bowl, put a carboy bung/drilled stopper in the bowl, with an airlock. Ensure full immersion. Let sit for a minute. Replace stopper with your bung/drilled stopper, affix airlock. Fill airlock with clean water, sanitizing fluid, or vodka. Rinse the stopper, fix it to your jug of sanitizing fluid.
Place must-jug in a dark place, I recommend a cabinet or closet.
Days 2-7:
Retrieve jug, give it a little jostle. Nothing so vigorous as to get your mead into the airlock, but enough to upset it. This is to release CO2 buildup, and to keep any part of the fruit from drying out. The foaming from the CO2 release may be very vigorous. Do this over a towel for your first batch. If the foam gets into your airlock, clean your airlock and reaffix it. Perform this jostling procedure at least once per day, more is better.
Day 8:
Final jostling, I recommend doing this in the morning.
Day 9:
let it sit, we want the sediment to settle.
Day 10: Time to get it off the sediment
Shake sterilizing fluid jug. Affix tubing to siphon. Put the siphon in the sterilizing fluid, shake the jug a little just to get the whole siphon wet. Siphon fluid into either a third container or a large bowl. This is all to sterilize both the inside and outside of your siphoning system.
Remove siphon from jug. Give it a couple pumps to empty it of any remaining fluid. Place siphon in your mead jug, leaving the end of the tubing in sterilizing fluid while you do this.
Take the jug that you just siphoned the sterilizing fluid from. Dump what fluid remains in it. Place the end of the tubing in this jug, then siphon the mead into it. Make no attempt to get the last bit of mead into your fresh container, it's mostly dead yeast and decomposing fruit.
Add potassium sorbate if you have it, stopper the jug, place it in your fridge.
Clean the jug you started in. Clean your siphon and tubing.
Day 11:
Let it sit
Day 12 or later: time to transfer again, or bottle it.
If you no longer have a jug full of sterilizing fluid, make one.
Repeat the earlier steps to sterilize the siphoning system, with a bottling wand attached to the end of the tubing if you want to bottle.
Sterilize your bottles or a clean jug, either with fluid or heat.
Siphon mead either into your bottles or jug. Stopper/cap/cork when done.
Put your jug/bottles in the fridge.
The yeast culture is still alive, and will continue to ferment. The fridge, and optional potassium sorbate, will merely slow this down. I recommend drinking any bottles within two months, to avoid a risk of bursting bottles. The mead should already be tasty at this point, but usually tastes much better after a couple more weeks.
EDIT: Fixed the formatting up a bit.
https://www.amazon.com/10-Pack-CleverDelights-Rubber-Stoppers/dp/B0747TWGBS/
https://www.amazon.com/dp/B00UDMT0A6/ref=cm_sw_r_cp_awdb_jU0RzbW9S2E6B
This has a lot of different sizes so you can find one that's closest and then trim it down if need be to match.
A while back, I bought a bowie bottler. If you aren't familiar with that, it's a #2 stopper with a hole in the middle that a piece of stainless tubing fits in. It's similar to a counter pressure bottle filler, but simpler. A short piece of tubing connects the metal tubing to a machined fitting that fits inside the faucet. They were originally produced and sold by a guy on homebrewtalk.com for ~$20. He has since stopped selling them, buy you can make your own for the same if not less. The original was made to fit into the Perlick 525 faucets. I have since sold mine and upgraded to Intertap FC faucets. I removed the old machined fitting and connected it to a barbed fitting for a keg and bought the ball lock fitting for the Intertap faucet. All I do is connect the bottling wand to my faucet, push the stopper into the bottle (Need to hold it in or it will pop out when it pressurizes), and open the faucet. No need to adjust pressure. Once the bottle is partially full and pressure is equal to that in the keg, it will stop filling. Simply let off the stopper a bit to slowly relieve pressure and the bottle will slowly finish filling. Once its to the appropriate level, close the faucet and remove the wand slowly. Doesn't matter if the keg is at 8 PSI or 28. I've never had issues and this method works exceptionally well and less costly that pretty much every other bottling wand. Since the end of the Intertap faucet unscrews easily and is close to the inner workings, It is very easy to spray some starsan in a spray bottle to clean all of the normally non-sanitary parts.
https://smile.amazon.com/gp/product/B0064OFP88/
These fit on all the carboy's that I've bought.
Like these?
https://www.amazon.com/38mm-Poly-Seal-Screw-gallon/dp/B0064OFP88/ref=asc_df_B0064OFP88/
Hmm...this is a tricky one.
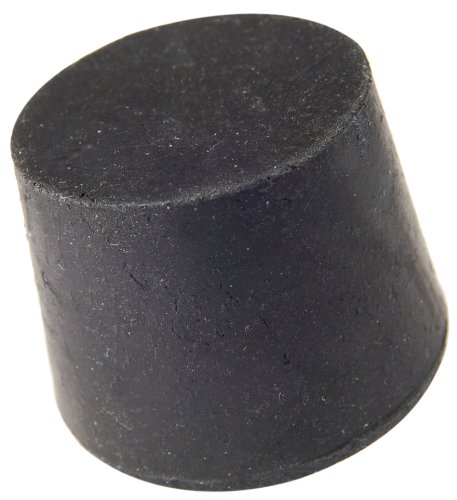
I would try to get a rubber bung plug like this:
http://www.amazon.com/SEOH-Rubber-Stopper-Solid-10/dp/B00191C7JQ/ref=sr_1_2?ie=UTF8&qid=1415229555&sr=8-2&keywords=rubber+bung+plug
And use that to get you home or to the shop...most importantly: Keep water and foreign debris out of the hole!
Even if that means just taping over the hole and having the bike flatbed towed home.
Either way: Drain your oil and change the filter after all this nonsense, just to be sure.
I got rubber plugs from Amazon, I think. I'll go look at my order history.
Though maybe it was a medical-supply place.
Nope, it was Amazon. Mine is bigger, but maybe this will lead you to another size. I had to buy a pack, not a single plug.
Try the word "stopper"
https://www.amazon.com/gp/product/B002VLYWWS/ref=ppx_yo_dt_b_search_asin_title?ie=UTF8&psc=1
Here: This one ranges from 26mm (1 inch = 25.4mm) at its widest to 19mm (it might just fit pretty flush, unless it compresses enough to go through the hole). This is a "size 4."
At that link there is a chart to stopper sizes, which might help you buy a single plug somewhere an industrial or scientific supply place, if you can get to one.
12 Pack - CleverDelights Solid Rubber Stoppers - Mix Pack | Sizes 000 to 10 | 1 Each Per Size https://www.amazon.com/dp/B072LN39VF/ref=cm_sw_r_cp_apa_i_g.N0DbWNBSN8G
Here's tubing on Amazon UK.
Stoppers. No holes, but you can buy a hole-cutter for stoppers (or make a jig to hold it and just drill a hole). You might be able to find some with holes if you look around some more.
Pyrex/borosilicate tube should be pretty easy to find as well. Usually you buy long pieces and cut and bend as needed.
Just in case there are US readers, I got these for this kind of old-school stuff:
I bought stoppers with holes and glass tube, and gum rubber tubing with no problem. That's thick-wall tube for use with vacuum, see the related products for cheaper thin-wall tubing.
I switched out the regular growler tops for these
38mm Poly Seal Screw Caps (fits most 1/2 & 1 gallon jugs) [Bag of 12] https://www.amazon.com/dp/B0064OFP88/ref=cm_sw_r_cp_apa_dnBDyb93PHGC3
Work awesome and fit any 64 oz growler I've tried them on.
I'm optimistic about these:
https://smile.amazon.com/gp/product/B00UDMT0A6/ref=oh_aui_detailpage_o00_s00?ie=UTF8&psc=1
I'll let y'all know how they do.
I am as well, Old Gt Bottles with a cap like this(cheaper at your local homebrew store) Have been working. however I use(and recommend because one growler takes up less space then 3 or so gt bottles) a Big growler with this cap for 2F and then strain into gt bottles that go straight to the fridge.
Mason jars are made to withstand vacuum, not internal pressure. so you're more likely to have an explosion with those than a bottle made to have internal pressure. The Grolsh style beer bottles work great. I also like using 1/2 gallon growlers (get the ploy caps).
United Scientific RSTPK4 Rubber Stopper, 2 to 8 Sizes Assortment, 2-Holes https://www.amazon.ca/dp/B00ES3UEOM/ref=cm_sw_r_cp_api_BdywxbZVBW4Q4
Something like this for that size of flask
Stuff you'll need (Prime links given)
$200 digital hotplate: amzn.com/B00AYGIFCA
$13.50 large flask: amzn.com/B00BERGESK
$9 rubber stopper to fit flask: amzn.com/B00ES3UE9C (can be had for $.50 at Fred Meyers or lab stores)
$17.49 for a hose to run from faucet to condenser: amzn.com/B000KI7VN6
$16.72 for the condenser: amzn.com/1450567898
$13.03 for a stand to hold the condenser: amzn.com/B00657N7TS
Misc you likely already have around:
Large pot or dish that can hold the flask
Cleaning sponge or rag
1/2 gallon vegetable oil
Total cost: $269.74 and maybe $20 for the misc stuff if you lack it
Preparation: This needs to be done in a temperature controlled room; the method uses slight variations in temperature to isolate out the individual chemicals, so any fluctuation in the room will hinder this. You will need to be near a sink with a running faucet. Be prepared for this method to take 24 plus hours.
Method:
As I said, this really only works for THC-like cannabinoids, you won't get any terps with this method without much more expensive equipment (theyll just evaporate away), and the overall loss is great enough that its unlikely youll be able to get an isolate of CBG or THCV, since they are such a small percentage of the cannabinoids, but you should have no problem getting pure THC and even CBD, assuming your starter strain has more than a percent of it. Once you have isolates you can isomerize and do other fun stuff as well.
That said, pure THC isnt fun at all, but its a great learning experience, and you can also use the same setup to distill essential oils or liquor, which is a slightly different process but uses the same equipment (though you can sub the digital hotplate for a cheaper electric range for those purposes)
Yeast dies at what? 140° - 145°F? I can make a sous vide water bath with a circulator at about 150°F+ to pasteurize in for about an hour. The type of caps I have for my 1 Gallon Carboys are 38mm Poly Seal Screw Caps. No idea if they would be strong enough for the pressure though.
These are the ones I originally found but i live in Canada and didnt want to deal with cross border shipping on a little mom an pop shop, so I found basically the same thing on amazon
Should be okay. Buy a #5 rubber stopper for laboratory glassware. Failing that, get these and split your inks up between them to minimize oxidation and "if I drop it I lose so much ink".
Rubber door stopper?
or even wine cork
Right now I've got almost exactly 3.5 gallons in one, leaving a decent amount of headspace in the neck. I was hoping to squeeze 4 in, but not quite.
Here's the stoppers I'm using. They take a few tries to get them to stay in, so you might try something different.
Another tip: they fit nicely in those canvas reusable shopping bags, which is great for hauling, as well as storage (keeps the light off).
I don't know for sure, but I'd try this or a plastic version like this.
You can get replacement tops for the GT bottles. They are not too expensive at Amazon.