 Reddit reviews AmazonBasics 9-Inch Thermal Laminator Machine
We found 30 Reddit comments about AmazonBasics 9-Inch Thermal Laminator Machine. Here are the top ones, ranked by their Reddit score.
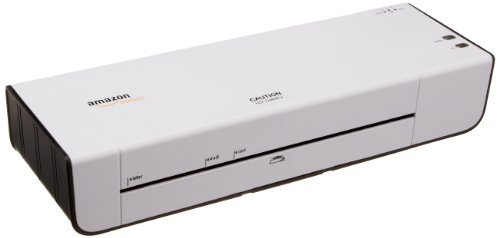
Laminate documents up to 9 inches wide; compatible with letter-size, legal size, business card size, and photo size papersTwo heat settings: for best results, use '3mil' heat setting for normal documents, photos, and card stock; use '5mil' setting for thinner papers (note: mil refers to thickness of lamination film)Works with any 3 mil or 5 mil laminating pouch; includes two 3 mil thick, 8.9 by 11.4 inch laminating pouchesCompact design - ideal for any home office or classroomQuick 4 minute warm up with ready indicator light; jam release lever for easy clearingNote: Reading the full user manual is recommended prior to the first use of this productNote: The laminating pouch may jam inside the machine, there is a "jam release lever" to help customer to return the paper and recover to normal running.Ships in Certified Frustration-Free Packaging
Reactive Foil
Card Stock
Laser Printer
Laminator
Laminators are pretty damn cheap as well.
this boi
A thermal laminator! Here’s the same one on amazon:
AmazonBasics Thermal Laminator https://www.amazon.com/dp/B00BUI5QWS/ref=cm_sw_r_cp_api_X.wPBbSFSWEFG
Replying so you get the update rather than editing.
---
I used some dry film photoresistive laminate I found at my university on a big spool. I do not know which specific type it is, though I'm sure most all the ones you buy on eBay will work fine.
Could you laminate it? I have a cheap little laminator I got from Amazon for like 20 bucks, and then another 10 bucks or so for the pouches. That might be too much to spend on only preserving one thing, but it sounds like there might be a lot more old patterns in the stash. You could always also just get a binder with some page protectors and slide the papers in there, maybe.
I would love a copy of the pattern when you're done copying it! That top is cute!
I would also add a laminator to this list. We bought this one and it's been great for player aids or anything we've printed out that isn't on heavy paper stock.
Sure thing! Here's the full process:
To prepare the champagne bottles I soaked them in a dish tub with a scoop of oxyclean and room temperature water for about 30-40 minutes. The oxyclean is REALLY helpful in getting the labels to slide off, but be careful not to get it near the top/under the foil. Then I rinsed them under cold water and used the scrubby side of a sponge to get off any remaining adhesive. I let them air dry on my countertop.
To make the labels, I used 3.5'' x 2.125'' weatherproof laser labels. This takes a few steps- first I had to print the dots on to the label in solid black toner, then run them through a laminator with the minc foil transfer sheets (link is to amazon, but I got them at Michael's with a 50% off coupon). Then I had to print the text on to them. I used fonts that I downloaded online.
Then, I just applied the labels to the bottles, tied a paper straw to each, and voila!
> Here in VA our first CC walk isn't to Walmart it is to Staples to get the CHP laminated.
How true!
Recently I spent $25 and got my own laminator. Laminated my renewal and some other stuff. Will use more over time.
https://www.amazon.com/AmazonBasics-PL9-US-Thermal-Laminator/dp/B00BUI5QWS
https://www.amazon.com/Universal-Products-Laminating-Pouches-Business/dp/B001602ZT2/ref=pd_bxgy_229_3/144-9164760-3358643?_encoding=UTF8&pd_rd_i=B001602ZT2&pd_rd_r=VBHEKH9ZJ6VP6HJZ1F11&pd_rd_w=bG5jh&pd_rd_wg=L2Y5U&psc=1&refRID=VBHEKH9ZJ6VP6HJZ1F11
Besides, the staples nearest me closed recently. :(
Sure! I just made them up so there aren't instructions, but here's what I used and what I did. My wedding colors are magenta pink and gold, with pops of teal blue (Indian - we like lots of colors :)) Also, now that I've written this all out I realize it's a lot of DIY - I'm super into crafting and it relaxes me (especially during the stress of wedding planning) so it's all good ... but if DIY stresses you out or if you are pressed for time this might be a bit much.
Phew, that was a lot, I hope it was helpful! Let me know if you have questions and obviously PLEASE share your pictures if you make it too!
EDITED: To fix typos
I did this s while ago.
http://imgur.com/gallery/j5Qpnng
I found it literally cheaper to buy & do everything yourself then go through a copy shop. It will likely cost 40-60+ per packet. Useful for other games & what nots as well.
$20 Laminator:
https://www.amazon.com/AmazonBasics-PL9-US-Thermal-Laminator/dp/B00BUI5QWS
$150 Spiral Punch:
https://www.amazon.com/TruBind-Coil-Binding-Machine-Professionally-Hole-Punching/dp/B00LNFOHNW
Personally, I've had awesome luck with this one:
https://smile.amazon.com/AmazonBasics-PL9-US-Thermal-Laminator/dp/B00BUI5QWS?sa-no-redirect=1
And these pouches:
https://smile.amazon.com/MFLABEL-Thermal-Laminating-11-4-Inches-100-Pack/dp/B01KH1CC9I/ref=pd_sim_229_3?_encoding=UTF8&pd_rd_i=B01KH1CC9I&pd_rd_r=EX24QDZ1ESTC5P2Z9N3X&pd_rd_w=Y5r7F&pd_rd_wg=ahzfa&psc=1&refRID=EX24QDZ1ESTC5P2Z9N3X
I was surprised by how well it works given how inexpensive it is. Granted, I only use it perhaps 4 times a month, but still...
looks like the machine is a Thermal Laminator
not sure about the rest
Thermal laminator and gold deco foil
Print this one instead:
http://www.davidpaulgreen.com/tumol.html
If you print it landscape on 8 1/2x 11 and put two pages on a sheet, you can get it laminated and bound and it becomes a very nice field reference.
if you're really into DIY, check out the amazon basics laminator, laminate it yourself and save a TON of money.
Buy yourself a pouch laminator and just laminate them as you go. They only take a few minutes to warm up and laminate quickly. Amazon's brand costs $21.99 + the pouches.
https://smile.amazon.com/AmazonBasics-PL9-US-Thermal-Laminator/dp/B00BUI5QWS/ref=sr_1_3?ie=UTF8&qid=1484591302&sr=8-3&keywords=pouch+laminator
Using the tape as a hinge is a good idea, I'll try this next time.
Laminators are much cheaper than I thought. I recently got the "Amazon Basics" laminator and pouch for $30:
If you want an inexpensive laminator, I bought this one from amazon (http://amzn.to/2kxWSdz). It was around $22. It does one page at a time and seems to do a fine job. I only have experience with this one laminator, but for taking paper things and covering them with plastic it seems to work pretty well. It only comes with 5 pages of lamination material, so you will need to pick up a pack of the lamination pages. A pack of 100 of the "laminating pouches" cost around $12 on amazon. "Pouches" is kind of a misnomer. They open kind of like a clamshell (connected on one edge, the other three sides open). You slide whatever you want to laminate inside, then slide it through the machine. It was a little difficult getting the hang of laminating a bunch of small pieces on one sheet. The trick I used was to put a book in front of the laminator that was even with the level of the input slot, that way you could just gently slide the page forward without moving the little pieces around inside. My first few attempts were done just holding it by hand and feeding it in and I ended up having pieces move and overlap and get laminated overlapping each other.
I would also recommend a corner cutter (like this: http://amzn.to/2k64w1u). When I was cutting out laminated cards/pieces, I ended up with pointy corners. It wasn't a big deal, but being able to round out the corners makes things just feel better to handle.
The whole setup cost about $45 from amazon for laminator, 100 pages (of which I still have plenty left) and the corner cutter.
After buying a laminator, I ended up discovering all kinds of things that I didn't realize needed lamination. :)
I see you appreciate office gadget types of things. I am dying for my own personal laminator. I had access to one at my last job and had to fight the urge to use it for personal stuff all the time. Works to make a great, cheap write-on/wipe-off board too. Thanks for the contest!
Target has these from Scotch brand that dont need a laminator machine:
https://www.target.com/p/scotch-174-self-seal-laminating-sheets-letter-size-10ct-clear/-/A-15419872
&
https://www.target.com/p/scotch-174-laminating-sheets-self-seal-letter-size-10ct-clear/-/A-16259821
Amazon basics sells a thermal laminator for $21.99 if you need a thermal laminator and dont want to pay a ton for one:
AmazonBasics Thermal Laminator https://www.amazon.com/dp/B00BUI5QWS/ref=cm_sw_r_cp_apa_i_PKPQCb98JZF8S
I'm looking at the AmazonBasics one because it's only $22 but has decent reviews.
What do you mean about the border?
Here you go: https://www.amazon.com/AmazonBasics-PL9-US-Thermal-Laminator/dp/B00BUI5QWS
It's an Amazon Basics Laminator.
It's used to heat the toner from image on the paper so the transfer foil can stick to it.
It's a laminator
Instructions from the actual source
Ive used this one with the photoresistive stuff. Works fine.
AmazonBasics Thermal Laminator Machine
https://www.amazon.com/dp/B00BUI5QWS/ref=cm_sw_r_cp_api_i_ex7IDbQ2EHS2J
If it's the kind of thing you do, these are dirt cheap, https://www.amazon.com/AmazonBasics-PL9-US-Thermal-Laminator/dp/B00BUI5QWS/ref=lp_300350_1_5?s=office-electronics&ie=UTF8&qid=1483563949&sr=1-5
I honestly have no problem doing it, i just can't ensure you that everything would look perfect in the end. If you shop on amazon you can get.
-------------
https://www.amazon.com/Swingline-Trimmer-Guillotine-Capacity-ClassicCut/dp/B00006IATI/ref=pd_lpo_vtph_229_bs_lp_t_1?_encoding=UTF8&psc=1&refRID=6YSKHPNNJF58YM0VJD11&dpID=51thzb%252B7vJL&preST=_SY300_QL70_&dpSrc=detail
-------------
https://www.amazon.com/Staples-Matte-White-Sticker-Sheets/dp/B00MD4IYIQ
-------------
https://www.amazon.com/Avery-Self-Adhesive-Laminating-Sheets-73603/dp/B00006IC7H/ref=sr_1_3?s=office-products&ie=UTF8&qid=1509583821&sr=1-3&keywords=laminating+sheets+stick
-------------
https://www.amazon.com/AmazonBasics-PL9-US-Thermal-Laminator/dp/B00BUI5QWS/ref=sr_1_1?s=office-products&ie=UTF8&qid=1509582547&sr=1-1&keywords=laminaor
I teach mod/severe in CA. I would wait to see the population you're working with. There are some things you will need. Like velcro squares, velcro rolls, titanium scissors to cut velcro, laminator, 5 mil sheets, 3 mil sheets, rotary trimmer, and optional but I would highly suggest it, a color laser printer The printer can take all manner of recycled cartridges and its nice to have to create picture cards at home. I would also suggest getting a subscription to Lessonpix when you start teaching in order to create all the picture cards you need.
Buy smart and write your name on everything. Take things with you as you go from job to job, if you do so. You paid for it, you take it.
Buy cheaply. Try Oriental Trading Post, stuff straight from China on Ebay, Reallygoodstuff.com, Dollar Tree, 99 Cent store, etc. Look at end of holiday sales. Look at ways to make what you can or adapt items. Don't buy everything and anything.
This machine is literally $20. There's a better reviewed one for $17.