 Reddit reviews BalanceFrom Puzzle Exercise Mat with EVA Foam Interlocking Tiles, Black
We found 17 Reddit comments about BalanceFrom Puzzle Exercise Mat with EVA Foam Interlocking Tiles, Black. Here are the top ones, ranked by their Reddit score.
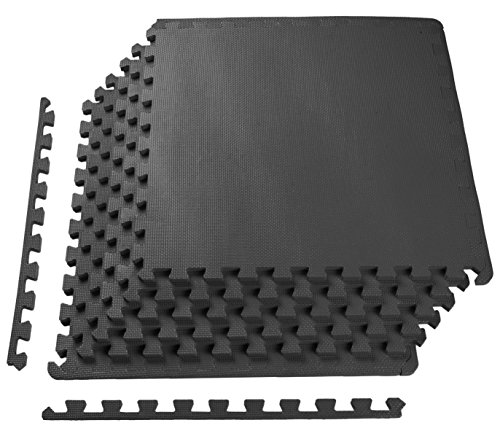
Protective workout flooring - Durable, non-skid textured tiles protect floors while creating a comfortable workout spaceEasy assembly – Lightweight puzzle pieces connect quickly and easily, and can be disassembled just as simply for quick storageVersatile – The water-and noise-resistant design is easy-to-clean, great for use in garages, gyms, home fitness rooms, or children’s play areasCovers 24 square feet - Each tile measures 24” x 24” x ½”- thick from the highest point of the texture; Includes 6 tiles and 12 end borders for a polished lookHigh quality foam - High-density EVA foam provides excellent support and cushion; Contains no toxic phthalates
Since you're saving cash on gym fees, you could also hit up Amazon, Lowe's or Home Depot and buy some padded mats to donate to your work gym and use for your deadlifts to protect the floor and plates.
I doubt people would have an issue if they see you're going out of your way to compromise.
Once you go coily you never go back.
That isn’t actually my floor. It’s foam flooring (you probably had it in your kindergarten class) which is sitting on top of my hardwood floor. You can find it here.
http://www.amazon.com/BalanceFrom-Puzzle-Exercise-Quality-Interlocking/dp/B013A4ATCQ/ref=sr_1_5?ie=UTF8&qid=1459108961&sr=8-5&keywords=puzzle+foam+mats for example
Ok it’s an alright start but there’s some glaring issues here from safety that need addressing.
Aside from that, I personally would recommend just punching to the head and with control. We did bareknuckle sparring at my dojo and made contact to the face.
I also would recommend that you either allow elbows to land to the head, or rule them out completely. Faking it will cause you to train in bad habits from both the receiving end and the delivering end.
How about just a couple of these
They're 1/2 Inch thick
I would suggest getting a pack of interlocking foam mats, and putting those down between your bedroom door and your bed, and in the hallway to the bathroom.
I would also advise your landlord that this is what you’re going to do, because then you have fulfilled your part of the bargain, where are you make an effort to accommodate your unreasonable neighbours
Here’s a link to the product I am referring to, on Canadian Amazon:
https://www.amazon.ca/BalanceFrom-Puzzle-Exercise-Interlocking-Tiles/dp/B013A4ATCQ?psc=1&SubscriptionId=AKIAILSHYYTFIVPWUY6Q&tag=duc12-20&linkCode=xm2&camp=2025&creative=165953&creativeASIN=B013A4ATCQ
They also sell them at Walmart, in various colors. I have a bunch of them, because my apartment has really hard floors (vinyl on cement) and it’s hard on my knees and heels. They are a bit thicker than a rug, so if anything they offer a bit better sound dampening.
If your neighbour complains again, you can just tell your landlord you’re gonna put down a second layer of them – it’s by no means too soft to walk on (I have two layers in my kitchen right now) – and your neighbours really shouldn’t be able to hear anything through that.
Plus, if you own a pet, the foam tiles semi-impermeable and therefore much easier to clean; and worst case scenario, you can just throw out the affected mat if something truly disgusting happens on it. Much, much cheaper than replacing a rug.
Best of luck; this situation sounds really stressful and unpleasant, and I’m sorry you’re having to deal with that.
(Edit: fixed link)
Safety first. No cosplay project is worth serious injury, death, or shortening your lifespan. The safer you are, the longer you'll live, the more time you'll have to make cool nerdy Halo shit. Complacency kills.
All the armor/prop building tutorials you'll ever need. For now, just look over the pepakura and foam tutorials in section 2. Or read them all. I'm not your boss. Plus, everything you learn here builds a foundation towards a better-looking build and a more enjoyable experience. Pepakura stuff is just more pertinent to what I'm discussing right now.
Amazon Shopping List:^*
^* ^(These two items will probably be the least familiar to most people, but they're the most important. Of course, there are other tools that come into play, but you'll figure that out once you read/watch the tutorials.)
Downloads and Tutorials:
Free Pepakura Designer v4.1.6 download - You'll be using this program a lot. It's very easy to use, especially if you know anything about 3D modelling, which I don't. Plus, it's free. And if it's free, it's for me, unless it's an STD.
Every Halo-related pepakura file in existence so far. Most of these are taken straight from the game. Some were painstakingly modeled from scratch by talented 3D artists, with only high-res reference photos for guidance. Definitely the most detailed way to build your projects. There are files intended for foam, but most are made for paper. Be sure to make the distinction. Even though the files designed for paper can be used to make foam armor (with some modifications, of course), a lot of the templates you print will go to waste. If it's unfolded for paper, the intention is to line it with fiberglass.
The fiberglass and bondo method is the most detailed and the most durable, but it's also the most expensive and the most time-consuming. I would not recommend this for a beginner on a budget, but if you have the money to spend, it can be a great lesson in patience. I made an ODST helmet using this method for my first attempt years ago. It's not a good-looking helmet, but I still have it. It's currently hanging in my workshop to serve as a reminder of the lessons I learned along the way and that I have the ability to jump straight into a project without any prior experience and finish with a prop that's... well, at least it's recognizable. Maybe one day, I'll gift it to someone who can bring it to its full potential.
This Instructables tutorial is probably the easiest one to follow that I know of. This is a great place to start if you've never touched pepakura, fiberglass, or even cardstock. I wish this tutorial existed when I built my first attempt 9 or 10 years ago.
Here's an ODST helmet you can make out of foam - cheap and easy, but not as detailed. These usually come out looking more angular than curved, so you'll have to get creative to solve that issue.
Bonus cardboard tutorial - fastest, easiest, cheapest, and quite honestly the best tutorial I have ever seen. This kid is a legend.
The best advice I can give to someone starting out is:
I hope this helps get you started, and if you decide to join the 405th, send a message to SGT Razor. I'll gladly watch your career with great interest.
Got it on Amazon. BalanceFrom Puzzle Exercise Mat with High Quality EVA Foam Interlocking Tiles, Black https://www.amazon.ca/dp/B013A4ATCQ?ref=yo_pop_ma_swf
Idk cant think of a time i've ever been on my knees in vr, and why not just use something like this?
https://www.amazon.com/BalanceFrom-Puzzle-Exercise-Interlocking-Tiles/dp/B013A4ATCQ
I am using that type setup and it works pretty well. Thanks for the idea of drawing the rings on it. Here is what I used to cover the MDF.
It was mostly taking my time and finding deals on Ebay/Facebook marketplace.
OptiShot II: Ebay, $200. They can be had new on Ebay around this price pretty easily. Brand new from Optishot is $300.
Impact Screen: $200 on Facebook Marketplace. It is a home-made setup with metal poles and connectors. I have no idea how much it cost the previous owner to put together. It happened to come with the Turf as well (which is probably the cheapest possible fake grass you could find)
Projector: $40 on Facebook Marketplace. This was probably my best find. The guy had dropped it and cracked off one of the sides to the projector so he said no one would buy it. It still works perfectly fine - score!
Hitting Mat: $38 Amazon (and turf that came with the impact screen). Bought 2 sets of these for 12 total tiles: https://www.amazon.com/gp/product/B013A4ATCQ/ref=ppx_yo_dt_b_asin_title_o03__o00_s00?ie=UTF8&psc=1. Arranged them in 2x6 layout 2 tiles high and cut out the slot to snugly fit the OptiShot . Technically, you don't even need to wrap them in turf, but you will still be about .3-.5" short of being level with the OptiShot without it and wouldn't look as cool, but it's manageable. IMO, the OptiShot is pretty much useless without getting close to level with it because you'll learn how to top a ball really well.
​
Its also fairly important to have extra turf/carpet up under the impact screen because otherwise the ball bounces all over the place after hitting the screen. For anyone wanting to do this on a budget, you could skip the impact screen and projector in favor of a net. As long as you have a large TV nearby to plug your laptop into, and you can skip the turf for something that is just functional - it will still be fun. When i first used it I didn't have a net or screen at all, I just hit the foam balls and went chasing them around my house lol.
OptiShotII: $200-300, we'll say $250
Basic hitting mat described above to make you level with the OptiShot: $~40
Hitting net: Can be had on Amazon for ~$75
Total: ~$365
​
Someone made a post here a few days ago showing them using EVA foam exercise floor mats as a makeshift enclosure. They're light weight, inexpensive, interlocking, sound deadening, and very well thermally insulated.
I just bought some to try printing with ABS/PETG
https://www.amazon.com/gp/product/B013A4ATCQ/ref=oh_aui_detailpage_o01_s01?ie=UTF8&th=1
The tiles are 2ft x 2ft each. the 24sq ft pack comes with 6 tiles, enough to fully enclose a printer.
You can find eva foam almost anywhere Wal Mart, Target, Amazon. Its that Interlocking Foam Mats you see at preschools or the Black foam mats you see in so Mechanic shops
https://www.amazon.com/gp/aw/d/B013A4ATCQ/ref=mp_s_a_1_1?ie=UTF8&qid=1473752584&sr=8-1&pi=SX200_QL40&keywords=black+foam+mat&dpPl=1&dpID=510eduZrpFL&ref=plSrch
Thanks for your input. I was thinking about making the liner just a smidge bigger so that the knots go on the outside of the grids, since I won’t be using coroplast. I plan on using puzzle mats as the base. Do you think a boarder is necessary or no?
BalanceFrom Puzzle Exercise Mat with EVA Foam Interlocking Tiles, Black https://www.amazon.com/dp/B013A4ATCQ/ref=cm_sw_r_cp_apa_uWcLBb90KQ0NC. This is EVA foam. Well the simpliest way to get it. You can find it cheaper just and example. If you watch youtube videos on most cosplayers they use EVA for armor and weapons. Simply because its cheap and easy to work with. Just an exacto knife and hot glue gun are all the tools you need. Heck im sure you can find a sub on here that is more knowledgable than myself. To answer the rigid question there are ways to make it harder.
i use a set of these for blocking, i just assemble them in whatever shape/configuration i need on the bed/floor
BalanceFrom Puzzle Exercise Mat with EVA Foam Interlocking Tiles, Black https://www.amazon.com/dp/B013A4ATCQ/ref=cm_sw_r_cp_api_i_alSwDb9YKK1NP
I am about 6'1 and 200 lbs so a little overweight but not terribly and my hips started hurting. I found that it was that our floor was too hard and I wasn't wearing any shoes being in the house and all. We placed some of these on the floor and it helped quite a bit. Other than that I am not quite sure what the answer would be. Maybe a swiveling rolling chair?