 Reddit reviews Norton 24336 Japanese-Style Combination Waterstone 4000/8000 Grit, 8-Inch by 3-Inch by 1-Inch
We found 17 Reddit comments about Norton 24336 Japanese-Style Combination Waterstone 4000/8000 Grit, 8-Inch by 3-Inch by 1-Inch. Here are the top ones, ranked by their Reddit score.
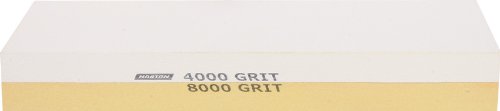
Waterstone to create abrasive slurry for effective sharpening with less pressure than an oilstone requiresCombination stone has 4000 grit on one face for maintaining and refining, and 8000 grit on the opposite face for polishing steel cutting edges1 x 8 x 3 inch (H x W x D) size is suitable for use as a bench stone for knives and toolsCleans up easily with water as lubricant instead of oilBlue plastic hinged box with no-slip rubber feet can be used as holder for the stone during sharpening
Here's a copy-paste I put together that might be useful.
Equipment Essentials
Honing Supplies for Restoring a Few Straights
To hone:
First, you need to flatten your stone, making sure you've removed the top 1/64th or so of stone material to reach the true grits (the top is a bit rough on Nortons especially).Make sure your stone is perfectly flat. Use the DMT or the sandpaper I described above for this.
Next, clean your SR in soap/warm water. Dry it, and put a piece of electrical tape along the spine and fold it over (like a book binding) if you'd like (not necessary, and I don't do this, but some prefer the look of the end product).
I like to clear the edge of possible errand burs before I hone, so I drag the shaving edge against my thumbnail or a glass bottle. These burs can cause issues, and may make for a rough feeling edge. I've found that this is a good way to remove them. It may be unnecessary for some/most blades, but it's part of my bevel setting routine, and by doing this, I've notice good things and increased consistency when I hone.
Now, to hone. You're going to get your razor sharp in these stages:
Setting the bevel:
While all steps are important, this step is foundational. Place your razor on your bevel setting stone, keeping the razor spine and edge completely flat on the surface togehter. Do tiny circle strokes (circular motion down the hone) so you do about 30-40 tiny circles as you move own the bottom hone. Repeat on the other side of the razor, moving up the hone in the opposite direction (and counter-wise circle direction). Now do 15 x strokes. This is a set.
Repeat doing these sets until you can shave hair on your arm or leg by very slowly grazing over the tops of the hair - it should catch and cut with a bit of a tug.
It will take many many of these sets with a 4k stone, and less with a 1K.
Once you can shave hair on your arm or leg all along the bevel (toe to heel) with uniform sharpness and cutting, you may be set. Do another 10 or so x-strokes, very lightly, very perfectly as a final sharpening for your bevel. See if this helps your edge.
Once you're happy with your bevel, strop it and shave. If it's painful, it's likely your bevel isn't set. If it's decent, you're ready to move on.
Polishing the bevel
Now move up to polishing. On the 4K and do 35 light x strokes. Go to the 8K and do 35 light x-strokes. Repeat this back and forth going 4K 30, 8K 30. Now keep this up, decreasing the stroke number by 5. When you're at 10 strokes, just do 25 on the 8K.
Always check for sharpness along the edge by trimming a bit of arm hair. You'll learn a lot from an edge by doing this.
Following the grits up in this fashion should give you a fairly polished bevel. It's best to go higher than 8K with a high grit chinese hone from a woodworking store, or a naninwa 12k, but 8K will do for now.
Truing the edge:
Strop about 30 passes on your chromium oxide, clean the blade, and the perform 200 passes on leather - all spine leading, done very lightly.
The Shave
After all this, you should have a great edge. Give it a test shave and compare it to your pro honed blade.
While honing, you'll likely get frustrated, but keep at it! If you're getting aggressive with the razor, just give it a break, and come back later. If the shave is no good, post back here and we'll help you diagnose.
Some thoughts:
I tired to present information that's very searchable. Straight razor place has archived many of the ideas that I just presented. I highly recommend researching on your own and reaching a personal conclusion. What follows are my personal opinions.
This equipment I suggest is not necessarily the best, nor is it bad at all. It's great way to get started and find out what you like in a stone/routine. Some ideas to consider if you upgrade your set:
The back and forth honing I recommend is a honing series called pyramid honing, where you go between two different grit hones to ensure you don't form a wire edge or a bur. I like to recommend this for folks getting into honing since this is one of the most documented methods for get a razor to shave ready from a bevel set. A quick google search on pyramid honing will give you plenty of reading. I don't hone this way any more.
I highly recommend honing your razor as sharp as possible on one stone, strop as I've outlined, and give it a shave. For example, sharpen as much as you can at the 4K stage, and strop it 200 times. If it shaves ok, you're on the right track. If not, you've got more work to do at that level of stone. You'll be amazed that such a low grit can shave so well. If it's painful to shave after your lowest stone.... you're not done, and moving up the stones will not benefit your edge. Repeating this process of shaving up all the stone grits (4K, 8K, 12K) will help you get a feel for what honing at the different levels provide. Shaving off my 1K bevel provided me the biggest leap in edge quality while learning.
Don't limit your techniques. Once you can confidently bring a restored razor to shave with consistency, I'd recommend playing around and experimenting. Though this, I've developed some strokes that are critical to my routine, and used effectively with every blade I sharpen.
I would say that 1000/6000 would be a bit low-grit for just maintaining a blade. I generally only use my 1000 stone for setting an edge. That stone also looks mighty cheap and I'm not sure what to make of that.
Norton split stones are often recomended and I'll have to agree. I would highly recomend getting the 4000/8000 for maintaining your blade; even though it's a little out of your given budget it's worth the investment and will last you a very long time. Unless you do anythnig bad like roll the edge or chip it you won't need anything more than that. If you do want/need to get into restoration the 200/1000 is really nice (Here's a kit with both stones and a flattening stone [though you can make your own with sandpaper it's not recomended unless you know what you're doing]).
The Pyramid honing guide should work for you regardless of what stones you end up buying and I'd very much recomend it as a technique guide.
Toying with the idea of picking up sharpening stones to hone and refresh straight razors, maybe the odd kitchen or pocket knife. Do these seem like decent choices?
Naniwa 1000 (Is this Chosera?)
Norton 4000/8000
Imperia La Roccia 12K-15K
At this point I don't know what I don't know. Pray for my wallet...
Edit: This guy has a set but for more money... any thoughts between the two?
Yup. Some of this I own, some of this I wish I bought instead of owning what I have now
*EDIT 2 I should also point out that this is not a "bare minimum" crappy tool list. I either own or would happily own everything listed here. If I went with the bottom of the barrel cheapo crap tools, I could cut the price in half - maybe 2/3rds. Also, this is a final list. Aside from some task specific stuff like spokeshaves and rasps, this is it - all inclusive - even clamps. I could make most things (happily - not struggling) with these tools. The only things that need to be added are wood and consumables (sandpaper, glue, and finishes)
Bandsaw - 330 on sale
Planer 220 (no haggling)
Dust Collector ~115 with coupon
Drill press - 210
M12 Drill Driver 70.00
Tatsumi Silver fang Ryoba. 240mm 37.00
Z-Saw "300" kataba and the rip blade - 40.00
Gyokucho 370 Dozuki 35.00
Takagi X-Beam Kataba 20.00
Veritas Low angle jack (O1) - 250
Vintage plane irons x 5. Lets say an average of
20.0010.00 each (even though this one is 3 dollars) - 50.00. with the saws and the low angle jack, I can make my own planes Edit -after looking more (and bidding on a few) these are a lot cheaper than I thoughtRouter plane - 60.00
Fujikawa Maruya chisels - 5 piece set - 132.00
Starrett double square 70.00
Shinwa miter square 12.00 With these squares I can make my own.
Norton 4000/8000 combo stone 77.00
200.00 worth of harbor freight clamps (aluminum bar and F style).
Total = $1,968.00** including estimated shipping costs
Norton makes a 4k/8k that I use. Naniwa superstones are also popular. A Swaty three line makes a good finisher that's a little cheaper than a 12k.
If I were in your position, I would definitely shoot for a big ticket item such as the sawstop PCS (36" T-glide) with 1.75hp motor. That will eat up your entire budget (plus $219 more). I cannot imagine a hobbyist woodworker who would not be happy with it.
OR you can do lots of little stuff: (take out the things he may already have)
Sharpening: this this this this and this
Chisels: here
Japanese saw: this and this
Caliper: here
Exceptional quality hand plane set every woodworker would love to have if they don't have it already: here. Conversely, you can get the Lie Nielsen 60-1/2 block plane and get the #4 and #5 from Lee Valley (I prefer their version).
If he doesn't have a planer, this is a great one: here
As for festool products, I would highly recommend the Rotex 150 with Dust collector combination
I'm sure i'm missing a couple of stuff here and there but I hope the list helps you get started.
I have been doing woodworking for upwards of 40 years. I recently bought a course DMT diamond plate
http://www.amazon.com/DMT-D8C-Dia-Sharp-Continuous-Diamond/dp/B0001WP1L0/ref=sr_1_3?ie=UTF8&qid=1398809883&sr=8-3&keywords=DMT
some Norton water stones.
http://www.amazon.com/Norton-Japanese-Style-Combination-Waterstone-8-Inch/dp/B0006NFDPI/ref=sr_1_5?ie=UTF8&qid=1398809928&sr=8-5&keywords=waterstone
and
http://www.amazon.com/Norton-Japanese-Style-Combination-Waterstone-8-Inch/dp/B00067ZSM2/ref=sr_1_16?ie=UTF8&qid=1398809974&sr=8-16&keywords=waterstone
Along with a sharpening guide.
http://www.amazon.com/Robert-Larson-800-1800-Honing-Guide/dp/B000CFNCKS/ref=sr_1_2?ie=UTF8&qid=1398810023&sr=8-2&keywords=sharpening+guide
And could not be happier with the results.
The major purpose of the diamond plate is to keep the water stones flat.
Even if you go the sandpaper route make sure that you get a guide and when you get one get your bevel-T square and a protractor (from Rite Aid) to check that the distance for the stop blocks is correct.
Not a ton for me to tell - I'm no huge expert.
For a SR, you wouldn't need to buy blades or anything (cheaper, less waste). Instead, you'd need the razor itself, a strop (to keep the edge in shape), and a hone (if you want to sharpen it yourself to save money).
/u/roctraitor can help you out with a nice razor and a great strop.
For a hone... I think this is usually considered to be pretty good for the job? I could be wrong, that's just my recollection. Ask someone more knowledgeable than me before you buy.
Soap and brush will be the same.
You need to be more specific. This community will always give advice to newbies but there are SOOO many different ways to work that we need to know what you think you might prefer.
Keep in mind that your opinions about how you like to work may change over the course of your adventures in woodworking.
Given that you have $100 at Amazon to spend and $100 cash to spend elsewhere here is what I would do: No matter whether you are going to be primarily power tool or hand tool, you will need sharp chisels. To sharpen chisels you will need a few things. This is a water stone. This particular stone is at two very frequently used grits. if you want to go over your amazon budget by $20 or so add this stone to the first one.
From there I would use some of your non amazon money to get this. This will help hold the chisels at the proper angle to get a good edge.
Finally we come to the chisels themselves. I would get a set that contains 1/4 3/8 1/2 and 3/4 inch chisels. I own this set which I like for the price but I am not in love with them like I am with the MK2 honing guide. To stay in budget perhaps you buy only one chisel to start practicing sharpening. I'd say get the 1/2 inch. It is a good balance of quality and affordability.
Keep in mind that all the gear in the world will not help unless you learn how to use it. Hit up youtube for DOZENS of how-to videos on sharpening.
All of those links above should come to about $220 before shipping.
Not sandpaper... a whetstone. But yeah, he did overpay. The Norton 4000/8000 is $75.
Although he may have purchased a full kit that included more than just the stone pictured.
As far as I'm aware Arkansas stones tend to fall into a grit range of around 600-1200, While this is fine for general use knives, it is far too low for honing a straight razor, except when setting a bevel. When honing a straight razor, most people will use a 1k stone for setting a bevel, then step it up. 1k/4k/8k is a popular combination, and the Norton 4k/8k stone seems to be fairly well regarded for the price. 8k is really the absolute minimum grit level you'd want for something you'll be taking to your face, and many people will step it up to a 10k or 12k stone as well, possibly finishing off with a pasted strop for a final polishing.
If this is your first straight razor and you've not shaved with a straight before then I'd really recommend sending it out for a honing. If you get it honed properly then you'll be able to get your technique sorted out by the time it needs honing again. If you try to hone it now then you may have a hard time figuring out whether you've managed to get a good edge on the blade, since it'll take you a while to get your technique down, and until then you may find it difficult to figure out whether it's the blade or your technique that's the issue.
There are a number of places you can send your razor that do good honing work. A few that you could try are:
On a separate note, congratulations on the razor! Can't see the blade particularly well due to the glare in the photo, but it looks to be in fantastic condition for a $35 Wade & Butcher!
I don't mean a sharpening system like a buy this one this to sharpen your stuff like folks have for their kitchen knives.
I meant a method you have to keep your stuff sharp.
I started out using the 'scary sharp' sharpening method.
https://en.m.wikipedia.org/wiki/Scary_sharp
Used a $3 tile from Home Depot and a set of sandpaper similar to this and used a honing guide like this one and then used Paul sellers techniques in this YouTube video
Also watch this Paul sellers video on preparing your chisels .
Scary sharp is great for beginner, and those that have little sharpening to do. The advantage and disadvantage is that you use up the sandpaper doing the sharpening. So the initial cost is low, but you need to keep paying for more it as your sandpaper supply runs out.
I lucked out and found a friend of a friend who gave me a pair of a course/fine combination oilstone similar to this. So I got a leather pad and stropping compound and then continued to use the honing guide and was very pleased with this result.
Now I'm pushing money towards getting a set of DMT diamond plates You want a course, fine, and extra fine. And lastly you want a 4000/8000 norton water stone.
This is what I meant by upgrading your sharpening system. All of these are options, and depending on your budget and needs, they can all work. Some advocate the buy once cry once mentality and just buy the last setup i talked about, but my progression has served me well enough that my shoestring budget allowed for continual progress, and also gave me the opportunity to cut my losses if I didn't use my chisels and planes as much as I do.
Hope this helps.
I had to look it up, and I think I immediately found my problem:
http://www.amazon.com/gp/product/B0006NFDPI?psc=1&redirect=true&ref_=oh_aui_search_detailpage
I think I need a rougher grit.
You just mucked up that razor. Send it out.
To hone (and this is basically straightening out the egde and polishing and edge you can't see)
First-
Second
Last
Some people skip the 12k stone but most feel its a need addition for the avid shaver.
Lower stones repair damaged blades and shouldn't be used otherwise. Lapping the stones to start and keep the flat are still required.
This problem could be solved if you're willing to put a little more love into it. I've been thinking about getting one of these babies and a honing stone and a nice strop. These things will last you the rest of your life if you treat them well enough.
I think Norton waterstones are one of the best values out there. You can get the four grits as combination stones (two sides with different grits on each side) to save even more:
https://www.amazon.com/Norton-Japanese-Style-Combination-Waterstone-8-Inch/dp/B0006NFDOY
https://www.amazon.com/Norton-Japanese-Style-Combination-Waterstone-8-Inch/dp/B0006NFDPI
Here's a video about using them:
https://www.youtube.com/watch?v=UfRxMsTOOeE
This may seem long but I spent a lot of time to share the knowledge so please read it and look at the links.
Everyone who uses any tool with an edge should own a Norton 4000/8000 grit water stone. (2 stones in 1) and know how to use it.
I own that one and a Shapton 16000 grit
For polishing a very smooth and fine edge
I plan on adding a Naniwa 12000 grit for an in between grit.
I bought them for honing straight razors but use them on anything that needs to be sharp
Lynn Abrams is like the go to guy for how to get things really sharp
The stones wear as you use them, so you will eventually need to lap them to flatten them back out. Some people use a flattening stone
I personally sprung for a lapping plate since I can also lap other things flat directly on it.
I also have one of these that I use for utility stuff like hunting knives or pocket knives or anything I think would gouge my nice stones and shorten the lifespan.
I know you are probably thinking, " all this stuff costs a fortune" Stones are durable and you will have them to use for the rest of your life. Chip away at them one at a time.