Best punchdown tools according to redditors
We found 89 Reddit comments discussing the best punchdown tools. We ranked the 32 resulting products by number of redditors who mentioned them. Here are the top 20.
We found 89 Reddit comments discussing the best punchdown tools. We ranked the 32 resulting products by number of redditors who mentioned them. Here are the top 20.


Here's the composition of the rack:
Elsewhere in the house/other useful parts:
Useful things I learned:
OP! That tester you are looking at will only check that the cables are installed without flipped or crossed pairs, and that there isn't a break somewhere. To do an actual performance tests on the cables you'd need this, or something similar...and you'd probably never use it again in your life. As it's more than ten times the cost of your install, I'd say it's not worth it.
That said, don't buy that POS you're looking at. Buy this. Paladin sucks. Buy the Ideal kit and it will serve you well until the day you die.
Ok, so looking over your pictures I have good news. You should be able to call a company that does actual communication's wiring and simply have them move that rack mount up 1.5 feet or so and re-terminate, and be done with it. It's at most 4 hours of work for a skilled tech. I could do it in less than 3. So..that's about $400 max, perhaps way less depending on where you live.
If that is a bit of a steep price you could buy this (DON'T BE CHEAP, GET THAT KIT!) and do it yourself no problem. You could then also pop open the face plates and repair the jacks if need be, because they are probably not terminated properly either based on what I see here. I could be wrong. Can you post an image of a jack side termination?
Now, is any of this strictly necessary? Probably not. The outer jacket on standard cat 6 is not doing very much over that short of a distance. Your twist density is maintained, and that's what's paramount. That said, properly terminating a patch panel can be an enjoyable and rewarding experience, and I think you should give it a try.
Also, residential runs are short (short = high performance), and cat 6 is excessive for most users needs. Cat 5e preforms at gigabit, do you have anything with a more than gigabit network port? Neither do most of the commercial customers my industry sells shielded cat 6a installs to...but that's another topic entirely. Anyway, proper terminations on both ends and nothing majorly screwy going on with the install as a whole and you have an excellent (excessive actually) home Ethernet system for the life of the building.
BTW, was this a commercial install it would have cost you a minimum of *$***7200** where I live...so you are getting a hell of a deal, even with residential cable being cheaper and these AV clowns having fucked the dog on the panel termination, kind of. But if they didn't kill the cable with metal staples for some reason, or bend the ever loving hell out of it for some reason, it should preform as is and if not with at best a days work a professional can bring it up to spec, maybe two days if you do it yourself.
I keep looking this over. It's a huge wall of text that says everything is probably fine, but you should fix it anyway. That is my final answer.
The best way to connect it up so that you have Internet is to get a switch with enough ports to handle all of the jacks, and then wire patch cables coming off of each one of the cables going into that block. You will need a punch down tool ( https://www.amazon.com/dp/B0072K1QHM/ref=cm_sw_r_cp_apa_a2sgzbNSBBEK7) a rj45 crimper (https://www.amazon.com/dp/B01F5PT7G2/ref=cm_sw_r_cp_apa_R3sgzb0GCQ5SN) some rj45 connectors ( https://www.amazon.com/dp/B00LG6DQUI/ref=cm_sw_r_cp_apa_m5sgzb3KQHCC8) and some CAT5 cable (https://www.amazon.com/dp/B0034XBFJU/ref=cm_sw_r_cp_apa_W6sgzb9E3ZTQ4). You strip the wires on both sides. One side gets punched down onto the block (make sure that the colors match) and the other side is terminated with a rj45 connector (make sure that the cable is long enough to reach your switch!). Once they are all terminated, you plug them into the switch, and have your switch hooked up to your Internet modem, and then all of the jacks will have Internet access.
First, do it now, while its not to hot/cold. running cable in the attic in the summer sucks. you kinda need 2+ people to run cable. it can be done solo, but that brings in so many more complications, beer for buddy. so yeah, like /u/xmangusx said, you don't want electronics up in the attic, top of a closet should be ok, somewhere a little more climate controlled. i haven't run cable in residential in a long time, but did do up a new floor of a building, and work at a datacenter, so take the numbers as a rough guide.
even if you think you want just 1 jack in each spot, run 4 cables to each room. alot easier to run a bundle of four now, then to go back and add in cabling later, even if you just let the bare end dangle behind the drywall. below is some suggested parts:
1000FT Cat 6 Bulk Bare Copper ethernet cable
4 hole keystone wall plate
cat6 punchdowns
keystone blank plates
electrical box
punchdown tool
network cable tester
24port patch panel will work in 19inch rack
wire line puller
pull string
so 1 blue box, 1 wall plate, a few blanks ( as desired # of ports) per room. start in somewhere a little less important like say the laundry room, or a closet, so you can get a hang of using the drywall knife to cut the hole, how big it needs to be etc. you will want to be near ( but not to close give liek 6 inches) to an electrical outlet if you can. use a studfinder, it should be where the electrical outlet is ( which side is the box on). find where the electrical cable comes through the 2x4, move over enough to account for stud width plus a little fudge factor, and drill a small hole, maybe 1/4 inch, just big enough to get the end of the fish line through. cut small hole in drywall near the electrical outlet ( opposite the stud) start with maybe 2 inch by 2 inch, will need to be bigger later for the box. run the fish down from attic through the stud hole you drilled, behind the drywall, and find it in the small hole cut. attach pull string to it, and pull it back, and keep pulling the pull string all the way back to central location. repeat till have all holes cut, lines run. now you will have a pretty good idea if you will need 1 or more cat6 1000ft spindles.
the hard part is going to be getting around in the attic, and simply finding a way to get from point a to be with the cable, creative use of a drill bit will be necessary. the punchdown blocks that go into the plates are color codes, do all A or B throughout the house, don't mix-n-match ( B is more common ), and is color coded. only will need a crimper, ends, is if you want to custom make the cables going from patch panel to switch, hint just buy 20 or whatever of appropriate length cables premade from monoprice, like $1 each.
expect 2 people who have never done this before, this to take more than 1 weekend.
Crimper:
Fluke Networks 11212530 Modular Crimper https://www.amazon.com/dp/B000E5VAXW/ref=cm_sw_r_cp_apa_i_oK1TDbHF8JB1F
Combo kit with stripper, lineman's snips and punchdown tool:
Fluke Networks 11293000 Pro-Tool Kit IS60 with Punch Down Tool https://www.amazon.com/dp/B000E5R3HE/ref=cm_sw_r_cp_apa_i_sL1TDbK5ZHW73
I've had my Fluke tools for years. Dropped, lost, dropped again and have never had an issue
Klein Tools is also a great brand for low-volt/Telecom tools
Edit: ideally, you should really never be crimping ends for production use. Horizontal cabling should never terminate with RJ45 modular plugs and instead terminate to keystone jacks on both ends of the run and patching should be done on both sides with high quality pre-made patch cords. You’ll save yourself a ton of heartburn this way.
I've only ever used these ones
They get the job done.
The advice given to get an Edgerouter + Unifi AP will likely service you the best in the long run. However you should strongly consider hard wiring any device you can. This will likely give you the greatest performance increase regardless of the hardware you decide using.
It's much cheaper than you may have anticipated. There's many ways to do this but here are a couple options:
OPTION #1
100ft finished Cable $12.99
https://www.amazon.com/KabelDirekt-Gigabit-Ethernet-Snagless-Connector/dp/B016A913LY/ref=mp_s_a_1_1_sspa?keywords=100ft+cat6&qid=1551089563&s=gateway&sr=8-1-spons&psc=1
OPTION #2
Create your own Cable with the following supplies
Raw CAT6 Cable 100ft = $18.90
https://www.amazon.com/Cable-Copper-Outdoor-Resistant-Syston/dp/B079H3BKGV/ref=mp_s_a_1_15?keywords=100ft+cat6&qid=1551089731&s=gateway&sr=8-15
Punchdown Tool = $9.99
https://www.amazon.com/Cable-Matters-Punch-Down-Blade/dp/B0072K1QHM/ref=mp_s_a_1_5?keywords=Punchdown+tool&qid=1551090195&s=gateway&sr=8-5
Keystone Jack (x2) = $9.80
https://www.amazon.com/gp/aw/d/B001BLWX3Y/ref=ox_sc_act_image_3?smid=ATVPDKIKX0DER&psc=1
CAT6 Patch Cable = $2.89
https://www.amazon.com/C2G-27141-Snagless-Unshielded-Network/dp/B00008KA6Z/ref=mp_s_a_1_3?keywords=Patch%2BCable%2BCat6&qid=1551090947&s=gateway&sr=8-3&th=1&psc=1
HOW TO
https://youtu.be/0gxNZoPcnP4
Paying someone to run Ethernet is a huge waste of money. Even with buying all the tools and supplies yourself you will save lots of money.
In your situation I would go up into the attic then run down into the walls to your wall jacks.
Stuff you'll need: (not including drywall saw and gang boxes/gang frames to mount the wall jacks)
http://www.amazon.com/UbiGear-Crimper-Connector-Network- Crimper315/dp/B008UY5WL0/ref=sr_1_2?s=electronics&ie=UTF8&qid=1457464334&sr=1-2&keywords=rj45
http://www.amazon.com/C2G-Cables-Go-19958-Steel/dp/B0017RAHSA /ref=sr_1_2?s=electronics&ie=UTF8&qid=1457464421&sr=1-2&keywords=wire+fish
http://www.cablingplus.com/t/networking/jacks-and-connectors/cat5e-keystone-jacks-25-packs
http://www.cablingplus.com/t/networking/wall-plates/classic-keystones- wall-plates
http://www.amazon.com/Cable-Matters-Punch-Down-Impact-Blade/dp/B0072K1QHM/ref=sr_1_1?ie=UTF8&qid=1457464708&sr=8-1-spons&keywords=110+punch+down&psc=1
http://www.amazon.com/Cat5e-Ethernet-Cat-5e-VIVO-CABLE-V001/dp/B0092TG310/ref=sr_1_5?s=electronics&ie=UTF8&qid=1457464781&sr=1-5&keywords=cat5
For around $165.00 you'll have everything you need. Less if you need less than 1000' of cable.
It's true that the cable I listed is not plenum rated but you're not going to be in the attic if your house is on fire anyway. I wouldn't worry about it or waste the money on it.
I've installed hundreds of miles of cat5 in my earlier career before switching to sysadmin stuff.
Krone tool.
Just recently bought this punchdown tool and this crimp tool kit and successfully created my first cat5e connection to a wall plate. Other than watching a few YouTube videos a few dozen times each, it was pretty painless.
Highly recommend a cable tester to confirm both ends are properly wired.
You can probably cheap out on the tools because you won't need to use them more than once or twice.
You can definitely do it.
Thanks...
Okay, the easiest and cheapest way of doing this is:
What you need to do is:
Note, you may need to get new wall sockets, but I could suggest to do one test cable first and then run a speedtest using speedtest.ui.com to see if you get the same as your internet provider. One other thing to note, is that I'm not sure that Frontier Communications device is a router and can handle all the connections, you may need to get a router also.
Use a patch panel. It's more organized, and you'll be able to terminate cables much faster and more reliably on a patch panel or keystone jacks.
Here's a decent tool: http://www.amazon.com/Cable-Matters-Punch-Down-Impact-Blade/dp/B0072K1QHM
Also, just buy your own patch cables rather than making them.
You would be better off making your own. I've found that a lot of the sets are cheap.
Here's my take on it.
1.Cable tester:
http://www.amazon.com/gp/aw/d
/B000P1OA1O?cache=6447edf9df8336c37ffb445471642e6b&pi=SY200_QL40&qid=1412645606&sr=8-1#ref=mp_s_a_1_1
Simple cat5 tester, cheap and works decently.
2. Cable stripper:
Here I've given two options, one is a spinning stripper made for things like taking the jacket off cat5, the second is a more of an electrical stripper for a bunch of gauges of wire with cutters at the back side. If your comfortable with it you can use the cutters to strip just about anything.
2.a http://www.amazon.com/gp/aw/d/B0099DIV4G?cache=6447edf9df8336c37ffb445471642e6b&pi=SY200_QL40&qid=1412645735&sr=8-1#ref=mp_s_a_1_1
2.b. http://www.amazon.com/gp/aw/d/B00080DPNQ?cache=6447edf9df8336c37ffb445471642e6b&pi=AC_SX110_SY165_QL70&qid=1412645735&sr=8-12#ref=mp_s_a_1_12
3.punchdown tool :
If your in a spot where you get to do punchdowns it's nice to have, they are cheap and work well,
http://www.amazon.com/gp/aw/d/B000KMFDZ0?cache=6447edf9df8336c37ffb445471642e6b&pi=SX200_QL40&qid=1412646040&sr=8-1#ref=mp_s_a_1_1
4. Cat 5 ends:
Always keep plenty of these, a bag of them is cheap and you will be glad you have them.
http://www.amazon.com/gp/aw/d/B003M5BIII?cache=6447edf9df8336c37ffb445471642e6b&pi=SY200_QL40&qid=1412646222&sr=8-1#ref=mp_s_a_1_1
5: crimper:
Never underestimate a good crimper. I have had no luck with the cutting portion of them but that's why I have other tools.
http://www.amazon.com/gp/aw/d/B0000AZK4G?cache=6447edf9df8336c37ffb445471642e6b&pi=SX200_QL40&qid=1412646393&sr=8-2#ref=mp_s_a_1_2
6. #2 philps head.
I like ratcheting screw drivers with multiple heads but this is easily the most used screwdriver in my set.
http://www.amazon.com/gp/aw/d/B000NNK9MS?cache=6447edf9df8336c37ffb445471642e6b&pi=AC_SX110_SY165_QL70&qid=1412646575&sr=8-5#ref=mp_s_a_1_5
The flat head out of this set is also nice, depending on your bag keep them all handy.
Everything beyond this point is optional or situational.
8. Power supply tester: if you do any sort of computer repair these are very handy to hold on to.
http://www.amazon.com/gp/aw/d/B001MKCALY?cache=6447edf9df8336c37ffb445471642e6b&pi=SY200_QL40&qid=1412646902&sr=8-3#ref=mp_s_a_1_3
9. Tweaker: good for laptop repair or if you deal with any sort of building controllers/ low voltage electrical.
http://www.amazon.com/gp/aw/d/B0058I6VNE?cache=6447edf9df8336c37ffb445471642e6b&pi=SX200_QL40&qid=1412647026&sr=8-1#ref=mp_s_a_1_1
I also have a similar sized Philips head screw driver but I use it much less frequently.
10. Electrical tape: some people say it's for those who mess up doing electrical, I call it insurance.
11. Linemans: I use mine to crimp chicklets mostly but they come in handy a lot. I couldn't find the exact ones I use b
http://www.amazon.com/gp/aw/d/B000A0S4XK?cache=6447edf9df8336c37ffb445471642e6b&pi=AC_SX110_SY165_QL70&qid=1412647275&sr=8-4#ref=mp_s_a_1_4
12: a bag:
Personally, I use an old back pack. I find its a lot easier to carry that along with a box of cable. This is entirely preference.
Get a Patch Panel, a Punch Down tool, a ethernet crimper, some ethernet ends (i prefer the EZ, but they are pricy), and a network tester. All that for $70 and you can terminate and troubleshoot all the cables you desire!
My personal kit is a little more expensive, but really the only thing I wouldn't trade for a cheaper tool is the tester. Crimper, Punchdown, Tester.
You can do it that way, but it isn't recommended. Putting on your own male networking connectors has become bad form, sort of, over the last few years. They just aren't very reliable when using solid conductor cable and they are extremely difficult to install on stranded cable without the $50k machine they use in the factory... Someday your home terminated cable will fail for no apparent reason and it will ruin your life.
If I were doing it, I would run the cable and put a box in the wall. The cable is fine. I would pickup some old work low voltage boxes, and install a wall plate and use some keystone jacks and whatever jumpers you like.
If you are open to buying somewhere other than monoprice, I really like the Cable Matters keystone jacks nowadays. I like this punch tool but this knockoff works ok as well and if you are just doing a few than you could probably get away with the plastic thing that comes with each keystone jack... they eventually will work it might just take longer and you might have to dick with it a bit.
It looks like the stuff you have picked out will work, but it just might not be super reliable or aesthetically pleasing. Plus, what do you do if you move something? Now you just have a hole in the wall with some wires flopping around... If you put jacks on the wall they just blend in with all the other jacks on the wall if you remove the jumpers...
I have been really pleased with everything from Cable Matters lately. We terminated 1200 cables for a huge IP HD video system a few weeks ago using their stuff and only had 2 or 3 that had to be repunched and we had one cable run that didn't check and that was probably our fault pulling too hard and getting a kink in it. It's pretty reasonably priced all things considered.
Also, the cable you have picked out is great. It's pure copper and not copper clad aluminum (CCA). Never use CCA it's absolute garbage and won't ever work for anything. CCA will ruin your life.
EDIT: I just wanted to correct myself, we have been buying Honeywell Genesis cat6 cable lately... not monoprice. We have been getting a better deal through ADI global on the Honeywell stuff and it is very nice cable. The reel in a box is so much better than the usual mess... no more kinks so you don't need to pay someone $25 an hour to babysit some boxes and pay out cable and yell "stop!" over the radio all day when they have to sort a kink...
Your Keystones and Patch Panels both require a 110 punch tool. Something like one of these:
https://www.amazon.com/Flexzion-Impact-Ethernet-Keystone-Network/dp/B076WV326L/ref=sr_1_29?crid=1PGRU2IK9OF4I&keywords=110+punch+down+tool&qid=1573846876&sprefix=110+%2Caps%2C140&sr=8-29
I would probably add that, drop the RJ45 Crimp Tool and RJ-45 plugs, and order a bag of pre-made patch cables of whatever lengths you need from Monoprice or whomever. That way they'll use stranded cable (which handles being messed with more) and be made, saving you time for all the other new house stuff you've probably got lined up. Making patch cables is generally a waste of your time.
But that is just my opinion.
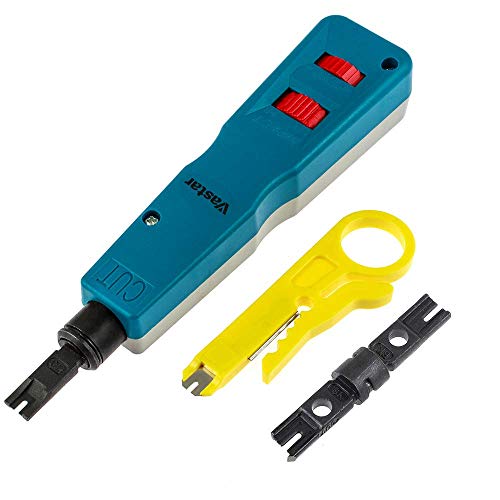
Vastar Network Wire Punch Down Impact Tool with Two Blades - 110 and BK & Network Wire Stripper https://www.amazon.com/dp/B01E58M5EG/ref=cm_sw_r_cp_apa_7DDtybSHVADW5
This is the tool I have.
I had to punch out a lot of labels, and this hole puncher for scrapbooking worked for me. I've read online that to sharpen it, use the hole puncher on an aluminum can; I can't verify this because I haven't had to sharpen mine.
Other people have suggested using a leather-punching tool. I used this, and it didn't work at all on cardstock, even after I tried to sharpen it.
Something like this would mount into a rack. You would take those cables and punch the wire into the back of the panel in the link above, similar to your existing setup.
Also, this is a punch down tool.
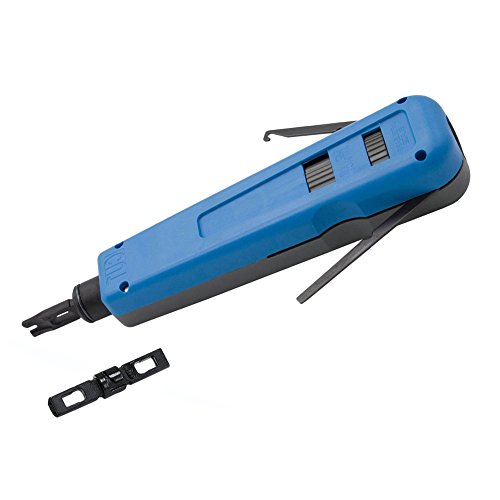
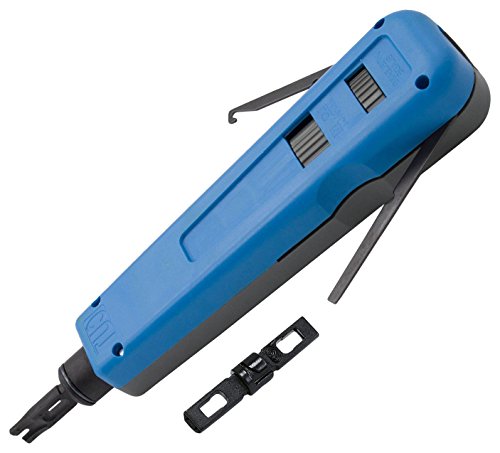
Punchdown tool. The hook is for snagging small wires. There should be a spring loaded punch in the front.
https://www.amazon.com/Multifunction-Network-Telephone-Terminal-Insertion/dp/B06Y53H9WF/ref=zg_bs_6396135011_8?_encoding=UTF8&psc=1&refRID=DCMN9CR4Z22Q31T3C9TR
https://www.amazon.com/Best-Sellers-Home-Improvement-Punchdown-Tools/zgbs/hi/6396135011
Here is my way to do this as cheaply as I'd feel comfortable doing (note, not as cheaply as possible).
I'd put a new switch in the new office and use cat5 cable to connect to the existing switch. I'd install the new switch in a wall mount rack, and install a wall mount patch panel in the rack. I'd terminate all stations in the new office to the patch panel. The inter-office connection should be terminated to this new panel, and the other side terminated to a panel there or surface mount jack if no panel available. The number one piece of advice for a novice is do not run the cables directly to the switches or computers. Cables should be terminated to a jack or patch panel.
If you don't have tools already I highly recommend you splurge a little here. I know it seems stupid "I'm only going to use it once!!". Trust me, buying decent tools can cut your install time in half or more. This $50 kit is what you need. It's extremely important to get and use the cable stripper (SureStrip in that kit). If you knick the inner cable while stripping the outer jacket on Cat5 you pretty much have to start all over. You don't really need an impact tool, that kit comes with a non-impact tool. If you have a few extra $$ go ahead and get one for about $20.
For a switch, maybe Dell. We've used them in non critical areas in our enterprise, and they work fine and reliably. You mentioned PoE - unfortunately PoE switches are nearly 2x the cost of non PoE. With your tight budget, I suggest using PoE injectors. Here is a 4 port for $60 and a one port for $24
amazon + paladin
http://www.amazon.com/Paladin-4909-SureStrip-Non-Impact-Punchdown/dp/B0008F5VA6/ref=sr_1_4?ie=UTF8&qid=1323570620&sr=8-4
http://www.amazon.com/Paladin-Tools-1574-Testing-Installed/dp/B0002W3A6M/ref=pd_sim_hi_1
Otherwise you're into the 200+ range.
this is pretty inexpensive and has good reviews
Ratcheting-Crimping
I would also recommend a cable tester so for a little more there is a kit like this that also has a punch down tool and a cable cutter
tool kit
but as a beginner defiantly get the tester and more ends than you think you need you will mess up some at first till you get the hang of it, them little wires can be a pain, and being able to test before plugin in is nice and if you do P.O.E. its a must
A network tester like this one doesn't cost much and might help you diagnose the issue. It can test if a link is working if you plug it in at each end, and you can also use them to send a signal through the link which the other piece can detect from nearby. Pretty useful if you ever need to suss out the location of a cable through a wall or something.
Imo the most likely case is that the connection at one or more of the ends has become broken. You should be able to fix that rather easily yourself. Google "RJ45 wall jack installation" for more info on that. You would need a punch down tool for that.
All those blue cables and the single white one might be cat5, so the statement doesn't make much sense. cat5 just means it's a 4-pair cable that has a certain number of twists per inch to meet frequency requirements.
If he had said "Row 7 on the 66 block is hot", that would mean something.
Now that I think of it, he could mean that of all the connected rows shown there, only 1 is passing the centurylink signal to a wall jack.
Either way, you need to map what row on that 66 block goes to what wall jack. The usual way is to map it with a tone generator. Trial and error is the other way (e.g., keep moving the centurylink signal on the 66 block until it lands on the wall jack you want).
At the very least, you could get a friend on a cell phone to sit at the wall jack that works while you sit at the 66 block. Start disconnecting stuff one-by-one until your friend tells you the signal went out. You'll have at least found where that wall jack is on the 66 block - or you found where the centurylink signal is coming in. The logic being you either disconnected the incoming signal to the block, or you disconnected the wall jack from the block. A punchdown tool is handy for making connections to the 66 block - just make sure you have the cutting blade pointed the right way.
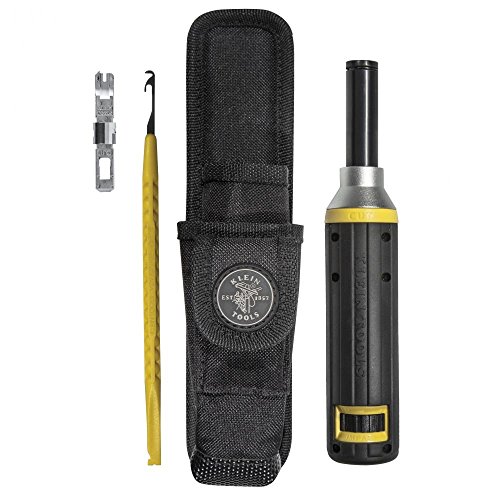
Good Sir, your plan was sound, but you needed (EDIT: "a tool like this one") too:
https://www.amazon.com/Impact-Punchdown-Klein-Tools-VDV427-805-SEN/dp/B002MSJMXY
Or one like it.
It properly seats the wire, and clips the end off in one punchy motion.
then it is for phone. You may get a patchpanel, remove the wiring from the phone panel, and use a punch tool to connect it to the ethernet patch panel. You would need to run power to that location and connect each patch panel port to the switch/router that you locate there.
Note: this only works if all 8 wires were connected in the wall sockets. If there are only 2 of the 8 connected, redo them.
Punch tool: https://www.amazon.com/gp/product/B01FHBZJ20/ref=oh_aui_detailpage_o01_s00?ie=UTF8&psc=1 )
Patch panel: e.g. https://www.amazon.com/Tripp-Lite-Wallmount-Ethernet-N050-012/dp/B000067SC6/ref=sr_1_4?s=electronics&ie=UTF8&qid=1495168315&sr=1-4&keywords=patch+panel
I did the same in my apartment last weekend. There was already a patch panel for ethernet, but all wiring was connected to the phone panel.
this is a good start. I dont own this set but it does look nice.
http://www.amazon.com/Fluke-Networks-11293000-IS60-Pro-Tool/dp/B000E5R3HE/ref=sr_1_1?s=hi&ie=UTF8&qid=1331522014&sr=1-1
Currently these are the tools I use... Mostly Klein. I've been using these for a few years now with minimal issues...
Crimper
Punch Down
Side Cutters
Scissors
Stripper
Lan Tracer / Tester
Disclosure - I have been doing cabling and telecom for 10+ years. I am recommending the same tools that I carry in my own bag.
First, that tool is garbage. I had that same kit once upon a time and the teeth in those crimps actually bent.
Since price is no option, get yourself a nice pair of crimps.
http://www.allentelproducts.com/catalog/model_AT680.htm?sid=5053870E92469B0FBDE26B823299C951&pid=2010
Also, since price is no option - Get a nice toner that includes a cable mapper to make sure crimps/punchdowns are okay.
https://www.amazon.com/Fluke-Networks-MT-8200-60-KIT-IntelliTone-Toner/dp/B00N2S6RPY
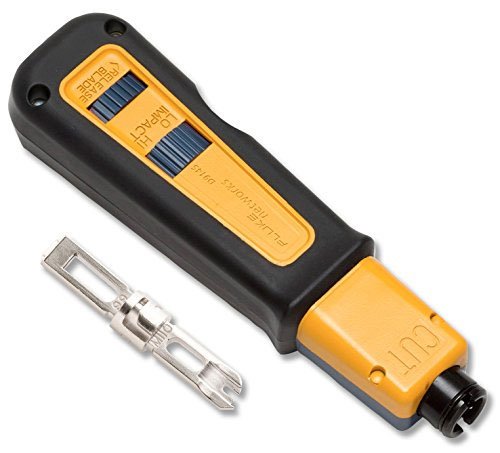
You will also need a punch down tool.
https://www.amazon.com/Fluke-Networks-10055501-EverSharp-Starter/dp/B000FJCRBG/ref=sr_1_3?s=office-products&ie=UTF8&qid=1475089176&sr=1-3&keywords=fluke+punchdown+tool
Last, do not crimp RJ-45 ends on solid copper cable. Solid copper is for terminating on jacks and patch panels. When you terminate an end on solid copper, the blade is actually not cutting through the wire as intended. Instead its either bending or cutting to side of the wire. This can lead to poor connection and oxidation of the wire over time. You will start having connection problems with no idea why. If you are set on simply using crimps, purchase your cable with stranded copper. With stranded, the blade inside of the RJ-45 end will actually cut through the middle of the wire coating and settle in between the copper strands.
Also, I would skip the Cat-7 and go with shielded CAT-6.
> Now, do I need a specified keystone for solid cat6 as opposed to stranded?
most keystones are designed for solid cable, because they assume that solid is what you run in the walls. Stranded is for patch cables, and should not really be run in the walls.
I just get these in whatever colors I want when I need them, and I use this punchdown tool, and it works perfectly.
Cat 5e unless your PS4 is capable of 10Gbs-1! Its cheap and dependable and most back boxes are designed for it. The e is important but it is quite unlikely that you will find only Cat5 which is only rated up to 100Mbs-1. If you only need one then run two and leave a foot or so in the wall at each end for the extra cable, just in case. If I was you I'd run three cables and terminate two of them and keep one as a spare coiled up in the back of the back box.
I assume US and let's see what Amazon.com offers. https://www.amazon.com/Ethernet-Plate-ESYLink-Cable-Female/dp/B076GLSN5J/ref=sr_1_3?keywords=wall+port+ethernet+2+port&qid=1565562692&s=gateway&sr=8-3
Ahh, it looks like you lot insist on Cat6 and have huge wall plates. So I'll change my suggestion to Cat6. Make sure you run an extra cable and don't stress them too much when you are laying them, especially when pulling through a hole, it is easy to kink them and try to use brute force to fix the problem. Buy solid core cable (not stranded) which is designed to work with "keystone jacks".
You'll need this tool https://www.amazon.com/CableCreation-protecting-jacket-Multi-Function-Ethernet/dp/B01FHBZJ20/ref=sr_1_12?keywords=ethernet+punch+down+tool&qid=1565563203&s=gateway&sr=8-12 to make the connections. You can practice on some off cuts of cable before going live. The hook on the tool makes it easy to pull the wires back out from the back of a jack. There are a lot of videos on the web about doing all this stuff.
Yeah, it was sort of a hacky way to do it. At this point, I'll likely buy some keystone jacks and redo it (since I also bought a punchdown tool already).
That's way overkill for the home gamer. I have this one, and it works great.
Sorry if I'm confusing you. I'm pretty jacked up on coffee right now haha.
So yes, tone each port on that panel before you remove the wires with this Tool. After you have each blue cat 5 labeled, not the grays, you can save the grays to patch between the switch and the new panel actually, you use your punch down to pull the wires out with the hook part. With everything out, repunch the wires into the patch panel, making sure the pattern matches whats on the wall plate. A punch down tool like this one is nice but not required, to get the wires into the terminals. These are nice because it takes off the excess wire, but a knife can do this fine as well.
As for your last question. I would run up the studs if you could. Then you have a nice plate at the end at the wall. You could even get a multi port jack so you can plug all your items into that and have those go into a separate vlan on the switch.
So according to that picture, if they wired it according to the color coding, it's 568A, so if you were to wire it up yourself, make sure the OnQ side is 568A as well to save yourself 50% of the work. But all depends if they did the blue, orange, green, brown pairs accordingly, which I'd assume they would to make their life easier.
If you were to get an 8 port Cat5E patch panel, you're going to need a punchdown tool in order to get the wires hooked up to said patch panel. It isn't hard by any means, and there are tons of videos on Youtube about terminating ethernet cables into rj45 jacks as well as onto patch panels. It isn't rocket science by any means, and depending on your comfort level and if you want to buy what you'd need (watch youtube videos first, maybe you'll find terminating rj45's directly to plug into your switch to be your cup of tea), that might be a MUCH cheaper route than getting someone out there to do it. Maybe you have a friend that can assist, if they are into networking.
But absolutely, Cat5E is Cat5E, be it used for POTS (telephone) or home networking, it's the same media, just how it's terminated on both ends is what matters.
Here is an example of an 8 port Cat5E patch panel. It has color codings for 568A and 568B (in your pic above, 568A per the wall plate, if wired correctly):
https://www.amazon.com/dp/B01LVZVUBO
Punch Down Tool w/ cutter (be careful when using that you pay attention which end the blade is so you don't cut the wrong side of the punch!):
https://www.amazon.com/dp/B0000AZK4D
https://www.amazon.com/dp/B01E58M5EG
This is just to hopefully give you an idea of what to search on Youtube for information. Glad to help, just research and research before tackling it yourself, but this isn't something that is going to be super difficult, but also don't want to see someone charge you $500 to do this job!
Good luck, and it's always fun to learn a new skill!
You may want to invest in a cheap punch down tool. It’ll make sure the wire is punched correctly and trim off the extra so it doesn’t get pulled out or cause a short somehow.
The jack appears to be wired correctly so as long as you can verify that you in fact have both ends of the wire I don’t see any reason why it shouldn’t work.
https://www.amazon.com/Cable-Matters-Punch-Down-Blade/dp/B0072K1QHM
If you ever decide to splurge on a bag get a Veto Pro Pac Tech-LC it really is a great bag for electricians. The tech-LC version has nice wide pockets on the back where you can fit meters, toners, p-touch labelers ect.
Veto Pro Pac TECH-LC Tool Bag https://www.amazon.com/dp/B008AK1ZHE/ref=cm_sw_r_cp_api_i_j2tSDbXZJ4NFG
Edit: and also look into fluke stuff they really make amazing tools for low voltage work! Like this:
Fluke Networks 11291000 Pro-Tool Kit IS40 with Punch Down Tool https://www.amazon.com/dp/B000E5VB04/ref=cm_sw_r_cp_api_i_Y9tSDb3RX2TZV
When I was a field tech, mostly working with structured cabling and networking equipment I took the following along with me, some of these things are no longer needed with VOIP phones though:
Obviously this all doesnt go in one bag, but I had mine in my car/truck all the time. It'd be a lot easier in an office.
If you have ports around your house, I would start by buying a cable tracer and tester kit like this.
You appear to have an OnQ 1x12 telecom system in place in that cabinet which is for phones only and an OnQ network interface panel. So the OnQ 1x12 part isn't useful for you, but you could use the OnQ network interface part and a switch to make this work. You will need a 110 punch down tool will have to do some rewiring though.
Edit: changed comment after noticing it was an OnQ system.
I personally do not like that crimper. I have used the blue one (they are our shitty throw around tools at work), and I personally much prefer the orange one. I like the ratchet action better.
http://www.amazon.com/gp/aw/d/B0008F5VA6/ref=mp_s_a_1_7?qid=1376270954&sr=8-7&pi=AC_SX110_SY190
Try this:
I've printed out my token images and glued the paper to medium-weight chipboard with spray glue and punched them out with this guy, and that worked really well. Of they weren't double-sided though. I didn't even try to glue sheets of images on both sides and have them line up.
> How should I finish the ethernet cables?
Like another person said, use keystones. Don't use toolless as they are pretty crappy but just get a cheap punchdown tool and keystones for each room.
I would personally use a patch panel where the cables are going to be run to, but it wouldn't be necessary if you're only going to be running them how you initially explained.
> Can there be any conflict between the wifi of my router and the wifi of the APs?
There can, but they should be able to figure it out on their own. That said, if you're using APs (or WAPs as I call them at work, for Wireless Access Point, sorry about the change in terminology), you should just use a wired router instead of one with Wifi. No reason to add another component and interface to your situation.
> Good to know. From what I read, the usual setup is to have Ubiquiti controller installer on a computer running 24/7. So this is only for logging stats, is that right?
Pretty much. I don't think many people are running an actual computer 24/7 just for the software but do it if they have a server running 24/7 already, or just put it on a raspberry pi instead if they really need it.
> So all the APs get the same configuration? They are all configured with the same settings? No need to configure them differently?
> And if I set the SSID and the security for the APs to be the same as the one from my router wifi, everything will appear as one and only one network and there will be no waiting time from the time when I'm connected to one AP and get connected to another one while moving? Also, how will that switch from one AP to the other be done? Will it be automatic or no? Will it be the APs that will determine when to change one device from one AP to the other or the device itself that will "take de decision"?
Unless you want to do something different in a specific part of the house (i.e. guest access not everywhere) then yes. You just leave channels to auto, give every ap the same ssid, and you're devices will automatically switch freely among them. The devices make that decision, but the APs will sorta "help" determine when they should.
> What is a "WAP"? Also, if on the ceiling, I guess it should be in an open area rather than in the corner of a room? I would prefer to install them in the corner of a room in order to make them more "invisible", but I don't want to impact the wifi coverage/speed...
Sorry again, WAP is just what we call Wireless Access Points at work, because we have wired ports labeled Access Points as well. You can definitely install them on walls as well, but the devices are designed to radiate signals stronger in a specific direction. That is usually every direction but directly behind them, which means if you put it on a centrally located wall, the side of the house in front of it will have a stronger signal than the side behind it. You can place them closer to the edge of the house and be pretty good, but you might need to add an extra one to get as good of coverage.
> Do you think the new chip will be integrated in device shortly (the house will still be probably open until june...)?
No need to worry about that. The idea is to run as many cables in the walls as you'll ever need, so you can change tings like a router or APs super easily by just unplugging the old one and plugging in the new one. I don't think they will be popular enough in devices by june to be worth getting yet. probably closer to 2 years.
> A PoE switch seems nice. What is there to look for when buying one?
Definitely. There's 2 types of PoE switches: passive and active. passive switches are cheap and will damage any device that gets plugged into it that doesn't work with the same voltage. Try to stay away from these. Active switches support either 802.1af or 802.1at. Basically you want to make sure your switch and AP support the same type of active PoE. You can plug in anything to these switches without worry. Yes, you'll want to install it right next to your router and run cables to all of your rooms that way.
> Do I need to have ventilation for a PoE switch? Also, there is some that get installed into a rack, but I think this is more for a "pro/business" installation. However, does a PoE switch can be wall mounted?
Don't think of them as "pro/business" models. You seem to be building a large modern house, and having everything centralized will make your life SOOO much easier. I have a much smaller house and have a 24 port switch in my garage. You can just sit it on top of something, or you can make a mini rack, like I did. Just bought a pair of these and secured them to a plate of aluminum. It has my router, a patch panel, and my house switch installed on it, and is sitting on a shelf, although when I get the time and drive I'll mount it to the wall with some shelf arms. As for ventilation, look for the temperature rating on them. The lowest max temp I've ever seen is 40°C/104°F so should be fine in a living space, but depending on where you live might not be in an attic or garage. That said, my garage gets about 115/120°F on the hottest days and I haven't had an issue with my swtich.
>In general, is it better to run distinct ethernet cables with a RJ45 jack on each end or to buy a full spool of ethernet cable and put a RJ45 manually to each end?
Just to reiterate, you want to attach keystones at the very least to the living space side, and either the same thing or a patch panel where they are being run to. Will give you a much more professional look than a hole with cables. People will see it and not notice it, as opposed to seeing it and thinking "they have a hole in their wall already!"
something a lot of people dont realize in new homes: All your phone jacks, that likely go to the same wiring panel as anything else would, most of the time those phone jacks were ran with Cat5e or Cat6. From there you just buy a 110 block punch down tool (https://www.amazon.com/Cable-Matters-Punch-Down-Blade/dp/B0072K1QHM), some keystones https://www.amazon.com/Cable-Matters-25-Pack-Keystone-Punch-Down/dp/B004D5PFGW, and some plates, and start re-purposing those phone jacks you dont need.
Battery backup on the rack for your servers.
Scratch the pre-maid cat cables and just learn crimp your own cabling.
Cybertech Cat6, Cat5e RJ-45 8P8C Ethernet Modular Crimp Connectors Plugs Pack of 100 https://www.amazon.com/dp/B00LG6DQUI/ref=cm_sw_r_cp_api_p7Q2AbHFZP2YW
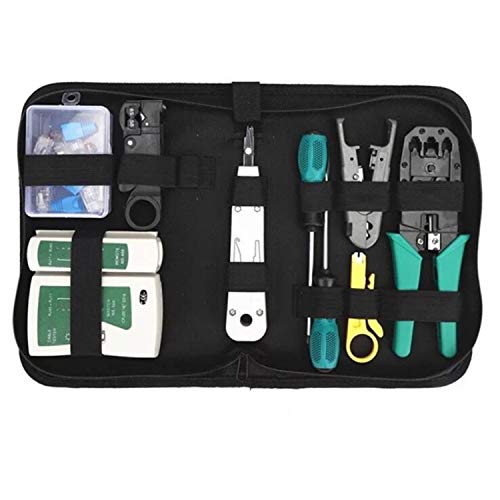
Network Cable Repair Maintenance Tool Kit Set 11 in 1 Portable Phone Cable Crimper 8P8C 4P4C 6P6C Connectors RJ45 RJ11 Cat5 Cat6 Cable Tester https://www.amazon.com/dp/B0756SN86D/ref=cm_sw_r_cp_api_o5Q2AbBW77GFT
I also recommend an anti-static mat if you are a builder:
StarTech.com 24x27.5-Inch Desktop Anti-Static Mat M3013 (Beige) https://www.amazon.com/dp/B00009XT3H/ref=cm_sw_r_cp_api_e9Q2AbGZVFVJ2
If this is a builder workbench I would also recommend a good surge strip:
Bestten 12 Outlet Heavy Duty Workshop Metal Power Strip Surge Protector, 15-Foot Long Extension Cord, ETL Certified, Black https://www.amazon.com/dp/B074MY384H/ref=cm_sw_r_cp_api_l-Q2AbTXDXJAX
Lastly, how is your lighting in the room?
Get a patch panel something like this. Pull the cables off the 66 block that you want to convert from phone use to data/network use. Punch them down on this patch panel with a punchdown tool. Use factory-made ethernet patch cords to connect from the patch panel to your switch. You don't need crimpers.
a punch down tool.
http://www.amazon.com/Cable-Matters-Punch-Down-Impact-Blade/dp/B0072K1QHM/ref=sr_1_4?ie=UTF8&qid=1463364132&sr=8-4&keywords=punch+down+tool
I bought this kit which is admittedly pretty pricey, but all of the tools are excellent quality. You can get just the punch down tool here for $55 (get the one that just comes with the 110 blade).
Yeah, you can definitely re-wire the jacks. All you'll need is a punch-down tool.
Leatherman - Charge TTI
Fluke Networks MS2-KIT
JackRapid Punchdown Tool
Fluke Networks 11293000 Pro-Tool Kit IS60 with Punch Down Tool or similiar
a set of crimpers (can't find a good set at the moment)
network ends, cable, wall plates etc.
Punching down is simple. Buy a Cat6 Patch Panel, and something like this for punching down. It's pretty straight forward just pick a standard (A or B on the jack/patch panel) and stick with it.
As far as your den - can you run a cable to the den from where you patch panel will be? You said there's already a cable there so if you have attic access or basement access and can follow the route of the other cable you could just use it as a pull string of sorts if it isn't stapled inside the wall. If not then wireless would be your option I'd think.
I found this tool https://www.amazon.com/dp/B01E58M5EG that says it has a “BK blade.” From the pictures the BK looks exactly like a Krone blade to me though and after googling I wasn’t able to find any other tools with BK blades. Is it safe to assume it’s just Krone with a different name?
Here you go man. If it ain't Klein, it ain't mine. https://www.amazon.com/Klein-Tools-VDV427-805-SEN-Impact-Punch-Down/dp/B002MSJMXY/ref=zg_bs_6396135011_19?_encoding=UTF8&psc=1&refRID=12JW936NXVSKAR5K1BW2
There's some good instructional videos on Youtube if you search for it. My walls were a bit of a pain, but definitely well worth it in the end.
Here's my tool list that I'd recommend:
Thanks for the advice! Do keystones need to be rated exactly for Cat6a, or are they interchangable? I saw this 25-pack on Amazon for 29USD but they say they're for Cat6.
This is the punchdown tool I've got so I think I'm set there. I have ordinary wire strippers (very similar to these), would those work or would I have to buy something like this instead?
Here are some ways to do this:
Easiest/cheapest/laziest:
Slightly better/more professional:
Best/cleanest/most professional:
>this patch panel from Tripp-Lite
You can absolutely do it yourself. You'll just need a bladed punch down tool like https://www.amazon.com/Cable-Matters-Punch-Down-Blade/dp/B0072K1QHM to help with punching down the wires and chopping off the tips. It's tedious but not difficult. Other than that, follow the online recommendations for minimizing the untwist of the wire pairs, etc etc. It's all there online for you to read up on.
You also want to ensure the wiring scheme is consistent between the wall jacks and the patch panel, so you'll want to take off one of the wall plates and confirm if the wiring is 568B to the keystone jack like the patch panel you plan to use.
​
With all that said I would wait and see what Webpass recommends. They may have better ideas or do some of the work for you. You're certainly not the first person there who needed to redo that closet.
If you plan to do wireless access points you can use a poe switch to power them. With a managed switch rebooting the access point is as easy as turning the port on and off from the switch management. Always run 2 cables at least to each location. You will always find more things to plug in.
You will need a punch down tool for the keystones. Also to make it correct you should have a patch panel at the switch location to terminate the cables. punch down tool
Patch Panel
Patch Panel mounting bracket
I Love This Greenlee Drill/Tap set!
And of course my Wera Screwdriver Set. Makes dealing with terminals a breeze.
Everyone here seems to like Milwaukee power tools, but I have a Milwaukee drill/driver, but seriously, I prefer the 12V Bosch drill and impact driver. I was trying to use the brand new Milwaukee to drive a 1/4" lag bolt into my dock, and it stalled about 4 threads in. Grabbed the 8 year old Bosch, and drove it all 3 inches down without a sweat.
ETA: Something I only pull out once in a blue moon, but when I do need it, a good Fox and Hound is an absolute bloody necessity! I have that one for general wires, and my Fluke network test kit one for Coax/Copper Ethernet. I wish there was some way for someone to make one for fiber, but oh well, that's next generation physics.
I guess I should also say, the GreenLee Slug-Buster knockout set is amazing. No time spent trying to pop out slugs from the punches.
Oh, lord, I could go on...
Okay, one last one, sitting on my desk: a Brady printer. I can use that to print wire labels FAST (Real Fast), directly importing from a wire run list in a CSV format, but it also does legend plates, and pushbutton/switch plates. Godly.
Okay, I'm done.
No wait.. .One more, for instrumentation guys: Fluke 4-20mA Clamp on... LOVE IT
Okay, I'm really, REALLY Done
punch down tool.
https://www.amazon.com/Vastar-Network-Punch-Impact-Blades/dp/B01E58M5EG/ref=zg_bs_6396135011_1?ie=UTF8&psc=1&refRID=86ZM49GHXCDNAYTMCYNQ
they are also spring loaded, like a nail punch. http://www.amazon.com/Cable-Matters-Punch-Down-Impact-Blades/dp/B0072K1QHM/ref=sr_1_3?ie=UTF8&qid=1377055017&sr=8-3&keywords=punchdown+tool
Earlier this year I got myself the Ideal 30-495 FT-45 Feed-Thru Mod Plug crimp tool. Such a time saver.
https://www.amazon.com/dp/B071VLDWS8/ref=cm_sw_r_cp_awdb_t1_09rQDbJM27GKP
As an added bonus it fits perfectly in the slot for the punch-down tool in my Fluke Pro-Tool kit (I usually know which I'll need before going up the ladder)
https://www.amazon.com/dp/B000E5R3HE/ref=cm_sw_r_cp_awdb_t1_PcsQDbMDSB16B
The stripping tools you can get cheap, and don't really impact ease of use, just make sure the blade is set to the correct depth as to not damage the pairs but deep enough to break the outer jacket. You can get cheap crimpers off Amazon but they aren't the nicest to use. I'm sure you can settle with them if you are just doing your own house, but doing bettering as part of my job, certainly would recommend a proper punch down tool (such as this style and not the cheapies online.
You can get a punch-down tool for $10-15 - https://www.amazon.com/WESTONETEK-Network-Telephone-Terminal-Insertion/dp/B06Y579HRQ
I'd guess a hole punch kit for making holes in sheet metal. Today they are used mostly for making holes in electrical panels to install conduit fittings.
Here is a modern example.