 Reddit reviews Channellock 909 9.5-Inch Wire Crimping Tool | Electrician's Terminal Crimp Pliers with Cutter are Designed for Insulated and Non-Insulated Connections | Forged from High Carbon Steel | Laser Heat-Treated Edges Last Longer | Made in the USA
We found 9 Reddit comments about Channellock 909 9.5-Inch Wire Crimping Tool | Electrician's Terminal Crimp Pliers with Cutter are Designed for Insulated and Non-Insulated Connections | Forged from High Carbon Steel | Laser Heat-Treated Edges Last Longer | Made in the USA. Here are the top ones, ranked by their Reddit score.
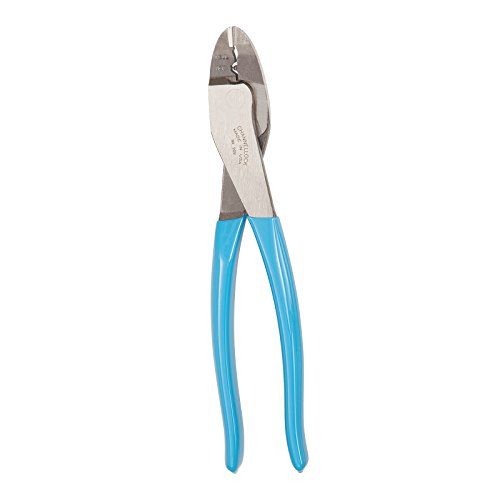
Cuts and crimps 10-22 AWG wireDesigned for crimping of both insulated and non-insulated solderless connections and terminalsLaser heat-treated edges last longerHigh-carbon C1080 steel for superior performance on the job and electronic coating for ultimate rust preventionMade in the USA
So your looking for something like THESE or THESE
I have both of these crimpers. The T&B's are my current go to's and i gave my Kleins to an apprentice, but they served me well for 15 years and still crimp as good as the day i bought them. The T&B 112(what i use) does insulated and non-insulated crimps and the 111 is non insulated only
Channellock also makes a very similar good quality crimper for a little cheaper.
ETA- Heres the channellocks
> Splice them into your trailer wiring
That's what I did. I went up about 4" from the 7-pin plug, cut the necessary wires, used uninsulated butt connectors with a closed-barrel crimper and adhesive-lined heat shrink to splice in a 6-pin Deutsch DT connector pigtail, then built my own wiring harness that plugs into the Deutsch connector and ran it up to the headache rack.
Went with the 6-pin Deutsch connector since I only needed 5 of the 7 wires (LT, RT, Tail, Backup, and Ground) and 5-pin Deutsch connectors aren't available. Deutsch DT connectors are frequently used in the automotive aftermarket (probably more so than Delphi Weatherpack connectors). I know Rigid Industries uses them for their LED lights, and Smith Race Wire uses them for parts of their custom wiring harnesses.
Also, since you can only close-barrel crimp one end of the uninsulated butt connectors, I chose to close-barrel crimp the side that had only one wire (since closed-barrel crimping is more secure, and the one wire was looser in the connector) and used Channel Lock 909 Pliers to crimp the end with two wires.
Once you made your harness, make sure you slip it into some split wiring loom. Using a loom insertion tool makes quick work of that. Wrap the wiring loom with non-adhesive dry vinyl tape for a factory-finished look and to avoid a gooey, sticky mess in case you need to unwrap the wiring harness in the future.
Finally, a good wire stripper will save your hands a lot of fatigue compared to using a standard wire stripper that you have to always pull the wire through.
Might want to check out the Channellock 909. Same features but only $18.
Cigartte lighter socket + quality car phone charger + Add-a-circuit kit (check your fuse type) + some quality tape + Right-angle USB charging cable
You wire the red wire on the cigarette adapter to an add-a-ciruit (i.e. with a crimp tool). The black wire goes to ground (i.e. tucked under some bolt someplace, or a ring terminal ). You put the charger in the now-attached cigarette adapter in the fuse area under your driver's side dash. Then you need to route an appropriate USB cable (i.e. with one with a right-angle head or right-angle adapter on the dash cam side) to the under dash area (usually by tucking it under the headliner over the windshield, and then by popping the A-pillar cover off and the side panel of the dashboard, and feeding the cable through). Once you have all the wires under the dash, you just need to hook them up, test them, and then tape them together so they can't come loose.
The advantage of going this route is that you 'own' all the pieces. If any part of the formula isn't working out, you can change just that part. You also get a spare USB-C charging port for free since that adapter has both A and C.
Here is what I would do. The grounds in the box are all tied together with a [copper crimp] (https://www.amazon.com/Easy-Twist-Copper-Sleeve-Connector-Blister/dp/B00CTU6TI6). You can get those at any home improvement store's electrical aisle. I would leave the grounds like they are, and crimp on an additional single ground wire to the existing group. Use that new wire to connect between all of the switch grounds.
Edit: Also, make sure to use a proper crimper for the sleeve - don't use a regular pair of pliers or something.
Just buy a GOOD crimping tool. Channel lock makes one. It has a tit that pressed a divot into the crimp. Make sure the tit goes in on the opposite side of the seam in your butt connector. After every splice try as hard as you can to rip it apart.
Bonus points for heat shrink style butt connectors. In exterior applications it may make a tiny hole in the side of the heat shrink jacket so after shrinking put a dab of dow corning7 732/733 in there. Never use DAP, it's highly corrosive
Using non insulated butt connectors and shrink tube with this tool is the best non solder connection money can buy.
https://www.amazon.ca/Channellock-909-Crimping-Tool-Cutter/dp/B00004SBDI
A simple crimper is cheaper and will give you more repeatable and reliable results than a vise. That one's made in 'murricah, and it's probably cheaper than the vise.
Invest in some of these, one of these, some self tapping screws, and some ring terminals.
Since your later comment says you've had it this way for 7 months, you need to know this kind of laziness is bound to cause problems. Problems such as blown fuses, intermittent operation, noise heard from the speakers, and possibly a fire. Do you know how it feels to have your car start on fire due to an electrical fault? I do, and it's the worst feeling.
I have all the crimping tools mentioned here and more. I am not kidding, it is my life. General purpose overall I prefer the Klein 1005 as mentioned by u/myself248 BUT I own the Chanel Lock 909 version. They are damn near the same tool but Klein charges a premium price. Channel lock is made in the USA!