Best disposable food storage containers according to redditors
We found 89 Reddit comments discussing the best disposable food storage containers. We ranked the 26 resulting products by number of redditors who mentioned them. Here are the top 20.
We found 89 Reddit comments discussing the best disposable food storage containers. We ranked the 26 resulting products by number of redditors who mentioned them. Here are the top 20.


![[48 Sets] 16 oz. Plastic Deli Food Storage Containers With Airtight Lids](https://m.media-amazon.com/images/I/41oBGSESOML.jpg)


sorry it's half gone... i meant to take a pic before starting. so the recipe:
***
cinnamon minute muffin, my way:
melt butter in microwave for one minute. you can use a coffee mug. i use a generic brand of this.
while melting the butter, i gather my other ingredients.
once the butter is melted, i add the flax first. it will swell and soften slightly from the heat. (i think this is a trick to a good minute muffin.) then put the baking powder and cinnamon on top of that.
next, add the cream (yes, i weigh it) and then the egg. finally, add the ez sweetz.
now stir, making sure to get into the corners and scraping the sides.
now into the microwave. 90 seconds in my 1200 watt microwave is perfect. 60 seconds can come out a little gooey; 120 seconds, a little dry. you'll have to play with your microwave.
***
the icing:
while your muffin is in the nuke box, grab the bowl you will be eating from and weigh your cream cheese and heavy cream into it. now add the ez sweetz and stir like hell. (if your cream cheese is particularly firm, 10 seconds in the microwave will straighten that out, but you'll have to wait for your muffin to be done.) it will look a little runny at first but it will thicken.
now move the icing to one side of the bowl with you stirring spoon and dump your muffin in. it should slide right out... i am yet to have one stick as long as i start with the butter. then spoon your icing over top and enjoy!
the stats:
*
totals:**
If using Splenda instead of ez sweetz, add ~4.5g of carbs to the total. I also usually count eggs as having 0 carbs, but it is actually ~.4g. Count it if you want, i just want everyone to feel fully informed. (As eggs are an agricultural product, nutrient macros vary from egg to egg. They actually range from .2g to .6g of carbs per large egg. That's why i do not count them... low enough to not matter.)
***
also note that i, personally, am not a big fan of cream cheese. my wife gave me this idea so i tried it and she nailed it. normally, my icing would be equal part whole milk and confectioners sugar.
once again, i am in heaven... and i still have half to eat.
edited to add alternative measurements so those without a food scale can enjoy as well.
Where do I start... This thing is DELICIOUS.
(Lots of links to thank the ketoers who've inspired!)
I made keto bagels last week, using /u/shenorth 's post. They were good, but after 6 days of eating dense bread, I wanted something lighter. I've made crust cheese circles in the past, and decided to try again. I had leftover dough after making 8 circles and decided to roll out the leftover dough, dump a bit of cheese and leftover taco meat (from the night before), then fold the corners in.
This is the recipe I followed, but made a few changes.
So. Let's start.
Microwave in a large bowl til melted:
Once it's gooey and well mixed when you stir with a spatula (should be same color throughout):
Divide your dough into 6 parts. (Use your spatula to rough cut while the dough is flattened in your bowl)
Sprinkle canned parm on 1 side of the parchment paper (it'll be folded like a greeting card, not a "reserved" sign)
Place 1/6 of your dough on the canned parm, then sprinkle a bit more parm on top. Fold the parchment paper over it and roll it out into an oval shape. Place your filling on 1 side of the oval (Again, it will be folded like a greeting card.) Put in less filling than you think... Leave at least a 1/2 inch empty radius around your filling.
Use the parchment paper to fold the empty half of the oval over your filling. Press the dough edges together lightly, then use a curry puff fold method to fold the edges over. Essentially, you fold over 1 corner into itself, flatten it down with your thumb, then fold over the flat bit on top of the previous fold, and keep going!
-----------------
If you're making circles, use this recipe:
Sprinkle some canned parm on your parchment paper and dump the dough on it.
Sprinkle a tiny bit of parm on the top of the dough ball as well, then cover with 2nd sheet of parchment paper.
Use your rolling pin or liquor bottle of choice to rooooollll out.
Grab a circular tupperware (the chinese take out kind works), and start punching out your circles. Re-roll out the dough. (If you find that your dough doesn't stick much to the parchment paper, you might not have to add more parm.)
Use a fork and poke holes in them so they won't bubble up.
-------------------------
Okay! So you've made your pasty/empanada/meat pie and/or circles.
Pop them into the oven for 5 minutes, then turn them over for an additional 2. If it smells like burning, take it out immediately...
------------------
Good luck!
P.s. If you're looking for a fried version, /u/looocha posted this recipe a year ago. Check it out!
I regularly cook food for myself and my wife to take with us to work.
I use 2 cup containers by Ziploc. They're water tight so I can put anything in there without worrying about spilling.
As for meal ideas, over the past several weeks, I've made the following for both of us to eat:
The point is, if you can microwave leftovers, you can put it in these 2 cup containers and microwave your left overs.
I make casseroles and freeze sections of them. My wife would take those with her for lunch, but I cautioned against doing that, mostly because it can be a LOT of food and far too many calories.
Typically, when packing my meals, I try to eat every few hours. I start with cereal, eat an apple, a granola bar, another apple and my hot lunch. It works pretty well for me.
Burritos:
I make about a dozen at a time and freeze them in foil. Due to their versatility, you can make them to fairly specific dietary requirements.
To reheat, I unwrap the foil and wrap them in a paper towel. Microwave for 3 one-minute bursts with 30 second rests. I find this helps the heat permeate the dense core without making it nuclear hot.
Chicken and Rice:
I make about 6 meals worth at a time, but you can do way more. You can get good variety by changing up the sauce for each one. Siracha, Teriaki, General Tso's, BBQ, etc... I also will toss in already frozen veggies like broccoli and carrots, one less thing to cook. Pan-fried or poached chicken breasts, and rice in these containers hold up really well.
Reheat in two one minute bursts. Stir (or shake) in between.
You might consider getting something like the crock pot lunch warmer.
It's not for cooking food, but warming it up slowly. I have used one to heat up frozen chili or soup for lunch and works well. This sounds a lot like what you are planning to do, but you freeze cooked chili or soup in containers like this.
I've lost 140lbs This year, about 1/3 of my body weight, and there's no secret. Just hard work and discipline. But there are a few things that I personally could not have done without.
Calories in/calories out is KEY. Be vigilant and over estimate when you can't weigh or have to guess on a food input. I use MyFitnessPal to track calories in and a Fitbit to track calories out.
I started just walking my dog for about 30 minutes. I found as it got easier and enjoyable I worked my way up to running. I found that using my Fitbit to measure I would burn almost the same calories (under 200 calories difference) walking or running the same distance walking just takes longer. I went from barely being able to walk a quarter mile without my back hurting or having to rest to running a 5k every day.
My fitbit: https://www.fitbit.com/shop/blaze I love gadgets so of course it was a new toy for me but getting a more accurate count of the calories burned throughout the day is key. Plus, it's very motivational when i'm close to my goal for the day or a new record of steps or calories burned for the day.
Shoes: http://www.dsw.com/shoe/new+balance+410+v4+trail+running+shoe+-+mens?prodId=324685 super comfortable lets me run as long as my body will allow
headphones: https://www.amazon.com/gp/product/B0132YHU0I/ref=oh_aui_detailpage_o06_s00?ie=UTF8&psc=1 Cheap, but they work AMAZING. I specifically chose this model so that they could not fall out while running.
phone case(?) https://www.amazon.com/gp/product/B00JF9DU4U/ref=oh_aui_detailpage_o09_s00?ie=UTF8&psc=1 I dont like the idea of an arm band. having something clunky on my arm would be distracting. This thing keeps my keys and phone snug to my body so nothing is shaking around. Again it's about minimizing distractions while running.
Food Scale: https://www.amazon.com/gp/product/B004164SRA/ref=oh_aui_detailpage_o05_s00?ie=UTF8&psc=1 Keeping an accurate calorie count is key and this battery operated scale is perfect. I like that it can handle up to 10lbs and is pretty accurate with smaller increments as well.
Meal prep: https://www.amazon.com/Glad-Food-Storage-Containers-Entree/dp/B0014D0SWW/ref=sr_1_cc_1_a_it?ie=UTF8&qid=1468187303&sr=1-1-catcorr&keywords=glad+containers These guys keep me on my diet. one day a week i make a ton of meals and these are the perfect size that they let me fill them and when im done eating I feel full. I eat all my meals at home and work, out of these to prevent me from over eating.
I use my slow cooker to cook my meat (usually chicken) and a rice cooker to cook a bunch of brown rice. My meals are usually 1 cup rice, 4oz chicken, an apple, and 3 oz carrots for lunch and dinner and a half cup of fiber one and 1 cup almond milk for breakfast. From there I just change the type of meat and fruits and veggies from week to week to keep from getting bored.
This sub also keeps me motivated!
Hope this helps! Good luck.
Reusable! I bought these containers at Target, where they were $2. I'll get the ones back from my husband's work on Friday, and we can wash them if they're dirty. Two of the other guys are going to have to wash their own and come get them filled at their convenience.
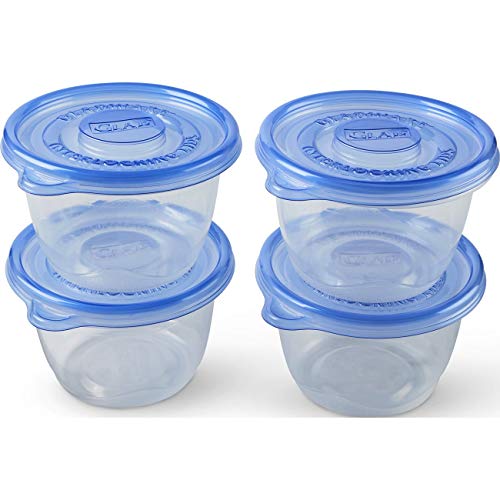
This is something I think about a lot when packing lunches for my daughter. She can't have anything that needs to be heated, either. Here are my tips. First, get some of these: http://www.amazon.com/Ziploc-Container-Divided-Rectangle-2-Count/dp/B003U6DJ90/ref=sr_1_1?ie=UTF8&qid=1345207791&sr=8-1&keywords=ziploc+divided+container They are divided and waterproof between the compartments. There are other divided containers, and some things called Bento Boxes, but these will not leak. So if you have strawberries in one of the spots, the juice won't leak onto your pretzels (for example).
I make her a trail mix, but it's a peanut-free school, so I usually use some of these things, depending on sales: almonds, raisins, M&Ms, craisins, yogurt-covered raisins, cereal. That goes into the smallest compartment.
The next-sized compartment usually has a muffin of some kind. Here are some of my favorites:
I rarely pack sandwiches, but she loves Greek yogurt, so I bought some of these http://www.amazon.com/Norpro-431-4-Piece-Silicone-Maker/dp/B0036B9KHO/ref=sr_1_cc_1?s=aps&ie=UTF8&qid=1345208411&sr=1-1-catcorr&keywords=norpro I either make a smoothie and freeze them in these or just put straight yogurt in them. They are usually thawed enough to eat by lunch time.
These are the same containers used for takeout. I use these all the time for mise en place and storage. Save some money and don't throw them out with your take out!
You can also buy them in bulk from places like Amazon
Ooh. I think your process could use some tweaks. That color does not look good. It looks infected.
I think it was probably too dry, and not enough gas exchange. There needs to be some gas permeability all the way around, and the humidity has to be HIGH at first, and low on the last half. It should only take about 36 hours.
Using that glass tray is not going to work. Only the top is going to grow, and only until the O2 runs out. you may want to either use ziplock sandwich bags or get some of these:
https://www.amazon.com/Glad-Food-Storage-Containers-Container/dp/B0014D0SWW/
You have to drill a lot of holes in them for gas exchange. Fungus intakes O2 and gives off CO2.
I use a medium-large ice chest to incubate. I stack the beans in their containers inside it, and place two large bowls of realyl hot water in there. I swap them out morning and evening and at bed time. This keeps it hot and humid while allowing gas exchange. When its fuzzy, I swap out the bowls for large jugs of hot water, so its hot but less humid. This causes the mold to grow inward looking for water.
36 hours almost on the dot its done. If you see sporulation, throw it in the freezer to stop it. It looks like a green dustiness. If you let it go further, it goes black. Tastes awful.
This. Especially with a few of those gladware containers I saw someone mention in a thread on here recently.
Thank you. It's been quite a long road, but I did my research and bought the tools that got me through it.
It's just a lifestyle now.
https://www.amazon.com/Ziploc-Twist-Loc-Containers-Lids/dp/B000LNY1D8
Are your friend.
Reflectix is this shiny insulation stuff (similar to a car sun visor) you can get at hardware stores. It's really easy to work with and makes great insulated cozys or bags for dehydrated meals.
Here's a quick tutorial on how to make them, again it's pretty straightforward - https://www.youtube.com/watch?v=-FTln2_5Pgo
This is reflectix, if you are decently crafty it's pretty straight forward to make a little thing to put a tupperware in to keep it warm -
https://www.amazon.com/Reflectix-ST16025-Staple-Insulation-Inch/dp/B000BQSYRO/ref=sr_1_1?s=hi&ie=UTF8&qid=1496262196&sr=1-1
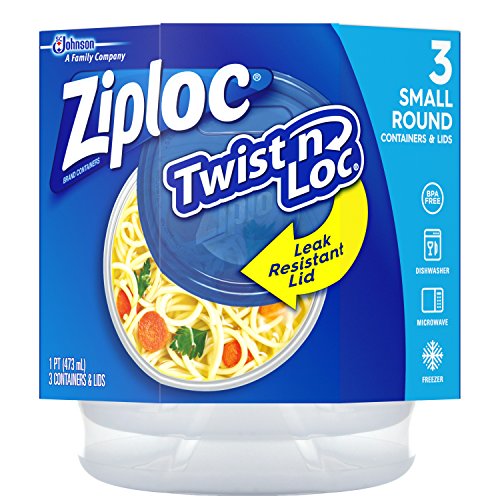
and Here is the type of tupperware I was mentioning, I've used them as a bowl on many trips and they have always worked great (they have 2 different sizes) - https://www.amazon.com/Ziploc-Twist-Containers-Small-Lids/dp/B003UEGZCA/ref=sr_1_2_a_it?ie=UTF8&qid=1496262262&sr=8-2
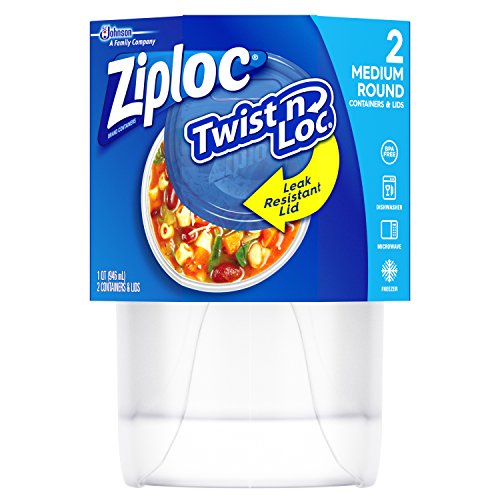
Leftover management is a huge challenge for me, so I did two things to make it easier. First, I use ONLY the 2 and 4 cup Ziploc Twist N' Lock containers. The lids are interchangeable, completely leakproof, and cheap enough that I don't care if some disappear. They also stack nicely in the fridge and cabinet, and are fine in the freezer, microwave, and dishwasher.
Second, every new container gets one of these labels made by Label Once. I used to use tape but it was a hassle. These are dishwasher proof, easy to write on and erase, and cheap. One set is plenty for almost everyone.
> . And if the choice is between a plastic packed fruit plate and complying with a glass Tupperware fruit container requirement
But it will never be glass. Probably a wax paper cup or a biodegradable clamshell or sugarcane clamshell.
The biodegradable clamshells usually cost about 25 (Amazon) to 50 cents each (largest ones here).
On Amazon, a large polystyrene clamshell costs 16 cents or so.
So it's really about cost, about 20 cents per large takeout item.
Might be an opportunity for a local entrepreneur to make biodegradable containers locally from sugarcane waste ...
As a kid, I used one of these: https://www.amazon.com/Rubbermaid-Litterless-Juice-L33117R3SPA-4-Pack/dp/B01FEBTU6E. I remember it working well.
I use these containers that you often see used as to-go soup containers at restaurants. They are thick enough to be used in the microwave, but also cheap enough to give away.
Going high on prices.
10-15$ jars
10-15$ for a tub
5-15$ vermiculite
10$ perlite
13-25$ for a syringe or 5 for 35. recommend these guys.
8$ for rice flour
30-100$ for a pc. (don't have to have this but it's good)
Somewhere between 60 and 120 dollars without the pc and sometimes you can find a pc at a garage sale for cheap or borrow your moms.
You can make your own brf with a coffee grinder, that would add 20ish. You can use these 1 pint Ziploc with screw on lids instead of jars but I would only use these if pc'ing, and make sure to melt inoc holes before pc'ing.
My suggestion is the same as what I took in 2015 and what I will be bringing to rayado this summer: 2c Tupperware container.
I got some smaller round storage containers that I thought would be perfect, but they were too small. These seem too big, but it turns out they are perfect. And surprisingly, the Amazon price is great, under $1 per container. To be clear, this item is 6 packs of 3, so 18 containers.
https://www.amazon.com/dp/B000EG5320/ref=cm_sw_r_cp_awdb_t1_7hJpDbNP8AXGW
Ziplock bags, as others have stated. Once I have the samples, I tend to press them into Glad disposable storage containers for loading the brush.
Maybe something like these vinyl bags with zipper sliders. Not sure if food grade and probably heavier than ziplock bags, but reusable.
In terms of a container you can store food and cook with, some hikers like pots like this Vargo BOT bottle pot that has a screw on lid. Maybe add hot or cold water to a plastic container with a screw on lid like this one from ziplock and let it soak all day.
Similar in weight to a twist lock tupperware; my 2 cup twist lock "cup/bowl", lid and cozy sit at 1.94oz. I use mine for coffee, to rehydrate meals in or to soak food in. Having a screw top lid is awesome and my toaks 750 pot will nest inside the cup (without the lid on, i just put the lid on top of the pot).
These are very cheap and easy to find - click here
Keeps my coffee or food nice and hot!
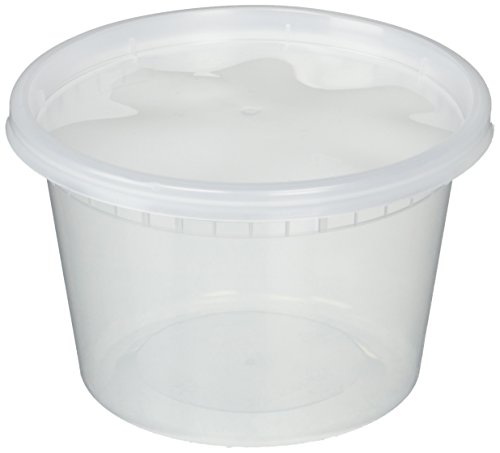
https://www.amazon.com/Deli-Storage-Containers-Ounce-Count/dp/B005SX9Y4C
​
These containers, between 8, 16 and 32 ounce sizes is what we used all the time in the kitchen to store basically anything. A home cook will probably not need the big size as frequently unless prepping for a big family.
I use deli containers like these. I freeze a lot so they work good for soups and sauces. amazon deli containers
They are also available at restaurant supply houses.
These are my personal favorite: https://www.amazon.com/gp/aw/d/B00SHJ87CO/ref=mp_s_a_1_1_a_it?ie=UTF8&qid=1469067671&sr=8-1&keywords=glad+salad+container+with+dressing+cup&pi=SY200_QL40
They're cheap and pretty robust. Never had any issues in the several years I've owned them!!
This is my favorite eating container, with DIY reflectix cozy.
Ziploc makes a plastic food container that is roughly shaped like a glasses case.
Ziploc One Press Seal Small Rectangle Container - 5 ct https://www.amazon.com/dp/B00SAJAXA0/ref=cm_sw_r_cp_api_i_gcCaBb92DMW96
I’m not sure how long that specific one is, but I have some at home that are long enough to fit my glasses. Maybe check at your local grocery store.
Well, that's very nice of you. I'd been considering ordering the new one with the M cut-out in black titanium again, so that's awesome. I'll gladly post the details; keep in mind that this wasn't an exact science, but ultimately led to the results in the pic.
First, the dye I used is Rit Dye, Liquid form. It comes in a 8-ounce bottle, super concentrated. Here it is on Amazon:
http://www.amazon.com/Rit-Dye-Liquid-Fabric-8-Ounce/dp/B001QX2G9S
The dye is also available at CVS and Wal-Mart, and I'm sure you can find it in grocery stores or wherever you find laundry detergent. I originally bought it at walmart a long time ago. Now, I only used the liquid because that's what I had laying around. There is also a powder form, which is half the price of the liquid. If I were going out to buy it, I'd just get the powder which you can probably find locally as well. It's definitely at Wal-Mart.
You won't be working with more than a quart of water anyway, and both are meant to be mixed with much more water.
Normally, you'd use a pot over a stove for this. However, I knew that this material would take longer to penetrate, and there's also the risk of melting or otherwise distorting the case's shape if you get the water too hot or if the case rests against the hot bottom of the pan. (When I dyed my computer cables and tubing, I used marbles to line the bottom of the pot to prevent anything from touching the bottom, but I was just too lazy to set all that up again for the case).
Instead, I used a throw-away two-quart Glad tupperware container that was shoved in the back of a cabinet.
Do not wear any clothes you don't want to stain, and if you drip any of the dye or dye solution on any surface, wipe it up absolutely immediately. This stuff will even stain your skin temporarily (use bleach to get it off your skin).
I filled the two-quart plastic container about halfway with hot tap water (The dye does penetrate a lot faster with heat, might even be worth your time to heat the first batch of water in the microwave to get it near boiling, but I didn't bother at first). I added the entire container of dye to the water. Overkill, but more dye=darker black. This rule, at least, applies to fabrics. I can't be sure that the slightly thicker solution (higher concentration) wasn't actually hindering absorption somehow, but I do know that if you dilute it too much when dying plastics, you'll get more of a deep purple tint rather than black.
After mixing the dye with a plastic fork for a few seconds, I placed the case in the container and put the lid on it. This was all done in the morning. In the evening, the water had gone to pretty much room temperature. I opened the container and removed the case (using a plastic fork) and rinsed it off. By then the color was just slightly darker than the initial gray, but it was still noticeable that the dye had done at least something. So, I heated the dye solution without the case in the microwave a little at a time until it was unbearably hot to the touch but not boiling (using the lid and paper towels for splash protection). Then I placed the case back in the dye solution, put the lid on, and left it alone until morning. In the morning, it was pretty dark, but I went ahead and put it in the microwave again. Honestly don't know if the extra time made much difference. The heat does for sure, so if you're patient and careful enough applying constant heat, you can probably get it done faster. A lot more time in heat could very well make it even darker, but I'm satisfied with how it looks now.
So, summary:
I have used a peanut butter jar and melted it with hot water.
I've since switched to a gatorade container and used it both in town in the microwave and with boiling water mooched off of friends and it seems fine.
Next year I want to try out a ziploc jar (https://www.amazon.com/gp/product/B007J46WRU). The 750ml capacity of the gatorade container is barely enough for a big meal so a 1qt jar with a better sealing lid would be sweet.
If you don't mind a little extra structure in your pack - there are ziplock containers (6 or 8 in a pack) designed for dressing and small sides. I find these are the perfect size for keeping Ritz crackers from getting smooshed.
I think these are it but haven't bought them in a few years. there may be one size smaller. http://www.amazon.com/Glad-Food-Storage-Containers-Round/dp/B000EGBLBM
Pita or tortillas are a good choice. No smoosh factor.
Ziplock has soup containers - they work great.
For the range, I just use these
I use one of these two cup ziplock containers. I just dump my dry food in, then either cold or hot water however I happen to be re-hydrating at the time. When you're done put some water in and put the lid on and give it a shake, then disperse the gray water. (I drink it) You may have flavors transferring over meal to meal depending on what you eat. A tiny bit of camp soap and warm warm water might clean it out better. I don't use camp soap so I couldn't say for sure.
http://www.amazon.com/Ziploc-Container-Divided-Rectangle-2-Count/dp/B003U6DJ90
BOOM I WIN
EXACTLY $6.78
I'm using Ziploc extra small square containers. I was incubating at relatively low temperatures (not entirely on purpose, lol), which may have helped select for the most aggressive growth. I also made a point to transfer a tiny amount of mycelium the first time. Mostly to avoid the contaminants that grew from the spore syringe, but it helps make use of limited space. If all else fails, see if rhizomorphs try to grow up the side of the container after the whole surface is taken over.
People love the Glade mini rounds too, I guess.
mini-rounds
I like to keep a small supply of disposable plastic containers (like 4 oz. Gladware bowls) for storage in games with bits per player, i.e. Ticket to Ride. All trains of one color, for example, go into a bowl, so setup is as easy as give each person a bowl. Then the pieces stay organized and are already in a container for quick setup. In the cases where a bowl like that won't fit in the box (Power Grid comes to mind), you can store silicone cupcake liners in the box to put pieces in.
Also, for anyone new to board gaming, if you seem to have more plastic baggies than you need that come with a game, keep the extras somewhere. Never know when you'll need a few extras.
I'll introduce myself later when I feel like I've been pregnant long enough to belong. In the meantime, I filled a friend's fridge at the end of her pregnancy with a few things:
It sounds like everything went over well. I've never figured out a good way to freeze dairy but would have otherwise made mac & cheese.
I purged my mountain of supermarket deli meat containers... (Oscar, Hillshire, etc) Every brand's lid is just a little bit differently sized and I was about to lose my damned mind!!
Now I use Mason jars, plus the 16oz & 32oz Deli Containers that you can buy online in bulk - A few restaurants here use them for your leftovers, and it's nice being able to add them into the collective pile without worrying over Yet Another Kind Of Lid.
Patrick Kane is our hero.
These are from my kitchen list i'd use them to store Lego heads. i find that i am frequently asking my kids "why doesn't this guy have a head?!" "where are all the heads?!"
I also do this! Cheap and tastes good.
I splurged a little more and got smaller tupperware, so when I make the jello I pour it into smaller containers. That way once I seal the container, it doesn't get exposed to anything outside of the container until I'm ready to eat. I usually only make a packet at a time and don't ever keep it past a week.
I use these two containers: one, two.
>I have long public transport commutes, so anything that is too liquid (even a chance of spilling) won't work for me
You know those plastic bowls you get when you order soup with your Chinese takeout? They really don't cost that much:
Deli Food Storage Containers with Lids, 16 Ounce (50 Count) https://www.amazon.com/dp/B005SX9Y4C
It gives you a few more options. I trust them tossed into my bookbag on top of my books.
Seal them inside a freezer bag for an added later if protection if you want.
Update: I have added a new catch-all container for my new deli/bakery additions: the plastic deli tray. It comes with a fitted lid.
Think something like this: https://www.amazon.com/Dart-Clear-Hinged-Plastic-Container/dp/B072QZD883/ref=sr_1_13?ie=UTF8&qid=1506713994&sr=8-13&keywords=commercial+disposable+food+container
but rather than a hinge, it has a removable clear lid with an opaque black base. And obviously in multiple sizes [just like paper wrapper is one size fits all and plastic bag is one size fits all]
After a year of daily packed lunches and zero leaks into the lunchbag, I can recommend the Ziplock Twist N Lock as seen here
I have some gladware containers that are rectangles and they have this little cup that clicks into the lid. It's perfect for dressing or sauce that you don't want to mix until eating time. This container, but the ones I bought came with little cups. I couldn't find them on Amazon, but I bought them at Target.
These: http://www.amazon.com/Ziploc-Twist-Containers-Round-Small/dp/B000LNY1D8/ref=sr_1_1?ie=UTF8&qid=1347308513&sr=8-1&keywords=Ziplock+containers+round
I use https://smile.amazon.com/gp/product/B01NC0HQYV/ref=ppx_yo_dt_b_asin_title_o02_s00?ie=UTF8&psc=1
What I like to do is poke {4} 1/4" holes on all four corners and put durapore tape on them. Hope this helps.
probably meant this
http://www.amazon.com/Ziploc-Twist-Loc-Containers-Lids/dp/B000LNY1D8/ref=pd_sim_k_5?ie=UTF8&refRID=11DRQJCP0MAG2R7J5D0M
http://www.amazon.com/Johnson-18036-Ziploc-Twist-Containers/dp/B000LNY1D8/ref=sr_1_3?s=home-garden&ie=UTF8&qid=1369524753&sr=1-3&keywords=gladware
just cut a hole the size of your speedlite in the blue top, and then cover the rest of the top with aluminum foil, and place the assembled container on your speedlite upside down.
you can also use foil inside the container on what will be behind the subject, so as to not waste light.
you're probably better off just learning to bounce, though.
I have a blender bottle and love it. I use it as a regular water bottle (easy measuring for my water intake), fill it with my breakfast smoothie every morning, and I use the little ball to mix all my supplements and it works really well.
As for storing, I keep my protein in my desk at work since my gym is one floor up from my office but I've also found I can keep a small scoop and several servings of protein powder in these:
http://www.amazon.com/Ziploc-Twist-Loc-Containers-Lids/dp/B000LNY1D8
> Then about an hour to let the dough warm up before shaping.
An hour warm up typically produces cold dough, and cold dough takes longer to bake and dries out more. I would give it two hours
> I let the dough ferment in a circular plastic bowl the whole time, covered with plastic wrap all the time.
If you put the plastic wrap on loosely, you won't get an air tight seal, and, if you put it on tightly, the gases formed by the dough will pop it off, so either way, the dough will be exposed to air and dry out.
You should be able to track down something like this locally
https://www.amazon.com/Glad-Food-Storage-Containers-Container/dp/B000EG5320
Get one of these, take a pin, put a super tiny pinhole in the top and that's your proofing container.
When you do two doughs, you're balling the dough before refrigeration, correct?
> The temperature on the surface of the stone was 650F with the laser temperature gun.
Pizzas bake with the the heat stored inside the stone- all the way inside. One of the problems with using the top burner to pre-heat is that it drives up the surface temp and gives you a less reliable idea of how hot the stone actually is. If your oven can turn both burners on at the same time (a fairly uncommon thing, btw), then I think that's probably a good idea- the more heat, the better, but, for our testing purposes, we're going to need to do at least one preheat with just the bottom and then get an IR reading.
When people have issues shaping dough, I typically tell them to make a lot of dough balls for practice since flour is cheap. For you, flour is not that cheap :) Still, though, it wouldn't hurt to get, say, around 4 containers, make 4 dough balls, stretch all of them, but only bake up 1 or 2.
If you really wanted to be thrifty, you could make a whole lot of practice dough out of the weak Saudi flour and vital wheat gluten. I would never eat a pizza made with VWG (VWG tastes ghastly), but it may give you something you can practice stretching with that shouldn't break the bank..
> What do you think of the underside of that dough ball I showed you?
Are you sure you uploaded this? I can't seem to find it.
Apples, bananas, oranges, carrot sticks/cucumber slices with dips/spreads: guacamole, hummus, PB/almond/sun butter, home made trail mix with dried fruits and nuts.
I love these little plastic containers for dividing up servings of trail mix and I keep a bunch of them at work for snacking. I also bring individual servings of dips etc in them so I don't overdo it.
As an interesting side note to this. I went to go get plastic containers with screw on lids
For those that don't want to click the link, it's 3 x 16oz containers (~475ml) for $6.50
Or 48oz of space for $6.50
A 12 x 16oz box of mason jars is $11.50
Or 192oz of space for $11.50
192 oz of plastic storage space would cost $26.
So glass and steel is somehow less than half the price of plastic, which I did not expect at all.
The jars also have replacement lids and seals you can buy, to hell with you plastic!
I have little stashes of prebagged and presliced stuff that I bring in, usually protein/fat based snacks because they fill me up pretty quick. I live by Ziploc's tiny snack-size baggies, this size, and also the mini little square tupperware thingies, these. I always have a pile of those at home. Every morning I throw something into one or two of that size of container. I standardize it so the weight of whatever is in the container is always 1 oz - makes it easy to log. This week I got extra organized and brought in a whole pile of baggies of snacks on Monday (there are little baggies of 1 oz almonds all over my desk right now) but usually I'm not that organized, but I've finally gotten so that I remember to bring a few pre-bagged, pre-weighed snacks each day. I don't always eat them (if I don't, I bring 'em home and add them to my dinner) but they're there if I really need a pickmeup in the afternoon.
I tend to rotate among these 3 snacks:
These are the ones I got, and they’re great! Some things do stick pretty heavy, but 90% of the time, a quick pre-scrub before going in the dishwasher does the trick. I’m still on the same pack I ordered last September and I use them all the time, but I’m down to about 20-25 due to some of them getting lost or gross and thrown out.
They do seem to perform better than takeout containers, but that could be just bc I want to believe it.
In the u.s. people use a lot of different things. Some people like the flimsy little bottles, some people like harder sided gatorade bottles, some just use coca cola bottles!
As for a cold soaking container - do you have access to these? https://www.amazon.com/Ziploc-Twist-Loc-Containers-Lids/dp/B000LNY1D8
They don't leak and are 16 oz. The talenti jars are 16 oz as well.
Post #2:
Preparation:
getting the supplies
Agar agar powder. [US](https://www.amazon.com/Telephone-Product-Thailand-Powder-Ounce/dp/B01KMHY2OU/) [Europe](https://www.amazon.co.uk/Special-Ingredients-Premium-Gelatine-European/dp/B00EZMPMNE)
Always start with agar! And don't throw old fully colonized plates out. Some contaminants (e.g. mycogone, AKA wet bubble disease will only show up after full colonization (white blobs oozing yellow/orange fluid). and that one (mycogone) will fck up your grow hard, been there done that...
Light malt extract. [US](https://www.amazon.com/Organic-Light-Dried-Malt-Extract/dp/B007XYGBXQ/) [Europe](https://www.amazon.co.uk/Balliihoo-Light-Spraymalt-1Kg-Bag/dp/B0153BASSY/)
Containers for no pour agar (Pasty Plates). [US](https://www.amazon.com/Glad-Food-Storage-Containers-Round/dp/B000WGBMMM/) [Europe](https://www.flaschenbauer.de/einmachglaeser/sturzglaeser/sturzglas-225-ml-to-82) (maybe use Google translate on that site). Also if you are in North America there are Glad mini rounds, they are used in the original Pasty Plate tek. They also have [430ml jars](https://www.flaschenbauer.de/einmachglaeser/sturzglaeser/sturzglas-430-ml-to-82) suitable as substrate containers
A pressure cooker. Good ones are a b**ch to find in Europe. I wouldn't buy [that one](https://www.ebay.de/itm/Pressure-cooker-17L-Stainless-steel-Made-In-Turkey-Largest-Size/133128864948) or similar constructed ones, they are complete s**t, build up next to no pressure and need ungodly amounts of water. I have two of them, but had to do some haphazard MacGyveresqe hacking to get them to sterilize properly, I'll bring that up later.
I also have a Fagor Alu 22 (22 liters, fits eleven quart bottles), but I think that model went out of production in 2017 without a replacement. IMHO the only sane option in Europe right now, would be to order a Presto from the US, they're ~80€ + 40€ shipping, so not that bad. [Presto 23 quart PC](https://www.amazon.com/Presto-Aluminum-23-Quart-Pressure-Canner/dp/B073NCFL2L/)
Also on US websites like shroomery, you'll always read something like "sterilize 90min @ 15 psi". Pressure cookers in Europe usually have no gauges and only go to 50-70 kPa (~7-10 psi). It isn't as bad as it sounds, since sterilization time isn't linear with pressure/temperature. I've found I can get away with 120 min sterilization time for grains, 75 min for PF sub and 30 min for agar.
Scalpel handle and blades. [US](https://www.amazon.com/100-Scalpel-Blades-One-Handle/dp/B01MPX3JTI/) [Europe](https://www.amazon.co.uk/Swann-Morton-Handle-5-10-Blades/dp/B004OIAVJY/)
(optional) inoculation loop. [US](https://www.amazon.com/OESS-Reusable-Inoculating-Inoculation-Bacterial/dp/B071DCS7TW) [Europe1](https://www.amazon.co.uk/Akozon-Inoculation-Inoculating-Microbiology-Laboratory/dp/B07KM7F8VH) [Europe2](https://www.amazon.co.uk/sourcingmap%C2%AE-Inoculating-Microbiology-Tissue-Culture/dp/B071X44DS4/)
Tyvek (for filtered lids). [US](https://www.amazon.com/Dupont-Tyvek-105gm-A5-Sheets/dp/B07418F31G/) [Europe](https://www.amazon.co.uk/Tyvek-75gm-Bumper-pack-sheets/dp/B004EXTKSW/)
(optional) oster blender attachments used for PF slurry or LI. [China](https://www.ebay.com/itm/4-Head-Ice-Crushing-Crusher-Blade-Replacement-Part-For-Oster-Osterizer-Blender/182451440105)
3M Micropore tape (for filtered lids and monotub holes). [US](https://www.amazon.com/3M-1530-1-Micropore-Tape-Pack/dp/B0082A9FEM/) [Europe](https://www.amazon.co.uk/3M-Micropore-Surgical-First-Medical/dp/B01KYK2666/)
A spray bottle for soapy water. [US](https://www.amazon.com/Tolco-Bottle-Frosted-Assorted-Colors/dp/B000H88PCU/) [Europe](https://www.amazon.co.uk/Leifheit-72416-Laundry-Sprayer/dp/B0049PB11Y/)
Isopropyl alcohol (rubbing alcohol), 70%. [US](https://www.amazon.com/Amazon-Brand-Isopropyl-Antiseptic-Technical/dp/B07NFSFBXQ/) (dilute down to 70%, that percentage is best for sanitization [EU](https://www.amazon.co.uk/We-Can-Source-Ltd-Fingerprints/dp/B07PGB5X6Y/)
A rack to elevate your agar dishes while you do transfers, like these that come with microwave ovens (contaminants tend to collect on the SABs bottom).
A slightly wet towel to put the SAB on. Some people disagree on this, I use the towel to absorb the sprayed soap/water mix and not having that run off the table.
A clear box that's modified as a SAB. I use this one as a SAB, maybe they ship outside Germany. Anyway the manufacturer is kis.it (builds the monotub too), so I think they might be available elsewhere in Europe: https://www.obi.de/aufbewahrungsboxen/obi-allzweckbox-santos-transparent-oversize-140-l/p/3333341?template=PDP&box=box4
More clear boxes used to fruit bottles (basically a monotub, just with individual substrate containers). I use these as unmodded monos (no holes, no flipped lid, lids not latched): https://www.obi.de/aufbewahrungsboxen/obi-allzweckbox-cadiz-l-mit-4-rollen-transparent/p/1930387.
Butane torch [US](https://www.amazon.com/Multipurpose-MDee-Culinary-Refillable-Adjustable/dp/B07MNN2B43) [Europe](https://www.amazon.co.uk/Kollea-Adjustable-Refillable-Blowtorch-Soldering/dp/B07QC1T6H5)
Bottles (can be wide mouth pint mason jars (US), quart Ziplock PP5 containers (US) or [these (which I use)](https://www.ebay.co.uk/itm/Round-Food-Containers-Plastic-Clear-Storage-Tubs-with-Lids-Deli-Pots-2oz-to-32oz/232308091965)
I've been using these lately, cheap, seals tight, no odor once the lid screws on. You can find them in almost any grocery store, Target, etc.
http://www.amazon.com/Ziploc-Twist-Loc-Containers-Lids/dp/B000LNY1D8/ref=sr_1_7?ie=UTF8&qid=1422208732&sr=8-7&keywords=plastic+screw+top+containers
I was in the same boat. Packing my lunch and bringing it to work was a hard routine to start but now it is second nature to me. Make twice as much dinner and bring the rest for lunch. My daily routine now is gym for an hour and eat when I get back to my desk. No one at work has ever cared.
Also, a small lunch bag and these Ziploc containers are money.
Not OP, but yeah - Ziploc makes em.
Probably more like a plastic deli container.
I use these tomatoes and others in the 6lb cans, and I freeze in 16oz portions. It gives me enough for a couple pies, and they seem to freeze well. I use these containers: https://www.amazon.com/Ziploc-Twist-Loc-Container-Medium/dp/B00U5MQFIY/ref=sr_1_6?keywords=zip+lock+twist+and+lock+medium&qid=1568991795&sr=8-6
It probably takes up half of my freezer, maybe more. I use these, portioned out to lunch sizes. It's the perfect size. These are $2.49/3 pack at Target, and they are pretty durable unless you drop them while they're frozen and full - they crack. They can probably be found cheaper but I was happy enough at that price. The screw on lids are key. Tupperware style lids will lose suction and seal, at least they did with me.
https://www.amazon.com/Glad-Food-Storage-Containers-Entree/dp/B0014D0SWW?ie=UTF8&psc=1&redirect=true&ref_=oh_aui_search_detailpage
I'm not too picky about my food touching, so I just use these. Eventually I'd love to invest in some nice glass ones, though. Dreams.
A few other things I remembered:
Don't forget mixing bowls. Having a lot of large bowls is always useful.
You will need a strainer or colander or similar to drain your pasta or wash veggies.
Aluminum foil and parchment paper are very useful.
Buy these for storing leftovers. They are way cheaper each than tupperware and stuff, they are reusable, and if they do get ruined, it doesn't matter since they are so cheap. I use these for everything, and I find they have a useful life of nearly as long as the cheap tupperware/gladware/whatever, I don't feel bad about giving them to people, and when I'm cleaning out my fridge of old crap that has gone bad, I can just throw the whole thing out instead of trying to wash stinky old food out of tupperware.
How could they forget the Ziploc Divided Rectangles? It's superior in every way to the EasyLunchBoxes (cheaper if you get it in stores, leakproof) except it has less lid color choices. For someone who just wants to pack their own lunch for cheap, the Ziploc Divided Rectangles are my choice.
Plastic deli containers.Tare weight across all of mine are the same, they're a great shape for stirring, and it's easy to scrape down the sides.