 Reddit reviews QLOUNI 620Pcs 2.54mm Pitch JST SM 1 2 3 4 5 6 Pin Housing Connector Dupont Male Female Crimp Pins Adaptor Assortment Kit
We found 6 Reddit comments about QLOUNI 620Pcs 2.54mm Pitch JST SM 1 2 3 4 5 6 Pin Housing Connector Dupont Male Female Crimp Pins Adaptor Assortment Kit. Here are the top ones, ranked by their Reddit score.
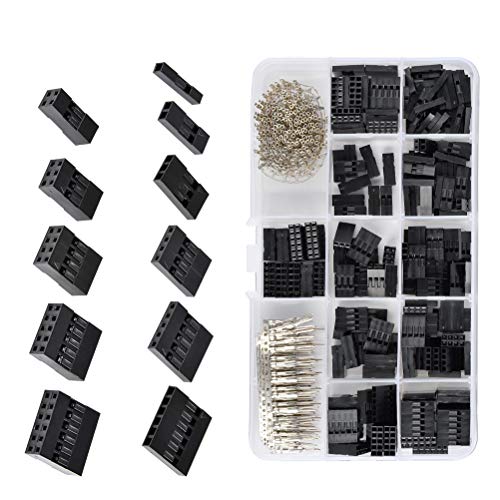
[Dupont Connectors Kit] 620 pcs male and female JST SM connectors assortment kit by QLOUNI for DIY project[Pin & Pin Pitch] JST SM 1 / 2 / 3 / 4 / 5 / 6 pin terminals, 18-26 AWG wire, Pin Pitch: 2.54mm[Easy to Use] Just put the crimps in the tool and press them, make the crimp the insulation are all the way toward the wire[Use Range] Compatible with Arduino and breadboard style pin connectors and sockets, like 3d printer boards etc.[Delivery] 200 pcs female crimp pins; 200 pcs male crimp pins; 10 pcs 2x5p, 10 pcs 2x4p, 10 pcs 2x3p, 10 pcs 2x2p, 20 pcs 1x6p, 20 pcs 1x5p, 20 pcs 1x4p, 20 pcs 1x3p, 40 pcs 1x2p, 50 pcs 1x1p
Hey all!
First off: THANK YOU!! Thank you to all of you for your profound interest in the project and all the questions! I enjoy sharing any and all information I can :) and thank you for my FIRST Reddit Gold Award! I never would have thought this would merit such an awesome distinction!
I've received a number of queries about how it was put together, different functions, the construction, programming, etc... so I will definitely be putting together a detailed break-down so that anyone interested can follow along and hopefully be inspired to create their own crazy mirror setup!!! Keep an eye out here for that! I'm hoping no later than tomorrow evening but it could be done before or after that. Stay tuned!
Edit: Here is what I have so far for you all!
- Materials
o Raspberry Pi 3 b+ - https://www.amazon.com/LoveRPi-Raspberry-Quick-Raspbian-Desktop/dp/B07JR3M7FY
o Raspberry Pi fan - https://www.amazon.com/gp/product/B076H3TKBP/
o Breakout board (testing purposes) - https://www.amazon.com/gp/product/B076KZY5P6
o USB 5V 3.5A Power Supply - https://www.amazon.com/gp/product/B00L88M8TE
o 64GB microSD card - https://www.amazon.com/gp/product/B07FCMBLV6
o USB Microphone - https://www.adafruit.com/product/3367
o USB Extension Cord – https://www.adafruit.com/product/993
o USB keyboard/mouse combo – https://www.amazon.com/dp/B07SW719NZ
o Raspberry Pi V2 Camera – https://www.adafruit.com/product/3099
o V2 Camera extended cable – https://www.adafruit.com/product/1730
o 4 ohm impedance speakers – https://www.adafruit.com/product/1669
o Speaker Amplifier – https://www.adafruit.com/product/987
o Stereo aux cable - https://www.amazon.com/Hosa-YMM-261-Stereo-Breakout-Cable/dp/B000068O5H
o PIR-Motion-Sensor – https://www.adafruit.com/product/189
o Speaker mesh – https://www.amazon.com/gp/product/B01HMBKNSS/
o Magnets – https://www.amazon.com/gp/product/B077SGKY3C/
o Drawer Handle – https://www.homedepot.com/p/Liberty-Classic-Edge-5-1-16-in-128mm-Center-to-Center-Matte-Black-Drawer-Pull-P34928C-FB-CP/303135233
o Monitor, 28”
o Mirror – https://www.twowaymirrors.com/acrylic/
o 18-22 AWG wire
o Wire Connector Kit - https://www.amazon.com/gp/product/B0774NMT1S
o HDX 6’ Extension Cord w/ ground plug - https://www.homedepot.com/p/HDX-6-ft-16-3-Indoor-Tight-Space-Cube-Tap-Extension-Cord-White-HD-158-007/202521667
o Lumber/Construction Material:
§ 2”x6” lumber (~200” long) (main frame/wall mounting)
§ 1”x6” lumber (8 ft long) (shelves)
§ 2”x2” lumber (8 ft long) (rear frame border)
§ Red Oak Veneer – https://www.amazon.com/gp/product/B001B1AR6E
§ Frame – https://www.homedepot.com/p/Weaber-WM-390-9-16-in-x-2-5-8-in-Oak-Chair-Rail-Moulding-73978/205923275
§ 1/8” MDF 2’x4’
§ 1/4” or 3/8” sandwich particle board, 2’x4’
o Construction Hardware:
§ Nails (for helping hold frame to wood while gluing)
§ Wood glue (secure frame)
§ Construction screws:
· #10 x 3.5” Construction Screws
· #8 x 2.5” Construction Screws
· Finishing nails
§ 3D printed pieces (custom 3D modeled and printed at home)
· Speaker/PIR/Microphone trim
· Camera trim/mount
· Speaker Amp/PIR/Microphone mount
· Speaker mount x2
· Pi mounting bracket
- Resources/References
o Raspbian Buster kernel – https://www.raspberrypi.org/downloads/raspbian/
o Magic Mirror 2 – https://magicmirror.builders/
o Modules: https://github.com/MichMich/MagicMirror/wiki/3rd-party-modules
§ mmpm (Module Manager)
§ MMM-Face-Reco-DNN (Facial Recognition)
§ MMM-PIR-Sensor (Motion Sensor Functionality)
§ MMM-AssistantMk2 (Google Assistant)
§ MMM-connection-status (Network Connection Check)
§ MMM-pages (Multi-Page Support)
§ MMM-ProfileSwitcher (Multiple Profile Support via Facial Recognition)
§ MMM-SingleStock (Track one stock of choice [my case, Microsoft])
§ MMM-News (News rotating on a 10 second basis)
§ MMM-GoogleMapsTraffic (Traffic Map w/ pins at work locations)
§ MMM-Traffic (Commute time from home to places of employment)
§ MMM-Hotword (hotword detection used in conjunction with Google Assistant)
§ MMM-3Day-Forecast (3 Day forecast for home)
§ MMM-Weather-Now (Weather at work locations)
§ MMM-WatchDog (Watchdog application for lock-up protection)
§ planetrise (rising/setting of planets based on lat/long)
Try JST SM connectors. I bought a kit from amazon for under $10 here The housings do both male and female with the pins being the difference.
I don’t but it’s pretty straightforward once you look inside the CST. I’d get something like this so you don’t have to reuse the connector inside, that way you can leave the old cable mostly intact Incase the new one has issues.
If you don't like soldering you can make a adapter using crimpers. A proper crimp can be STRONGER then soldering. Soldering wiring tends to promote wires cracking and breaking.
https://www.ebikes.ca/learn/connectors.html
See the JST-SM connectors there. They have lots of different styles and variations. The important thing is the 'pitch'. That style mentioned by Grin there is great for little external connectors since they have little clips to keep things together. That way they have positive engagement.
But not all JST connectors I like that.
For example:
When I switched over from battery monitors to using a BMS I used these to make a adapter.
https://www.amazon.com/gp/product/B0774NMT1S/
That's the most common style. It's the 2.54mm pitch that is used all over the place. You see them getting used on computer motherboards for the front panel connectors, as a example. Those are straight-through and don't have any sort of retention mechanism so I just used gaffer's tape to keep them from separating.
When I first built by battery I didn't use a BMS. I just used hobby cell monitors (type that have buzzers and show voltage) and a fuse (later on a breaker). I didn't like that BMSes are black boxes and you have no way of knowing if they were working or not since they didn't have any display or anything. But the Bluetooth style solved that problem and I switched over.
So when I added the BMS to my existing battery I didn't feel like soldering all the connections. They give you a little pig-tail bundle of wires along with the BMS when you purchase it. So I made a adapter by using those JST connectors and the pig-tail they supplied with the BMS.
If you go and measure your existing BMS's plug it to confirm the type of plug it is using then you can go and make your own adapter in the same way. That way you don't have to cut and solder all the little wires.
https://en.wikipedia.org/wiki/JST_connector has a table of different sizes.
I recommend this style of crimpers:
https://www.amazon.com/gp/product/B002AVVO7K/
Most crimpers for JST-style connectors are copies of a design that does both crimps in one go, but the knock-offs are probably more trouble then they are worth.
Engineers is a quality Japanese tool manufacturer. Those crimpers you have to crimp twice for every connection (once on bare wire, once to clamp down on insulation), but since they are so well made I think that you end up going quicker because there is less tweaking of the pin you need to do after using them.
http://engineertool.wixsite.com/engineerintl/home
The easiest way to use them is to put the bare plug in the chrimp, clamp down a bit to get the pin wedged in at the top, and then insert the wire and clamp the rest of the way down. It's a very tight thing so it's irritating to have to wiggle the pin out, but usually all I need to do is straighten things out a bit with a couple small pair of pliers and it's good to go. Tedious, but not too bad.
With those you can do a variety of different styles and plugs. This is really good for when you need to shorten wires or add extra length for making really clean wiring or fixing bad plugs. Since JST connectors are common they are extremely handy to have.
I bought something like this and this crimper. It's not worth the cost for a one-off job, though.
I’d recommend getting a cheap dupont connector kit and a decent crimper. The plastic dupont housings are a huge pain, if not impossible, to print effectively because of the little plastic clip used to hold in the crimped-on male or female connector. There are plenty of YouTube videos about it once you know what you’re looking for. :)
This is the kit I’ve used for awhile:
QLOUNI 620Pcs 2.54mm Pitch JST SM 1 2 3 4 5 6 Pin Housing Connector Dupont Male Female Crimp Pins Adaptor Assortment Kit
https://www.amazon.com/dp/B0774NMT1S
And this is the crimped I’ve used for dupont and jst connectors (like the white ones for thermistor/endstop)
IWISS IWS-3220M Micro Connector Pin Crimping Tool 0.03-0.52mm² 32-20AWG Ratcheting Crimper for D-Sub,Open Barrel suits Molex,JST,JAE,TYCO-E
https://www.amazon.com/dp/B078WPT5M1
Stay away from the cheaper “jaws” style crimp tools, btw. They’re a nightmare.
With those tools, some female to female breadboard wires, and a pair of snips I was able to wire up a 6-pin header to hook up to the Pi for SPI flashing. For the SKR boards I did a similar thing with the 5-pin SWD connector.
Left both SPI and SWD headers hooked up to my Pi’s GPIO pins and dangling out it’s case so I can just grab the Pi and flash whenever I need to, which is handy when doing a lot of tinkering and bricking things by accident. :)