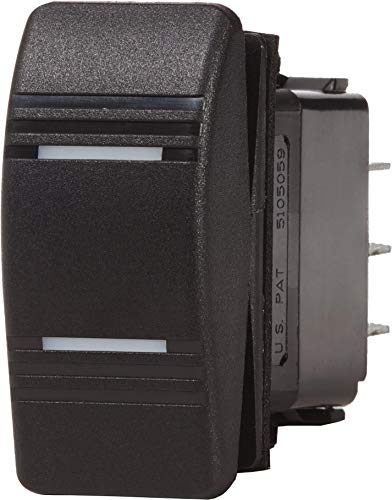
Best boat rocker switches according to redditors
We found 21 Reddit comments discussing the best boat rocker switches. We ranked the 19 resulting products by number of redditors who mentioned them. Here are the top 20.
We found 21 Reddit comments discussing the best boat rocker switches. We ranked the 19 resulting products by number of redditors who mentioned them. Here are the top 20.


These are fairly common and cheap, not to mention pretty robust. It would be far more elegant than the plug solution. I swapped one out for my mom on her smoke exhaust in the kitchen, it died after 10 years of constant use and it died only because the internal contacts has been covered with grease/grime over the years. Tons of other variations exist too that are pretty common.
I would get them from amazon or mcmastercarr. Something like this
http://www.amazon.com/Amico-250V-SPST-Rocker-Switch/dp/B0056F5D4M/ref=sr_1_4?ie=UTF8&qid=1374217613&sr=8-4&keywords=rocker+switch
http://www.mcmaster.com/#switches/=nooipu
Just chisel a square out of wood for rockers. Acrylic is kinda finicky for someone not familiar.
You don't need the best bits to drill wood or acrylic just need to go slow. Could also pick up a step drill bit depending on the price of a cheap set. The store people love to hate harbor freight has a cheap bit set for 4 bucks I lost them before I broke any so they work well enough.
Edit: Guess they have round rockers too.
http://www.amazon.com/Amico-10Pcs-Round-Rocker-Switch/dp/B00BQEK26Q/ref=sr_1_12?ie=UTF8&qid=1374217613&sr=8-12&keywords=rocker+switch
Hey everyone! Not sure who's been reading my updates but heres another one about upcoming changes on the mod I'll be testing this Sunday as well as restating where I'm at. If you haven't read my last update then let me start there.
I have wired up in my back housing a usb type C breakout board and a rocker switch to my batteries to bypass the vita as the source of charging. The positive lead from the battery and the vita is interrupted and the switch is here. When you open the switch (off position) it isolates the batteries from the vita allowing them to charge safely wile removing the possibility of grounding though the vita and frying the device. This also acts like I'm physically pulling the battery without opening the device so thats a plus.
Now that recharging is possible without the vita as a limitation this mod is amazing! My only thought moving forward is lifetime on the batteries that are parallel. From research I shouldn't have too many issues as ive taken every step to make sure they are the same as well as physically checking voltages with multimeter before last solder job. With that said i have a large 8000mah battery coming in 10/11 that i will rig up on 10/13 and will let everone know how its working by next week!
I love the enthusiasm of some people who have tried this and say its not possible and dangerous BUT I haven't ruined a single battery or any parts of my vita yet by simply doing research on the current bottleneck and using knowledge I have in digital logic and circuitry to bypass the issue and address it! I will be making another post if this 8000mah battery works or not showing the wiring and explain again how it works.
Much love to the vita community!
All parts used (rocker was purchased at local shop so thats just matching specs)
Smart charger for directly charging battery without using the vita port
https://www.amazon.com/gp/aw/d/B07BFWHD7G?psc=1&ref=ppx_pop_mob_b_asin_title
USB type C Breakout board as direct charging port
https://www.amazon.com/gp/aw/d/B07PVBM4FT?psc=1&ref=ppx_pop_mob_b_asin_title
Rocker switch to break circuit when charging
https://www.amazon.com/Uxcell-a16121900ux0202-Position-Rocker-Switches/dp/B071NFKHV6/ref=mp_s_a_1_15?keywords=120v+rocker+mini&qid=1570722598&sr=8-15
USB type C Connector for charger cable
https://www.amazon.com/gp/aw/d/B01787LKDI?psc=1&ref=ppx_pop_mob_b_asin_title
Ok let me start at the beginning.
I now own my RadRover eBike for almost 7 months. Great bike, I'm closing in at 4000km on it. The bike is great but comes standard with a 48v battery and while it's decent, it doesn't compare to the Luna Dolphin 52v I run through it mostly.
I bought my 52v dolphin pack from luna cycle, as well as the advance 300 watt charger, their top model.
I always leave all my chargers plugged in even when not charging. None of my chargers have a problem except this advance charger I bought from luna.
After just 4 weeks the LCD stopped working that gave out the voltage read out, I had it warrantied, they send me a new LCD. And the weird thing is they had me manually open up the charger and do the replacement myself, rather then sending in the unit for exchange.
4 Weeks later the same LCD blew. I kept using the charger for another 2 months, and then the charger stopped working all together. I contacted support again, and they told me that the chargers are not very durable and should not be moved around, I told them it was in the same spot in my garage but they refused to replace it. They send me a 2Amp 52v charger instead, ($35)
I got pretty fed up.
I went to youtube to look for other options and I came across this a video of a Swedish guy who build his own charger.
Components looked solid and I have my own printer so I can customize it so I thought why not.
The whole reason this and many other chargers like this are failing is due to poor cooling, they have a 1x1" fan to cool as 12" box thats loaded with crap, this is why I wanted to do my own design that would focus around cooling.
Here is what I ordered
$12 - 2 of Bgears b-Blaster 90mm 2 Ball Bearing High Speed Extreme Airflow Fan
getting returned * $45 - LETOUR Power Supply 12V 40A 500W AC 110V/220V Voltage Converter
$22 - DROK® Digital Multimeter DC 6.5-100V 20A Voltage Amperage Power Energy Meter
$45 - Yeeco Numerical Control DC DC Boost Voltage Converter, 6-60V to 6-90V 10A 600W
$36 - DROK DC-DC Numerical Control Step Down Voltage Converter, 6-65V to 0-60V 8A 400W
$13 - Yeeco DC Motor Speed Control Driver Board 3V-35V 5A PWM Controller
$11 - DIGITEN DC 12V LED Digital Thermometer -50-220F Fahrenheit Temperature + Temp Probe Red
$7 - Switch I had one already but something like this will work
$10 - Screws I also had to mount the controllers + power supply to the PLA
$3 - LED Lights
$8 - Header Set of raisers x 2
$25 - PLA Wasted about 1 roll
total 212 CAD or $165 US
I've been printing for a couple months now so still a noob, and learning how to create in fusion 360, but for a first project it turned out pretty good.
I first tried this with a 500 watt 12V 40AMP power supply, which i though would work great with the step up converter to bring it up to 58.8v for my 52v battery, but it didn't, it's actually kinda bullshit advertising.
the 600 Watt step up converter I bought can only step up to 600 watts at 60v, at 12v it can only output 120 watts, 10a x 12v. Basically this charger could only charge at 120 watts / 58.8v, roughly 2 amps, or what a basic shitty charger that comes with the bike can do. No point of going through all this to make a 2 amp charger.
So I opted to switch to a 48v power supply, so i can get close to 480 watts out of the charger.
The new power supply came in and I got it up and running, but for the hell of me could not charge at more then 4 amps, I tested with bigger wires, and I didn't know why it was dropping to 30v under load. Then as i was putting it away for return, I saw the stupid small side switch that was set on 220v instead of 110v. I swapped it over to 110v, and viola the charger was flying at just over 7 amps, 7 x 53v or almost 400 watts.
Now it was time to build a case for this thing.
I designed the case in fusion 360 with cooling in mind, so I put 2 high cfm fans in, one at the top blowing air out, and the one on the bottom sucking air in.
Since the power supply is almost the size of my 300mm print bed, I knew I had to print it in 2 pieces and assemble it after.
Final assembly is still in progress, I have everything mounted in, cables hidden as much as I could, waiting on more black PLA, so i can reprint the top and make the bottom translucent with the LEDs behind.
I'm also waiting on more raisers to come, so I can bring the adjustable LCD for the Step up converter above the front cover. This way I can switch between the pre-sets I programed in, 48V Slow / Fast / Preserve ( 85% ) & 52V Slow / Fast / Preserve ( 85% )
I have a temp gauge in and it's showing a good 10 degrees cooler with the fans on. The whole idea of the fans is just to make a wind tunnel through the whole case. The step up and step down converter fans have been removed as they are not needed anymore. I also added a variable DC-DC knob thingy so I can adjust the fan speed, depending how fast I charge.
Before you say You shouldn't charge at such high amps, I actually charge around 6 amps on my 52v which has the upgraded high discharge rate cells and can handle alot more then 6 amps. And for the 48v stock battery I just run it at 3 Amps all day and it's pretty happy.
Questions ?
video of Nexi and his project
https://www.youtube.com/watch?v=vGrBT_P9Xfc
its just a switch. could have been hooked to anything. it can turn on a motor that has 15 amps of draw on typical north american wall power.
https://www.amazon.com/uxcell-250V-Position-Rocker-Switch/dp/B0087Y9ZWU/ref=pd_sim_60_2?_encoding=UTF8&psc=1&refRID=EZB15M3M1W9XF8SP92EG
No idea where to get a new pump. I did recently replace the switches on ours with these ones on Amazon, they fit perfect and work great: red & green.
Let us know if you do find a source for a new pump, I would love to be able to do that at some future point. Good luck!
You can definitely make it work, but you're going to have to use 2 rocker switches for that light unless you get an SPDT rocker switch like that one, but you need to check if it fits the housing you're going to use.
3 position switch examples:
https://www.amazon.com/Waterproof-Rocker-Switch-position-Off/dp/B001PNMBUI
https://www.amazon.com/dp/B00DUYRE0M?psc=1
https://www.amazon.com/dp/B00E1JNAC6?psc=1
If you want them on as running lights, just set the relay for the eyes to be turned on by the accessory circuit instead of a switch. that way theyre on when the keys on, but get cut off when you need to run the starter.
then put the relay for the fogs themselves on a normal on/off switch.
most all of the rzrs ive seen use the same switches as just about all the other rockers out there. but im speaking about my rzr 800.
basically anything that looks like this
https://smile.amazon.com/MICTUNING-MIC-LSB1-Laser-Rocker-Switch/dp/B00M5YC7Q4/ref=sr_1_3?keywords=rocker+switch&qid=1567628836&s=gateway&sr=8-3
or
https://smile.amazon.com/Amarine-made-Waterproof-Marine-Rocker-Switch/dp/B00ODWODOU/ref=sr_1_16?keywords=rocker+switch&qid=1567628836&s=gateway&sr=8-16
will work fine.
now, that said, some tolerances are slightly off, so in my case when i replaced the oem light switch with an aftermarket one, i had to wrap the aftermarket one with a bit of black tape so it fit snugly.
that said, i would have had to do that with all of them, no matter what brand i used.
Most switches will work if you're using it for a cut off switch. You only need high current switch if you're turning the motors on and off. 6A rockers will be ok.
https://www.amazon.com/dp/B0725Z6FR7/ref=cm_sw_r_cp_apa_i_hlj5Cb56CZXBE
Wiring Harness: https://www.amazon.com/dp/B071ZPX32N/ref=cm_sw_r_cp_api_i_dUV1DbJY985KX
The wiring harness came with a pretty crappy switch so I bought a separate switch and went the extra mile.
Switch: CH4X4 Rocker Switch for Nissan... https://www.amazon.com/dp/B01I006EUQ?ref=ppx_pop_mob_ap_share
You just have to remove the switch that come with the light bar and connect it to the new switch.
The switch is designed to be placed in stock switch panel. I routed mine to the left side panel. There are two clips to remove the placeholders. Just have to reach behind the left side (or remove) panel to do so.
I recently freed up a rack unit on my desk and wanted some electronic bench tools handy when working at my computer. First order of business was a power supply, so I picked up some parts and then designed a panel for everything to mount in.
Parts:
Source files (saved with SketchUp 2017)
There's a fair amount of available space so as I figure on needing additional bench tools I can add them by printing new faceplates.
Oh its a gearmotor thats like 16RPM. I'm fine with it just being on/off with my particular application (it's a work thing).
However I didn't realize they were 20A until the seller called me. The spec's I found online made me think they were 10A each. So I'm hoping these toggles work. People in the comments say they are rated for 20A, which hopefully means 20A sustained and not 20A peak.
https://www.amazon.com/gp/product/B078W8NNY8/
FXC Waterproof Marine Boat Rocker Switch Panel 6 Gang With 4.2A Dual USB Slot Socket + Cigarette Lighter + Voltage Monitor Alarm LED Light for Car Rv Vehicles Truck (Original Design) https://www.amazon.com/dp/B0732M2R2V/ref=cm_sw_r_cp_apa_i_njW4Ab670HJVV
Yeeco Multifunction DC 0-120V 0-30A Digital LCD Multimeter with Relay Wireless Voltmeter Ammeter Watt Capacity Electricity Meter Coulomb Meter Charge-Discharge Battery Tester https://www.amazon.com/dp/B06XZ4PB3S/ref=cm_sw_r_cp_apa_i_skW4Ab2PEBDCE
Thanks for the response.
Well first off, I wasn't totally sure if it was that easy, but that being said, there are switches with two, three, or as much as five pins, so how do I go about choosing which type of switch?
I would assume it depends on the project and what you're trying to turn off and on.
As of now I'm not 100% what the inside of the wire for the microphone looks like. Like I said its your standard analog pc microphone. I'm kind of still using it so I was hoping it might be some sort of common knowledge for someone in the know, but obviously I'm willing to cut it open and find out. Looking online I can't find a definitive answer so I'm assuming I'm going to need to figure that out myself.
you got access to the lugs that the inverter is connected to?
if your inverter is the standard kind, it takes 12v.
you can get a hard-wire 3 socket splitter and lug it to the same supply the inverter is using.
https://www.amazon.com/ONLINE-LED-STORE-Automotive-Extension/dp/B00PXAMYTC/
​
then you can get a PSU for your laptop
https://www.amazon.com/CHARGER-Latitude-E4300-Adapter-Listed/dp/B0046HU670/
​
your drone charger already takes 13v, so you just need a new plug.
https://www.amazon.com/CUZEC-Heavy-Duty-Cigarette-Inverter-CU10010B/dp/B072KDLH54/
​
get a new tv that uses a power brick, and it will take 12v instead. you'll just use another cigarette plug.
​
all that would be cheaper than a new inverter.
and you stop dumping heat into the cab by converting 12v to 120v, back to 12v :)
-
if you want to be extra swank, get a DC switched hub, and then you can hardwire your charger, laptop cord, and TV.
https://www.amazon.com/dp/B01LS0PDZM/
-
>I can say the Mavic is durable. I crashed it into a wall at 20 MPH, and it fell about 30 feet. I just unfolded the arms and it flew like it never happened.
nice! i would love to get one, for doing aerial photography, but i'm scared of dumping $1k into a lake.
Please share the video you found!
I use this boost converter for my laptop. I used a lighter duty one previously but my laptop can really consume some juice, and the other ones would overheat and fail. I combine them with a typical cig outlet cord and the laptop end of a cheapo charger. You could also fid a pre-made one if you know the specs of the plug and its power requirements.
I installed this switch panel and all my DC stuff is wired on a switch. The labels on the switches are stupid but you can put a label sticker over them. I also have several of these around the bus.
When you convert between AC and DC power, it's very generous to figure on only losing about 15% for each conversion. If you go with that, though, and you have a 100 watt load (laptop charger) using a typical AC adapter (15% loss here) through a typical inverter (15% loss here) to a typical battery (15% loss here), you're going to be consuming over 150W from your battery...And that's being very kind, it's likely more like 180W.
If you use a boost converter like the one I liked, it's more than 90% efficient, but let's just say it's 90%. It's only doing one transition, so your 100W load is only consuming 110W or so from your battery.
Oops thought I pasted.
Baomain Boat Rocker Switch ON-Off-ON 3 Position AC 15A/250V 20A/125V 3 Pin SPDT 2 Pcs CE UL Listed https://www.amazon.ca/dp/B01D0UXM2E/ref=cm_sw_r_cp_api_i_hXhBDb09JTYWB
If this is for mains power use a DPDT (double pole double throw) to switch both the phase and neutral. The switch must be rated for the same or higher voltage and current than what you are switching, and should have a fuse lower than the switch's current rating. E.g. for use in a country with 240V mains and a pair of 100W bulbs (~1Amp) you would need a 5A switch and 2A fuse. Also make sure it is enclosed in an insulated box and the earth wire is connected straight through, not switched.