Best engine valve train tools according to redditors
We found 15 Reddit comments discussing the best engine valve train tools. We ranked the 8 resulting products by number of redditors who mentioned them. Here are the top 20.
We found 15 Reddit comments discussing the best engine valve train tools. We ranked the 8 resulting products by number of redditors who mentioned them. Here are the top 20.


No, this tool makes them SOOOOOOOO FUCKING EASY
I modified one of these, but thanks for the offer.
http://www.amazon.com/gp/product/B000F5ECUY/ref=oh_details_o01_s00_i00?ie=UTF8&psc=1
What's the tsb? I've never had a problem with the 5 valve heads.
Nice, that bike is lucky to have you. Yeah, since you are taking it apart that is the way to go. If you were lazy and a gambling man you may have got them loose with some taps and some heat and ran a quart of ATF in your oil but you are doing it right. The stem and valve seat on that one might be a little scary when you get it apart if it's that stuck.
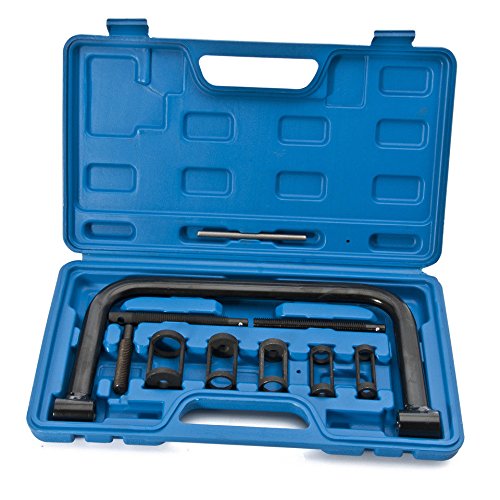
A lot of valve spring compressors don't fit on motorcycle engines too. The kind you hit with a hammer I hear mixed reviews. I welded a socket I cut a section out of to a large c-clamp to come up with something similar to this thing https://www.amazon.com/OTC-4572-Large-Spring-Compressor/dp/B000F5ECUY. Also I think the dingle berry hone is better for a quick deglaze than the 3 stones on your bores, that is if you don't have a machine shop do it. Good luck.
1 and 3 are the big indicators here. Sounds like your valve seals are indeed fried. Mine were toast before I rebuilt my engine. The SOHC valve seals are possible to do without removing the head. You would need an air compressor and a compression tester hose.
Remove the valve cover and rocker shafts, then screw the compression tester hose into each cylinder’s spark plug hole, attaching the hose from the air compressor to it. The air will hold the valves shut while you remove and replace the valve springs and seals. Use this style of valve spring/keeper tool for best results.
Sorry for the incoming text, but worth knowing:
Taken from cb750c.com
---
I successfully replaced all the valve seals in my 1100 without removing the head. I used the smaller of the two Lisle ‘plunger style’ tools pictured here: http://www.amazon.com/Lisle-36050-Keeper-Remover-Installer/dp/B0012S61IO. I sent an email to Lisle telling them what I wanted to do and asking which tool I should use and they recommended the one above. I’m not sure why the smaller of the two tools is not available as a stand-alone product but it doesn’t’ seem to be – it’s only available in the kit. There were several tool options that purported to do the same thing but since I didn’t know for sure that it would work, I purchased the cheapest one I could find and it worked just fine.
Replacing all 16 seals took about two hours (not including engine and cam removal of course) and that was being very careful and inspecting each bore carefully. If I did it again, I would expect that it would take less than an hour.
Here’s the method I used:
(Here's a link to a video on how the tool works - not my video, or the tool that I used, but it will give you an idea of how it works: http://www.youtube.com/watch?v=ZFTaeu4GIPo)
I lowered the desired piston and pushed 20 ~30 cm’s of clear plastic tubing into the cylinder (trying to get it to ‘ring’ around the piston crown), then raised the piston until it stopped. Some folks have used rope for this trick. I couldn't find any suitable rope in the garage so I used he battery hose (which I don't need any more since I have an AGM battery). Since you're not actually pressing on the valves when you use the tool, you don't need a lot of pressure on the piston pushing up on the plastic tubing - only enough to keep the valves from falling down.
I cut the bottom off a 35mm film container and split the side and used it as a valve bore protector.
Plugged everything in sight with rags
I removed the bucket and shim with a magnet and inserted the bore protector.
Using the removal section of the above tool, press down on the valve retainer with moderate pressure to remove the retainer and keepers, both of which will be grabbed by the magnet in the tool It’s hard to convey what ‘moderate’ means – but in this context, it means significantly less pressure than required to put the keepers back in.
Using a small pair of needle nose pliers, remove the keepers from the tool and insert back into the retainer (the strong magnet in the tool necessitates the use of the needle nose pliers most of the time)
Remove the springs - taking care to ensure the spring seats don’t come out too – they sometimes stick to the oil on the bottom of the spring and need to be re-inserted.
Using a pair of long needle nose pliers with serrated noses (if that’s the right term?), carefully remove the seal. If you have a small set of valve seal removal pliers, this would be a breeze (next time I do this job, I’ll have a set). In my case, this was the most time consuming part of the job, not because it was so difficult, but because I took my time to avoid damaging the valves and guides, or losing the valve seal springs. On the seals that I found installed in the head, the small wire ‘spring’ that wraps around the base of the seal to ensure a tight fit with the guide, was so small, it was barely visible (admittedly I can see worth crap), but I had to be extra careful when I pulled the seals out, that the wires came out too (probably not a good idea to have any floating around in the valve train). In almost all cases, the wire came out by itself first, before the seal came out. In my case the original seals (don’t know if they were original to the bike) were not brittle, in fact they were the opposite, gummy even. Fortunately, they weren’t so gummy that I had to scrape any of them off the guide, but I did have to go fishing for a few pieces that were mangled due to us of the needle nose pliers
Press a new, oil dipped Viton valve seal over the valve
Using an appropriate sized deep socket, press the valve seal over the guide. Only thumb pressure required. It’s obvious when the seal ‘clicks’ on.
Reinstall the springs, taking care to ensure the tightly wound coils are facing down (toward the piston).
Place the retainer with the keepers in it back on to the springs
Using the installation section of the above tool (inserts into the removal section), press down hard to seat the keepers into the valve and retainer. It took me a while to figure this part out. I thought that it wasn’t working, then by playing with a loose valve I have, I figured out that I wasn’t pressing hard enough. I’ve used this type of tool before, but it was on an automotive engine with a single spring, and it was a while ago - It takes a lot more pressure on th tool to seat the keeprs the 1100F engine. I put a folded cloth in my palm (cause it would hurt my hand if I didn’t) then laid my body weight on my hand/arm to get the required pressure (while keeping the tool in line with the valve. There is an audible click when the keepers install – it’s very satisfying! It seemed to take a lot more pressure to seat the exhaust keepers than the intake keepers. Doesn’t make sense as the springs are the same (I think). Perhaps just a better angle for pushing on the intake side when the engine is sitting flat (i.e. top is sloping towards the front)
Using the removal tool on the newly installed retainer, give the retainer a mild whack with a plastic hammer (less than a whack really) to ensure the keepers are properly seated.
Remove the bore protector
Dip the bucket and shim in oil and place in the head
Repeat for 3 remaining valves for that piston
Take large swig of beer (you don’t want to do this too many times before completing all valves)
Release piston, remove tubing, then move to the next piston
Notes
Having the head on the engine makes this tool easy to use. Because of the pressure required to install the keepers using the tool, it might be tricky to use on the head while it's sitting on the bench. Might just be a matter of blocking off the head so it doesn’t move. All head movement issues aside, using this tool would be much, much, much faster and simpler than dinking around with the old tried and true “C” clamp method, but if that’s what you trust, go for it.
Even if you wouldn’t use this tool to install the keepers, it makes removing them so easy; it would be a welcome addition to any tool box.
In closing…..
So, I’m still fixing things and haven’t put the motor back in the freshly touched up frame (contemplating cam chains now) so I can’t comment on how everything has worked out – that’s yet to be seen, but I don’t’ expect any problems at this point, at least, I don’t expect any problems related to the valve seal job (lord knows: there tons of other shit that will fail in the project yet). One could argue that it’s a bit nuts to have the engine out of the frame and not take the head off. I don’t necessarily disagree! It's just that this motor is new to me and I don't have a good feeling for what needs to be done to it to freshen it up. I did compression and leak down tests and they booth looked exceptional but it smoked on startup like it was a prop in a war movie – a pretty clear indication that the valve seals were gone, but everything else seems good. I didn’t want to remove the head and all the work that goes along with that only to find that there was nothing wrong. After I put a few miles on this engine, I may decide that I want to get into the engine after all – but I’ll make that call when I actually ride it and have a feeling for how it’s running. I can look at motor disassembly next winter if things are worse than they appear.
I have a low mileage 900 that runs really nicely but it too blows some smoke. I wouldn’t ever even consider changing the seals if that means having to crack the head, but now that I know this method works, when I get a chance, I’ll eagerly pull the motor, touch up the frame and bit, swap in new seals, and shove the motor back in.
Hope this is useful.
If there is any clicking noise, most of the time electricity isnt causing the problem.
Get yourself something to measure the voltage (Even a lightbulb 12V 21W is enough > Look it up on youtube).
If its ok, replace the motor.
But nyfdup is right. Also check the wiring for the trunk on the left side :) Its easy and if its broken, even you can see it.
If volage AND wiring is ok, replace the motor. Its a very common thing.
BUT! be aware, your wiper doesnt lose that easily
You need a special tool to break it free without destoying the glass..
Tool like that > Amazon
You can get the proper tool for a whopping $15.
Stick a valve lapping tool on the good side, and spin on a flat sanding block.
Amazon
Again Im not saying you personally fucked it up. I'm saying in my opinion someone fucked it up via timing, my guess would be failing to set the cams in their neutral position and restrain the cams so they don't get knocked forward or backward and smack a piston. And again my opinion, I'm not attempting to argue or send this so far off topic as to be entirely of topic.
For those of you attempting this, this tool will make it MUCH easier. Magnetized removal means no keepers flying about, and installation of the new retainer and keepers is a breeze
https://www.amazon.com/Lisle-36200-Keeper-Remover-Installer/dp/B000P0ZJIS
http://www.amazon.com/Lisle-36200-Keeper-Remover-Installer/dp/B000P0ZJIS
https://www.youtube.com/watch?v=B8WTTfkyW8g
I've never done it before myself but it doesn't seem like it would be too difficult if you've wrenched on your car before. However, it does look like it would be a day job doing it this way.
If you're willing to buy a tool I'd get this: http://www.amazon.com/Lisle-36050-Keeper-Remover-Installer/dp/B0012S61IO and then follow this video: https://www.youtube.com/watch?v=qEe8C5u1LWg it would be a much faster way to do it.
You can get a cam lock for the B20 engine in that Cr-v. Here is the first link I found. There are a lot of different ones but they generally install the same way between the cam gears. As others have stated, the tool isn't actually necessary but it helps, especially if it's your first time with that engine.
*looking around a little more, the price from the one I linked seems about $10 higher than others. Shop around.
If you have the tools ahead of time (unlike me), I would say it's definitely doable in about an hour.
You'll want a wiper assembly tool like this one:
https://smile.amazon.com/Amon-Tech-Windscreen-Remover-Removal/dp/B01HJBM2WG/ref=sr_1_2_sspa?crid=39LZHU7SU7KN6&keywords=wiper+arm+removal+tool&qid=1557626963&s=gateway&sprefix=wiper%2Caps%2C158&sr=8-2-spons&psc=1
I got mine from my local O'Reilly because I was determined to get it done that day. Otherwise, I would have planned ahead and ordered it.
Then to cut the ends off of the drain, I had to get a long-handled set of needle nose pliers from Walmart like these:
https://www.walmart.com/ip/8-Nose-Pliers-Sbln8p/34771013
I ended up just kind of pulling and tearing those little flaps off. My hands are too big and I couldn't even reach the driver side with scissors. It was so frustrating, but only because I was unprepared... The wiper assembly doesn't just come off, so I let it soak a few times with the PB Blaster. I honestly thought I was never going to get it, so I was pretty ecstatic when it started budging. YouTube is a good resource for this part if you're unfamiliar. Good luck! Let me know if I can help further!
I had this same issue a while back. I used two different items. I tried using a gear puller, but it wouldn't fit below the motor pinion. The claws were too thick. I ended up using a Windscreen Window Wiper Blade Arm Puller to get it going. Then I switched to the gear puller. I forgot what size the gear puller was, but here it was something like the one I linked below. Some heat couldn't hurt as well.
https://www.amazon.com/Pro-Grade-18212-4-Inch-Adjustable-Puller/dp/B002O16UGQ/ref=sr_1_4?ie=UTF8&qid=1523555996&sr=8-4&keywords=gear+puller
https://www.amazon.com/Windscreen-Window-Puller-Remover-Removal/dp/B01HJBM2WG/ref=sr_1_1?ie=UTF8&qid=1523555789&sr=8-1&keywords=windshield+wiper+blade+puller