Best power hammer drills according to redditors
We found 75 Reddit comments discussing the best power hammer drills. We ranked the 49 resulting products by number of redditors who mentioned them. Here are the top 20.
We found 75 Reddit comments discussing the best power hammer drills. We ranked the 49 resulting products by number of redditors who mentioned them. Here are the top 20.


For this process, I used a Vision Defense 80% Lower Reciever and the Vision Defense jig as, admittedly, they were cheapest options I could find. However, there exist an abundance of different receivers and jigs from different manufacturers. For example, the second lower is from Blitzkrieg Tactical.
Disclaimer: This isn't really meant to be a guide, although you're able to use it as a guide if you wish. I recommend finding a different method to drilling the fire control pocket because, as you can see, mine wasn't the best.
I know you're not supposed to mill with a drill press. They're not made for taking side loads and it's possible to gravely injure yourself doing this, however not likely. Best case, the press breaks. Worst case, the press breaks and kills you. I took that chance and came out with two functioning lowers. Your mileage may vary. If you decide to take on this project, good luck.
Advice:
There are other ways to finish a lower like this, including getting and actual end mill, or using the 80% arms Easy Jig. Going the Easy Jig route means that you can use a hand drill instead of a drill press.
Completed rifle.
To finish building the rifle you will need:
If this is your first rifle, it is usually recommended you purchase a complete upper assembly which simply attaches to the lower receiver. Palmetto State Armory has a nice selection. These typically do not come with a bolt carrier group or charging handle, which you will also need.
You can always make Amazon URLs more awesome:
https://www.amazon.com/Place-For-Your-Dick/dp/B002RTKFWU/
Yet another great place for my favorite tool.
A needler? Like this one, for attaching to an air chisel?
Why go through so much trouble? They already sell cordless versions you just need to find the right attachment. Or if she likes it rough you could try this one.
edit: Or this
edit: something /r/steampunk might enjoy too.
Use this: http://www.amazon.com/Dexpan-Demolition-Excavating-Alternative-Jackhammer/dp/B000BRQ9A2/ref=sr_1_3?ie=UTF8&qid=1465050465&sr=8-3&keywords=Non+explosive+rock
Here's a few. I recommend checking Black Friday deals but pretty much anything from Makita, Bosch, Milwaukee and DeWalt will be good to go. 18v is more heavy duty, 12v is more light duty.
https://www.amazon.com/Bosch-GXL18V-232B22-2-Tool-Compact-Batteries/dp/B07D89F5BH/ref=mp_s_a_1_5?keywords=bosch+impact+combo+kit&qid=1574960153&smid=ATVPDKIKX0DER&sr=8-5
https://www.amazon.com/Milwaukee-Lithium-Ion-Cordless-Driver-Impact/dp/B005NSWHN2/ref=mp_s_a_1_27?adgrpid=57155394678&hvadid=274683045294&hvdev=m&hvlocphy=9015650&hvnetw=g&hvpos=1t2&hvqmt=b&hvrand=5608443985744977742&hvtargid=aud-837686656069%3Akwd-298541366838&hydadcr=20375_9349043&keywords=impact+combo+kit&qid=1574960113&sr=8-27
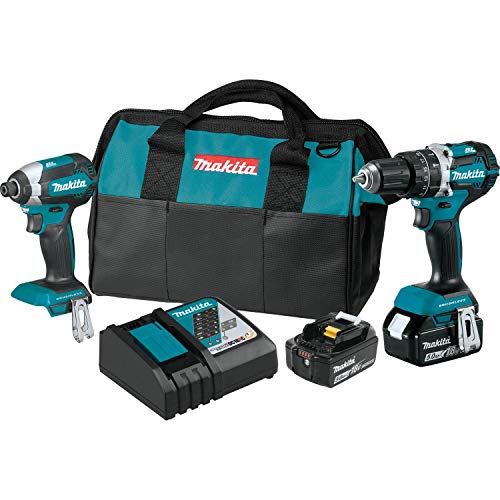
https://www.amazon.com/Makita-XT269T-Lithium-Ion-Brushless-Cordless/dp/B07N9LDD65/ref=mp_s_a_1_17?adgrpid=57155394678&hvadid=274683045294&hvdev=m&hvlocphy=9015650&hvnetw=g&hvpos=1t2&hvqmt=b&hvrand=5608443985744977742&hvtargid=aud-837686656069%3Akwd-298541366838&hydadcr=20375_9349043&keywords=impact+combo+kit&qid=1574960113&sr=8-17
for the demo, rent a concrete drill from Home Depot/Lowes/whatever and drill a bunch of holes.
THen pour this stuff in.
Dexpan
You still have to dispose of the concrete chunks but so much easier than spending all day with a jack hammer. Hit up youtube for how to prep the stoop for the dexpan.
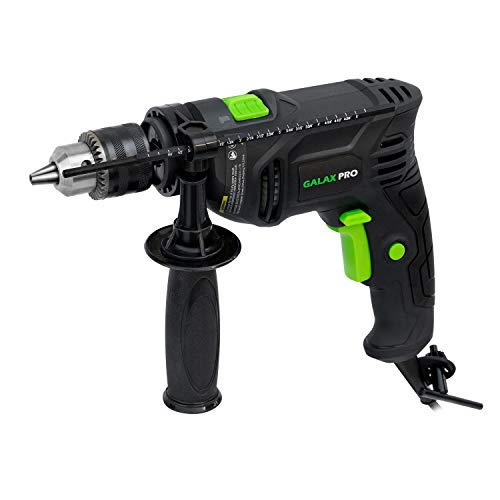
If you want to drill a hole into concrete, block wall, ceramic tile or any other kind of masonry you'll need a hammer action drill with a Tungsten bit, a regular bit will heat up and melt.
If you're planning on keeping the drill for a long time spend a few bucks more and get the right one, Amazon have some great drills, I bought a Milwaukee similar to this one 15 years ago and I can't kill it.
The stuff with the ridges under the tile isn't grout, it's thin-set adhesive cement. Try an oscillating tool with a grit blade.
A small scaling chisel would work too if you can find one to rent or borrow.
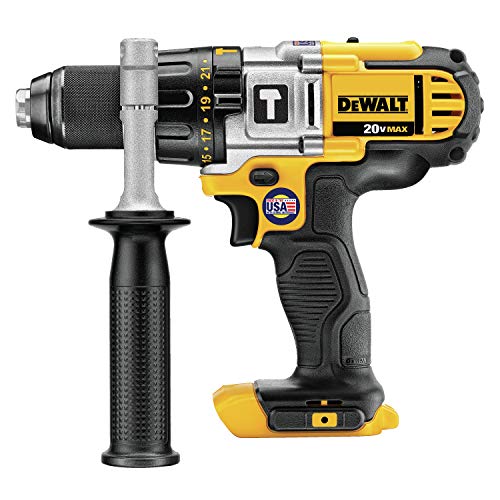
I think it’s around $50 per day at a Home Depot near me, I’m in Canada though. FWIW, a DeWalt drill like this one (DCD985) has a hammer drill mode but can also be used for wood, metal, etc. - just use a masonry bit when you’re on hammer drill mode and going into concrete. Other power tool manufacturers likely have similar tools, so if you were planning on making the investment anyhow it might be worth it.
air hammer
http://www.amazon.com/gp/product/B000VZAENC
You could try dexpan.
http://www.amazon.com/Dexpan-Demolition-Excavating-Alternative-Jackhammer/dp/B000BRQ9A2
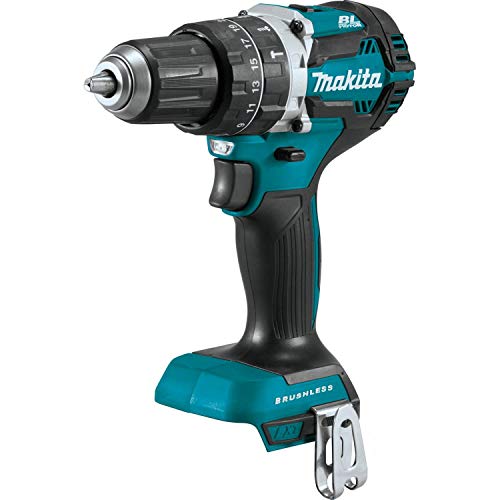
Found some on Amazon, don't know what to think. Have always heard good things about maktia and maybe it's just this certain model
https://www.amazon.com/Makita-XPH12Z-Lithium-Ion-Brushless-Driver-Drill/product-reviews/B01M4HGFRS/ref=cm_cr_dp_d_hist_1?ie=UTF8&filterByStar=one_star&reviewerType=all_reviews#reviews-filter-bar
I have this DeWalt and it works great for the price....
Borrow or buy a cheap hammer drill like this: (https://www.amazon.com/gp/product/B010S8DG4U), swing by Home Depot or Lowes and buy a handful of Tapcon concrete screws and the recommended size masonry bit to go with them. You can have it bolted down in just a couple minutes. I would think any adhesive you buy will be rough on you and the floor if you need to move the rack in the future.
Something like this? http://www.amazon.com/Milwaukee-5380-21-2-Inch-9-AMP-Hammer/dp/B000MYC91W/ref=pd_bxgy_hi_img_b
Or is that way overkill? I want to buy tools that will last a very long time rather than cheapos that break in a few years.
I've seen people bleed trying to break them open. And it's not impossible that you might just break your knives. Try a hammer and chisel. If all else fails Try This. Oh, and don't forget your safety gear!
ok, first off, I'll just emphasise, there's a real big improvement from the previous one you did - each one is clearly showing improvement throughout - especially the shaping of pommel and grip, which are really starting to get into the right sort of ballpark now, compared to your previous one - a huge step forward there.
.
main thing I am spotting is that the pommel and particularly the cross are fairly large and bulky - the cross thickness is much more than most real ones are - its a common fault - people tend to see pictures of swords in profile, and dont really get to see the depth of the crosses - they tend to be much more gracile than they expect... let me see if I can find a few photos on auction houses for you:
.
best I can find quickly, those, particularly the last one show clearly how slender hilts can be - the crossguards often taper away to almost be as narrow as the blades. So you might like to think about the 3d nature of the hilt, and how you can shape it to have pretty dramatic curves and shapes which make it quite sculptural, without being bulky at all.
.
Given the length of the blade, therefore, I'd have expected it to be much less balanced than it is. What that indicates to me, combined with the weight of about 1.3kg, is that the blade is still pretty chunky along its entire length. Would I be right in saying that the stock you're working from is 1/4 inch thick bar? So, for future ones, you might want to start thinking about making distal taper more dramatic - its a lot of work, and tiring to grind thin, but the results are satisfying when done. These relatively broad cutting blades tend to have fairly agressive distal taper - a blade 75cm (30") long might start at about 4.75mm (3/16ths) thick, 50mm (2") wide at the cross, but by the time it's 10 cm from the tip, they might be just 1.5 mm thick - slightly more than 1/16th of an inch. that sort of dramatic distal taper pulls a lot of mass out of the blade, and that in turn lets you use a more compact pommel and cross, which makes the weapon move much more dynamically. its like the difference between twirling a weightlifting bar with 1kg at each end,like this: |---------| vs trying it with the weight in close to the middle, like this ---|-|---. With exactly the same weight on that bar, just moving the mass into the middle makes it far easier to twirl around and control. Same goes with a sword.
.
So, that's the main area I'd look at working on now, tapering the blade down in thickness so there's less mass to it. Other than that, the only thing I can say is, that small spring that came with the larger one is absolutely asking to be used to try a dagger blade. I'd guess the whole thing is about 30cm, 12" long? If so, then its easily big enough to fit a dagger into, working round the holes (you dont want a dagger to be more than about 32mm / 1 1/4" wide, so you can offset it and avoid the holes) , and try out techniques. I'd be inclined to make a small quillon dagger. Cut the bar lengthways for the main blade, but keep the offcut, and then use that to make a steel cross with a curve to it. then saw off a 1/2 inch thick length of the brass you've got, drill it lengthways for a tang and you've got a perfect base shape for a round wheel pommel shape. (also, that lets you practice doing tangs for peined ends, instead to screws, if that's an area you'd like to improve in future.)
.
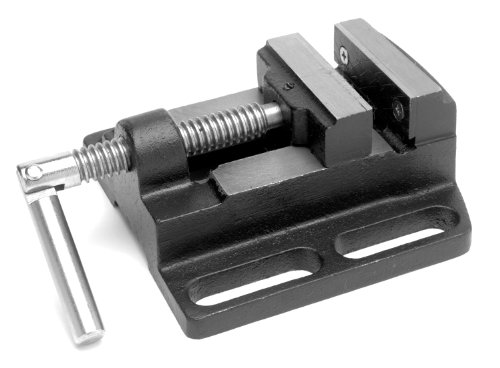
last tip I can give, it looks like you're using a G-clamp and/or mole grips for a lot of your work holding stuff. that's always a nightmare, so I'd thoroughly reccommend one of these little 2-1/2" Drill Press Vises - they're really useful for detail work, in all sorts of crafts applications:
.
https://www.amazon.com/Performance-Tool-W3939-Drill-2-Inch/dp/B002RTKFWU/ref=pd_cp_469_3?ie=UTF8&psc=1&refRID=YCYCRJ61NHKYGG8CCJ5J
.
you can clamp it onto the worktop surface, and it'll allow you far more control working on things like crosses, working with a file, all those sort of little fine details. Not big or tough enough to use as a real vise for clamping work ultra-securely for heavy work, but they're a great investment for fine jobs where you just want a secure hold sitting on the table or bench.
I highly recommend getting an SDS Plus Drill and Sawzall.
https://www.amazon.com/dp/B01M24U0CJ/ref=psdc_552802_t3_B01NAZQUEO
The SDS Plus has a ground rod attachment that is really nice.
I make less than $10k per year, my house and land cost me $4k to buy. I'm not going to hire or rent my way to a solution -- either I buy the tools, or I work by hand with what I've got. If I had a good manual method I'd do it that way, but my manual method is both tedious and gives poor results. 26 hours of labor is nothing to me. I spent over 200 hours this year terracing / building dry stone walls.
I think two closely spaced holes with a 2" chisel bit would give me the maximum desired post-hole diameter for pretty much all my jobs. This isn't granite I'm cutting into, it's crumbly shale.
I think a rotary drill/hammer or a jackhammer under $1k is probably the ticket but I'll probably need to rent one or two for a few hours to see if they can actually outperform me with my wrecking bar and sledge and pickaxe. They may not be much faster than me.
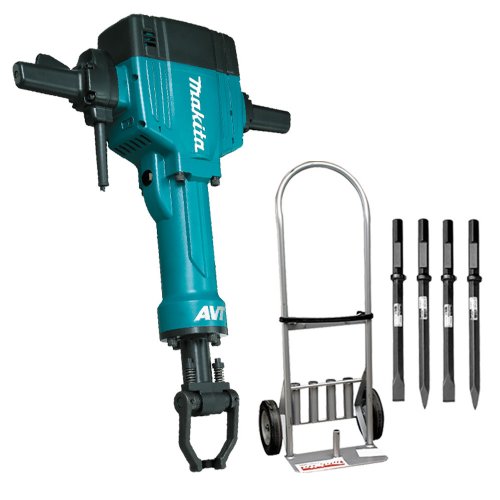
http://www.amazon.com/Bosch-11335K-35-Pound-8-Inch-Hammer/dp/B000PWCNVW/
http://www.amazon.com/Bosch-11245EVS-2-Inch-SDS-Max-Rotary/dp/B00004SUPS/
Try using an expanding agent to break up the concrete: http://www.amazon.com/Dexpan-Demolition-Excavating-Alternative-Jackhammer/dp/B000BRQ9A2/ref=cm_cr_pr_product_top
This will save you a lot of time compared to using a jack hammer alone. Here's another link showing what it looks like in use: http://www.dexpan.com/dexpan-how-to-use-dexpan-non-explosive-controlled-demolition-agent-breaking.aspx
Another option
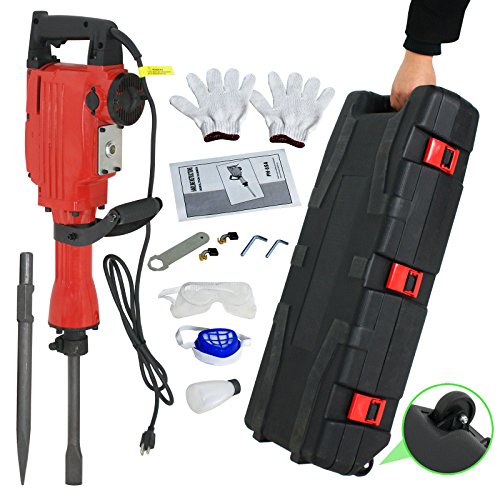
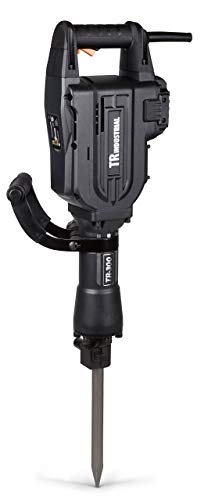
https://www.amazon.com/F2C-Electric-Demolition-Concrete-Breaker/dp/B0718W1M14/ref=asc_df_B0718W1M14/?tag=hyprod-20&linkCode=df0&hvadid=310828259700&hvpos=1o3&hvnetw=g&hvrand=7162423722310718020&hvpone=&hvptwo=&hvqmt=&hvdev=m&hvdvcmdl=&hvlocint=&hvlocphy=9028248&hvtargid=pla-568083986606&psc=1&tag=&ref=&adgrpid=65583250281&hvpone=&hvptwo=&hvadid=310828259700&hvpos=1o3&hvnetw=g&hvrand=7162423722310718020&hvqmt=&hvdev=m&hvdvcmdl=&hvlocint=&hvlocphy=9028248&hvtargid=pla-568083986606
I got you bro ;)
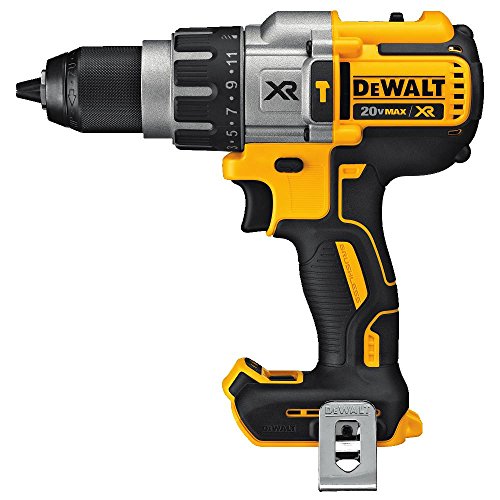
You might want to try something like like this. The more someone tries to pull up the tighter its supposed to wedge. If they want it bad enough they will get it. https://www.youtube.com/watch?v=IYIqoxsjsNE I would talk to someone who does concrete since you will need a hammer drill. A drill with regular bits will not work. You will just ruin the bits and waste your time. If you have a cordless drill/ hammer drill like this https://www.amazon.com/DEWALT-DCD985B-20-Volt-Lithium-2-Inch/dp/B007ML7EVI/ref=sr_1_2?s=power-hand-tools&ie=UTF8&qid=1518417647&sr=1-2&keywords=dewalt+hammer+drill you could to it yourself. Those drills take forever compared to an sds or sds max hammer drill. They also don't like bits over 1/2". They will work but the motor gets frakn hot. If you know someone with something like this https://www.amazon.com/DEWALT-D25263K-D-Handle-Rotary-Hammer/dp/B00VNBV2F2/ref=sr_1_1?s=hi&ie=UTF8&qid=1518417765&sr=1-1&keywords=dewalt+hammer+drill+sds or this https://www.amazon.com/DEWALT-D25601K-4-Inch-Combination-Hammer/dp/B00MAB8DHY/ref=sr_1_5?s=hi&ie=UTF8&qid=1518417765&sr=1-5&keywords=dewalt+hammer+drill+sds your golden.
Alright, no offense to the first commenter but we need to clearly define what we are talking about.
There isn't an "impact driver drill" I believe your talking about something like this that is a cordless electric 1/4" impact driver. It accepts 1/4" hex driver bits notice the special cut out at the base of the bit, that's what keeps it from falling out. It functions like a drill/driver until it encounters sufficient resistance then it impacts, giving increased torque(rotational force), it does not produce a hammering force(along the axis of the bit).
Now this is an impact wrench it too functions like a drill/driver until it meets resistance then it impacts adding rotational force but not hammer force. What are the differences between this and the driver we looked at earlier? First is obviously size, the wrench is bigger, and stronger, and heavier. But that's not what makes it a different tool, what makes it different is the tip, it's a square, like for putting sockets on, in this case 1/2" sockets but they make 3/8", 1/4", 3/4" and much larger!
So could you use the first tool in place of the much larger second tool? Yes! Use one of these adapters
Here's the problem tho, the first tool, the driver, makes at most 117 ft-lbs, and I believe that's stretching, the second tool, the wrench, makes 700 ft-lbs. To remove a rusty, crusty, stubborn lugnut you will need the bigger badder tool, sometimes it still won't be enough, and you'll need a breaker bar with a cheater pipe.
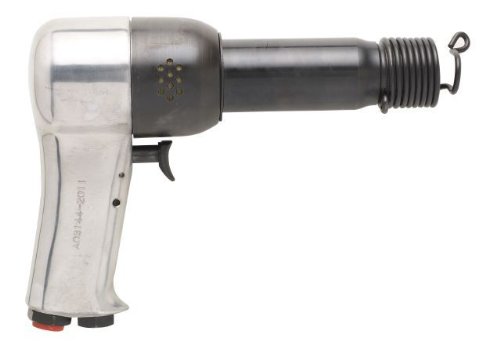
Now what the other commenter mentioned, the hammering force, that can be made with a few different tools. Let's start with the handheld impact driver yes it's confusing, two different tools, both called impact drivers, but this one we'll call the handheld, you hold it with one hand, and hammer it with a hammer. It has a cam mechanism that takes some of that axial force and imparts a slight (like 1/16 of a turn) rotation. It's good for stuck screws especially Phillips heads.
Another, more common tool is the hammer drill it is essentially a drill, it grips with three jaws onto the same bits as our first impact driver, or onto completely round bits, like your common drill bits but when you engage the hammer mechanism it will push its chuck forward and back rapidly, and the pressure you apply to the back of the drill hammers the bit into the material your drilling, useful for concrete/masonary work. But for real drilling power into concrete you want an SDS rotary hammer drill this bad boy only accepts SDS bits, provides it's own rotary and axial forces and will drill thru reinforced concrete like non reinforced butter.
Ok I think that about covers it, if anyone would like to add on I'd appreciate it. And remember:
Always use the right tool for the job, a hammer is the right tool for every job, and every tool can be used as a hammer!
Obviously that was sarcasm.
I wouldn't be, it's the walmart of tools. With all the disadvantages that come with a Walmart, like quality decreasing across all stores to compete on price. Plus, a lot of their stuff isn't even that cheap. Like $8.99 USD isn't "cheap" for those kinds of mats, it's just there's only 4 pieces. This one here is $8.50 CDN for 4 pieces, and is better quality, it's just 12 instead of 4.
Also, you might feel you're saving 50%, but when half the things you buy fail quickly, you realize you saved zero dollars.
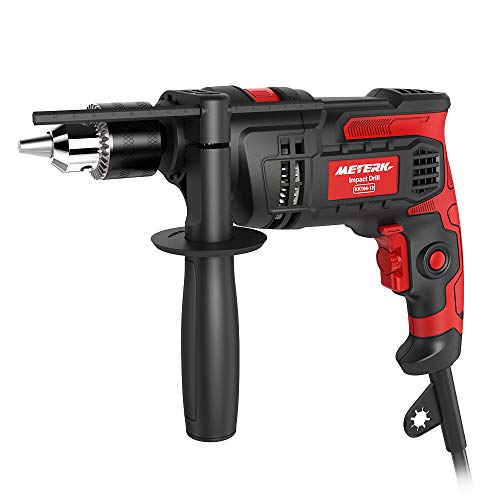
It might have been cheaper before you could buy Chinese direct stuff off of Amazon, Ebay, Alibaba... but now you can get stuff that's the same price, but higher quality. Like personally, I own their $12 with coupon, power drill, and it's pretty terrible. I couldn't use it for a lot of jobs andended up buying this one instead. It's vastly superior, and what, $10 more?
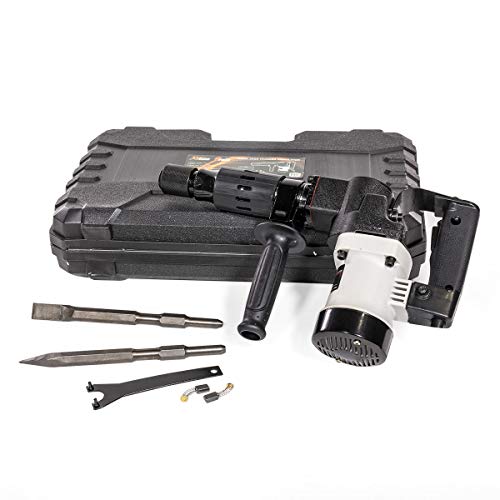
Product Link: https://www.amazon.com/Meterk-Electric-Adjustable-Drilling-Concrete/dp/B07HP5T9C7
Code at checkout: SRWXDTVE
you call that a scraper? that ain't a scraper, this is a scraper! :-)
http://jaylorconcrete.com/img/scraping/ride-on-floor-scraper.jpg
yeah, makita makes a handheld one:
http://www.amazon.com/Makita-HK1810-Variable-Scraper-Scaling/dp/B00004YOKZ
and there are pneumatic scraper chisels that would do it too.
call your local rental place and see what they have. Home depot rents stuff like that too.
I have a 6" Eskimo auger. It works great, just keep the blades sharp and covered if not in use. My Eskimo auger is attached to a DeWalt heavy-duty brush-less drill. I can drill countless holes through twelve inches plus of ice in about ten seconds. https://www.amazon.com/DEWALT-DCD985B-20-Volt-Lithium-2-Inch/dp/B007ML7EVI/ref=sr_1_9?ie=UTF8&qid=1541702599&sr=8-9&keywords=dewalt+hammer+drill+20v+brushless
Most guys use a Milwaukee Fuel drill, but I like having the compatibility with other DeWalt tools. Look on Craigslist for a used ice auger and have the blades sharpened or replaced. Bought mine for $20 and I happen to live down the street from one of the two places that sharpens auger blades in Michigan (Angler's Pointe). If you need auger blades sharpened in the future you may mail them to me and I'll mail them back once sharpened. Costs $5-10. Message me if your interested.
you need this
Let me start by saying that this would be the bare minimum. This is assuming that you have all the experience to use these tools effectively as someone who has the appropriate skill and knows to do things like not bear down on a saw when cutting, keeping everything square, how to mill boards by hand, how to not kill sandpaper in a few strokes, how to tune and sharpen a hand plane, ETC.
2x$8.69Vise grips Two vise grip clamps. Clamps can be universally adjusted and clamped in almost any direction with some quick thinking. One is never enough.
$9.99Cheap set of chisels Everyone needs a chisel. These will be made from a milder steel, but it's better than nothing.
$22.00Generic ryoba saw A ryoba saw will double for crosscuts and ripcuts. They go as far as you can take them provided you treat them right.
$18.62Bench Plane You need to be able to take down material in terms of thickness. A simple bench plane will due for now.
$20.61Block Plane A block plane will help slightly with end grain smoothing where the bench plane cannot.
$3.47Bundled Sandpaper You need to finish your products somehow. I would get a generic bundle of sandpaper and use it sparingly and tenderly.
$12.85Square Keeping things square is vital.
$6.79Mallet Hammering your chisels is going to be very important since you cannot use a 2x4 reliably.
$3.47Wood Glue Need to be able to glue things together.
$11.80A set of card scrapers Remove material smoother and faster. You don't want to waste sandpaper if you don't have to, and these are quite versatile.
$8.06A bastard file A bastard file will do for now when it comes to heavier shaping and sharpening your card scrapers.
$15.92A small drill viseKeeping something secure in place is very important. A small vise will accommodate small and narrow pieces of lumber and can be bolted to a bench.
$3.97Assorted finer sandpapers You need something to keep your chisels constantly sharp, especially when it is such a mild steel as a set of 9.99 chisels.
$15.59Wipe on polyurethane You need to be able to finish your products somehow.
Comes to $170.52 I would use the rest to make a bench and two sawhorses out of some 2x4's.
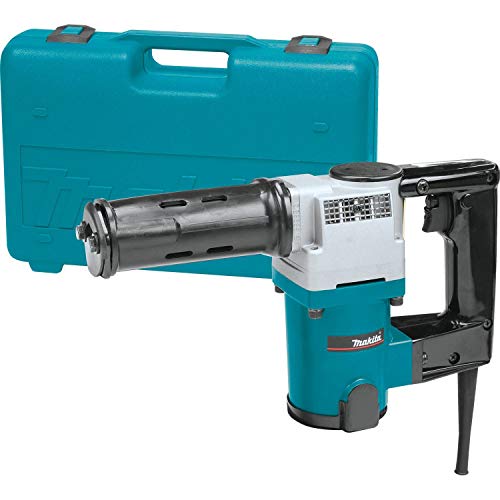
I used this: http://www.amazon.com/Makita-HM1810X3-Lb-Breaker-Hammer/dp/B000N5Y7JW
It worked wonderfully.
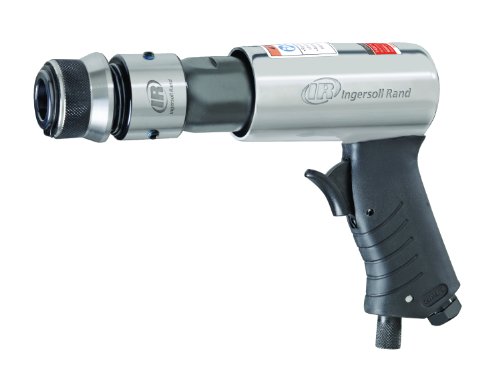
It's worth the money to own one if you use it more than once. I have a Mac long barrel that comes out about three times a week. But prior to that I had this edge series from IR. Works great hits good holds up and best of all cheappppp.
Ingersoll Rand Air Hammer 114GQC https://www.amazon.com/dp/B000VZAENC/ref=cm_sw_r_cp_api_hKrMzbKP5VSEY
Rent a jackhammer man. $65 bucks got me this for 24 hrs a month back - worth every penny.
http://smile.amazon.com/Bosch-11335K-35-Pound-8-Inch-Hammer/dp/B000PWCNVW/