Best telescope motor drives according to redditors
We found 44 Reddit comments discussing the best telescope motor drives. We ranked the 21 resulting products by number of redditors who mentioned them. Here are the top 20.
We found 44 Reddit comments discussing the best telescope motor drives. We ranked the 21 resulting products by number of redditors who mentioned them. Here are the top 20.


Well thank you. Now I get to expand the text field to full size, so that's fun. Warning, this is gon' be long. You might wanna grab a snack, or start walking to get one if you're reading this on your phone. I've got a full bottle of Shandy, and another round of four Team Valor keychains to print, so I've got about an hour to blast this out.
Alright. We'll start from the top. First, I'll go with the basics, the hardware, and I'll work up from there.
So, the motors. The Tiko uses the 28BYJ-48 motor as its base. Running flat out, this motor can achieve 15 RPM, and output about 7% of the torque a typical NEMA17 shelled motor could. Now, you'll notice something. Compared to the NEMA17 I listed, the 28BYJ-48 is cheap. Really cheap. As in, five of them costs the same as one NEMA17. Due to this, a lot of people look at these motors and go "wow, these are just barely strong enough to move a carriage. I betcha I could make a printer out of this!" After a little bit of work, most people give up, or by the time they're done, they've realized exactly why everyone else did. See, the 28BYJ-48 is cheating. That torque, the one that literally is only barely pushing above a 20th of the power a normal motor does comes from a 1:64 gearbox made of plastic inside the casing. If the machine ever exceeds that force, the motors start to lose teeth faster than a hockey team. The Tiko team claims to have fixed this problem with a nylon gearbox. I have to tell you, with the experience I have using these motors, a nylon gearbox really isn't that much of an improvement. The plastic in there is already some tough stuff, and it's really only treating a symptom, not the problem. Keep in mind, the people at M3D have replaced the gearbox in their 28BYJ-48 powered printer (the only other printer to ever reach the market with these motors, by the way) with a metal one, and they're still blowing out.
To compound this, the team at Tiko, in their infinite wisdom, have decided to create a "unibody" printer. Meaning the linear motion is handled by its plastic body. I really don't have to explain why this is a bad idea. Combining a plastic gearbox with a plastic motion system is just begging for trouble. Printers really do need metal, just because plastic wears away. The Tiko team boasts "we've tested our printers for days, so we know they're durable!" But that's... That's not impressive. Given the time that can be expected from a typical printer, having a few days under the belt isn't something that matters a whole lot. Plastic wears down. That's what it does. If steel can get smooth patches rubbed into it from use, imagine what can happen to even the toughest polycarbonate.
But enough about the longevity of the device, let's talk quality. See, the Tiko is brilliantly priced. The Tiko is priced right at the range for people to say "well yeah, the prints aren't great, but what can you expect from something this cheap?" From your flair, you have a Maker Select. You know for a fact that cost doesn't really scale linearly with quality in printing. That thing can easily outclass a lot of machines five times its cost. This is because printers are tools, not electronics. Sure, they've got electric guts, but so does a drill, and you know that with a pretty damn cheap drill you can still make a good enough hole. The Tiko relies on being classified as a consumer electronic. They want to be classed like a cheap laptop, or a cheap phone, where "yeah it's not great, but hey, for the price..." But, yeah, for the price, the Monoprice Mini can kick ass and take names with a skilled operator. That's another fun thing. Their ultra-closed down control system keeps would-be tinkerers and hackers from actually using these things to their full potential, and their use of a proprietary firmware combined with a proprietary design means repairing and extending this thing is next to impossible. You, with a Maker Select, know that the extensions the community comes up with are the best part. The things missing out of the box on a lot of printers are a huge pain to work with. Imagine not having the option to add those. This is, in essence, the Tiko. The king of "well, yeah, but it works."
About those missing things. No layer fan. No heated bed. 30mm/s max "safe" movement speed. A layer fan on a PLA only device is kind of the ultimate must-have. You need that shit to bridge worth a crap, or print anything small, which is also important on a printer with such a small bed! That bed, being unheated, means that while they say it can use other materials, it kinda can't. Yes, PETG can be printed without a heated bed, yes, a lot of materials can be, but it's in the same way that you can make a cross country road trip on nothing but a mountain bike and a massive stockpile of turkey jerky. You can, but dear god, don't. Lastly, that low mm/s. That's a product of that 15RPM those poor motors are capable of. Bridging with no layer fan is hard at twice that speed, but at such a low speed, you're looking at major sagging. As in, just, don't make things with gaps in them. They claimed something about their titanium nozzle compensating in some way for this, but that literally makes no sense, and I honestly felt personally insulted when I read that. This brings me to my next point...
The people running Tiko seem to think they're the smartest people in any room. In one of their AMAs, I asked them why they used a leveling system that puts extra strain on already overtaxed motors, and they compared themselves to Elon Musk for some reason. This is a group of people not used to being called out to actually explain what they're doing. Every question is met with buzzwords and the conversational equivalent of jazzhands. Seriously. take a look at their AMAs. The utter contempt they seem to express for the community they're trying to enter is astounding. With such choice, juicy lines as "Open source is great, but it's time to leave the nest," they really solidified their reputation. The best part is that, despite closing everything they could about their printer, they're using a delta design. Delta printers are the most open line of printers there are. Almost entirely a priori from the rest of the printing industry, delta printers were spawned when a bunch of hardware hackers looked at an industrial robot and said "hey I betcha we could make that thing barf plastic into Yoda heads." So Tiko took every bit of the last half decade of work that's gone into the Rostock and Kossel designs that they could manage, and decided that contributing back to the community was for chumps. Like all of us, they stand on the shoulders of giants, but unlike everyone else, they chose to piss in their hair.
Speaking of that behaviour, that brings me to their litigiousness. In their first AMA, they opened by bragging about the law firm they'd hired to pursue "false innovators" (ironic) for copying anything they'd created. They claimed they needed to jealously guard every idea they'd ever had, and that this was how they'd succeed. When informed by /u/jebba (the CEO of Aleph Objects, AKA the guys that make the fucking LulzBot) that this behaviour really wasn't helpful in the printing industry, they redoubled their efforts, contending that these were to protect their work producing products in China. When informed by several people in the manufacturing industry that, haha, no, it's cool if you want to patent stuff, but the Chinese do not give a single solitary shit about if you have a patent or not when they rip stuff off, they stopped replying. But again, this is them positioning themselves to look like electronics, instead of tools. To people outside the industry, the idea that you need to guard your ideas closely and keep your code internal is commonplace. It's just how it's done in a lot of tech. But in printing, the best machines are open, and even ones that cost as much as a decent used car use firmware with almost 100% community developed code, and open slicers. Home printers developed in a way wholly alien to the rest of the tech world of the last two decades, radiating out with community development like the old home computer clubs, and even further back with home radios hand soldered together on wooden cutting boards (fun fact: that's where the word "breadboard" came from. Early home radios made by hackers were made with cutting boards as backing. Neat right?). Not centrally developed, and given to a begging public. Printers are the ultimate Bazaar and any attempts to drag them into a Cathedral should be met with hostility.
Alright, I think I could go on for a few more paragraphs, but this seems a good stopping point. If anyone who's bought a Tiko is reading this, I want you to know I sincerely hope you enjoy your purchase. That's not sarcasm. Printing is fantastic, and whatever you use, I'm glad you're here. Everyone loves their first printer, regardless of what it is, and I'm sure you'll get some great stuff from it if you give it some work. However, that doesn't change what I think about the company that made your product.
First issue you'll have will be in getting it focused right. The lenses can focus past infinity so that the AF feature can operate. What you're going to be doing is roughly akin to doing shots of city streets for car-light streaks but with the iris wide open. Not moving the camera at all is very important.
Try not to use ISO over 1600 as it generates heat and messes with image quality.
Get a true black-cap for the lens so you can do a couple bias shots while taking each set of pictures - this helps with noise and hot pixels. Remember to turn the camera off and on between shooting segments to save on battery charge. If you have some kind of remote timer control for the camera that can be used for shutter duration you'll want it. Also check to see if you can get a copy of BackyardEOS on trial to use over the weekend. It can help with focus etc but requires a laptop/computer to use - which may be a complication considering battery life on a laptop.
That 50mm f/1.4 looks interesting tbh it produces http://www.lonelyspeck.com/wp-content/uploads/2014/07/ian-norman-orion-processed-1400.jpg (not mine) images when used with a tracking mount. ( http://www.lonelyspeck.com/astrophotography-101/ scroll down to "What Is Astrophotography" ) and is likely the go-to lens of your kit for 16 to 20s exposures that are then stacked.
This shot http://www.alexnail.com/blog/wp-content/uploads/2014/06/f4-stars.jpg was made with the 16-35 f/4 at 16mm at ISO6400 for 30 seconds. It has star streaks you can see but produces a beautiful amount of detail.
What you should do to start with is go for the beauty of it, see what you like to see.
Right now we have a mean and nasty moon up in the evenings 8( Which may make the whole deal a problem.
If you end up getting a sky tracking mount I can see you using the 16-35 f/4 a lot. Its overall image quality all the way to the edge of field is excellent but that big 50mm f/1.4 is your stronger light gathering lens. For the most part you'll be operating in the 14 to 24s range of exposures depending on which lens with a fixed mount BUT you don't have to spend a lot of money to get a simple tracking mount. A used german equatorial mount from a garage sale, the kind you have to turn by hand, with a simple telescope on it can be used as a reliable guiding mount. Many of the old ones can be had for $25 or so and come with an attached piggy-back screw in place. For even the 50mm lens a 40 second exposure with simple polar alignment will produce stunning results and the coolest thing is you can get a little "tangent head" to mount on the garage-sale toy which lets you aim at bright stars while the camera is aimed elsewhere. Time is money, a little old tasco EQ mount is light and easy to move around.
https://www.amazon.com/Orion-9055-Tabletop-Equatorial-Telescope/dp/B0000XMX8O/ref=sr_1_3?ie=UTF8&qid=1465991481&sr=8-3&keywords=manual+equatorial+mount and https://www.amazon.com/Orion-7826-EQ-1M-Electronic-Telescope/dp/B0000XMWBW/ref=pd_bxgy_421_img_2?ie=UTF8&psc=1&refRID=BDGVXK5F7TQPJ47R0PN9 combined can give you good 90s tracks for the 50mm. You can find equipment like this used for very very little cash.
The camera was on a star tracker mount that was aligned with the celestial North Pole and moves the camera at the exact speed that the sky moves past.
Omegon Mount Mini Track LX2 NS, Set https://www.amazon.com/dp/B07JF3X6VN/ref=cm_sw_r_cp_apa_i_XRriDb3RYNSMK
And the earth is flat!
You don't need very much magnification at all, as they're visible with the naked eye. But if you want a really clear, detailed image, you want to collect a lot of light, so the diameter of the telescope is what really matters. The bigger the better. This one is a pretty good bang for your buck, especially if you also get this to go with it.
You might consider using an Arduino Mega 2560, or an Arduino Uno combined with a "motor shield" (plugs right on top of the Arduino). I have no experience with any such shield, so I will explain the basics of how to turn stepper motors without using one.
A typical stepper motor has 4 wires which means is consumes 4 digital pins on the Arduino. 6 X 4 = 24, so the Uno won't have enough digital pins, but the Mega 2560 will have plenty.
You will probably use NEMA-17 stepper motors. They are common, and inexpensive. "NEMA-17" is a standard, specifying the physical "face" of the motor: it's size, where the mounting bolt holes are positioned, thread size, shaft diameter, etc. Beyond that, not all NEMA-17 motors are the same. There are differences in the "length" (measured along the shaft axis), holding torque, Voltage, and Amps needed. More powerful motors tend to cost more.
Compare: https://www.amazon.com/Torque-Current-Stepper-Motor-Extruder/dp/B00PNEQP1G
Compare: https://www.adafruit.com/product/324?gclid=CjwKCAiAy-_iBRAaEiwAYhSlA3-xRR0UZE7jNieiR2F545xYR4L8G7LnTsNopJaziuhrSjR4_f67ThoCWkcQAvD_BwE
Since you need 6 motors, you might consider buying two or three different NEMA-17 motors, compare them, then buy 5 more of your "winner".
NOTE: Do not plug the motors directly into an Arduino; that would be bad (could harm the Arduino). What I do, connect my motors to L298N motor controllers, then connect the controllers to the Arduino. The motors will have their separate power supply. For example, if each motor draws 0.35 Amp at 12V, you'll need a 12V power supply which can put out at least 6 X 0.35 = 2.1 Amps (or, buy 6 power supplies at 500 mA each). Actually, you'd need even more than 2.1 Amps because the motor controllers are not 100% efficient. So, 5 Amps, whatever. If the motors you pick draw 1.5 Amps each, do the math... 6 X 1.5... you'll be shopping for 15A power supplies.
Once you have a stepper, and a motor controller, an Arduino, and power supplies - and it's all connected, you'll probably start with an example (built into the Arduino IDE): File --> Examples --> Stepper --> stepper_oneRevolution
You'll find that you need to do a little bit of arithmetic to turn something, say, 90 degrees. Your motor will (probably) do 200 steps-per-revolution. So, it works out that 50 steps is 90 degrees, 25 steps is 45 degrees, 100 steps is 180 degrees, etc.
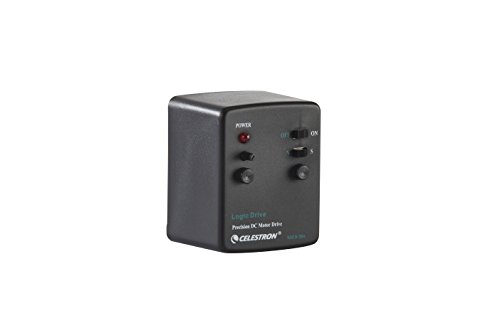
He's right, I too own one. I struggled with this for a while before I realized what the problem is. If you feel like messing with it for hours you can get it close. That scope isn't really powerful enough that your going to notice if it's a little off anyway. That being said. It's a great beginner scope. Buy the RA drive for it and it can provide fun viewing of the planets and SOME dso's just get used to squinting and asking yourself, is that what I think it is?! Eventually I upgraded to a XT8 and now really know the difference between Bird Jones 1000mm Focal length and true 1200mm focal length.
Celestron R/A Single Axis Motor Drive for the AstroMaster Telescope https://www.amazon.com/dp/B00039R23G/ref=cm_sw_r_cp_api_Gvs3xbDQXJDN1
Celestron Collimation Eyepiece 1.25" https://www.amazon.com/dp/B00009R7RJ/ref=cm_sw_r_cp_api_xws3xb7FXWMSM
(Edit: Links)
Sure! It's this one!
Short Body Nema 17 Bipolar Step Motor 3.5V 1A 18.4oz.in/13Ncm DIY CNC https://www.amazon.com/dp/B00PNEQ79Q/ref=cm_sw_r_cp_api_Hna9yb6CWH606
Coding can be done in python. Rasperry pi has by default a RPi.GPIO package that gives you very very easy interfacing with the GPIO pins on the board. You will need some resistors, and some leds, and a breadboard (board that lets you put wires into it so you don't need solder). Assuming you have a pi and that is working I would get these:
breadboard
jumpers
resistors and leds starter kit
DMM, not necessary but nice to have.
Here is a nice guide to the pinout on the pi and the numbering system
This is a nice guide to using rasperry pi GPIO python package
This is the generic python tutorial assuming you do not know python.
edit:
while we are at it here are some other fun things you can do with a pi:
Make it move with these ICs and DC motors. Not pi can not hook up dc motors directly, thus the chips. There are also rover kits with dc motors and wheels already.
There are sonic range sensors.
GPS receivers
temperature sensors
uv light sensors
There are a lot of projects you can do with relatively cheap sensors with the pi.
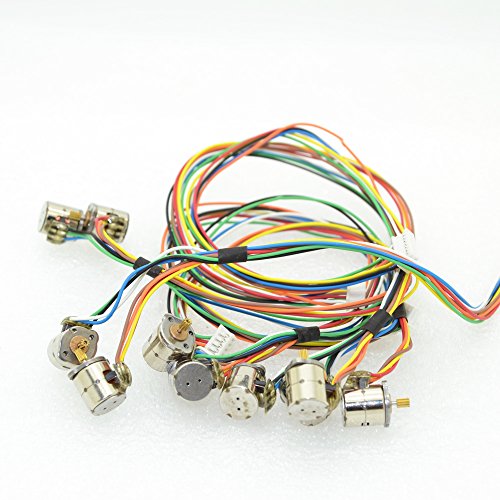
I bought this a while back. They are the tiniest I've seen. So tiny, I haven't quite found a use for them yet. Good price though:
50pcs totally 5pcs each of 10 kinds 2 Phase 4 Wire dc micro stepper motor Mini stepper motor Assorted with Plastic box 5086 https://www.amazon.com/dp/B00NNM66GO/ref=cm_sw_r_cp_api_cJ0uxb3WX7NG8
This might be bass-ackward but you could rig a small peristaltic pump to draw 5ml of water from the tank into a test tube, and another to drip-in the usual chemical test kit solution, then a webcam (or other optical sensor) to compare the color and produce a digital result. After testing, you would need to tip and flush the test tube a couple of times. It sounds like you would need 3 stepper motors, and these $2 ones might do the trick: https://www.amazon.com/Longruner-Stepper-Uln2003-arduino-LK67/dp/B015RQ97W8/ref=sr_1_4?keywords=stepper+motors&qid=1557919422&s=electronics&sr=1-4
​
There are plans on Thingiverse for 3D-printed peristaltic pumps made from stepper motors and skate bearings.
Here's the pancake stepper I use. It works well and was only $10 on Amazon Prime:
https://www.amazon.com/dp/B00PNEQ79Q/
It's called a monster moto shield
ARCELI Dual VNH2SP30 Stepper Motor Driver Module Monster Moto Shield Replace L298N https://www.amazon.co.uk/dp/B07J2PNWP1/ref=cm_sw_r_cp_apa_i_4WbYCbQBXY0K1
For $170 with this tripod and this drive you can do a whole lot more than the K-5 can do.
Orion 7826 EQ-1M Electronic Telescope Drive
https://www.amazon.com/dp/B0000XMWBW/ref=cm_sw_r_cp_apa_i_4Y-nDbNCE3DJ4
I accidentally bought the motor for the eq 2. So make sure you get the right version. It works great . It does have a bias for tracking things on the west side of the meridian because the telescope can bump into the motor. You also should be careful on where your counter weights are. Aside from that I have has zero problems.
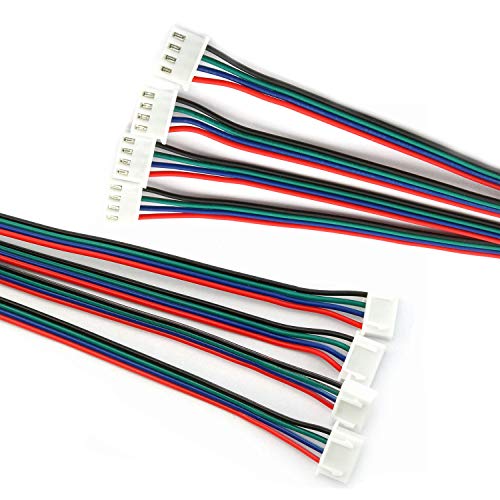
Get a new cable, something like this. That is just a guess at what length you’d need, measure your length like he’s suggesting.
https://www.amazon.com/2-phase-4-wire-stepper-stepping-Copper/dp/B06XTX2CTW/ref=pd_sbs_23_1?_encoding=UTF8&pd_rd_i=B06XTX2CTW&pd_rd_r=XG7FFMD7EHYEJ333E7ZW&pd_rd_w=3QEOv&pd_rd_wg=C8nIQ&psc=1&refRID=XG7FFMD7EHYEJ333E7ZW
These are pretty small. I doubt anyone could make a printer out of them. Sorry for the giant url
motor with discrete stops on it and either acme screw or spur gear to change switch position would do it. For example. Solenoids with enough force would be quite large and bulky.
https://www.amazon.com/12VDC-Stepper-Linear-Double-Bearings/dp/B01LNJFKA6/ref=sr_1_3?ie=UTF8&qid=1518267809&sr=8-3&keywords=linear+motor
https://www.amazon.com/4V-6V-stepper-slider-dia15MM-degrees/dp/B014IGBECO/ref=pd_bxgy_328_img_2?_encoding=UTF8&pd_rd_i=B014IGBECO&pd_rd_r=8VM77MVQ4EJSYT5QVBZH&pd_rd_w=rhSgb&pd_rd_wg=0kdYv&psc=1&refRID=8VM77MVQ4EJSYT5QVBZH
Bit rube goldberg of a setup depending on the motor and soldering would be more discrete.
I agree that a servo would be the best option. But a servo can only rotate 180° so if you need it to rotate more you have to go with a geared down Dc motor.
https://www.amazon.co.uk/sourcingmap-Reduction-Electric-Gearbox-Centric/dp/B01KTZXZDE/ref=sr_1_6?ie=UTF8&qid=1491417991&sr=8-6&keywords=dc+motor
https://www.amazon.co.uk/0-06A-5Kg-cm-Electric-Reducing-Geared/dp/B00977HK2S/ref=sr_1_7?ie=UTF8&qid=1491417991&sr=8-7&keywords=dc+motor Or a stepper motor.
https://www.amazon.co.uk/HALJIA-4-Phase-Stepper-ULN2003-Arduino/dp/B01DM8N9HW/ref=sr_1_7?ie=UTF8&qid=1491418126&sr=8-7&keywords=stepper+motor This one even comes with a h bridge.
They have a small motor with an unbalanced weight attached to the shaft that spins and creates the vibration.
Below is an example of some.
https://www.amazon.com/10pcs-3500RPM-Pager-Phone-Vibration/dp/B016VQSZ7Q/ref=sr_1_4?ie=UTF8&qid=1506609399&sr=8-4&keywords=vibration+motor
Awesome!
So here are some additional pics. I don't have a pic of the stepper mounted but here are some additional pics:
https://imgur.com/a/fJChE
The 12mm hole off to the side with the two smaller threaded holes would be where the stepper goes. I would just need to print a bracket to connect the stepper shaft to the pot.
The stepper is non captive and there is some slop in the mechanism. Luckily it only needs to move 30 mm or so.
I'm thinking of swapping that stepper for something that can be braced. I'm not sure which is better:
4-5V dc 500mA 2 phase 4 wire Micro stepper motor Stepper angle 18 degrees with screw slider Sliding table for DIY mini slipway https://www.amazon.com/dp/B00SWDQUGK/ref=cm_sw_r_cp_api_CxD-yb0MHTQJ9
Dc 4-9v 500mA 2 Phase 4 Wire Drive Stepper Motor Screw with Nut Slider Step Angle 18° https://www.amazon.com/dp/B016MB8TWQ/ref=cm_sw_r_cp_api_PzD-ybTSEPQT4
Sucks that they are 18* steps but it's nice that they have a structure to support it.
I cannot find a cg-5 anywhere, but what about a CG-4 with a motor?
Personally I'm still using direct-drive, not Bowden, which is why I'm swapping out the extruder motor for a smaller one. The one I'm using is this one, and you can find details about how to set up the wiring harness on soliforum if you're not confident in rewiring it yourself just going by a multimeter and the spec sheet.
If you're just gonna do a bowden setup though, you may as well just stick with the stock motor since there's no real reason to change it- the whole idea of a bowden extruder is to keep the weight of your extruder off the moving parts of the nozzle, so you can print faster, meaning you won't need to reduce the weight of the motor itself.
I could be wrong about the stock extruder specs, but I believe it's right around 42 Ncm. The BMG is a 3:1 gear ratio, so you're getting 3x torque output at the filament at the cost of the stepper running at 3x speed. 42/3=14 Ncm, so anything around that will give you about the same torque as the stock setup. That being said, I picked up a 13 Ncm pancake stepper for my direct drive setup which is working well for me, albeit running a bit too hot for my tastes. This one specifically. You could likely find something similar on eBay or Amazon.ca that would match that.
I know you didnt ask me but im using this one: https://www.amazon.com/gp/product/B00PNEQ79Q/ref=ppx_yo_dt_b_search_asin_title?ie=UTF8&psc=1
Qunqi NEMA17 Stepper Motor bipolar 4 leads 34mm 12V 0.4A 26Ncm https://www.amazon.com/dp/B017B8UF4O/ref=cm_sw_r_cp_apa_KgrQybA1SQS9A
These are the two new ones I bought
Short Body Nema 17 Bipolar Step Motor 3.5V 1A 18.4oz.in/13Ncm DIY CNC https://www.amazon.com/dp/B00PNEQ79Q/ref=cm_sw_r_cp_apa_zhrQybAF00AD8
This is the short body one.
https://www.amazon.com/dp/B00PNEQ79Q/ref=cm_sw_r_cp_apa_i_ANMFDbTMYV3KF
It will work perfectly for a 3:1 direct drive setup.
ok if you are going to do robotics. you will need a few things. Not all of them are necessary. Pick what you want. I generally purchase things off Amazon but I am sure anyone will attest there are cheaper options.
https://www.amazon.com/gp/product/B01LXY7CM3/ref=oh_aui_detailpage_o02_s00?ie=UTF8&psc=1
https://www.amazon.com/gp/product/B00ODQM8KC/ref=oh_aui_detailpage_o00_s00?ie=UTF8&psc=1
Once you get those working, you will need sensors but that should get you started.
I bought some door actuators. They use linear movement. Combine that with a L293D chip to change polarity and you have a simple button pusher for cheap.
PIXNOR 10pcs L293D DIP 16-pin IC Stepper Motor Drivers Controllers (Black) https://www.amazon.com/dp/B00ODQM8KC/ref=cm_sw_r_cp_apa_EkxBybF3HW1ZK
InstallGear Universal Car Power Door Lock Actuators 12-Volt Motor (2 Pack) https://www.amazon.com/dp/B00CZBQCR2/ref=cm_sw_r_cp_apa_OjxBybTETBVE1
Just adding an update for future reference to others who may be looking for the same...
While some new kind of specialty hardware could be created, the best bet is likely to find an existing high-volume component that could repurposed (making it more reliable and cheaper than a custom on-off part).
In particular, there are some really small/cheap hobby servos used for micro RC applications (~$5/ea) and mini stepper motors for use in camera lens focusing applications(~$1/ea).
The servo will hold position because of friction in the gear train, and the stepper will hold position because of the magnetic "cogging" in the motor.
I'm using these stepper motors
But I've got the gpio pins directly attached to this little controller board (little more than an h-bridge circuit (ULN2003 APC) and a tiny capacitor)
Interfacing was as simple as importing a library; RPi GPIO for Python, which comes already installed on the Pi :)
I started hooking up the steppers by setting the pins to output, and also created a method that sequenced through the steps by setting each pin to high or low
Looks like this product on Amazon. Its a 4-phase stepper. The 5 wire configuration confuses me a little bit, maybe I'm up too late to figure it out. The steppers I've worked with in the past only have 4: 2 for each winding in the motor.
Do steppers exist that require a voltage source into the motor itself? I'm used to using a driver like this one from Pololu rather than a shield, it runs with just 4 pins, again 2 per coil.
Wow these are quite pricy for my broke college student budget haha. Right now I have a Celestron 127EQ telescope with a German Equatorial stand and a lens adapter for my DSLR. Could I just use a motor like this one (compatible with my telescope) for tracking?
I've also found a few instructables on how to build tracking systems and I'll probably try my hand at these if you don't recommend the motor in the link above.
This refractor on a CG-4 EQ mount looks to me like a good starting point for astrophoto for less than what you want to spend. You have to add motor drives, a polar finder scope, a camera adapter, and T-ring to connect your camera but then you are good to go.
There is a version of this setup using a 150mm reflector as the imaging scope that has given very impressive results. "Jarrodnb" has posted his images here over the last several months. Whether to go with the refractor or the reflector is probably a matter of preference. The reflector gathers more light and has a shorter f/ratio, both of which enable shorter exposure times.
I don't think you can get an imaging setup with autoguiding like the CG-5 for the money you are looking to spend, but a lot of people may say that it is needed for decent results.
I am using a wedge-mounted Celestron 8 I got on Craigslist along with a second hand Canon 400D, and so far I have this image of M13. It's FAR from perfect but I enjoyed the process of making it.
I'm a beginner to astrophotography and I'm wondering about scopes, mounts, and guiding. I have a Canon T5i with a 18 - 55mm kit lens and a cheap thrift store tri-pod. I also have a Meade Infinity 60mm refractor telescope. The scope hasn't really been useful for anything other than photos of the moon, but I've been able to get some nice shots of Orion with M42 with my lens at 55mm untracked at 4" with no star trails. I'm interested in DSOs, but would also like to observe along with imaging.
Is this a good choice for a Mount? And would this be an aceptable motor and finder for polar alignment? Also is an auto guider necessary if I take the time to set up the polar alignment properly? I saw that the EQ5 is recommended in the wiki, but that is beyond my budget and I don't really care if I don't have a Go-To tracker built in.
I haven't looked too far into scopes yet, but I have a feeling that asking for one that is good for imaging and observing is asking to have my cake and eat it too. Is it best to get something like an 80mm refactor scope for imaging and a 6" or 8" reflector for observing? Could I switch them out and use the same mount?
Omegon Mount Mini Track LX2 https://www.amazon.com/dp/B077N59DCP/ref=cm_sw_r_cp_api_i_mCfvCbT9P7C23