Best putty knives according to redditors
We found 95 Reddit comments discussing the best putty knives. We ranked the 43 resulting products by number of redditors who mentioned them. Here are the top 20.
We found 95 Reddit comments discussing the best putty knives. We ranked the 43 resulting products by number of redditors who mentioned them. Here are the top 20.


As a someone who detail cars.. This WILL scratch the shit out of your clear coat, especially if there is a lot of snow on the tarp as you drag it off. I wouldn't suggest this to anyone who cares about their cars appearance, if you drive a beater tho.. Have at it.
Edit: A lot of people are making suggestions about if they can use this or that instead to avoid scratches, so I'll just give my best advice. Winter is tough on cars in many regards, so your car and it's paint is going to take a bit of a beating no matter what. The most important thing you can do to care for your car in snowy climates (besides regular maintenance) is to wash it frequently, and when you go through a car wash pay the extra buck or two to get the under carriage. Salt and rust is far more damaging to a car then some scratches so that's first (Note: Go to reputable car wash to minimize scratches) . Honestly you're going to get scratches no matter what you do, so all you can do is try your best to minimize them. Using a tarp is a bad idea because as you remove it will drag the dirt and grim that's on your car along the paint. If there is snow on the tarp it will add weight digging into the paint even further. General purpose tarps are also harder then your paint and by itself could causing nasty swirls and scratches. If you'd like to use a cover use one that is designed for cars, they're typically made of a softer materiel that causes less scratches, but still remove the snow prior to trying to pull it off.. this defeats the purpose of this LPT tho. The fastest way to remove snow from your car with doing the least damage is to use regular snow brush or brum. They will cause some light scratching as anything would, but it will be significantly less then a tarp and you might not even notice them. If you want you can even put your wipers up if you can to make clearing your window easier. Best scenario is to garage the car when you can or use something like a leaf blower to blow the snow off, but that's not always possible/practical..and in all honesty a bit overboard for most cars. Also if you own a black car..your're screwed swirls and scratches are the bane of glossy black paint.
Third edit: Get your car waxed, if your cars paint is properly maintained (i.e wash polish & Wax etc) the snow/water will bead up and slide of easier reducing the amount of scratches.
Second edit: Buy a shitty winter beater(that runs decent) slap some winter tires on there and not give 2 fucks about it.
Gold for me!? Haha, why thank you generous person.
I've done most of the smoothing techniques.
XTC-3D does not work on larger flat surfaces. It only makes flat surfaces wobbly uneven. It works great if you have a lot of curves. Don't expect to sand this easily. It's a pain in the ass to hand-sand with sandpaper. If you have a file, it works much better. You don't have to wait the entire day. It sets non-sticky hard in about 6 hours. Another downside of XTC is that you have limited working time. It starts to harden after 20 minutes and its hard to spread even after that.
The best method is to spray everything with filler primer spray can. Sand it light with 80 ~ 100 grit sandpaper. Anything higher is harder to sand.
Then use this to fill gaps/uneven places: https://www.amazon.com/DELUXE-MATERIALS-DLXBD044-Perfect-Plastic/dp/B0076LAVFK
Sand with 200 grit paper. Repeat if you still have uneven places. Finish everything with 800 grit paper. It will come out so smooth you want to rub your face against it.
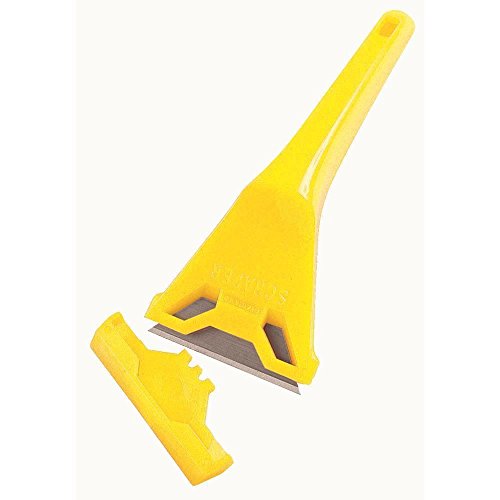
My scraper has a brush side, and on that same side also has a rubber like bar that I can use on my car and paint will be fine. Then of course the other end is a scraper.
Like this
Here is a list of things that people will always need, I understand you can't stock everything as overhead is an issue with retail, and storage as well, but most of these are small enough that they can occupy the shelf space you currently have. As for the larger things, like the 2020 extrusions, you could sell them in common lengths of 500mm and 1000mm and let the customer cut them down to the size they need, or just don't carry these at all. It's not a niche item, but for a retail store like you it would be hard to store and maintain, but man, would it be nice to be able to get those locally if i needed a piece for a project instead of having to wait on mail order.
this is just a basic list, others have listed other things as well, Steppers, Belts, Pulleys, Bearings etc. If you want 3d printing as a reason for other people to go to your store, these items will satisfy the need. Just keep prices fair, I have no issue paying a bit more compared to amazon to get it today.
If you have any questions about getting the Photon going, give me a holler. I made all of the regular mistakes, so can probably help.
I will say the following:
Leveling the plate is the most important thing you can do. My process is a lot like the generic instructions, but I take it a step farther: When I level the very first time, I loosen the top screw, and the four build plate screws as well. I then use the paper method (Get a regular piece of printer paper under the plate and gently .01mm lower the plate from 0 until the paper can be pulled out, but not pushed back in. I then hold the plate in my hand and don't let it move as I tighten down the 4 plate screws in an X formation. I then check the paper, and usually have to lower it a few .01 mm at a time until it's back to being tight. Then I hold the plate again by hand and tighten the center screw. Finally, I hold the square head and tighten down a quarter turn or so more to really lock it in place. At that point, I try to leave it alone until it gets moved, or prints get weird. I haven't had to re-level this since then.
For the Thumb Drive: Seriously, replace the one it comes with. I fixed a lot of problems by spending $10 at Frys. Resist temptation to get a large drive. You don't need it, and it can mess up on the Photon. I got a 16GB Sony, and it works really well. I still have occasional issues where I've ejected the drive, and will have to put it back in the computer, and re-eject. This happens about 1/6 or so times. A little irritating, but not a huge issue.
Download Chitubox. Use it. Forget the included Photon Slicer, which is simply an older version of Chitubox, and is inferior in every way.
Don't be afraid to use 3rd party resin. Like I said, I use Elegoo grey. It's a little thinner, but that doesn't seem to give me any less in the way of prints, but it does make it a little easier to get off of the build plate.
Invest in some plastic putty knives. By some, I mean a lot. They're about $1 each at Home Depot, or you can buy in bulk from Amaozn. I also sometimes use a [plastic razor scraper ] (https://www.amazon.com/gp/product/B076BBW1WM/ref=ppx_yo_dt_b_asin_title_o05__o00_s00?ie=UTF8&psc=1), but honestly, the plastic putty knives work great. I never use metal on the build plate.
Stir your resin between prints.
Don't overfill resin.
Inspect your print basin every few days for leaks. A leak onto your LED screen is a bear to get off.
Buy a big pack of nitrile gloves, a bunch of 99% IPA, and some jars or bins where you can rinse off resin.
You can buy a $11 UV nail curing station from Amazon that'll work beautifully to cure your prints. It actually works great, and there's no real reason to buy something more expensive, except for convenience.
Anyway, I could go on, but this is a basic overview based on all of the mistakes I've made, and hopefully learned from!
Edit : thanks for the gold!
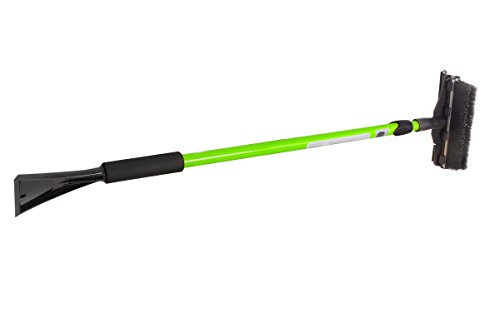
Yup, totally agree. They seem like a good idea, until that bitch is frozen to the car and you have to chip it out with the ice scraper anyway. More often than not if you have to use the cover the rest of the car will be covered and you're back to using the scraper/brush again. The best thing you can get for you car in the winter is a solid scraper with a nice extender like this guy.
You want plastic razor blades.
https://www.amazon.com/FOSHIO-Scrapers-Contoured-Refillable-Application/dp/B076BBW1WM/ref=sr_1_2_sspa?keywords=plastic+razor+blade&qid=1568816210&sr=8-2-spons&psc=1&spLa=ZW5jcnlwdGVkUXVhbGlmaWVyPUEzSlc0M0NQTkkzSFJDJmVuY3J5cHRlZElkPUEwNjI3NDg5M09TSkVBOTJJV1pIOSZlbmNyeXB0ZWRBZElkPUEwNjM2MzYwM0xLREs0T05IVjhJUCZ3aWRnZXROYW1lPXNwX2F0ZiZhY3Rpb249Y2xpY2tSZWRpcmVjdCZkb05vdExvZ0NsaWNrPXRydWU=
http://www.thewindscreenco.co.uk/news/top-tips-removing-car-window-stickers/
WD40 on kitchen roll, with a stanley blade, will get rid of any stickiness.
EDIT: to clarify, I mean use a blade without holder. this gets best flat contact with surface. use carefully. if you don't fancy this, they make holders for this scrapper action, but use very carefully. also watch out for the screen heating elements often stuck to inside.
At this point there's not that much I would do unless you feel like repainting it, and you already decaled it. Unless you have spares, it's not worthwhile. Just learn from it.
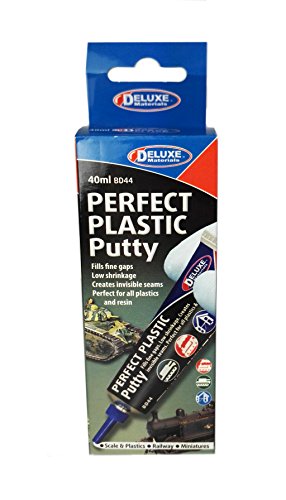
I might be wrong, but are you from the UK? A manufacturer in your country makes a nice putty, called Perfect Plastic Putty, by Deluxe Materials. I just recently bought some of theirs and it works quite nicely. While wet, it can be cleaned with water, and is a good filler.
PVA can be used as a filler in small quantities; it might work in this case.
In the future though, you should putty these things and test-fit before you paint, so you can solve the problems before it starts.
Other fillers that I have used include Squadron White Putty, which you can smooth out with nail polish remover (which must contain acetone), tamiya filler, which you have to sand, and Mr. Surfacer 500, which is more like thick primer. (It wouldn't work for what you're trying to do).
In this case, if you had to do something, I'd use white glue and slowly build up the seam. However, white glue doesn't sand well either, so you're unlikely to get it to blend without sanding it, destroying the finish, and removing the decals.
In the future, fill gaps prior to painting. It's easier and shows you what you need to work on.
And when i say "excess" plastic, that's not always flash or residue from the molding process, or the attachment points on the sprues. Sometimes, kit parts are too thick or something, and I shave the inside of the parts so that it will mate with the part on the model better.
The putty I mentioned is here:
http://www.amazon.co.uk/Deluxe-Materials-Perfect-Plastic-Putty/dp/B0076LAVFK/ref=sr_1_1?ie=UTF8&qid=1394322259&sr=8-1&keywords=perfect+plastic+putty
Also, with putties, you almost always have to either clean up the seam with some kind of solvent (e.g. nail polish remover for Squadron White, or alcohol for Mr. Surfacer), or sand it to fit, unless you are so good at applying putty that you get exactly what you need exactly where you need it. I usually have to sand my stuff. To do that, cheap wet and dry sandpaper from the hardware store will do. Get one lower grit one, and a medium grit sheet, and then the finest one you can get. (The grits I use respectively are 320, 600, and 1500; I would get higher but that's what the store sells, and it costs less than a dollar per sheet). So putty is not a magic solution, you need to wet sand it afterwards to remove the excess. On older model kits with raised lines, this will obliterate the detail; the only way around this (in my experience I'm sure others have something else to say) is to tape off the areas with raised detail, and then carefully sand in the area that you don't have masked.
Also, thick superglue is also used for filling gaps, but it will craze clear parts, so don't use that here. (Recall episodes of CSI where they get the fingerprints from the drinking glass or clear object with some superglue in gaseous form? That's the same process that clouds the clear styrene if you just superglue on it.
These might be some more "advanced items" but I have found them all to be of extreme usefulness and not too expensive to justify. Note: Where provided Amazon links are for reference only and I have no financial interest in the sale of the item listed.
- A set of ball-tipped metric hex key wrenches. The ball end allows you to get around obstacles and still rotate the fastener. https://www.amazon.com/Bondhus-10946-Balldriver-L-wrenches-1-5-5mm/dp/B0006O4AEC Note: You'll only need, IIRC, three sizes but the set is still cheaper than buying the individual keys.
- A clean popsicle stick works great to "scrape" or swipe the occasional pre-print and post-print drip from a hot nozzle's orifice and cannot damage the metal. Actually a suggested tool by a lot of industrial hot melt adhesive system companies for the reasons I just stated.
- A small open topped container, about the size of a kids sand pail, for all the waste support, brim, raft and skirt material you'll be generating. I happened to have a clean empty plastic 1 gallon OJ jug and cut off the top where the jug started to narrow leaving me a 8" tall "bucket". Small enough to keep next to the machine because tiny bits of PLA...
- A small magnifying glass, good for layer quality inspections.
- A small AA powered penlight, I had one anyway on hand anyway but was surprised at how often I needed it around the printer that it now lives there full time.
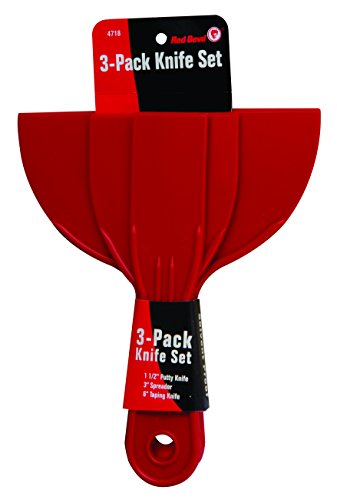
- A plastic paint scraper since I do lots of technical prints that leave large amounts of random first layer support spaghetti stuck all over the build plate. https://www.amazon.com/Red-Devil-4718-3-Piece-Plastic/dp/B001SBJIA8 (I know for a fact this set I've linked to is soft enough not to scratch the PEI coating. You actually only want the smallest scraper in the set, the other two can be used for what ever but at $2.99 per set even if you never need the larger ones it's no big loss.)
- A small table-top digital humidity and temperature gauge to monitor your printer's local "micro-climate". At the beginning I found that there was some temp/humidity related print quality issues where I had first set up my printer that forced me to relocate it and the only way I figured that out was by using this gauge. https://www.amazon.com/gp/product/B0013BKDO8/
- Good quality needle nose pliers with some grip to them. The pliers Prusa included with the printer are, IMNSHO, junk. I have both of these and am satisfied with both:
Good: https://www.amazon.com/Xcelite-378M-Profile-Electronic-Serrated/dp/B004UNFK58
Better (and cheaper): https://www.amazon.com/gp/product/B00FZPHEW2/
Oops my bad I’m at work so just skimming. No me and my roommate work in body shops and we each got one from our shops lol. We use plastic blades to peel off decals and bumper stickers and whatnot.
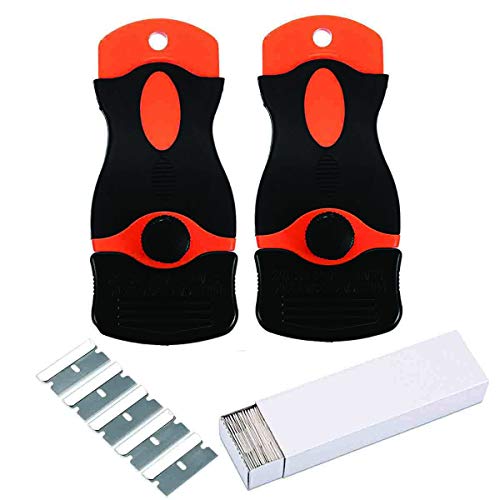
FOSHIO 2PCS Plastic Razor Scrapers Knife with Contoured Grip + 100 PCS 1.5 inch Refillable Double Edge Plastic Razor Blades Ideal for Auto Window Tint Vinyl Tool Application https://www.amazon.com/dp/B076BBW1WM/ref=cm_sw_r_cp_api_i_T0GjDb9ZB50AX
This was recommended to me a little while ago, Perfect Plastic putty.
Best filler I've ever used, it goes on, however you want it, then you just let it dry for a few minutes to an hour or so, then you can use a damp cloth or a damp cotton swab and wipe down the excess since it cleans up with water. It's very similar to milliput, but it seems finer to be and its easier to use since it's just a paste, not two solids you have to mix.
I find this type of putty is the absolute best kind, because it requires no sanding at all to clean up, meaning you won't destroy panel lines or any raised details.
I live in an area with heavy snowfall and prefer this type of brush since it removes a lot of snow quickly. Not necessarily recommending that specific model- mine is one my dad bought at some random auto parts store.
For rollers, get a tool called a five in one. It can be a seven or eight in one. Any paint store or section of box store will have them. Look at the pic, see the rounded cut out? Use that to scrape excess paint out of the roller, thats what its for. you'll scrape half a pint of paint using that tool.
http://www.amazon.com/gp/aw/d/B000GAX812
I use this
TEKTON 5878 11-Inch Long Reach Scraper https://www.amazon.com/dp/B0037V0EOQ/ref=cm_sw_r_cp_awd_a13Nwb8DJVNGD
Its an endearing model because every modeler has one like it. Pretty good job for being a first kit!
As for airbrushes... I started with the super cheap Master brand airbrush. Later on I got a Japanese made Iwata. I can say that buying the Master airbrush + compressor is the perfect starter. This is a good example: https://www.amazon.com/Master-Performance-Airbrushing-Dual-Action-Airbrush/dp/B0017640RK/ref=sr_1_7?ie=UTF8&qid=1482902837&sr=8-7&keywords=airbrush+compressor+tank
You get an airbrush that will be a perfect starter and a good compressor that will last you into your next step up airbrush.
I recommend staying with acrylic paints-- just easier to work with.
For putty, to fill seams with, I also recommend Perfect Putty. It's water based so it's easy to clean up and work with. You put some on a tray and use a toothpick to apply to a gap or seam, then wipe excess off with brush or finger. After it dries you can use sandpaper or a wet cottonswab to remove excess.
https://www.amazon.com/DELUXE-MATERIALS-DLXBD044-Perfect-Plastic/dp/B0076LAVFK/ref=sr_1_2?ie=UTF8&qid=1482902965&sr=8-2&keywords=hobby+putty
What is your next kit?
This is the best answer. Dealerships and detail shops use something like this or this. If you don't want to get a tool you can just use plain razor blade like this, they're dirt cheap at any home hardware store or most places that sell car parts/tools.
This will work much better, quicker, and with less mess than any of the other suggestions of expensive solvents or, for some inexplicable reason, lemon essential oil.
Made just for that
https://www.amazon.com/DELUXE-MATERIALS-BD44-Perfect-Plastic/dp/B0076LAVFK
I use wet & dry paper starting with 400 grit, ( i print at .12 whenever possible) then 800 grit then 1000 grit, then primer and paint, i use THIS putty to fill any joins etc, i find it to be very good,
before sanding i use files a lot , a small mini file set, i use this one, id be lost without it !
I use the metal razor blades and have never scratched a window. Pretty sure it’s impossible.
To make it very easy go pick up a handle: https://www.amazon.com/dp/B015D8QHEG/ref=cm_sw_r_cp_api_i_s0rWCbRJNFM2C
That style ^ but I’ve seen other colors and brands of the same thing. Just holds the blade at an angle and makes it easy to use.
If you ever need to remove a sticker on your rear window, just don’t damage the antenna or heating element if you have one.
It's just usually called "green putty". There are several different brands. GW carries a two part putty, but it's the same as other brands, but way more expensive.
This is a two part that's really good. You can also use it to mold and sculpt parts, like purity seals and the like.
This plastic putty has a nozzle so you can control the bead.
Tamiya and Squadron both make white/green putty that's good for filling small gaps and cracks.
There is a specific tool, which consists of a handle and a blade, and below the blade there is a rig for connecting a plastic grocery bag to catch the stuff as you scrape it. Should be able to find it in the home depot paint department. Here, like this little chingadero
https://www.amazon.com/Putty-Knife-HEAVY-DUTY-Ergonomic/dp/B06XC8ZGK2
Summertime and the livin' is easy
[Long Beach, NY] (https://scontent-b-lga.xx.fbcdn.net/hphotos-ash3/t1/941876_10151617160808987_612360162_n.jpg)
[yay for contests!] (http://www.amazon.com/dp/B0037V0EOQ/ref=wl_it_dp_o_pC_S_ttl?_encoding=UTF8&colid=1F7K0EGCRXYZY&coliid=I25V2UMXCWFPOG)
For vat removal, I got this from an earlier recommendation. FOSHIO 2PCS Plastic Razor... https://www.amazon.com/dp/B076BBW1WM?ref=ppx_pop_mob_ap_share
Works way better than the provided scraper and it is plastic so less chance of damage than a metal one.
Perfect Plastic Putty made by DELUXE MATERIALS
http://www.amazon.com/gp/product/B0076LAVFK
I'm not entirely sure if I can recommend them, but what I have and gets the job done is:
https://www.amazon.com/gp/product/B001SBJIA8/ref=ppx_yo_dt_b_asin_title_o08_s01?ie=UTF8&psc=1
They are pretty cheap though, with fairly soft plastic that will take damage. I've had to sharpen my main one once already.
http://www.amazon.com/gp/product/B0016GRTVU/r
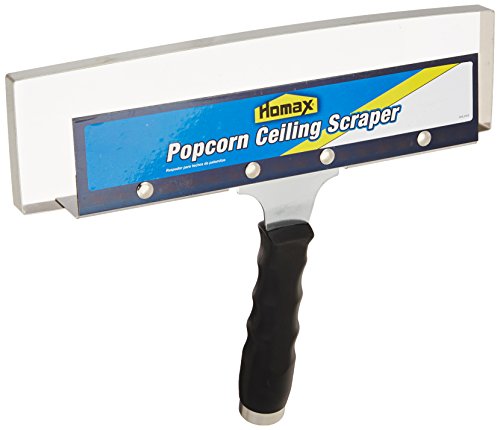
Our contractor quoted us $2400 to do two rooms. I bought a $20 tool, some plastic to put down and a water sprayer for $15. Soak the ceiling with water. When it starts to rain in the room, you have almost enough...keep spraying.
Wait about 15 minutes and then scrape. This is the tool you want. Plastic shopping bags clip to the bracket, so what you scrape goes into the shopping bag.
good video. you should check out plastic razor blades. super helpful in peeling acrylic!
https://www.amazon.com/FOSHIO-Scrapers-Contoured-Refillable-Application/dp/B076BBW1WM/ref=sr_1_4?keywords=plastic+razor+blades&qid=1574494005&sr=8-4
By bubbly, do you mean a popcorn ceiling? If they haven't been painted over, they're easy, if annoying, to remove yourself. We had to do our whole damn house. I have another tool to recommend for that! https://www.amazon.com/gp/product/B0002YSQSW
You'll still want to cover your furniture and electronics, but the bag you attach catches a whole lot of the mess and makes clean up a lot faster. Just spray the ceiling with water and then scrape it off.
lol why are you using a screwdriver? You need a drywall putty knife. looks like this.
Sand the edge down so its about half it's original thickness (.005 inches or ~.1 mm), just enough that it can get some of the blade under an edge of the first layer.
Yeah you would kill your build surface with a screwdriver or an actual knife. PEI is a plastic so don't try gouging it with a blunt as hell steel blade. If you can't cut cooked chicken with it easily, it has to be sharper.
I use plastic razors as a first “scrape” pass and then Gorilla clear tape as a “clean up” pass.
You generally want to use a fresh new razor blade for each run to avoid contamination. Here's a cheap box of blades. And here's a great little blade holder. It makes scraping way easier, just remember to clean off the blades with some ISO before using. Cheers.
Maxcraft 69283 Stubby Scraper https://www.amazon.com/dp/B00BRL59E8/ref=cm_sw_r_cp_apa_i_TeBcBbF4QCCSY
Extendable ice scraper, https://www.amazon.com/gp/aw/d/B0016GRTVU/ref=mp_s_a_1_4?ie=UTF8&qid=1484070791&sr=1-4&refinements=p_n_feature_keywords_browse-bin%3A4718393011&pi=AC_SX236_SY340_FMwebp_QL65&dpPl=1&dpID=31RvFRZrSiL&ref=plSrch
I think you can still order the paint from Porsche, they still carry Guards red, but it's expensive. $23 for a paint marker the size of my finger... I can't imagine the cost worth a whole car.
With paint that old the new paint may stand out too much and you'll be unhappy with it even if you did a perfect job.
There are some plastic razor blades you can buy off amazon and use to scrape the paint can splatter- I'd try that before a thinner. For cost effective (and time) I would use a paint marker from porsche for the scratches if it doesnt bother you to do it that way. If you want to fill every scratch, nick and ding with bondo then you may as well repaint the whole girl when you're putting in that much effort
​
Amazon razor blade example:
https://www.amazon.com/FOSHIO-Scrapers-Contoured-Refillable-Application/dp/B076BBW1WM/ref=sr_1_1_sspa?crid=2JQ4C968XSF5X&keywords=plastic+razor+blade&qid=1571288437&sprefix=plastic+razo%2Caps%2C320&sr=8-1-spons&psc=1&spLa=ZW5jcnlwdGVkUXVhbGlmaWVyPUFCSDRPS1pQMTBSOUEmZW5jcnlwdGVkSWQ9QTAwNzUzMjIyM1NQWVoxNVEwUTJIJmVuY3J5cHRlZEFkSWQ9QTA2MzYzNjAzTEtESzRPTkhWOElQJndpZGdldE5hbWU9c3BfYXRmJmFjdGlvbj1jbGlja1JlZGlyZWN0JmRvTm90TG9nQ2xpY2s9dHJ1ZQ==
I was just turned on to Perfect Plastic Putty https://www.amazon.com/gp/product/B0076LAVFK/ref=ox_sc_act_title_3?ie=UTF8&psc=1&smid=A1BKVSJG1RNAQO
Sounds like exactly what you need.
Use a plastic razor
https://www.amazon.com/FOSHIO-Scrapers-Contoured-Refillable-Application/dp/B076BBW1WM/ref=asc_df_B076BBW1WM/?tag=hyprod-20&linkCode=df0&hvadid=309805457405&hvpos=1o1&hvnetw=g&hvrand=2768152868600843908&hvpone=&hvptwo=&hvqmt=&hvdev=m&hvdvcmdl=&hvlocint=&hvlocphy=9029703&hvtargid=pla-570646761565&psc=1
It should be thin enough to atleast take a bit out and If not you could sandpaper it down
Made this hole way back when I was in school. Tried hiding it with thick paper and tape. Now that im planning on repainting my walls from this pee colored yellow to a shade of grey, I need to repair this hole first.
Whats the easiest way for me to repair this without costing me too much? Take into consideration Ive never done anything like this before.
I was thinking this Patch Plus Primer, Fiber Mesh Patch, and Plastic Knife Set? Will these be all that I need?
Do you think this will do the job? http://www.amazon.co.uk/Stanley-593Oc-Window-Scraper-590/dp/B0001IWDBK/ref=sr_1_5?s=diy&ie=UTF8&qid=1406124660&sr=1-5&keywords=razors
I love projects like this. Your furnishings feel much more your own, and they take on a sense of permanence you can't get with big box furnishings.
A heat gun and putty knives work very well to remove the stickers. Use a low setting, don't keep the heat focused on one area for too long and keep an eye out for browning, singeing, smoking, and fire. You've got lots of space to work with so skip around to allow the wood to cool. You'll potentially be removing whatever finish is on the couch if you are too heavy handed and or use too much heat. If you plan on refinishing use the heat gun and putty knife to remove the finish.
You can try just scraping with a razor blade to remove most of the stickers and then saturating the area with full strength degreaser, such as D-Limonene.covering the area with a paper towel to keep the degreaser in place.
A couple of razor tools to consider: 4" wide short handled for large areas with thick layers of stickers. Smaller razor scrapers with metal and plastic blades. Plastic detail scrapers might be useful too.
Instead of using Goo Gone I like pure D-Limonene solution. It's a potent degreaser extracted from citrus peels and contains no petroleum distillates, unlike Goo Gone. It also comes in food safe solution - though to be safe for digestion it really does need to be quite dilute.
Use the putty knife and rags or gauze to clean the adhesive from the wood. Large Woven Gauze Sponges are more scratchy and will give more traction with absorption. Rolled Stretch Gauze Bandages have the same great absorbing properties but they're softer and great for detail work. You'll get to know what you prefer - I'm partial to gauze sponges. They're cheap and I just toss them into the compost bin as long as they aren't too bummed up with adhesive top.
To remove the degreaser dish soap and rubbing alcohol work well. I like Dr Bronner's castile soap diluted for dishwashing. Wipe down with 90% Isopropyl Alcohol. You should be good to move on to your next step, probably sanding and smoothing, patching any holes or gouges to prep for staining and finishing or painting.
I linked a whole bunch of products to give you an idea of what will work for certain applications. There are definitely other ways to achieve the same goals, this is just how I tackle this task. Please don't order everything listed here at once, see what works from you. I link Amazon because they have everything but locally owned small businesses are an invaluable resource and great when you get stuck in a project.
Don't forget your PPE'S!
Dust Mask - I like this one as you can vacuum the filters out to extend the life and reduce waste. It has a smaller profile too - my husband actually doesn't complain about wearing it, just puts it on.
N95 Respirator
Replacement filters available on Amazon
Comfortable Safety Glasses or Goggles
Heat Resistant Gloves
Long Cuff Gloves Disposable
Some type of work gloves
Good luck!
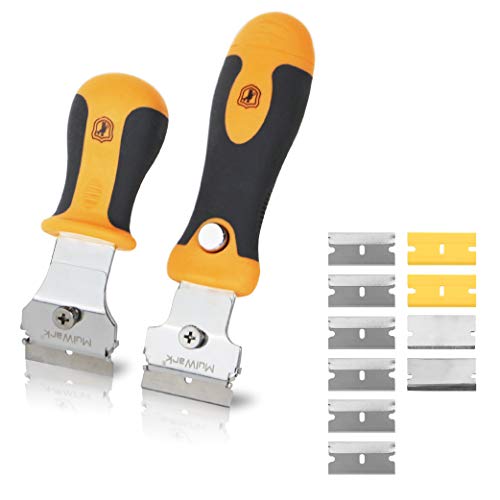
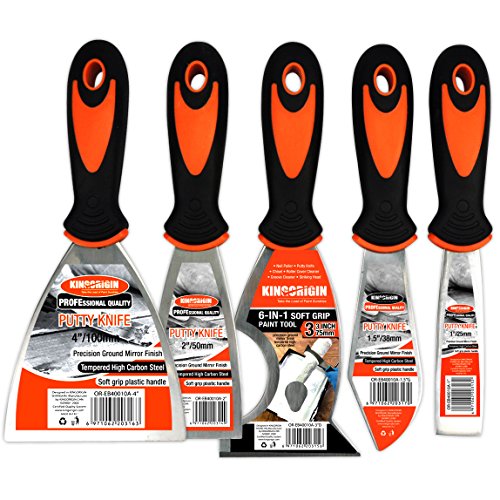
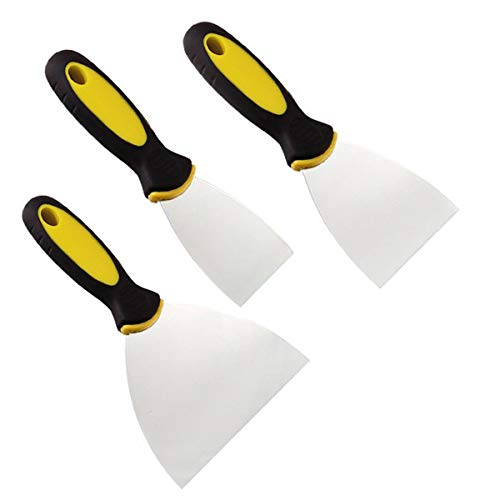
Putty knives, like these:
https://www.amazon.com/dp/B075XHZ2L9/ (representative example; I cant vouch for those specific tools)
They're like magic. I reuse the same tape many times.
Make sure your windshield wiper fluid is freeze proof to -20F (If you bought it in CA, then it will not be)
Buy a good ice scraper for your windshield for defrosting in the morning. I use this one: https://www.amazon.com/Hopkins-2610XM-Subzero-Extender-Snowbroom/dp/B0016GRTVU
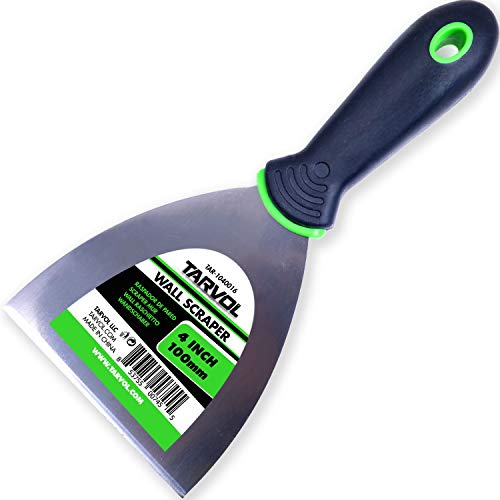
I think you'd be fine with any putty knife of similar size/shape to the one in the video, like these:
Or go to your local hardware store and ask for a putty knife.
Hi, remove what paint you want to remove, and from 2 feet away with eye protection and a cheap paper respirator mask, use this product to spray the unpainted ceiling area. It comes out fast, so do not over spray the product or it will drip. You might want to shake up the can and practice spraying for 2 seconds outside, to visualize the volume.
Wait at least 15 minutes for that to dry, and with a 4" flexible drywall knife, apply some patching compound to the primed area, with the goal of achieving the same thickness as the old plaster. Wait overnight and then sand and paint. I recommend this patching compound. It's easy to work with, the knife will fit inside of the tub, it sands well, and it will not drip on you while it's being applied to the ceiling, as many other drywall joint compounds tend to do. What it can do sometimes is accidentally fall off the knife and onto the floor, so the way that you hold the knife with the product, a little bit at a time, as you approach putting it on the primed ceiling, is all important. And sand the dried patch with at least a 200 grit sandpaper that is being held by something flat, not your hand. And you may use the Kilz on your sanded patches prior to painting the ceiling. Again spray lightly. Good luck.
It looks a little like a painter's multi tool without a handle. What makes you call it a bar tool?
This is what I have and use. Super helpful with scraping caked-on shit from pots and pans. Any paint scraper will do, honestly, but ones with a sharper edge will work better.
Good Lord... you never removed a registration sticker before?
Use this next time that sticker gives you a hard time. These work great (just keep it flush, don't go with a corner against it like a crazy person)
You have one of these?
has a bag that catches most of the falling junk.
Plastic scrapers. Or very careful use of a razor blade.
You can also get plastic razor blades. Check an auto parts store--they might have them locally.
The point is metal razors are too easy to use incorrectly and permanently damage one's stovetop.
If you're a self-sure pro willing to risk it, great! Have at it!
For anyone else, willing to follow your lead and they insist on cleaning glass with a metal razor, make sure both the razor & glass are wet. Do not use a metal razor dry on glass (stovetop, window, etc).
Also, plastic razors are cheap & will not scratch, so not sure why the risk is needed.
All prints are straight off the print bed. I hate sanding so I've worked really hard to get the printer dialed in. And when the printer isn't as dialed in as I'd like, I have found a wonderful putty that will fill gaps, holes and even join two parts of a print together ... it's Perfect Plastic Putty ( https://www.amazon.com/DELUXE-MATERIALS-BD44-Perfect-Plastic/dp/B0076LAVFK/ref=sr_1_2?crid=1DRCN7LC5IRMS&keywords=perfect+putty&qid=1573437609&sprefix=perfect+putty%2Caps%2C169&sr=8-2 ). It's great stuff! Unfortunately I don't get a share of the profits but I'm impressed with it enough to recommend it anyway!
BEoffer 2 Pack Razor Blade... https://www.amazon.com/dp/B07GLNLQ4D?ref=ppx_pop_mob_ap_share
This is what I use. Fantastic product and cheap.
Do you have one of those telescoping jobbers? I'm also short and the telescoping variety was a game changer for me.
> FWIW, I was born and raised in Rochester, learned to drive literally in the snow, and have never had snows, always all seasons. The most important things are knowing the limits of your car and yourself, keeping an appropriate speed, and being able to correct if things start to go south.
Don't listen to this poster. You can know the limits of your car and yourself, trundle along at 5 MPH, and generally do everything perfectly, but none of this will help when some other idiot careens into you going 30 MPH in foot-deep snow on all-seasons because "they literally learned how to drive in the snow!"
GET THE SNOW TIRES
My snow-driving anxiety levels went down by orders of magnitude when I bought my Jeep Patriot (with 4x4, naturally) and Blizzak snow tires to put on them. I literally went from being a nervous wreck whenever a snowflake appeared in the sky to "Meh, better text my boss and tell him I'll be a little late to work because it's snowing again. Hm, do I want to play it safe and take the thruway or have some fun on the back roads..."
GET THE SNOW TIRES
edit: And if you've got a truck or SUV, for the love of FSM, invest in a telescoping rotating snow brush (example) to clear the snow off the top of the vehicle (as required by law, but also because you don't want to cause an accident for the people behind you who suddenly get whiteout'd from the snow billowing off the top of your car).