Best rv water heaters & accessories according to redditors
We found 52 Reddit comments discussing the best rv water heaters & accessories. We ranked the 24 resulting products by number of redditors who mentioned them. Here are the top 20.
We found 52 Reddit comments discussing the best rv water heaters & accessories. We ranked the 24 resulting products by number of redditors who mentioned them. Here are the top 20.


The temperature probe is in the main column inserted down from the end cap. It sits directly in the vapor path at the 90 degree turn.
The PID controller has an auto-learn feature; after one setup session (where it bounced the temperature all over the place and recorded data) it can hold the steam temperature incredibly steady at just about any temperature.
Parts:
So I believe the Wave heater aswell as the Mr.Buddy are Propane with no external intake/exhaust. I believe this means it is a wet heat and will not necessarily 'dry' things.
I have heard of people running their Fan-Tastic fans with their heaters to help push out the moisture. The Propex propane heaters have external intake/exhaust vents so there is no moisture build up.
I am perplexed as I was hoping the Mr.Buddy was going to answer all of my problems. I may have to invest in the propex to get the heat/dryness I need for the Winters in the Pacific North West.
No way running the furnace will keep your tanks from freezing in those extreme conditions. You’ll need 3 things.
Tank heaters.
A heated water supply hose.
RV antifreeze.
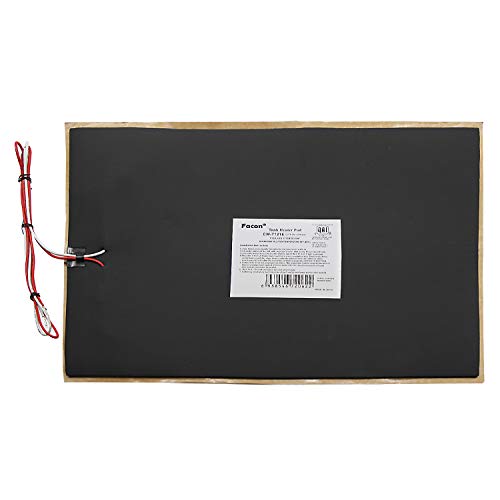
Facon 12" x 18" Holding Tank Heater Pad for RV Camper Trailer with Automatic Thermostat Control (Pack of 2) https://www.amazon.com/dp/B01MT9EUG9/ref=cm_sw_r_cp_api_i_BpkwCbPVC0C2K
Camco 25 25ft TASTEPure Heated Drinking Water Hose with Energy Saving Thermostat-Lead and BPA Free (22911) https://www.amazon.com/dp/B01ABONB0A/ref=cm_sw_r_cp_api_i_NrkwCb85DA2HR
The heaters and a little anti freeze in the tanks as you flush and wash will keep them from freezing.
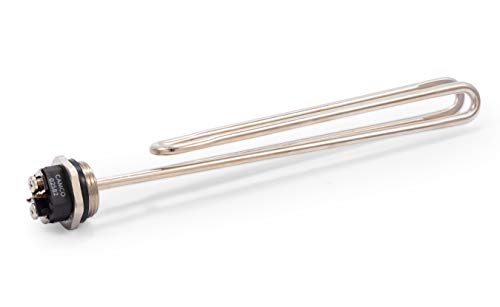
you want an ultra low watt density element [https://www.amazon.ca/Camco-02963-Screw-Ripple-Element/dp/B000BPG4LI], not a high density one. that's why you're getting all that scorch on there.
I've got a compact RIMS machine that I built into a 19" toolbox. It's roughly the same idea as the one you linked, but all packaged up a bit tidier. I wrote a post about it a while back. Lemme find it.
Found it. Not everything necessarily relevant, but it's got a few details that helped some other folks.
> For something like a RIMS where you mostly just need to hold temperature, 110v is plenty. It's actually useful. The element is just a big resistor it doesn't really know or care what voltage runs through it. When you step down voltage by half, you actually quarter the power output (through the combination of Joule's and Ohm's laws, P=V^2 / R ). That means you can use low density elements intended for 220v operation and run them at quarter power on 110v and get super low watt densities.
>
> It's the wattage and how you distribute that through your wort that are the important parts. You want low density because you want to spread the heat out in your wort as much as possible. Higher wattage and higher density can lead to boiling and/or scorching in your tube. /u/GrizzlyBearKolsch had this problem with his setup. Luckily, his PID controller allowed him to adjust the timing enough to overcome it. I use a 220v, low-density, 4500W element, but I run it at 110v for about 1100W. It takes about half an hour to heat my strike and it fires for about half a second once every few seconds to maintain temperature. It's powerful enough to do the job, but gentle enough that it doesn't burn anything when running flat out.
>
> There are a couple of regular recommendations for PID controllers. Auber makes a well-built, well-documented model that basically the go-to for this kind of thing. If you want to spend a bit less and you're willing to put up with some really badly translated Chinese instructions, the Mypin TA4 also gets a decent amount of use.
>
> I'd recommend silicone tube for just about anything. Either three-eighths or half-inch depending on your preference. It's highly heat resistant, maintains its shape, and it's clear enough to see wort in it.
>
> Chugger or March are the perennial recommendations for pumps, but kind of overkill. I use a 12v DC solar pump for my setup. I've used this style for other builds and it has also worked pretty well. These lower power pumps are a decent fit for this kind of setup because they're compact and they're adequate flow but not so high that you need to bother throttling them.
>
> I use a separate heat stick for my boil kettle because my apartment stove can't quite boil 6+ gallons comfortably. It's a dead simple 1400W element hooked up through some drainage pipe. Just plug it in and it gets hot. Same as any other build you see on the Internet.
Look into updating the plumbing to PEX (white /red) if possible. It's a nightmare to go behind all the fixtures, but PVC (grey pipes) gets old and if it cracks it's a major problem.
Also roof and window seals, another bane of the old RVs. Make sure they're all good, or redo them. Leaks like that, aside from mold, tend to swell anything water comes in contact with.
Fridge, furnace and water heater - clean everything as best as you can. Burners especially. For the water heater - flush it good a couple times and replace the drain plug with a zinc anode to extend its life. Upgrade them all as soon as you have the means to.
Amazon also has propane and CO detectors. Make sure they're up to date, and put at least a 50w solar trickle charge panel on the roof for your house battery, as the propane detector has the nasty habit of draining it.
Finally, I'd look into upgrading whatever furniture you can. Mostly the folding couch if there is one. Motorhomes like this are / were designed for seasonal living in, and everything inside isn't designed for full time occupancy. Add the fact that it's a moving vehicle and thus subjected to vibrations and flexing. Last thing you want is your stuff to come apart while you expect it less.
Source: I'm on my 4th RV and been through all the crap I'm telling you about 😁
You'll need one or more Heating Elements inside your keg. The one I linked to is for water heaters. You need a 240V hookup, too. If you don't have one, these elements will work on 120V, but you're going to need more of them unless you want to wait an hour to get 5 gallons of water to boil.
You'll control these elements with a PID controller and one relay per heating element. The PID controller I linked comes with one good solid state relay that's capable of switching 240v. The PID controller also supplies you with the temp probe you need to put into the kettle somehow.
In addition to this, you'll need some various connectors, and probably an electrical box. I'd say budget a couple hundred bucks for odds and ends.
Finally, when messing with 240v... or even 120v, you really should get a real electrician to look over your connections before you apply power to it. A: to keep you safer, and B: to keep your investment safer.
30 Gallons is going to take a crap ton of power/time... 15 gallons may even be pushing it.
This is the popular element used in e-brewing setups, but for 15+ gallons you would probably need more than one.
I'm BIAB, so that helps cut down on the space and equipment, but I'm looking at adding [240V Heating Element] (https://smile.amazon.com/gp/product/B000BPG4LI/ref=ox_sc_act_title_2?smid=ATVPDKIKX0DER&psc=1), Inkbird Controller, and [a basket to make raising the grains a bit easier to manage] (https://smile.amazon.com/gp/product/B000VXKJJI/ref=ox_sc_sfl_title_5?ie=UTF8&psc=1&smid=ATVPDKIKX0DER). Which doesn't seem like too much of an investment to make my brewday a LOT shorter, and a bit easier.
edit: [alternative inkbird controller] (https://smile.amazon.com/gp/product/B01KJZMWSI/ref=ox_sc_act_title_1?smid=A1RUFFFCQ74BCW&psc=1). This is the one i am currently considering, but i don't know the real differences.
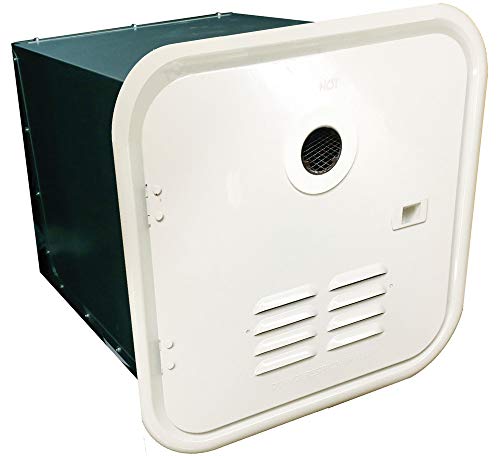
If you do end up tankless and I would only ever recommend a gas fired one, because houses are rarely wired to handle the additional load. Be sure to get some sort of drain pan like this: https://www.amazon.com/Camco-11470-Tankless-Heater-Fitting/dp/B0060HOUJO
Unless its in a garage and it just doesn't matter if it leaks (and it will)
I have this one in my Toyota Dolphin, super sippy on propane and doesn't emit fumes like a Mr. Buddy. I also have a carbon monoxide detector/fire alarm mounted and test it weekly. Yes I do vent through the roof vent and yes I do turn it off at night. From what I've heard I may be able to get a month's worth of use from a 5 gallon tank before I need to re-fuel, so much better than using the small tanks on the Mr. Buddy that run out after six hours of use on low heat.
​
https://www.amazon.com/gp/product/B000BUV1RK/ref=ppx_yo_dt_b_asin_title_o02_s00?ie=UTF8&psc=1
These work very well wired to use the original switch connection. Toggle switches and full time cobbled up bullshit is always a bad idea.
You might just need a real radiator if yours is plastic.
Some models wire differently than others, knowing your year would help.
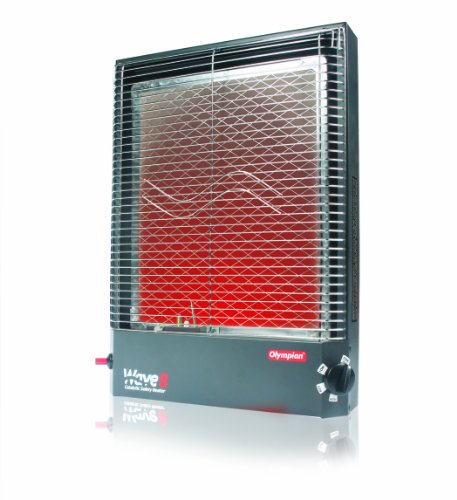
Check out the picture of an Olympian heater - just the lower portion glowing.
I don't have an authoritative answer but I could imagine the fuel flowing in from the bottom and being catalyzed as it goes upward. At some point it would all be used up and stop generating as much heat. You wouldn't want unburned fuel making it all the way out the top.
Was it on the highest setting in the picture?
Also - make sure both your CO and LP detectors are in working order!
This one is good...
https://www.amazon.com/Flojet-305730004A-Accumulator-Tank/dp/B004BC8LZO/ref=mp_s_a_1_2?ie=UTF8&qid=1541543730&sr=8-2&pi=AC_SX236_SY340_QL65&keywords=flojet+accumulator+tank&dpPl=1&dpID=41lb5-WJm2L&ref=plSrch
But the bigger the better. The bigger it is the less your pump ever needs to run to refill. I have a very quiet duetto and that pump kicking on everytime you pull a shot was driving me insane.
4000 really isn't much heat, it would warm hands held over the flames, but not really contribute to the heating of the room.
I would go for a proper heater, then have one of the little, for effect only, fake fireplace ones for the visuals if wanted.
Not sure what your budget is, but the ultimate combination of these would be a Dickinson propane model. They are pricy, but built to last forever, are quite efficient, very esthetically pleasing, and direct vented (so none of that pesky dying in your sleep due to low O2 or CO poisoning!).
A strong thing to think about when choosing a heat source is fire danger. In a tiny home, a small fire can quickly become lethal, so ones like an infrared heater have very directed heat which require a lot of safe space in front. Also, even with the small ethanol fireplaces like you've linked, make sure you crack a window or something, especially if burning for a longer period, as they really do eat up a lot of your O2 and replace it with CO.
Lastly, regardless of what you go with, make sure you get a GOOD CO detector, just a smoke alarm is not enough! As an EMT I have seen way too many dead pets, kids, adults due to poor ventilation of a combustible heat source in a small space.
The pump I'm using is an on demand RV pump, it's designed to cycle the way I am using it. A lot of folks recommended different RV pumps for rainwater systems because of the way they automatically cycle when pressure drops. When you say check valve on the inlet line, can it be as simple as a tee, with the 90 degree being the inlet and the upper part of the tee being a ball valve that i can open and pour water into to prime it.
My first plan of action if I were you would be insulation, while it's still warm out. Being in an aluminum can will sap any heat you pour into it without decent insulation. And don't forget the floor.
That said, when it comes time to put a furnace in my 67 Avion (also an aluminum can) I'll be looking for a propane catalytic heater, something like this one
I was considering one of the diesel heaters you can find on eBay in various BTU capacities, like this one, until I watched this video where a guy tests one for heat output, carbon monoxide, etc. It passed the CO test just fine, but I don't think I could deal with that noise. I must admit though that the price is certainly attractive.
Here you go. You'll find tons of similar stuff on this page. Not sure of the material of that specific one though, stainless would be best.
I recently installed an element in my kettle. I ordered the following element, locknut, and o-ring from Amazon:
http://www.amazon.com/gp/product/B003GXF5EO/ref=oh_aui_detailpage_o00_s00?ie=UTF8&psc=1
http://www.amazon.com/gp/product/B000FMWPNI/ref=oh_aui_detailpage_o00_s01?ie=UTF8&psc=1
http://www.amazon.com/gp/product/B000BPG4LI/ref=oh_aui_detailpage_o00_s00?ie=UTF8&psc=1
outside
https://www.amazon.com/Facon-Holding-Trailer-Automatic-Thermostat/dp/B01MT9EUG9
Would this pump (switch actuated) work? https://www.amazon.com/SHURFLO-4008-171-E65-115V-3GPM-Revolution/dp/B00C5T6OS6
Mount a T valve on each side, so hot+sink and cold+sink could be plumbed in the fluid path, using the cold line as the recirculation return line.
My thought is that because the water pressure is equal on both sides, you don't need a high pressure pump.
> 6 gallon Atwood water heater with electric, gas, and a heat exchanger
https://www.amazon.com/Atwood-GEH9-EXT-Electric-Exchanger-Gallon/dp/B00CLSUIU6
Yeah I was looking at this one
https://www.amazon.com/dp/B019BWN8E2/ref=wl_it_dp_o_pC_S_ttl?_encoding=UTF8&colid=1W9T1VHESHHDF&coliid=I3PZ7KHTTQMH7E
It gets mediocre reviews though. Has a gas valve that needs a whack quite often it seems.
Sure thing!
Grey Water: https://www.ebay.com/itm/Waste-Water-Tank-Kit-For-Ducato-Boxer-Relay-XLWB-X250-290-Campervan/282623292350
Water Heater: https://www.amazon.com/gp/product/B019BWN8E2/ref=ppx_yo_dt_b_asin_title_o00_s00?ie=UTF8&psc=1
We are going to be full-time so we are definitely doing some more luxury features than if we were building a weekender rig.
For mattress ventilation go here:. https://www.defender.com/product.jsp?id=1818021
It's a mesh pad that separates your mattress from the platform.
Trade name Hypervent. MUCH cheaper than I had thought. Wish I'd read that better, would have ordered sooner. I'm flat broke now.
Falcon holding tank heater pads here. https://www.amazon.com/gp/product/B01MT9EUG9/ref=ox_sc_saved_title_2?smid=A16G53YHOQFM2H&psc=1
Neat idea. Would you perhaps be looking at something like this?
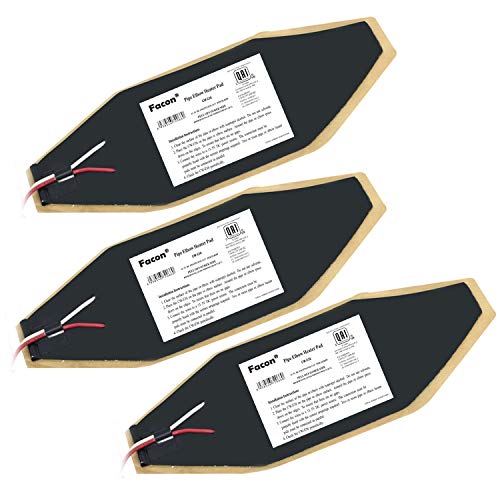
Facon 3" x 8" Elbow Pipe Heater Pad, Work for 1-1/2" Elbow Pipe on RV, Camper, Travel Trailer, 13.5V DC(Pack of 3) https://www.amazon.com/dp/B01MUC7XI5/ref=cm_sw_r_cp_api_i_V88RDbGFHW55X
Not sure if the voltage is picky or not with this item, but I've used a buck converter for a project to dial in voltage.
I would caution against mounting outside of the cabin unless you provide a under/over temperature circuit. LiPO cells really don't like to be charged or discharged under 0'C or over 40'C.
The common solutions to this are using a self regulating "Holding Tank heater" (Like this: https://www.amazon.com/Upgrade-Version-Facon-Automatic-Thermostat/dp/B077VLB1KK/ ) to keep temp above 45'F.
The other side I was planning on was using a PC Watercooling setup triggered to start at 40C (105'F) and circulate glycol through the built in cooling channels and then through the PC Cooler's radiator.
I should clarify because I seemed to have misunderstood what a sanke is. I don't want to use a keg for a few reasons and I can't easily get one so I doubt I will. I want to use a large stockpot, 5-7 gallons, but am new to this hobby so still concerned about safety.
Is the process of installing an electric heating element as simple as soldering a flange with interior threads that a heating element like this can screw into? Would a soldered seal be enough for the pressure of a boiling liquid overtop of the seal? What safety risks do I then run? Should I unscrew the heating element after each run to clean?
Olympian wave 3 heater. It's propane powered, safe and it's relatively cheap. It has great ratings on Amazon too! I'm think of getting it for my van.
https://www.amazon.com/dp/B000BUV1RK/ref=cm_sw_r_other_apa_i_.iUKDbK8Y2ME6
yeah, you'll spend maybe 80 bucks gearing yourself up (getting the socket, the elements, the electrical tester), but then you'll have those things, and know how to do it.
It will probably take you a couple hours (most the time spent draining it)
I cant recommend strongly enough getting a proper socket off amazon
Ill update my recommendation to this one actually: http://www.amazon.com/Camco-Professional-Heater-Element-Socket/dp/B00361V162/ref=sr_1_2?ie=UTF8&qid=1376406712&sr=8-2&keywords=camco+water+heater+socket
it grips better.
Getting the bottom element (whats likely your problem) out may be very difficult if its segmented in, you'll regret it if you dont have the right tool.
Other than that, theres are TONS of youtube videos on how to do everything i described (learned from them myself).
Id start by pulling your bottom element and thermostat and replacing those first (get the kit anyway, pricing on the kit means you get at least 2 items for "free" compared to buying individual)
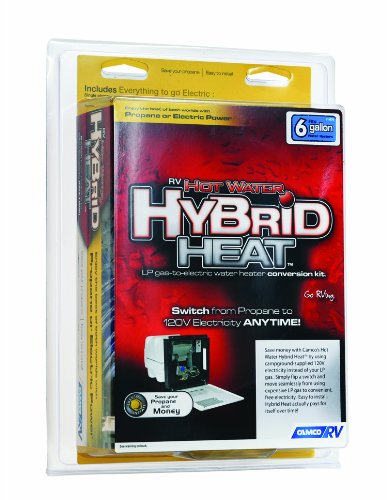
Convert LP Gas Water Heater to 120V Electric to Conserve Propane:
https://www.amazon.com/Camco-Hot-Water-Hybrid-Heat/dp/B0024ECCJW
Best upgrade I ever did to my old TT.
I don't think it is a good idea for the element to touch the glass-covered steel on the opposite side. I've used fold-back incoloy ULWD elements in narrow tallboy 50 gallon water heaters. They work great and have lasted a long time.
The other popular ones seem to be the Olympic waves. They're a good bit more expensive though.
Probably not, the only way to control humidity and condensation is going to be with really good ventilation. You would need to run fans to keep air circulating enough. It does start to negate the heat your creating by needing to ventilate so much. My Mr. Buddy does alright with my vent fan running but it's not a perfect setup. If your set on using propane with a heater that isn't vented to the outside consider the Wave heaters as they are catalytic and shouldn't produce moisture as much I believe. I'm sure someone can chime in about them relating to moisture.
https://www.amazon.com/Camco-57331-Olympian-Wave-3-Catalytic/dp/B000BUV1RK
My heating elements are camco: https://www.amazon.com/Camco-02963-Screw-Ripple-Element/dp/B000BPG4LI
If you can follow directions, you can build a very simple control box by yourself.
Herm coils are easy to make, too, in case you change your mind.
Sure, it's pretty much the standard these days:
http://www.amazon.com/Camco-02963-Screw-In-Ripple-Element/dp/B000BPG4LI
The electric heating elements are Ultra low power density (50W per sq. inch), so no single point on the heating element will get hot enough to carmelize the wort.
I had the same question when we were debating whether to go electric or not, but after some research I found that electric brewers don't ever seem to run into that issue. It is more Internet folklore than anything.
These are the elements we will be using: http://www.amazon.com/Camco-02963-14-Inch-Ripple-Element/dp/B000BPG4LI
On top of the boiloff rate you will probably scorch the hell out of the wort with that element. The 6500 watts look to be spread over too little surface area. I've used a 4500w element that looks to be of similar size and my beer tasted like burnt porridge.
May I recommend the tried and tested 5500w camco ripple element?
http://www.amazon.com/Camco-02963-14-Inch-Ripple-Element/dp/B000BPG4LI
You're gonna need some sort of controller to tune it down when you're boiling. I Use 60% to maintain a good boil in 50l boils. Here's my system: http://brew.is/blog/2011/10/20-gallon-boil-kettle-electric-biab-kettle/ . I haven't written up something about the controller, but I'm using an auber instruments 2362 PID controller. It's used to control the mash temperature and the boil.
I recently started looking at what I'd need to convert to electric and it looks very doable for around $100. You can get one of these and a heating element like this. Since you already have the 240V hookup for your dryer, it should be pretty easy to set up.
I haven't actually done this yet, but a coworker uses this setup and he likes it a lot.
sure. which parts do you need more detail on?
so take an SCR controller. this one is nice as it has the digital display. that saves you with the bother of an ammeter or voltmeter. this will leave you with a dial control for increasing or decreasing power to your unit.
220 from your wall goes into the SCR. if you want it cheap get the power cord off of a craigslist (etc) free stove or dryer.
power out goes to your hot water tank element. they say that ultra low watt density is best. but low watt fold back ones are usually fine too.
your element screws into one of these . they are available from a number of suppliers.
to prepare the keggle, simply remove the spear, and then cut what is normally the bottom of the keg off (its quietest if you do this with the keg full. you might be able to find a disk to seal the ferrule up with, or even fill with water and then reinstall the spear, and do it upside down) now the sanke flange can be used as a 2" tri clamp ferrule. buy yourself a 2" TC clamp and gaskets
you'll need legs or a stand for the keggle. I'm sure you can figure that out.
now as that is you'll see that your hwt element sticks up the center of the keg from the bottom to about the middle of the keg. so. if you got yourself some 2" copper pipe - the same length as your element and hammer on an easy flange. for that basically you take a ballpeen hammer and work the ends down so that they are flat and 90° to the rest of the pipe. if that's a little thin for the TC clamp to attach to, you can put a hose clamp on it, and melt some solder in to beef it up. file it to shape and for smoothness. even better is if you can add a tee with at least a 1/2" but maybe as much as a 1" connection and then you get a bottom drain as well.
If you remove them and try to clean them you might not need to replace them. But if they're too far gone or you don't want to mess with them and just replace instead. This http://www.amazon.com/Camco-02923-Heater-Element-Foldback/dp/B0002YUDSI This should fit your heater. You will have to check for compatibility. I would go to a plumbing supply house with the model info of the heater and purchase them off the shelf. They'll take them back if they don't fit.
HD is ok too but it's more of a hassle if they don't have the right part. You'd have to go to a plumbing supply anyway.
I know a lot of people prefer ones that have more surface area so there is no scorching. look at
http://www.amazon.com/Camco-02963-Screw-In-Ripple-Element/dp/B000BPG4LI/ref=pd_bxgy_hi_img_y