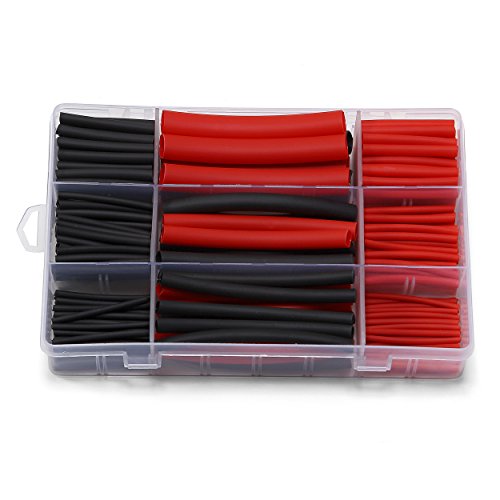
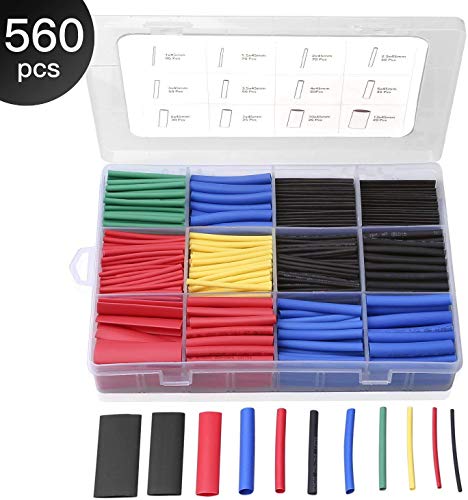
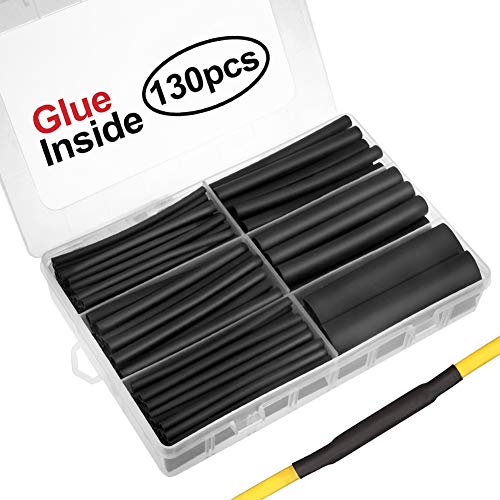
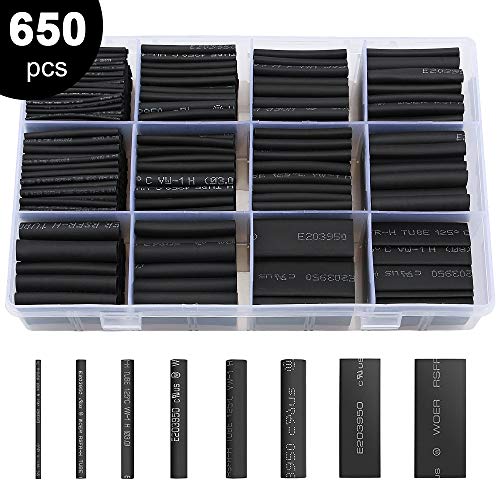
Best industrial heat-shrink tubing according to redditors
We found 188 Reddit comments discussing the best industrial heat-shrink tubing. We ranked the 90 resulting products by number of redditors who mentioned them. Here are the top 20.
We found 188 Reddit comments discussing the best industrial heat-shrink tubing. We ranked the 90 resulting products by number of redditors who mentioned them. Here are the top 20.


Looks like a great start!
Having some experience in automotive wiring, some pointers:
Happy wiring! We have always had a lack of sexy vehicle wiring around here so I look forward to following your project!
Seconded on the heat shrink. Something like this
Also- don't use a lighter, use actual heat from an extra hot hair dryer, or a heat gun. A lighter will give you a hard time and just burn the tubing- source: I've burned tubing with a lighter.
A couple of things come to mind:
A) Cool.
B) Instead of drilling through your stencils, I recommend using a finishing nail or an awl and banging pilot divots. This centers and guides the drill bit, and keeps you from killing your stencil, just in case.
3) Try heat shrink tubing. It's not terribly expensive, it's fun to use, and it makes you look clever.
D) In the event that you ever want people to think that you are very clever, get a decent soldering iron. If you have a lot of extra money to throw around, get a fancy Weller station. If not, I recommend the adorable Hakko FX-888. Now that the analog version has been discontinued, it's hard to find on sale, but... they're fantastic. If you want to feel fancy, you could get something like this. Look at all those bits! I don't know either!
This is actually something I began last year and have only really posted a few teasers here and there. Well now that I've finally had time to clean it up and go back and add in the original cable I figured I'd share it with you all.
This "Stealth SD Mod" as I'm calling it, uses a MicroSD card and reader, however, you could just as easily use a small USB thumb drive in place of the MicroSD card and reader.
The way the stock USB cable connects to the inside of the controller actually presented itself as quite a problem, and not wanting to cut the cable, or destructively dremel away any of the controller (mainly due to my OCD) only made things harder. Fortunately, I was able to find a solution. Once assembled, this non destructive mod is Plug & Play.
This is actually an early prototype of something a little more advanced I'm working on.
Parts Required
You'll also need some wire, solder, a soldering iron and of course a Philips screwdriver (1.5x30mm works for me) to open the controller.
Checkout this gallery for more images.
F.A.Q.
Answer:
>Currently yes it must be connected to Port 2 (Player 2). The reason for this is when connected to Port 1 the system doesn't recognize the controller. This is something I think we can fix in a future update.
Answer:
>Yes, absolutely. Keep in mind however that the draw does exceed the allowed amount, so the USB Current Limit Mod is still required.
Answer:
>While the power draw on this is incredibly low you'll still need to perform the USB Current Limit Mod in order to use this (Or use a hub, but that sort of defeats the purpose).
Answer:
>Yes, absolutely.
Answer:
>Only if they have a powered USB hub or have performed the USB Current Limit Mod
Answer:
>The difference in weight is negligible (Stock 130g vs modded 136g).
There ya go. Make your own or spend lots and lots of money.
Heat Shrink Wrap Bands
Here is a parts list for those interested
Nema 5-15r To C14
Voltmeter Analog Panel Meter
Shrink Tubing
32GB MicroSD
Raspberry Pi 3 + Power Supply
MCP4725 Breakout Board
TCA9548 I2C Multiplexer
RJ45 Extender
22AWG Wire
Plastic 2U Box
Wire:https://www.amazon.com/gp/product/B01J639G74/ref=oh_aui_detailpage_o01_s00?ie=UTF8&psc=1
Cotton:https://www.amazon.com/gp/product/B00X6PQJ2Y/ref=oh_aui_detailpage_o04_s00?ie=UTF8&th=1
battery wraps for custom designs: https://www.amazon.com/gp/product/B018I08UKU/ref=oh_aui_detailpage_o01_s00?ie=UTF8&psc=1
Coil wrapping kit: https://www.amazon.com/Coil-Master-Authentic-Tweezers-Resistant/dp/B01GWD5GCK/ref=sr_1_1?ie=UTF8&qid=1486692532&sr=8-1&keywords=vape+tool+kit
These are all items i have bought and use. some other things i didnt list because it doesnt seem like they are sold anymore for whatever reason. I didnt list other things since they are vape related but not exclusivly for vaping like a vice or drill.
edit added the coil kit. i didnt buy this from amazon but i won it in a giveaway here on ECR a few months back. its the exact same kit and i love it. carry it everywhere.
The kit is also perfect if you need one or were looking to get a new one since its sitting right at that 50 dollar mark
Heat-shrink tubing.
I used heat shrink tubes in conjunction with with the neodymium magnets on the pocket clip, and the light sticks anywhere. Here are some pics!
[Heat-shrink tubing] (https://www.amazon.com/Anytime-Tools-SHRINK-SLEEVES-ASSORTED/dp/B005W42SW2/).
When I put on new strings, I always slide a 1/2" section of the tiniest heat-shrink tubing that I can find over my upper strings. To make sure you get it in the correct spot, lay your string across the nut like you are going to string it up, mark the spot on the string about a 1/2" after then nut, then slide the heatshrink over the string to that spot and heat it with a lighter, heat gun or HOT hairdryer. It will look nice and more importantly, dampen and and all vibrations after the nut.
I'm building some today with...
these banana plugs
this wire
this heatshrink
and this tech flex
it's often used in marine applications for water proofing. many of the adhesive heatshrink will say marine grade because it designed to stand up to the harsh (wet/salty/sunny) marine environment that could damage regular heatshrink or allow water to get inside the heatshrink.
Technically it's any heatshrink with adhesive inside but the quality marine-grade stuff isn't much more expensive than quality non-marine-grade stuff.
https://www.amazon.com/Ancor-Marine-Electrical-Activated-Adhesive/dp/B000QCPKE8
I forgot to factor in shipping for the cable in the total in the title.
Edit: I want to share this cost savings with people and thought this would be the best subreddit to do so. If it isn't, please let me know.
Here you are, my friend: Amazon
Shrink tubing
Heat shrink tubing. http://www.amazon.com/Anytime-SHRINK-TUBING-SLEEVES-ASSORTED/dp/B005W42SW2/ref=sr_1_1?ie=UTF8&qid=1372787908&sr=8-1&keywords=large+heat+shrink+tubing
If you shrink it on the end of the cord that might help.
I got you fam
https://www.amazon.com/Install-Bay-Heat-Shrink-Tubing/dp/B0053PYF62/
https://www.amazon.com/Professional-Equipment-Overlap-Welding-Voltage/dp/B01DDXLNVU/
Heat shrink tubing and a hot air gun, this way you can spend a few hundred bucks on something you are going to use for a few seconds and then throw away.
Edit: Please make sure you turn off and unplug your power supply before cutting any wires.
Parts / tool list below, this what i used but there are substitutes out there.
Note: Main thing that is slightly challenging is soldering the XT60s, basic idea is to “tin” (soldering term) the wires and the XT60s first, then heat the connector with your iron as you put the wire in to get a good fusion. Decent video on soldering them:solder XT60s
My soldering Iron:
https://www.amazon.com/gp/product/B00ANZRT4M/ref=ppx_yo_dt_b_asin_title_o00_s00?ie=UTF8&psc=1
Soldering Flux:
https://www.amazon.com/gp/product/B008ZIV85A/ref=ppx_yo_dt_b_asin_title_o01_s00?ie=UTF8&psc=1
Solder (60-40)
https://www.amazon.com/gp/product/B071G1J3W6/ref=ppx_yo_dt_b_asin_title_o01_s00?ie=UTF8&psc=1
New XT-60’s and Shroud:
https://www.amazon.com/gp/product/B074PN6N4K/ref=ppx_yo_dt_b_asin_title_o03_s00?ie=UTF8&psc=1
Helping Hands (not required, but def helpful)
https://www.amazon.com/gp/product/B000RB38X8/ref=ppx_yo_dt_b_asin_title_o01_s01?ie=UTF8&psc=1
Bought this a while ago, but any heat shrink will do:
https://www.amazon.com/gp/product/B01MFA3OFA/ref=ppx_yo_dt_b_asin_title_o02_s00?ie=UTF8&psc=1
Wire - If you’re new to soldering and need practice, or you’re going to split your cables for Rasberry Pi, or other components, etc:
https://www.amazon.com/gp/product/B01ABOPMEI/ref=ppx_yo_dt_b_asin_title_o03_s00?ie=UTF8&psc=1
OK, here is the short and dirty version. If you need more info, I can give it to you. I'll assume you know the bare essentials of coding, and soldering. This subreddit seems like they don't mind a bit of DIY and learning. There are 2 versions. One has a color changing blade, the other doesn't. The only downside to this DIY is that the LED in the blade could be brighter. I am currently experimenting with different lighting types to see what's best.
For a saber with color-changing ability, buy this wishlist:
https://www.adafruit.com/wishlists/491218
and also this:
https://www.amazon.com/gp/product/B00ONOI9K2/ref=ppx_yo_dt_b_asin_title_o07_s00?ie=UTF8&psc=1
For a saber with no color changing ability, buy this wishlist:
https://www.adafruit.com/wishlists/492907
and also this:
https://www.amazon.com/gp/product/B00ONOI9K2/ref=ppx_yo_dt_b_asin_title_o07_s00?ie=UTF8&psc=1
________________________________________________________________________________________________________
You will also need a soldering iron, some wires to put stuff together, and if you're fancy, some heat-shrink tubes. You'll also need a computer with internet access and a USB-microUSB cable that has data-transmission capabilities. Any moderately expensive USB cable usually has data functionality as well. Here is a list of stuff that would get you on your way:
Guide on how to get your microcontrollers up and running:
https://learn.adafruit.com/adafruit-feather-m0-express-designed-for-circuit-python-circuitpython/kattni-circuitpython
Easy-detach wires
https://www.amazon.com/gp/product/B075K4HLTQ/ref=ppx_yo_dt_b_asin_title_o00_s00?ie=UTF8&psc=1
Heat-shrink
https://www.amazon.com/gp/product/B072PCQ2LW/ref=ppx_yo_dt_b_asin_title_o09_s00?ie=UTF8&psc=1
________________________________________________________________________________________________________________
Now follow this guide to put it together:
https://learn.adafruit.com/lightsaber-featherwing/circuit-diagram
We're not using a neopixel, so don't worry about that part. Just stick with the LED wiring. This part will take experimentation, so take your time and test-test-test. This guide will help with additional wiring and coding questions:
https://learn.adafruit.com/adafruit-prop-maker-featherwing
Now use this code if you're doing a color changing blade. If you're not, you can keep the code as is, and just manually set the saber color you desire:
https://github.com/robert1233/lightsaber/blob/master/code.py
And you should be good to go! I'm still working on perfecting the code. I'm still learning as well, but this works. The guide I based this off is:
https://learn.adafruit.com/lightsaber-featherwing/software
_______________________________________________________________________________________________________________
Features: micro-USB charging, color changing blade, sound and motion sensor for: startup, shut down, idle, swing, clash. Light up power button.
Cons: This has only been tested with a full-size ultrasabers blade. The LED could be brighter. I'm still working on that.
______________________________________________________________________________________________________________
Tips:
Sound files that I used can be found here. Use at your own discretion:
https://www.fx-sabers.com/forum/index.php?topic=41379.0
The hardest part of this build is the soldering. If you are comfortable with that and you are willing to do some reading, this is very easy to do. I had pretty much no electronic background and was able to figure all this out in about a month.
Make sure you use the short headers for soldering the feather and wing together! This is very important or the microcontroller may not fit into your hilt! Test twice, solder once.
Don't veer off the wishlist. Everything I picked is low profile and allows for maximum space and flexibility. I went with as much plug and play as I could. The battery, speaker, and charger are all plug-ins. The LED, power button, and color-changing potentiometer require soldering.
If you are going the color changing route, you may have to drill a hole wherever you want the color-changer to be.
______________________________________________________________________________________________________________
I'll upload photo's whenever I can. Like I said, I'm working on finding a better lighting source, so right now everything is taken apart.
_______________________________________________________________________________________________________________
I take no responsibility if you shock, burn, or stab yourself; or ruin your lightsaber or any electronic components. This is a guide on how I made the inside of my lightsaber and no more.
i grabbed one during the sale as well; it should arrive tuesday. here are some things i ordered that were recommended on several guides i found online:
Purchased physical:
Purchased games:
Bundled with my Vive order:
And you easily fix it with a piece of shrink tubing
I bought one of these: https://www.amazon.com/Amass-Female-Connector-Multicopter-Airplane/dp/B0747MW9RX/ref=sr_1_2?crid=1BOGOG9J6ZIPO&keywords=mr-30+connector&qid=1565891680&s=gateway&sprefix=MR-30%2Caps%2C142&sr=8-2
I tested the output for polarity, I'll see if I can find my notes.
Amazon, hardware stores. Stuff is everywhere in the electrical sections.
Best part is that if it doesn’t work, or if it affects your closure too much, then you can just cut it off.
here
Amazon has them. If you have prime it would be your fastest cheapest route.
Edit: Here's what I got - 240 wraps, assorted colors, nice and thick - $11.80
Here's 300 for $8.50 Can't vouch for their quality though.
I agree with the guy saying to repair the existing one. Just cut out the chewed portion of wire, strip the insulation back about an inch, slide on some heat shrink, make a western union splice (can be done with no solder), slide heat shrink back onto the bare metal and heat.
If you choose to buy a replacement, make sure you measure the diameter of your existing plug and match it to the one you buy, there are several different size barrels.
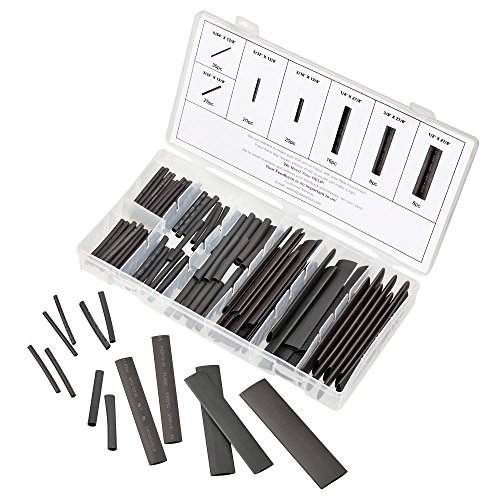
130pcs 3:1 Dual Wall Adhesive Heat Shrink Tubing Kit, 6 Sizes (Diameter): 1/2, 3/8, 1/4, 3/16, 1/8, 3/32 inch, Premium Wire Cable Sleeve Tube Assortment with Storage Case for DIY by MILAPEAK (Black) https://www.amazon.com/dp/B071H5XC7C/ref=cm_sw_r_cp_api_i_LuUUDb724D9GV
Wasn’t sure what size I would need before ordering but I ended up needing the 1/8 inch for this.
Links to components used:
Headlight
Wiring Harness
36v-12v Converter
Tail Lights
heat shrink
Mounting Brackets
Do you mean how to connect the 2 sets of 4 wires and cover it so it looks clean?
I do this - The 4 wires are all soldered together and then individually taped with electric tape or covered with heat shrink and then the whole thing is covered with heat shrink tubing.
Braided sleeve:
http://www.amazon.com/gp/product/B00H2RG20G/ref=oh_aui_detailpage_o02_s00?ie=UTF8&psc=1
Heatshrink:
http://www.amazon.com/Vktech-150Pcs-Polyolefin-Halogen-Free-Shrink/dp/B00EXLLXK8/ref=sr_1_5?s=hi&ie=UTF8&qid=1420770599&sr=1-5&keywords=heatshrink
i dont know. its not like the regular plastic shrink bands are hard to replace. id think there is just a good supply of - https://www.amazon.com/Heat-Shrink-Wrap-Bands-Diameter/dp/B018TNDK60
should try some clear shrink tubing instead of the gloss.
Credit to this youtube video for the idea: https://www.youtube.com/watch?v=Xfy2Ae_9tTQ
I've been trying to find a way to Texas rig a Ned Rig to make it weedless and have had trouble finding some affordable light wire hooks with a bait keeper. I found the above linked youtube video and tried it out this evening and it seems to work great! I picked up a variety pack of heat shrink tubing from Harbor Freight for $5. The smallest size, 5/64", worked best and you could definitely go smaller to 1/16" or maybe 3/34" and it might even hold a bit tighter. I tried it with a TRD and it worked fine, I just cut the top/outer corner so it was easier to get the plastic over
Sorry if this is old news but just wanted to share this very cheap way of adding a bait keeper.
Edit: I just looked on Amazon and found this pack of heat shrink tubing: https://www.amazon.com/Ginsco-270Pcs-Shrink-Adhesive-Tubing/dp/B073R69KNB/ref=sr_1_3?ie=UTF8&qid=1525832477&sr=8-3&keywords=adhesive+lined+heat+shrink+tubing+1%2F16 I would expect that it would work better being a 3:1 shrink ratio and also is adhesive lined which I don't think the HF tubing has.
Yup, I bought a 240 pack in all different colors, and just give them away, and help apply them for anyone I know who might need one.
i can appreciate a real hardwood floor...
https://www.amazon.com/ThreeBulls-240pcs-29-5mm-18-5mm-Battery/dp/B01I6OU8YY/ref=lp_15069575011_1_2?srs=15069575011&ie=UTF8&qid=1493095501&sr=8-2
amazon prime, you can have em in 2 days... and youll have enough wraps for a lifetime, and enough to give out to others who need them...
http://www.amazon.com/Anytime-Shrink-Sleeve-Tubing-Assorted/dp/B008WWC6FU/ref=sr_1_2?ie=UTF8&qid=1370903152&sr=8-2&keywords=shrink+wrap
A few weeks ago I used the marine heat shrink on my sparrows picks since I didnt have any success with Plasti Dip. I does feel nice, and I don't think ive lost any feedback or sensitivity on them.
For anyone who's interested here's what I used, I just needed to trim them to the appropriate length:
https://www.amazon.com/gp/product/B073R69KNB/ref=ppx_yo_dt_b_asin_title_o02_s00?ie=UTF8&psc=1
Any non adhesive lined heat shrink that is 3/4" before being shrunk will work.
So something like this:
https://www.amazon.com/Install-Bay-3MHST34-Shrink-Diameter/dp/B0053PYDFA/ref=sr_1_4?ie=UTF8&qid=1467917023&sr=8-4&keywords=3%2F4%22+heat+shrink+tubing
Electrical tape or heat shrink.
I find it funny but understandable that the things that break and don't get fixed are the things that can be fixed for <$5.00 if people only knew what to buy or what to use. It's easy to know you need a new chair, but it's harder to know it's wobbling because of a small loose screw. So the little things fall into the category of not broken enough to need a new dishwasher but inconveniently broken. There's nothing Sugru can do that you can't find a better solution for in the adhesive aisle of a hardware store.
If you don't have enough slack after cutting off the original connectors, just crimp butt splice some wire of the same gauge onto the loose wires you cut, then cover with glue-filled heat shrink. If you can't find uninsulated crimp splice connectors at the local store, just heat up the insulated ones with a heat gun until the plastic softens then pull the metal inside out of the plastic sleeve.
Make sure whatever Weather Pack connector you use, it's sized to accept the proper gauge wire. Trying to force larger wires into smaller gaskets and pins will ruin your project.
Nurk is using these.
I was in same situation with plenty of paracord. I ordered this and it has worked well: https://www.amazon.com/gp/product/B0053PYF62/ref=oh_aui_search_detailpage?ie=UTF8&amp;psc=1
However, it feels just a bit thinner than the stock stuff that comes on the bag. It really is not a big deal. You can also search for "glue lined" to get the stuff that /u/Dewy93 mentioned. The key is 1/4" thickness.
Along the same lines... you could finish the tails with a little heat shrink tubing, maybe 1/4 inch heat shrink, then leave an inch or so to fray... trim to suite. Or with a folded end as you have, and larger heat shrink.
Hello, I was just about to order a couple days ago, then figured I should ask you all here on /r/Multicopter if you have any recommendations for changes. I can solder and have tools, is there anything that I am missing here for a complete setup? Oh I also already own a Spektrum DX6i with two Spektrum AR610 receivers.
item | link | price
-|-|-
AV transmitter/receiver | Boscam 32Ch 5.8G 600mw 5km Wireless AV Transmitter TS832 Receiver RC832 for FPV | $35.63
Charger | Genuine SKYRC iMAX B6 Mini Dual Power 6Amps 60Watts Professional RC Balancing Battery Charger & Discharger (Version RCLITE) w/ Micro USB Port For RC Lipo Battery Cherge, Temperature Port | $36.58
Heat shrink | uxcell® 1 Meter 50mm Dia Ratio 2:1 Heat Shrinkable Shrinking Tube Black | $6.66
Flight Controller | AbuseMark Acro Naze32 Rev 6 Flight Controller W/ Straight / Bent Pin Headers, Breakout Cable, & Apex RC Products Nylon Standoffs | $39.99
Frame | YKS DIY Full Carbon Fiber Mini C250 Quadcopter Frame Kit for FPV Mini Quadcopter Part | $37.99
Motors | 4pcs EMAX RS2205 2300KV Brushless Motor 2CW 2CCW for QAV250 QAV300 FPV Racing Quadcopter | $78.79
ESC's | Crazepony 4pcs Littlebee 20A Mini ESC Oneshot125 Electronic Speed Controller 2-4S Brushless for FPV Multicopter Quadcopter | $39.99
Props | Hooshion® 16 pcs 8 pairs GemFan HD HQ 5030 5x3 CW CCW Propeller for Mini QAV250 Quadcopter (Black+Orange) | $12.59
Connectors | XT60 Drone Connectors 5 Pairs (5 Male and 5 Female) | $2.96
Battery | Turnigy 2200mAh 3S 20C Lipo Pack | $16.70
AV Antenna | Anbee® FPV 5.8Ghz Circular Polarized Clover Leaf Antenna High Gain Aerial Set w/RP-SMA Plug | $10.98
Camera | SC2000 600TVL D-WDR DNR Board Camera SONY Super HAD CCD for FPV, 2.8mm Lens, IR Blocked Filter | $33.99
| total | $352.85
https://www.google.com/amp/s/amp.reddit.com/r/electronic_cigarette/comments/46c99s/a_guide_to_making_custom_battery_wraps_for_idiots/
20pcs 29.5mm 18.5mm PVC Heat Shrink Tubing for 1 x 18650/18500 Battery https://www.amazon.com/dp/B018I08UKU/ref=cm_sw_r_cp_api_9cXpzbQDYWTBP
Here's the process I used 😁 Super easy
https://www.amazon.com/gp/product/B009IILEVY/ref=ox_sc_mini_detail?ie=UTF8&amp;psc=1&amp;smid=A1THAZDOWP300U I found this. 25mm heatshrink is supposed to be good (approximately 1 inch).
I bought 275 paracord and cut it to 4 equal lengths, and then took out the inner strands. Then I used 26 AWG wire, threaded it through the paracord sleeving which took a little bit of time. Then soldered the 4 ends to a 1/4 in jack. At this point I braided the 4 strands together, chose how long before my y split, then just twisted the two sets of wire and soldered the 650 terminals on. I also made sure to have heat shrink, so I bought the most popular amazon set.
Sorry for the late reply. First of all, take all of this with a grain of salt. This is my first build, so I am by no means an expert. You should definitely look in to all this on your own rather than blindly trust my purchases.
Here are the tools I got in my Amazon order:
I hope this helps.
Thanks guys. Again, didn’t know it was an issue. Just bought a set of wraps from amazon. Will be here Sunday. Have a heat gun so it should be smooth sailing.
ThreeBulls 240pcs 12 Color 29.5mm 18.5mm PVC Heat Shrink Tubing Tube For 18650 18500 Battery Shrink Film https://www.amazon.com/dp/B01I6OU8YY/ref=cm_sw_r_cp_api_i_S9bcBbW648CGQ
> Well shit didn't think about that with the controller. Here is exactly what I ordered.http://www.hobbypartz.com/79p-th9x-r9b-9channel-radio.html
According to the description it comes with a receiver.
> Just bought 2 of the 3S 5500mAh 30-40C
That should do you nicely.
> Any other random things you think we will need
Using amazon links and favoring prime options even if a few $$ more. The most cost effective way to get any of the below would be ebay and slow free shipping.
I use both this and heatshrink when I want a water tight seal.
Also pro tip for ya, you will need a 3:1 heatshrink if you have to go over a head phone jack.
https://www.amazon.com/Ginsco-270Pcs-Shrink-Adhesive-Tubing/dp/B073R69KNB/ref=sr_1_3?keywords=3%3A1+Heat+Shrink&amp;qid=1555176527&amp;s=industrial&amp;sr=1-3
Some of these parts may be purchased at your local hardware store for a cheaper price.....
• Dual Digital Display PID Temperature Controller: http://amzn.com/B002PIM3R8
• Solid State Relay w/ Heatsink: http://amzn.com/B005K2IXHU
• PT100 Thermocouple Sensor: http://amzn.com/B008MU0VFY
• Aluminum Project Enclosure Box, Econobox: http://amzn.com/B005T7RPFC
• 3 Pin IEC320 Male Power Socket w/ Switch: http://amzn.com/B00F4MGRRE . TIP - Replace Fuse With F15AL250V.
• GX16-3 Aviation Connector:http://amzn.com/B00FB56T04
• Black - Tamper Resistant Power Receptacle: http://amzn.com/B002L6H414
• Gray - Tamper Resistant Power Receptacle: http://amzn.com/B002L6H428
• IEC320-C13 Power Cord: http://amzn.com/B0012EI6KE
• Rubber Feet: http://ebay.com/itm/351131287090
• Heat Shrink: http://amzn.com/B00EXLLXK8
• Fork Terminal Wire Connectors - Non Insulated ~ 16-14 AWG: http://amzn.com/B00LUUAB94
• Female Disconnect - Non Insulated: http://amzn.com/B0071OXJ5Q
• Insulated Copper Wire ~ 18-14 AWG
• Nuts & Bolts
Here is my Intro
Ill add a pic once I get out of class!
No Diggity
And on the off chance that I win, either Red Diggity or Blue Diggity
Edot: Of course I forgot haha
If you don't want to buy new grips, don't tape over it. Use large diameter electrical cable heat shrink. Won't get sticky and will be reasonably durable. Place over grip and use a heat gun to shrink in place.
Like this: https://www.amazon.com/gp/aw/d/B00MJVQR7I/ref=s9_top_hm_awbw_blQPPf_g328_i11?pf_rd_m=ATVPDKIKX0DER&amp;pf_rd_s=mobile-hybrid-11&amp;pf_rd_r=4QB9VE1H7VHCVBTP2ZVW&amp;pf_rd_t=30901&amp;pf_rd_p=b57f5639-73c6-5e58-aea5-2473e4740a80&amp;pf_rd_i=700782011
These precut heat shrink tubing off Amazon. First time trying this, so I have nothing to compare them against, probably something better out there, but they worked just fine.
Underneath is just cheap printer paper through a color laser printer. All the shine is coming from the clear tubing. Could probably improve the quality further by using better/shinier paper but that stuff is also thicker and I don't know how close these tolerances are before it will no longer fit in a mod box. With just the paper added its already a noticeable tighter fit. Higher quality paper might put it over the edge into not fitting.
Ended up getting the transformerto fit in the old box. Working fine at 16V 30va setting of the transformer (vs 24V). Used 3 pairs of wire total with this heat shrink tubing and these heat shrink solder wire connectors. Thanks all.
I found a piece of wide heat shrink on amazon.
https://www.amazon.com/gp/product/B00MJVQR7I/ref=ppx_yo_dt_b_asin_title_o01_s01?ie=UTF8&psc=1
Hi everyone! If you liked the electronics enclosure you can download the design files here -
And here's the part list!
QUANTITY | COMPONENT NAME | LINK / COMMENT
:---------:|----------|----------
1 | 7I76-5I25 PLUG-N-GO KIT | http://store.mesanet.com/index.php?route=product/product&amp;product_id=215
1 | DROK LM2596 Analog Control Step-down Regulator Module | www.amazon.com/gp/product/B019RKVMKU
1 | DC Fan (120mm x 120mm x 25mm 24V) | www.amazon.com/gp/product/B01FBPQMXW
1 | Mesh Dust Filter for 120mm Fan | www.amazon.com/gp/product/B01M0A2UH0
3 | DIN Rail | www.amazon.com/gp/product/B015E4EIOK
1 | IEC320 Inlet Power Socket | www.amazon.com/gp/product/B00ME5YAPK/
4 | KL-5056 Stepper Motor Driver - 32 bit DSP Based | www.amazon.com/gp/product/B00O6DC8PW
1 | Emergency Stop Button Switch | www.amazon.com/gp/product/B0094GM004
25ft | 4 Pin Cable | www.ebay.com/itm/20M-4-Pin-5050-3528-RGB-LED-Strip-Light-Wire-Extension-Connector-Cable-Cord-Line-/282110056592?hash=item41af11d890
1 | Antek Linear Power Supply - 500W 30V 16A Peak 25A With Passive Filters / EMI-RFI Filters and Suppressors | https://www.ebay.com/itm/PS-5N30-500W-30V-16A-Peak-25A-Stepper-Motor-Antek-Linear-Power-Supply-/371664502398?hash=item5688ee3e7e
3 | Wall Outlets from Home Depot | Find ones you like / feel are safe enough using
16ft | Led Strip Lights | www.amazon.com/gp/product/B01GJ3O0J8/
1 | Misc. Hardware | Nuts, Bolts, Standoffs, Crimp Connectors, Spare Fuses, 2 Extra Limit Switches
2 | Ogrmar SSR-25 DA Solid State Relay with Heat Sink | www.amazon.com/gp/product/B074FT4VXB/
1 | 18 AWG Gauge Stranded Hook-Up Wire Kit | www.amazon.com/gp/product/B00N51OO7Q
~30pc | Heat Shrink Tubing | www.amazon.com/gp/product/B00OZSL8UE
1 | Shop-Vac | www.amazon.com/gp/product/B00EPH63K0
7 | Uxcel 16mm Thread 4-Pin Panel Mount Wire Connector | www.amazon.com/gp/product/B016FCZ5SS
2 | 8 Circuit 20A Terminal Block | www.amazon.com/gp/product/B000S5Q2VS
Best of luck! Feel free to PM me or comment with any questions or feedback!
I bought this pack of 3:1 in various sizes, and it's the one in the top middle row. I'm not sure what size it is, though I'll have to figure it out soon cause I'm running out and I use that size the most. I highly recommend 3:1 when connecting things that are very different sizes (like the sennheiser connectors to the cable), it helps secure much better.
Plastic like say the stock one? Wiring will be fine as long as you have no exposed wire at connections. Buy some cheap shrink tubing, https://www.amazon.com/gp/aw/d/B018G6CQAG/ref=mp_s_a_1_2/134-3190994-9463610?ie=UTF8&amp;qid=1493068823&amp;sr=8-2-spons&amp;pi=AC_SX236_SY340_FMwebp_QL65&amp;keywords=electrical+wire+shrink+wrap&amp;psc=1
What headlight you installing?
I have the same setup! I have q701's, so I hang them by the top wires.
I had some heat shrink that I put over the metal, just to give it a little extra protection from rubbing.
This thing and dielectric grease on the contacts.
You guys are awesome!!! This is exactly what I need!!
Do I need to buy a heat gun or could I get away with a hair drier? lol
Link to video - process
Link to heat gun on amazon
Link to Heat Shrink Tubing Sleeve - prob should order the correct dimensions or cable
If I'm understanding your issue correctly, someone in the past cut out the plastic connector that would fit into the stock unit, leaving you with just wires. If that is the case, you will need a meter to help you figure out the wires. in a pinch, a 9 volt battery can be used to figure out which speaker is which (really not good for the speaker, but it does work).
Strip the ends of all wires and twist them together. Electrical tape works in a pinch, as do wire nuts, but really I'd opt for heat shrink tubing cut to size before you twist the wires together. A hair dryer should work to shrink the tubing since you probably don't have a heat gun lying around the house.
I have this exact set from Amazon. You'll need the 1.5 mm (approx 1/16") heatshrink tubing from the set. My original comment has a link to the tutorial, which mentions the dimensions as well.
Buy some dual wall shrink wrap. https://www.amazon.com/Ginsco-270Pcs-Shrink-Adhesive-Tubing/dp/B073R69KNB
Isint 3/4" the heatshrink and 1/2" the sleeving? Do you know we would need a smaller heatshrink or sleeving?
I was thinking of getting this sleaving:
http://www.ebay.com/itm/FLEXO-PET-Expandable-Braided-Sleeving-Wire-Cable-Sleeve-Loom-10FT-25FT-Feet-/141743771843?var=&amp;hash=item21009650c3:m:mA_pHsTsShuJLw2Ey8mUeLw
What size braided sleeving would you recommend for the new 3 in 1 cable?
and this heatshrink:
https://www.amazon.ca/Install-Bay-3MHST34-Shrink-Tubing/dp/B0053PYDFA
Would this size heatshrink work for the new cable?
Nice find Op!
Might want to look into heat shrink the keep those clips together.
Ginsco 580 pcs 2:1 Heat Shrink Tube 6 Colors 11 Sizes Tubing Set Combo Assorted Sleeving Wrap Cable Wire Kit for DIY https://www.amazon.com/dp/B01MFA3OFA/ref=cm_sw_r_cp_api_i_uU53AbJP0KQHA
No I mean shrink wrap.
https://www.amazon.com/dp/B072PCQ2LW/ref=cm_sw_r_cp_api_TaY7BbYWB0K24
I used TechFlex 1/8" 25 feet from Amazon.
I used VKTech heatshrink.
I could have done a much better job on the heatshrink on both ends of the cable, however I didn't have time to use my heat gun so I used my Zippo with a Thunderbird butane insert.
It turned out pretty good in my opinion, however like I said, I could have done a much better job.
I started out with something like this. I used Z-line instead of braided cord, but it's really personal preference. Nylon is nice because it's soft and comfy, though it may slip easier than other ropes because it's got less tooth (so some kinds of knots work better than others). The advantage of having a long length to begin with is that you can choose what lengths you'd like to cut from it. 6' and 12' lengths work well for most limb ties, depending upon what you're doing, but you'll probably need 20, 30, even 50 foot lengths if doing more intricate body harnesses. If you're not sure what you're interested in just yet, do a few shorter lengths and then one or two longer ones. Once you cut the lengths to your liking, you can slip some heat shrink tubing over the ends and run a lighter over them a few times to seal the ends and keep the rope from fraying.
I also recommend Jay Wiseman's "Erotic Bondage Handbook" as it not only gives a great overview of a lot of different ties, but also focuses the first 1/3 of the book on things you'll need to keep in mind for safety and comfort. There are things that can go wrong, but it's not much to worry about as long as you learn from the experience and mistakes of people who've been in the scene a while.
Nonononono. No aluminum foil.
First, you'll need some heat shrink tubing of the appropriate size.
http://www.amazon.com/Anytime-Tools-SHRINK-SLEEVES-ASSORTED/dp/B005W42SW2/ref=sr_1_7?ie=UTF8&amp;qid=1463080614&amp;sr=8-7&amp;keywords=heat+shrink+tubing
Then, you should trim the cable a bit on both ends to clean up the messy ends.
Next, cut open the cable sleeve the wires are in, and strip the ends of the wires. Put a piece of shrink wrap tubing large enough to fit on the outside of the entire cable along one end of the cable. You'll use that later.
Then, you'll have cables that look like this
}=]--
} is the sheath
= is the covered wire
] is where you stripped the wire
-- is the naked wire
Take one of the wire, and push the shrink wrap tubing up it. Then, take the two stripped ends of matching wire and solder them together so that they overlap a bit.
}=]-@--@-[={
@ are the solder points
Move the shrink wrap tubing over the soldered wire and hit it with a hair dryer until it tightly covers the exposed wire.
Do that with each of the wires. Test that the cable works.
Once you have confirmed it is working, take the shrink wrap tubing you put over the whole cable sheath, bring it over area that no longer has sheathing (where your wires were soldered and shrink wrapped) and hit the tubing with a hair dryer to seal it up.
You should be good to go. I left out the mesh tubing or additional insulation for the newly heat shrunk wires, but you could add that as well - not something I am familiar with.
Yea it's this stuff. Normally you use a heat gun to shrink it but you can use a gas stove top or lighter, just be careful.
It's important for the strain relief, to make sure pulling the cable doesn't pull the solder joints. Otherwise your cables won't last nearly as long.
Here is how NASA would splice that wire :). All you need is a decent soldering iron and a little bit of solder. Do it outside, especially if you are using lead based solder. A little heat shrink tubing and you can have that cord back in working order, even if it's a tiny bit shorter :).
There should be two wires inside that cord though: one for positive, and one for negative- make sure not to let these wires touch each other!
I don't know if your IEMs are different, but when some older ones I had failed, there was no good way to access the cable. (The unit was press/glue fitted together. From a quick search, the ones you have don't look much better.) I recommend that you buy a soldering iron kit and solder the wire back together instead of replacing the cable. Heat shrink tubing is recommended to prevent the same cable from failing in that location again.
Those cables are covered in varnish, so twist them together and then use the soldering iron to burn off the varnish while you solder the two wires together. If using heat shrink, use 2 layers: one for the inner wires, then one for the entire cable. You can shrink heat shrink with a lighter or a heat gun.
Oh I'm still talking about 3s - in fact this is the exact battery I'm using, but to each their own.
What kv are those motors? Also, how wide are your esc's? The size of the heat shrink depends on the size of your stuff. I believe I used this heat shrink for my esc's, but mine are pretty small. If you want to be safe I recommend a set of heat shrink such as this or this.
I personally don't use braided wire but I've herad that this one isn't too bad.
Make sure to get that power supply! It'd be a very sad thing if you get can't charge your batteries but have everything else done.
This is a Grasshopper GHB2 battery. Had a tear at the negative end and at the positive end. I could not find 12650 battery wraps as previously guided, nor can I find 13mm inner diameter when not flat PVC material/battery wraps.
I tried a few 18650 wraps to no avail, then tried some 13mm heat shrink tubing I have for computer wires.
This is a link for the heat shrink wraps I used. I cannot find what material they are made out of and I know that 18650 wraps are usually (or always) PVC wraps.
https://www.amazon.com/Anytime-Tools-Shrink-Sleeve-Assorted/dp/B008WWC6FU/ref=cm_cr_arp_d_product_top?ie=UTF8
Does anyone know if this material is good to use as a battery wrap?
Nice van!
Don't be too intimidated with adding a house battery. You can do it.
Very in-depth guide for adding a house battery with solenoid: https://www.youtube.com/watch?v=1zrwHyy4qyY
This is the battery I used, it ROCKS. (smaller and cheaper options from same company available)
Other items I used...
is your face worth more than $0.30 to you?
Thanks for the help! I don't have a background in Mech Engineering (?), but I think I understand those instructions. Would this kit of shrink tubing do the trick?
AmazonLink
PLT: If your aglet breaks or otherwise comes off, you can repair it by cutting a piece of that plastic wire cover that shrinks when you heat it. This stuff.
Those earbuds have no stress relief in the connection. It is not your fault they are breaking. You just need to heat shrink for some stress relief.
Heat Shrink Tubing, Eventronic Electrical Wire Cable Wrap Assortment Electric Insulation Heat Shrink Tube Kit with Box(5 colors/12 Sizes) https://www.amazon.com/dp/B072PCQ2LW/ref=cm_sw_r_cp_apa_i_U6uRDb148T5HS
Method https://youtu.be/oHbgAiKBpf8
Do this to the points you feel are being tugged at. But do this for new earbuds, the old ones need to be fixed.
For hiding the mustard and ketchup cables, I would recommend getting a Silverstone cable extension. You can get them in every colour, and they're compatible with every PSU. You just stick them on the ends of your PSU cables to extend them, but with a nicer colour
Like this 24pin
Unless you want to buy a new CPU cooler, there's not much you can do to hide the exposed cables of the stock one. My only idea would be to buy some Cable heat shrink wrap and cover it that way
On This Guide it only shows it being done to the Power which I found weird. You did it to the "Hotbed" one next to that as well?
That guide also suggests getting this Heat Shrink but that is included with the connectors?
Thank you very much for the information, that is very helpful!
at first I just let them go however they wanted, as I was swapping between my HD598s and my M50Xs. However, once I decided to use my HD598s 100% of the time for my computer, I initially just threw a few zipties to hold them together, and then I eventually bought some shrink wrap like this, and used a heat gun/lighter to do a nicer job combining the cables. You could sleeve it like this for unique colors/better look
It looks like regular clear heat shrink, though now that I think of it, my clear tube is a bit more flexible (and more prone to tearing when shrinking sometimes) than the regular stuff. This is what I bought, I don't know if it's exactly what you're looking for but it does seem close to what those battery buzzers come with.
They have rolls on Amazon
Uxcell a12080700ux0466 Polyolefin 2:1 Halogen-Free Heat Shrink Tubing, 2 m, 6.5', 25 mm Diameter, Clear https://www.amazon.com/dp/B009IILEVY/ref=cm_sw_r_cp_api_UOX4ybZ4QD60D
What's on the plug side?
Maybe something like this. Seems to have a high shrink ratio along with adhesive on the inside to prevent future slippage.
"I'm so pissed off. Who's gonna replace my brand new ruined batteries? I have no way of wrapping them myself. If I added tape to my battery they will 100% not fit anymore into the mods."
YOU ARE.
Fucking woe is me, man.
Go on amazon and get some battery wraps, here's 240 in assorted colors for $10. https://www.amazon.com/ThreeBulls-240pcs-29-5mm-18-5mm-Battery/dp/B01I6OU8YY/ref=sr_1_4?ie=UTF8&amp;qid=1538600861&amp;sr=8-4&amp;keywords=18650+battery+wrap
Enjoy!
I cut the wire, soldered the individual wires,heat shrink tubing on each side, then a larger one to seal the whole splice, used a heat gun to shrink it, which also sets the glue in place.
I don’t see why more amps on your 600W ps should matter. As long as you’re providing exactly 24v, you should be fine.
I don’t know how long your run is, but you might end up w voltage drop towards the end of a very long run.
https://www.amazon.com/130-pcs-Adhesive-Assortment-MILAPEAK/dp/B071H5XC7C/ref=as_li_ss_tl?ie=UTF8&amp;qid=1522203192&amp;sr=8-13&amp;keywords=1/2%22+heat+shrink+tubing&amp;linkCode=ll1&amp;tag=shareyourrepair-20&amp;linkId=334b0112d9034822b95e7eaaec202904
this will do.