Best power rotary tool buffing wheels according to redditors
We found 37 Reddit comments discussing the best power rotary tool buffing wheels. We ranked the 21 resulting products by number of redditors who mentioned them. Here are the top 20.
We found 37 Reddit comments discussing the best power rotary tool buffing wheels. We ranked the 21 resulting products by number of redditors who mentioned them. Here are the top 20.


Won't work. You need this guy.
We used a regular hair dryer to soften the adhesive, though it was likely unnecessary since it was also hot out and kind of inconsequential to the final result.
I then flossed behind the plastic letters with fishing line (12 lb. test, for what its worth), which easily popped them off but left the thick chunky adhesive behind.
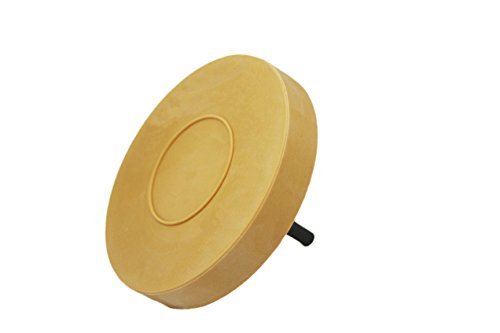
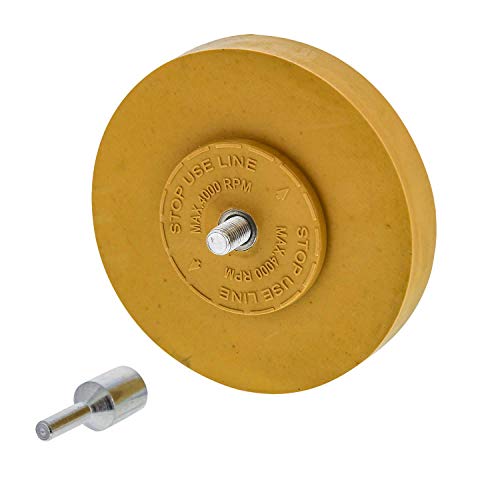
The real key here is the adhesive remover wheel you attach to a drill. I used this one: https://www.amazon.com/dp/B018WG2XYE/ref=cm_sw_em_r_mt_dp_U_Pw.wDb34TNWHK
The trick is to keep the RPMs relatively low and apply strong pressure. The adhesive will fling off easily, it's just a matter of making sure you go over each spot thoroughly.
Then I dabbed a little goo gone on a rag and wiped down the area, which revealed any further stuck on adhesive / stains. Used the drill again if need be.
The last step for me was a super quick pass with carnauba cleaner wax since there was kinda some grime around the letters that left an outline of them behind. The cleaner wax took it off with almost no effort. :)
I did all of the badges too - two on the sides, the Ram on the back, and the Promaster logo on the back. Took probably 45 minutes total, maybe less.
Before pics
Wonderwheel
There are more expensive versions of this but for 10$ it did pretty damn good
Just use low rpm (I think it says less than 2000 rpm drill) and don’t stay in the same spot for long. After wards I just brushed off the remnants and wiped away with goo gone and a towel.
I’m not like a mechanically inclined person so if I can do it you can too
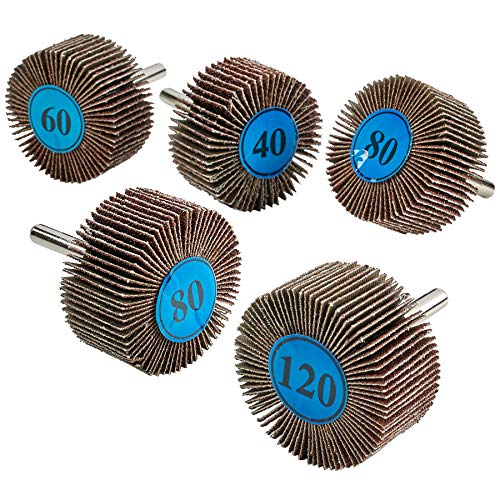
try 2000 grit wet sand. If you are afraid that will be too much for it then use a buffing wheel. You can get these at most tool or auto parts stores
one good turn deserves another, I'd say. I pretty much use mainly these in 10mm to do majority of my grinding. Keep them wet while grinding will give a decent polish right off the rotary tool.
http://www.amazon.com/TEMO-cylinder-RUBBER-rotary-polishing/dp/B004HSI5NA/ref=sr_1_2?ie=UTF8&qid=1458449203&sr=8-2&keywords=temo+rubber+polishing
I have these for a supposedly high level of polishing, but haven't really found much of a difference (maybe slightly) compared against the green bits. http://www.amazon.com/3pc-Polishing-Bit-Set-Natural/dp/B007QWEQFA/ref=sr_1_16?ie=UTF8&qid=1458449342&sr=8-16&keywords=balata+rubber
If you're in the states, rio grande has a good selection of high quality wheels that you can wade through here. https://www.riogrande.com/Category/tools-and-equipment/polishing-and-finishing/abrasives/abrasive-wheels
Initial turning was done fairly clean, so I started with 220 grit , switching directions through 600 grit. Then I put on 2 back to back applications of danish oil. At this point, that is the picture on the left, and it looked really good, and normally I'd call that done.
I have a couple of 8" buffing wheels mounted in a Threaded Arbor Mandrel and this goes in a jacobs chuck mounted on my lathe. It could just as well go in the drill press. Spinning at about 800 rpm, I load up the buffing wheel for about 3 seconds with the tripoli bar. Then buff out the wood piece against it. Then take a scrap piece of wood, and use the edge to clean the buffing wheel. You're supposed to use a different wheel then, but I use the same buff wheel to load up the white diamond compound, and put the wood to it. wipe clean with paper towel.
Then I switch to a new wheel, just for wax. I load up the wheel for a few seconds by buffing a stick of carnuba. Then apply wheel to the wood piece at around 1000 rpm. Keep the wax thin on the wheel, so that it stays thin on the wood.
So 2 rounds of buffing compound, and 1 round of carnuba. Process took me about 20 minutes.
[Here is a pretty good youtube video on this! ] (https://www.youtube.com/watch?v=1XgspdjERyI)
The only things I can think of are
Since you're looking at refurbing one and using the other, I'll offer the following insight:
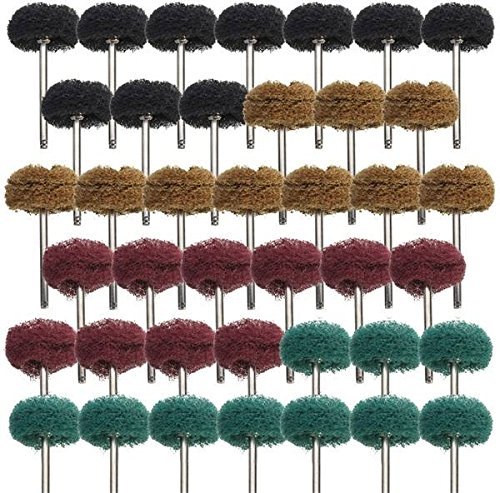
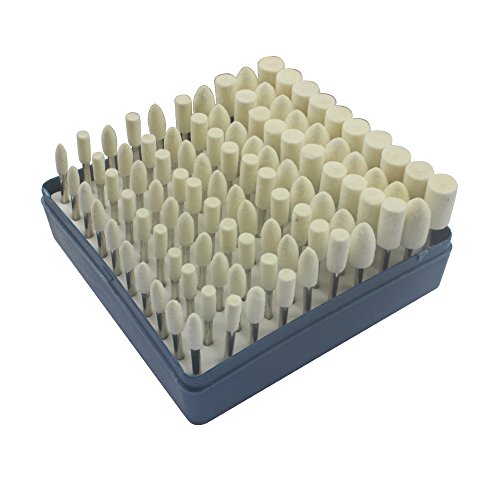
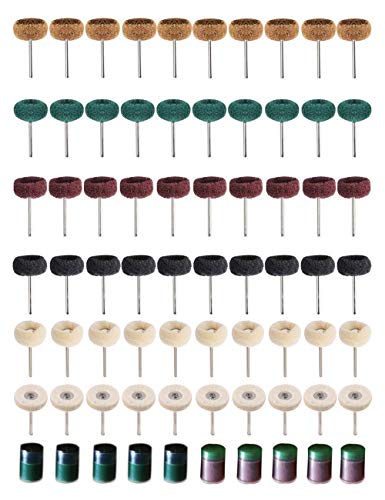
I don't really know. I've never had very good luck with the stones. I think the most useful dremel accessories for grinding away material is either use the sanding drums like these or use rasps/burrs coated in diamond or tungsten carbide like these.
For the brushes, the silver ones are steel or stainless steel, and the brown ones are usually brass. They'll have different effects on different materials based on the hardness. I've used the stainless brushes on steel before to clean it and kind of give it a texture.
For buffing/polishing of things like painted surfaces you'll want something like this or this and some sort of buffing compound. Most dremel accessory kits usually come with 1 or 2 buffing attachments.
For getting rid of molded clothes, and so many other super useful things, I recommend owning a dremel, or other rotary tool.
You don't need a fancy one. I've got 3 dremel tools, of varying degrees of torque and power. One is identical to this one - only without the pet grooming branding. It's still a dremel - it'll still work.
Dremel 7300-PT 4.8V Pet Nail Grooming Tool https://www.amazon.com/dp/B003TU0XG4/ref=cm_sw_r_cp_api_i_jF4xDb8CJPTXW
$30
I did find this guy for a super cheap price -
WEN 23006 Two-Speed Cordless Rotary Tool Kit with 10-Piece Accessory Set https://www.amazon.com/dp/B07MSL9PW4/ref=cm_sw_r_cp_api_i_4C4xDb9MG46FY
$12
Can't vouch for it being any good, given its price, but it should be compatible with the dremel rotary bits, and for a starter tool, and just working on dolls, it should be fine.
Whatever rotary you get, you'll need a few things to go with it. I recommend one or both of these -
Sanding drums
https://www.amazon.com/dp/B07BK1VRH6/ref=cm_sw_r_cp_api_i_yJ4xDb738D61Y
Abrasive buffing wheels
https://www.amazon.com/dp/B075C72PGK/ref=cm_sw_r_cp_api_i_NH4xDbCZ6DM5C
The buffing wheels are pretty good a removing tiny molded clothing details without eating up the plastic a lot.
If you ever do anything with apoxie-sculpt, the dremel can come in handy with grinding down things after its cured.
OH - and sand paper. Buy sand paper.
I recommend getting some 120 grit, 220 grit, and some 400 grit. You work your way from the lower, rougher paper, up to 400 to get a smooth finish. When you get up to 400, make sure you sand in circular motions to avoid leaving gouges in the plastic.
Use eraser wheels. There are some cheap ones that work like this or this or even autozone I believe has these bit they are pricy. Or we use the MBX tool with the mbx wheel. That will eat it up quick, but those are pricy too. The first link get a good amount of those. The vinyl eats them up real fast.
Eraser wheel.
ABN Rubber Eraser Wheel 4in Pad & Adapter 1-Pack - Pinstripe, Adhesive Remover, Vinyl Decal, Graphics Removal Tool https://www.amazon.com/dp/B018WG2XYE/ref=cm_sw_r_cp_api_i_vkIKDb53F3HEB
ABN Rubber Eraser Wheel 4” Inch Pad & Adapter 1-Pack – Pinstripe, Adhesive Remover, Vinyl Decal, Graphics Removal Tool https://www.amazon.com/dp/B018WG2XYE/ref=cm_sw_r_cp_apa_b1k-BbKAHXSWA
I've had good success with these as well.
https://www.amazon.com/ABN-Pinstripe-4-inch-Sticker-Removal/dp/B018WG2XYE/ref=pd_lpo_vtph_328_bs_img_1?_encoding=UTF8&psc=1&refRID=W3892VGE3A2YFF602443
ABN Rubber Eraser Wheel 4" Inch Pad & Adapter 1-Pack - Pinstripe, Adhesive Remover, Vinyl Decal, Graphics Removal Tool https://www.amazon.com/dp/B018WG2XYE/ref=cm_sw_r_cp_tai_835kDbE8GQNEZ
I bought little scotchbrite pads like these:
https://smile.amazon.com/ZFE-Abrasive-Buffing-Polishing-Dremel/dp/B010NLHCOW
I only ended up using a couple of them. Since the putter as a bunch of large surfaces, wet/dry sandpaper did most of the work. Started at 400 and went up from there. Think I finally got sick of sanding at 2000.
I curbrashed my 3's 19" silver 3 rim :'(
I watched a ChrisFix tutorial on how to repair an aluminum rim using a dremel w/ a sanding detail brush.
Has anyone tried this? Also, I can't tell if there's a clear coating on the rim. Would it make sense to sand with the course & fine grit detail brush? Or do I really need to strip the whole thing and recoat?
I hear shops will do this for $100-200, but would be nice to avoid that expense.
On my personal vehicle i clean them with soap and water. Then i use either a powerball or a Cotton buffing pad with Mothers mag polish. Take your time and it will look amazing.
Something more like this, for a bench grinder
https://www.amazon.com/Cotton-Grinder-Buffing-Wheels-8BUFF088/dp/B000SLNQCK
then you buy some fine polishing compound that you touch to the wheel while its spinning.
I wouldn't use a dremel or other small rotary tool, its too hard to get it all nice and even. The big buffing wheels do a large enough area that it looks good and even.
I just got a NOVA chuck and can't wait to try it out. The pen jaws are kind of small for briar turning, but should work for turning the stems. I'll start my bowl turning next week and see how the nova works out.
Also, pick up one of these guys: https://www.amazon.ca/Enkay-156-6K-6-Inch-Buffer-Polishing/dp/B001QXI9VW/ref=sr_1_4?ie=UTF8&qid=1509590584&sr=8-4&keywords=BUFFing+kit
Throw that buffing kit on a 3/8" threaded rod with some washers and nuts and it works great. I grabbed some carnuba on eBay for cheap. I increased the tension on the motor/belt as much as I could to keep the belt from slipping (I bought my lathe 2nd hand and the guy before me complained it had no power.. he didn't even tighten the belt!).
For a chuck (drill bits, french sanding wheel, etc), just grab a MT1 chuck. I got mine from Lee Valley for ~$42 I think
The lathe is probably my favorite tool after my drill, miter saw, and thumb detecting nut-fucker (/r/skookum)
ZFE 88pcs Felt Polishing Pad &... https://www.amazon.com/dp/B0097PM17Y?ref=ppx_pop_mob_ap_share
Do you have the stone cut and shaped yet? No offense to you, but it seems like theres alot of research on your end that has yet to be done.
Probably if you're careful, I've used these https://www.amazon.com/Drill-Warehouse-Abrasive-Buffing-Polishing/dp/B075C72PGK
I got these cotton buffing wheels for my drill press from Amazon:
https://www.amazon.com/dp/B01H6Y0KUC/ref=cm_sw_r_cp_apa_3IFszbN6Z2XZN
They work great, but the smallest one is just way too small, so I'm going to have to get another big one. I also used some tripoli and white diamond before the wax
It looks just like a grinder, yeah. But what I'm thinking was to take the replacement wheels like this and maybe in the chuck of a drill driver you'd be able to make your own flap sander of sorts.
This and a drill.
This thing ABN Rubber Eraser Wheel 4in Pad & Adapter 1-Pack - Pinstripe, Adhesive Remover, Vinyl Decal, Graphics Removal Tool https://www.amazon.com/dp/B018WG2XYE/ref=cm_sw_r_cp_apa_i_w3w2DbDZV2EWK
The first thing to use is Frame Protector for the inside of the frame. This can be messy so do this first. Next a brass wire brush on an electric drill or better yet on Dremel-type tool. Third thing is VHT SP229 Rust Convertor Can - 10.25 oz.. This stuff is amazing. It will turn your rust to a mineral that can be sanded off. Lastly, prep for paint. You can get in all the nooks and crannies with these and these. Do not try to paint it yourself. You suck at it. Take it to a motorcycle painter and if you ask for clear he will just hang it next to a motorcycle tank or fender and do them both at the same time. Should cost next to nothing if your prep is good.
Edit: sp
I’m guessing you meant to ask how to remove the scratches, and if that’s the case your best bet is a Dremel (or similar) with a set of buffing pads and a 3 step polish like Novus. You could do it by hand if you don’t have a Dremel, but you’d need some serious patience.
Ya, I have these. Its my last resort, it will mess up some of the finishing polish though. https://www.amazon.com/gp/product/B00XJINV42/ref=oh_aui_search_detailpage?ie=UTF8&psc=1
I used the same molding tape to attach as you did, to remove I used one of these rubber wheels and a drill to get the old adhesive off. You have to get the right technique of light pressure, but once you do it works perfectly.
Removing the gunk was the most tedious part of it, but once it was off and things were clean getting stuff reattached was a breeze. It's also very likely that you won't need those new fasteners and that the old ones are just popped out in a way that they can't be popped back in without twisting like you can when it's off.
Yes it requires care. It also requires accessories that are at the gentler end of the spectrum. I use a sanding/polishing kit e.g. http://www.amazon.com/Dremel-EZ684-01-Lock-Sanding-Polishing/dp/B002L3RV4M and it works well so far.
Don't even mess with trying to heat and peel decals that old. Use a drill and a rubber eraser wheel. Heat guns are for amateurs that don't know any better.
https://www.amazon.com/gp/aw/d/B018WG2XYE/ref=yo_ii_pd_dx_gr_1/188-7323185-1878014?ie=UTF8&pd_rd_i=B018WG2XYE&pd_rd_r=MYRGCVXK6K2NTR47WFW0&pd_rd_w=s6OIm&pd_rd_wg=NzRRH&psc=1&refRID=PK1A5W57D0GPM348SN3F
You can thank me later.