Best home cabinet organizers according to redditors
We found 648 Reddit comments discussing the best home cabinet organizers. We ranked the 252 resulting products by number of redditors who mentioned them. Here are the top 20.
We found 648 Reddit comments discussing the best home cabinet organizers. We ranked the 252 resulting products by number of redditors who mentioned them. Here are the top 20.


I Love organization and love the organization posts :D I posted my ikea-made vanity set in a thread once but I wanted to share the whole setup.
Also /u/Thatsbasic suggested a 'shelfie saturday' in another comment so I thought I'd give it a try :3
Top of the hutch: makeup brushes, larger bottles, and a little basket for all my AB samples, pore strips, etc.
Top row: perfume (no AB), and some Face Shop cotton pads
Middle row: all my AB products, plus some sunscreen, hair products, and deodorant hiding behind them
Bottom row:
empty space: sheet masks and makeup wipes
Drawer: Makeup--a couple AB things in there :)
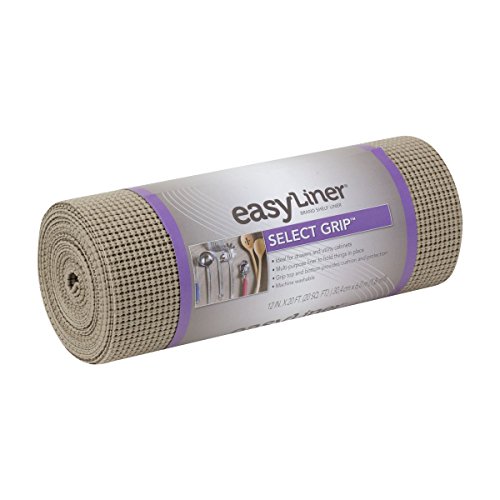
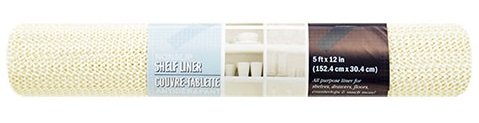
[It's like you guys aren't even trying to save money] (https://www.amazon.com/Non-Skid-Cabinet-Shelves-Non-Slip-12-Inch/dp/B00IXYIWC8/ref=sr_1_10?s=home-garden&ie=UTF8&qid=1485932223&sr=1-10&keywords=shelf+liner)
If I may make a suggestion as someone who's bought a similar unit, buy this and line your bottoms with them: https://www.amazon.com/Tact-Premium-Non-Adhesive-Non-Slip-12-Inches/dp/B001AH8PLI
It will help prevent things from sliding off and also help keep your white shelves clean for a longer period of time.
The pull through is the worst thing you can use.
If it is for a Spyderco Bug, I assume it will not be hard use and all you have to do is to maintain the edge.
Here are some ways you can do so:
Honestly, If you're really strapped for cash and pinching pennies, the Turnbox is the most reliable system you can get on a budget and it'll go a long, long way.
Not to be a jerk, but honestly, in going through the photos, I feel like you could probably fill a couple garbage bags just in trash. I suggest going through and quickly gathering garbage, sweeping the floor and then assessing.
Go through your make-up and toss anything old. It's not hygienic to keep old mascara/eye products, etc and I really doubt you need that entire white drawer thing for make-up unless you're a make-up artist or something. Go through the kitchen and toss anything expired. Buy a small collapsible step stool so you can access the cabinets. Really think through how you use your kitchen and buy items that are multipurpose. Can you pare down your pots and pans? You could use the wall the garbage is against to hang pots if needed. How often to you use your microwave? Can you justify having one? The pantry sucks, no getting around it. I suggest buying square containers for dry goods, like your rice, beans, etc so they are upright instead of flopping over on everything else. The pantry looks deep, but stuff will get buried in the back if you can't see it, so maybe use some shoeboxes or something in the back to elevate things that go in the back. Or get those wire shelfthings. You could also store your plates vertically in there and free up cupboard space for pantry items.
Your closets are totally being underutilized....where are the clothes? Wash all the laundry, sort through it, and start hanging stuff up. You may be able to free up a drawer in your dresser that could be used for something else. Looks like there's room for a shelf above the current closet shelf - again, get a trusty collapsible step stool. The wall in the closet would be a prime place to hang a vertical shoe rack. This over the door style could easily just be hung on a wall instead of over a door. Shelf dividers can help get the closet shelves under control.
I'd work on those things, and then do a major purge, and then look into other storage - you may find out you don't need as much extra storage as you think.
OOH, finally a question I've been waiting to answer:
Get a roll of drawer liner. Works wonders.
I cut a square and fold it twice so it's 4 layers thick. Just put that between the battery and the frame. It squishes down and grips really well. On some of my quads I also wrap a thin strip around the battery to provide more friction between the battery and the strap.
There are some organizational things you can get for kitchen cabinets.
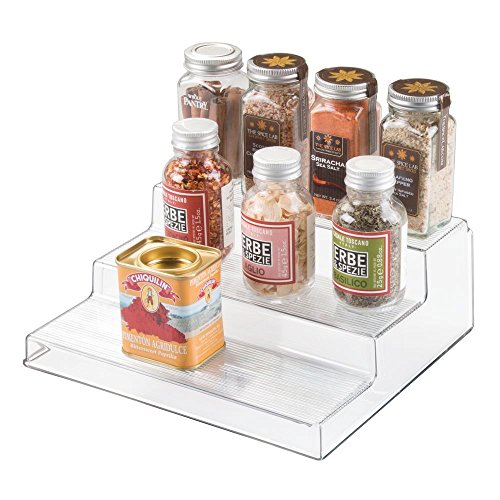
I have one of these for my spices so that I can see what's in the back.
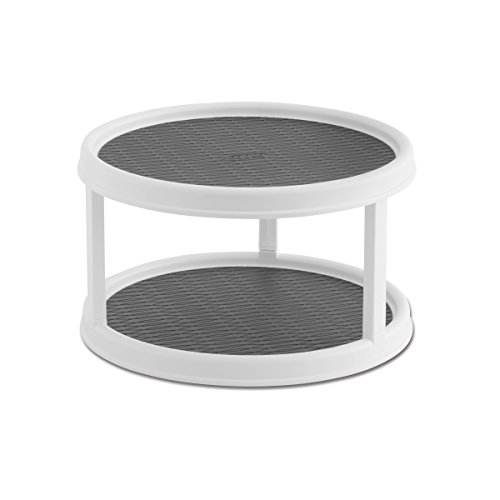
Something like this can help, too. I have a full size lazy susan in my pantry, because I have a habit of pushing stuff to the back and letting it sit there for a decade or two.
You can add extra shelves with something like this.
Good luck!
May I make a suggestion? I'm going to guess that those have a tendency to slip and slide on your table. Get a roll of drawer grip liner and place your tiles on that. During gameplay as you move minis around the tiles should stay put. I hope that helps!
I saw a similar post like this last November and I used that for Christmas presents. Too bad I didn't take any pictures, but it was very simple and fun. Instead of tape, I used clear, one-sided shelf liner. It is great because it is measured out on the paper. I then taped my shapes on top and traced with an X-Acto. I didn't compare with tape, but I felt that the edges would be finer with the method I used. On another note, be careful with that Armor Etch. It WILL eat up porcelain sinks. I didn't have an issue with it mixing in running water, just don't leave it in the sink or on a brush on the side.
From working in a vet clinic for the past four years, I can say that stuff like this happens all. the. time. Usually because cats are unpredictable and like to rub up against your legs. I think it's their idea of playing chicken.
Items dropped on cats:
A FULL water bottle for a water cooler (18L commercial size). Hit the exact right place to shear the head off of the femur; referred to orthopedist and cat healed well enough.
CRT TV. Cat was DOA.
Car wheel with tire. Severe concussion, broken jaw and several teeth, possible skull fracture; ultimately euthanised at recommendation of critical care practice.
Have you looked at getting one of these? They're a real back- and knee-saver.
https://www.amazon.com/Spyderco-Tri-Angle-Sharpmaker-Sharpener-204MF/dp/B000Q9C4AE/ref=mp_s_a_1_5?keywords=spyderco+sharpmaker&qid=1566515206&s=gateway&sprefix=spyder&sr=8-5
Or
https://www.amazon.com/Lansky-4-rod-Turn-Knife-Sharpener/dp/B000B8FW0E/ref=mp_s_a_1_1?keywords=lansky+turnbox&qid=1566515237&s=gateway&sr=8-1
Non Slip Liner my friend. The stuff works awesome, It's cheap, non permanent and tacky as hell. I use it on my desk, but I've wrapped it around a book and placed the hotas on it and by my sides, it works man.
Cool man, welcome to the obsession. You should look into getting a sharpener next.
The lansky turn box is a great entry level one for cheap.
https://www.amazon.com/Lansky-4-rod-Turn-Knife-Sharpener/dp/B000B8FW0E
I just know it as drawer liner. Any homegoods store will have it, Target/Wal-Mart/Meijer/etc. they make the same stuff for tool boxes but it is 5x as expensive and I can't figure out the difference.
The best thing you could do is wash your cabinets regularly with a good all-purpose cleaner like Lysol or soapy water and a microfiber cloth (approximately once a week to every few weeks). Also, make sure to wipe everything dry afterwards as a moist environment will aid bacterial growth. Here's a pretty good article that runs down properly cleaning cabinets. And though it's often not recommended, using a low percentage (3-5%) bleach solution probably isn't a horrible idea if you do it infrequently (it shouldn't damage the wood that much if you clean it properly). However, never use bleach on stainless steel because it pits the steel and may lead to increased bacterial growth in the long run.
There are also shelf liners made of antimicrobial materials that you can use inside the cabinets. As to actual wood treatments that would aid in antibacterial resistance, I'm afraid I'm not aware of any on the market. There's stuff like Silverban and melamine resin (often used in laminate flooring) that have good antimicrobial properties, but I'm not aware of any consumer products in terms of wood treatments for kitchen cabinets.
I have a friend who bought those mats that you use in the kitchen (or office or anywhere really) and placed it under their pad to keep it from sliding. Maybe that will work for you too? http://www.amazon.com/Grip-Shelf-Drawer-Liner-Black/dp/B000KFSOFI
For sure! And I would have loved to be more specific in my answer and have a whole new discussion - but just can’t right now. I’m also interested to see if anyone has been using anything new to display.
One other thing I’ve been meaning to pull the trigger on is this pantry shelving thing. It’s three tiers and clear plastic and is great for letting characters in the back of a shelf more visible. I decided to use the mobile Amazon app to look it up - here’s a link:
InterDesign Linus Cabinet Organizer Rack – 3-Tiered Storage for Kitchen, Pantry or Bathroom Countertops, Clear
https://www.amazon.com/dp/B001KOTJTS/ref=cm_sw_r_cp_api_8l32Ab0PF7J5Q
It really wouldn't take much to build one, actually.
Get a lazy susan, build a base with a frame to hold the kaleidoscope around it, get a planter shallow enough for the frame/lazy susan, get yourself some annuals or perennials and boom.
This may be a summer /r/diy, if it happens y'all will be the first to know!
I'm finally really happy with my makeup organization. Almost everything is in the top drawer of my 4-drawer Ikea Malm dresser. In the drawer, things are separated by item type (eyeliner, single shadows, brows, etc.) into these, except for palettes, which are in a mail organizer in the drawer. On top of my dresser, everything else fits into one of these except for my brushes which sit in a cup. Then I hung a mirror and a light over the dresser and have a great standing vanity that still has three drawers for clothes and other stuff!
I'd recommend something like this to store your brushes and cotton pads/q-tips since it has a cover to protect your brushes from dust/dirt.
Using letter holders such as this one is good for storing your eye shadow palettes.
You can either get individual inserts for your drawer that you can customize to however you want or you can just get sectioned ones if you're feeling lazy. You can also use these on top of your desk for skin care stuff since you use them everyday (I assume). With these, you can prevent your desk from staining and you can quickly wash them if they get gross.
I personally don't like the mini-drawers as I find them inconvenient since they're small and sometimes you just want to grab something quickly instead of having to squeeze your hand in them. Unless you use them for q-tips and cotton pads, since those need to stay covered.
I don't have those spinning ones, but I think they would work well if you have a bigger desk, since it gives you easy access to all your stuff.
If you don't have a lot of storage space, you can use a pegboard like this from Ikea. Or just straight up use small wall shelves.
Hope this helps.
Edit: I recommend storing your blenders in this to keep them clean, but I would make sure they dry first or you can stick something small to keep the lid slightly open.
If you get the blank white cardboad boxes, you can decorate them and then cover them in contact paper to protect the outsides.
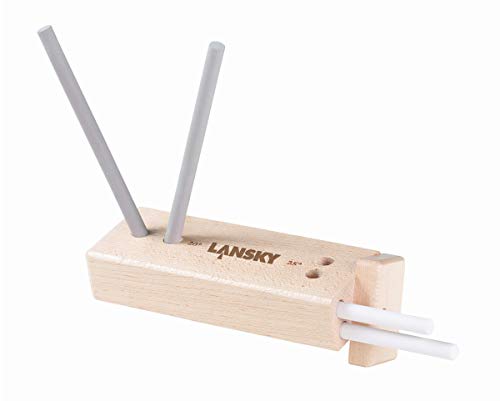
Carbide sharpeners chew up and spit out edges. They peel off steel and leave behind a jagedy burred up edge. I'd suggest looking into getting a Lansky Turn box. They are between $16 and $20 dollars, and they will get your knife sharp if you go through the proper motions. Which are like 20 strokes per side (5 strokes then switch sides and repeat) (depends on were the edge is at in wear) on each of the rods then five alternating strokes extremely lightly. Most knives you just have to hold vertical, and if the edge angle is too wide you tilt it a bit until the stones are hitting the edge. You can tell this by marking the edge with a sharpie. The stone will rub of the sharpie where it is contacting the bevel.
The Lansky Turnbox is essentially a poor man's Spyderco Sharpmaker and both systems are literally idiot proof. They will get you a hair popping edge that will make factory edges feel dull in comparison.
You'll probably be able to find a Lansky Turn box at a local sporting goods store. Here is a link for it on Amazon so you know what you are looking for.
Lansky 4-rod Turn Box Knife Sharpener
https://www.amazon.com/dp/B000B8FW0E/ref=cm_sw_r_cp_api_BXKZBbVC5X9HY
Practice first with a Lansky Turn Box. In fact, you may not need anything else, unless you need a sharpening angle that's different. I use mine to keep my knives shaving sharp.
Oh, it s a good steel. It used to be the sort of steel you only saw in higher end knives, it’s trickled down a lot over the years so now it’s very common. It’s a very definite step up from the lower end knife steels. I agree with the other posters that it’s really not that hard to sharpen or take care of. A simple ceramic rod sharpener like the Spyderco sharpener or really any of the type would be more that enough to start with being that this is your first decent knife.
Lansky rod sharpener
This is the first think that looked decent on Amazon when I sorted by price low to high. Stay away from the pull through sharpeners especially any that use carbide.
I like this sharpener. It's easy to use and inexpensive. Sharpening stones are great too but they really do take a lot of practice to get a good edge. Maintaining the proper angle is crucial.
Just focus on one technique and style of sharpener and practice a lot. Keep at it and you will see success!
If you have problems with the board sliding around, or just want to protect the table, you can get some shelf liner from a hardware store (or Amazon) to lay under the plywood.
I have both of these:
Acrylic Riser Stand Shelf for... https://www.amazon.com/dp/B07559P21F?ref=yo_pop_ma_swf
InterDesign Linus Spice Rack,... https://www.amazon.com/dp/B001KOTJTS?ref=yo_pop_ma_swf
As someone who plays on an ION drumpad in a 3rd floor apartment, I know your pain. These are my 3 fixes.
crappy decayingrubber pads with some mesh heads. You'll never be happier. They're a good 50% more quiet, and they feel great to play on.I have a piece of shelf/drawer liner on my desk under my surface for this same problem. It keeps it from slipping around, but you have a mat on your desk then.
Similar product: shelf liner
Shelf liner available at grocery stores and Dollar Stores.
Here you go. As you can see that's a tilt head in the product photos on Amazon. And in the stowed position it leaves room below for a storage pullout. With a larger mixer the available storage is reduced. That model is the one I've used several times and I haven't seen one quit yet. It is spring loaded to produce the lift, and the springs appear to be high quality enough to last at least a decade. The first one I installed was in a very tight galley kitchen such that when it was in use the projection into the galley passage from the countertop edge limited movement a bit. But you could still get around it.
Also I hereby second u/jellis811800's recommendation of all drawers below the counter (with the obvious exception of the lifter, and the sink base, etc.) if you can afford it. Full extension. High weight capacity drawer boxes. Drawers add dollars to a cabinet order big time. But imho drawers below the counter vastly expand the useful storage. I believe most people soon find themselves unwilling to remove one or two heavy Le Creuset casseroles to get to something in back when it is on a bottom shelf near floor level. Full extension, heavy duty drawers fix that.
On that note I'll also add I am particularly fond of the Blum TANDEMBOX system. I'll admit it isn't fine furniture featuring fancy dovetail joinery. But they can be configured in a nearly infinite variety of ways, at the high end are stronger by far than any other system, and fully adjustable, and most importantly easily repaired. If it should become damaged in daily use any one of the components can simply be replaced without having to build a new drawer. Drawers are the hardest working components of any cabinet system. And they do get damaged. As a point of reference I once built a vertical file system for my wife with high capacity TANDEMBOX and I was able to stand on them when fully extended (I'm over 250 lbs) and they only barely sagged. Blum components are available from lots of cabinet builders, but sometimes only as an extra option.
I find specific makeup organizers to be pretty overpriced. It's also a little hard to tell what you're looking for, but you can repurpose a lot of kitchen organizers as makeup organizers. For example, I use a pot lid organizer for my palettes. And I have some interlocking drawer organizers that I got from Target. There are also a lot of drawer organizers (and stuff you can put on top of a desk) in office supply stores/departments.
If you look around this sub (and YouTube), a lot of people have done cool DIY makeup organizers. Specifically, some people use a magnetic board and stick magnets to their makeup so they can display them on the board. It all depends on how you want to do it.
Are you using cricut transfer tape? If so, go to get contact paper instead. It isn’t very sticky. Won’t stick to paper as much but takes more patience for vinyl application.
Ikea Stainless Steel Pot Lid Organizer
You can send it in OR buy a Lanksy turn box for very cheap and get a nice little sharpening done yourself. It's very easy to learn on that box, I like it quite much.
https://www.amazon.com/Lansky-4-rod-Turn-Knife-Sharpener/dp/B000B8FW0E
Yes, I certainly do.
On the low end you have some handheld sharpeners. The Smith's model is iconic and cheap. It gives you an acceptable edge, but it's not going to be good, and once it's loaded with metal it's hard to clean. These are mostly for tackle boxes and backpacks, quick solutions. It really wouldn't do a Benchmade justice.
In the middle, you can buy a guided rod system. The Spyderco Sharpmaker is the best I've seen. Lansky makes a few like this one. These systems do a really good job on pocket knives. The Sharpmaker is a great investment if you plan on dealing with knives for any extended period of time. They can keep a knife very sharp for years. Lansky's systems are relatively inexpensive, but aren't as precise as and lack some of the features of a Sharpmaker. I think the Sharpmaker is an ideal solution.
On the high end, you're looking at sharpening stones. There are two classes, oil and water stones. Oil stones are slower, but water stones are used slightly in the course of sharpening (one might last a decade for me) and are more prone to damage. These let you do repair, produce a more customized edge, and work on a knife's geometry behind the edge, something all knives require eventually. The majority of the time you wouldn't need this level of equipment, but when they come in handy they really come in handy. I use water stones on all of my knives. For most pocket knife users it's much easier and less costly to let a professional do this sort of work and maintain the knife with a rod system. No links here; there are dozens if not hundreds of stones on the market and there's no perfect one. Starting costs are around $150.
At the super duper expensive level, you have advanced assisted sharpening systems like the Edge Pro. These things are slick, easy to use, and ridiculously effective. They should be for the cost. Stones are still more versatile and a lot of the people who use these branch out in many ways.
Okay,
this is a fantastic lubricant
this is a fantastic sharpener
I do not recommend going to Walmart or a general sporting goods store. They hire people who don't specialise in knives ( unless they have a personal interest ) and aren't very aware of better products.
If you can, a Lansky turnbox is an amazing thing to pack and use as it has both a diamond rod for quick sharpening and a ceramic rods to maintain that working edge. At a standard 25° and 20° angles. It is simple, light, and inexpensive($17)
Lansky Turn Box is a relatively inexpensive way to restore initial sharpness (work especially well for recurve knives (due to the round stones).
Here is a good vid on how to use it.
Why not? You can get a professional quality sharpener very cheaply http://www.amazon.com/Lansky-4-rod-Crock-Sharpener-LCD5D/dp/B000B8FW0E. And then you just need a Steele and you can have razor sharp knives all the time. It's more about learning how to take care of a blade. Doing it is easy and inexpensive.
Or even the Lansky systems
5 Stone Deluxe - $38.99
Or the good ol' 4 Rod Turnbox - $16.99
Lansky 4-rod Turn Box Crock Stick Sharpener
It's a poor man's Sharpmaker. I used one for years until I got a Sharpmaker.
https://www.amazon.com/Lansky-4-rod-Crock-Sharpener-LCD5D/dp/B000B8FW0E
You should never use the pull-through portion of that sharpener and the rod gives you no way of maintaining a consistent angle. This would be a lot more effective and versatile for about the same price.
This is the one I bought. It won't work as well as a full on sharpening stone set but it's quick and easy. Use the coarse sticks first and finish with the fine, obviously. I take great care not to mess up the knife so I've only used the fine sticks so far.
My recommendation.
Lansky 4-rod Turn Box Crock Stick Sharpener (LCD5D)
by Lansky
Link: http://amzn.com/B000B8FW0E
well, we both have the exact same cabinet organizer set on our list (practical stuff list, for me)
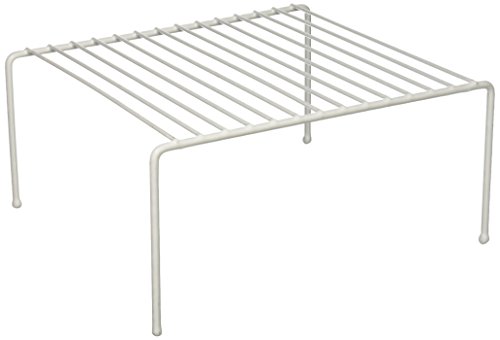
Get one of those white wire racks you use in kitchen cupboards/cabinets. Like this one.)
I got one to stack my xbox over my ps4. Fits nicely on my stand.
I'll post a pic in a day or two as I'm working way too much right now.
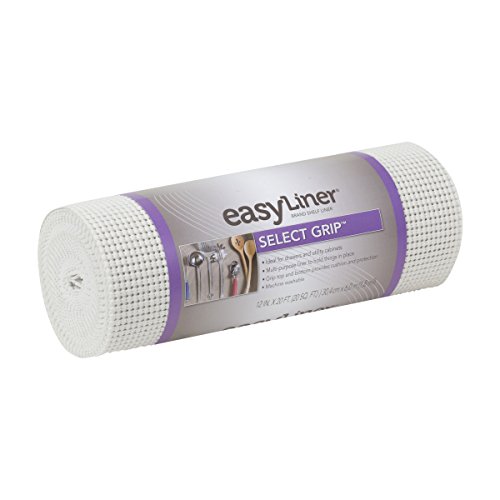
I highly recommend making a mat out of non slip shelving grip. Something similar to https://www.amazon.com/dp/B001AH8PLI/ref=cm_sw_r_other_apa_a8D0xbYN4VDAQ
I picked it up cheap at Walmart, cut it appropriately, and our group appreciates it. Much less slip then felt (which I also grabbed from a fabric store first) .
Yeah so the back of the Dynamat is adhesive so I line the bottom of the case with it, then I put a layer of trayliner above it just for added softness underneath the pcb. Links to both are below:
Dynamat
Drawerliner not trayliner sorry, I always say the wrong thing
amazon! i had been looking for black or clear ones and found these, i'm really happy with them.
https://www.amazon.com/gp/product/B001KOTJTS/ref=oh_aui_detailpage_o00_s00?ie=UTF8&psc=1
I bought this from amazon
Wet towel underneath.
Or a shelf liner
edit. to give you a better example
Well making stencils is easy, all you need is an idea, an exacto-knife, and a heavy material. There's material specifically for stencils out there, but I haven't tried anything like it out yet. I recently bought a roll of self adhesive laminate that I used to make this painting which worked very well. They only problem I had was that it gets a bit unwieldy (most noticeably when doing the outlines) and I needed a hand or two to get it in the right location. The Adhesive cuts down the need for excess tape and weighing down, but you only really get one or two good sticks, and if you peel it quickly you might take a little paint off (if you haven't completely let it set (which I have a bad habit of doing)).
This stuff is way easier.
Clear contact paper
https://www.amazon.com/Copco-2555-0187-Non-Skid-Cabinet-Turntable/dp/B0036OQWT0/ref=sr_1_2?ie=UTF8&qid=1483832437&sr=8-2&keywords=lazy+susan+spice+rack
u/slashbored covered the bulk of the options, for sure. I'll underline that each game will likely want something slightly different. At least for maximum efficiency, there isn't a one size fits all so counting 12 games and buying 12 Planos may not be the best idea.
Considering the setup, play, and clean-up processes and looking to eliminate time bottlenecks will help guide you. For example, multi-section Plano style boxes are really cool...for some things. But keeping 5 denominations of coins all in separate compartments adds a lot of clean-up time when players (or you) have to re-sort the huge pile of individual coins used throughout the game back into their individual sections. In that case, it's easier to shift all that time to the players, a few seconds here and there fishing their change out from a mixed bowl or two through out the game and reduce the clean-up to just seconds of dumping the bowl into a single ziploc.
On the other extreme, searching for one or two chits of a particular unit type in a whole pile of chits (of many unit types) is silly; multi-section boxes or GMT style counter trays are definitely the way to go.
I'd recommend must haves as:
Other options for organization during play (links for example, rather than specific product recommendations):
Inside the box:
I've seen this lift out shelf used very effectively - you can stash appliances away AND bring them to counter height when needed.
https://www.amazon.com/Rev-Shelf-RAS-ML-HDCR-Height-Cabinet/dp/B0042QB6M4
Desk organizers are usually the best way to go. Things like this or this.
A drawer organizer works quite well for carting around a tournament, but you need to improvise a lid if you want to transport it much further.
https://www.amazon.com/gp/product/B00AN8CTX0/
So, it's this but more expensive?
http://www.amazon.com/Con-Tact-Brand-Self-Adhesive-Shelf-Liner/dp/B00D8GBO2G
I had same problem. I used privacy film contact paper. Let’s lots of light through. https://www.amazon.com/Tact-Covering-Self-Adhesive-Privacy-18-Inches/dp/B00D8GBO2G?th=1&psc=1
Easy to apply and you can get in different widths. I just did bottom half of windows and left top clear.
Get some fabric paint, some contact paper, and an exacto knife. A design like this is super easy and can be done in one night. You can get cheap plain tshirts at walgreens or michaels etc.
We tried 2 things: Buy some strong shelve plastic and wrap it around the xpen so they can't stick their feet to climb out.
Or make a "top" of cardboard so it's facing inwards. It acts like a visual and physical blocker so they can't climb out the top.
Here's my xpens: http://imgur.com/a/NMcCO. The cardboard top works better, IMO, cause the pup can still see you. But... it's a bitch and a half to make. The clear plastic isn't very "clear".
Warning: Don't leave her alone in the xpen unsupervised until you redo the xpen. Ours got his foot stuck once on the top bar while he was trying to jump over. He was dangling upside down for a second before I ran over to him.
EDIT: If your pup isn't a chewer, another option is a fabric play pen
Sure. Pulling the nib out was easy enough. I just used some non-slip shelving material to get a good grip on the nib and gave a decent tug.
The feed can only go in one way, it seems. You can just turn the feed around until it aligns with whatever channels are in the grip section and then it'll slide in easily.
Don't have the new nib yet, but hopefully this experiment works out.
Or, you know
https://www.amazon.com/dp/B00IXYIWC8
One of these will do the exact same thing
I agree with what everyone has said. Tent on the inside of the pack.
​
If you must have the tent on the outside, go and buy some of this and wrap it around the outside of the tent. It will stop it slipping - https://www.amazon.com/Non-Skid-Drawer-Cabinet-Shelves-Non-Slip/dp/B00IXYIWC8
Or buy some Voile Straps and secure it with those - https://www.voile.com/voile-straps.html
Another user here of the 3 gallon/ (12 quart) rubbermaid container and lid. I cut a very small hole in the lid for my anova to fit into and it hardly loses any water even on >24 hr cooks. Plus the lid is flexible enough to just lift one or two corners and position bags. you can also use it to keep a zip top bag in place instead of clips or vacuum bags.
http://smile.amazon.com/gp/product/B000R8JOUC?psc=1&redirect=true&ref_=oh_aui_detailpage_o03_s00
http://smile.amazon.com/gp/product/B000VAUFD6?psc=1&redirect=true&ref_=oh_aui_detailpage_o03_s00
I also use this ikea pot lid organizer to help separate bags or weigh down food that just keeps wanting to float. It is pretty nice because you can turn it around and remove pegs to customize the shape for what you are cooking.
http://smile.amazon.com/gp/product/B00TJTWR04?psc=1&redirect=true&ref_=oh_aui_detailpage_o05_s00
Something else that is nice to use is a pair of tongs with silicone tips so that they don't rip your bags but still grip your food for removal or changing the placement of food, because you don't want to stick your hands in hot water!
http://smile.amazon.com/Vivree-Kitchen-Tongs-Set-Stainless/dp/B00XGXGP3Y/ref=pd_sim_79_3?ie=UTF8&dpID=41nuul3KFhL&dpSrc=sims&preST=_AC_UL160_SR160%2C160_&refRID=0TK46SWSYA8WEN7S6YPR
It is only necessary to weigh things down with sous vide if they're floating. If you use a ziplock bag you can get most of the air out using the water displacement method where you put your food in the ziplock and mostly seal it. Then you dunk the ziplock bag into water almost up to the seal and the water pushes most of the air out.
You'll never get all of the air out though with that method so a cheap foodsaver is a good idea. Also some foods (like veggies) give off gas as they're cooking so they still need to be weighed down. I actually have a pot lid organizer from IKEA that is great since it can keep your food separated for better water circulation but it can also be flipped over to act as a weight when necessary. As you can see from the Amazon reviews, this is a pretty popular alternate use. It probably goes without saying but head on over to /r/sousvide if you want to see what we're up to!
Good question. What you see in the last picture is a 5lb shoulder roast that I threw in this morning. It was too big for the pinching action you describe so I added a knife to the bag and attached magnets to the rack which is holding the shoulder in place.
But yes, this rack can be used in a variety of ways: the squish method you mentioned, the magnet setup I described, or you can use binder clips to attach the bag to the metal posts. All really depending on what you're cooking.
I usually attach it and then gently lower it into the water until I get my fingers almost to the surface of the water and then drop it in. To remove, I've used tongs and silicone gloves. I've tried barehanding it a few times - certainly not recommended.
The rack is fine. It's been through probably 30 SV sessions and it's holding up pretty well. It's a cheapo Ikea deal so there's a little bit of rust but the price is definitely right! Here's a link: https://www.amazon.com/gp/product/B00TJTWR04/ref=oh_aui_search_detailpage?ie=UTF8&psc=1
My two favorites are the Kershaw Cryo and the Spyderco Tenacious. They're perfect. The only reason I'd recommend the Cryo over the Tenacious is because of the speed opening. It's very handy to have, but if you don't care, I'd go Tenacious.
Then take your left over money and get a Lansky sharpener.
http://www.amazon.com/Lansky-4-rod-Crock-Sharpener-LCD5D/dp/B000B8FW0E/ref=sr_1_34?ie=UTF8&qid=1404325410&sr=8-34&keywords=knife+sharpener
I was complaining about my knifes and their edge because I always used those Smith ones from Lowes. The Lanksy made my knife a thousand times better. Sharpen it every other week and it's perfect for everything I need whenever I need it. Makes all the difference.
Get one of these:
https://www.amazon.com/Lansky-4-rod-Turn-Knife-Sharpener/dp/B000B8FW0E/ref=sr_1_10?crid=3NXU9W1Q4DYRO&keywords=lansky+4+rod+turn+box+knife+sharpener&qid=1564075158&s=gateway&sprefix=Lansky+4+rod%2Caps%2C165&sr=8-10
It’s not high end, but it’ll do the job.
In my opinion, one of the easiest sharpening systems for beginners are crock sticks or Spyderco's Sharpmaker. The crock sticks are significantly cheaper though and will last a lifetime if you don't break them.
I learned to sharpen on crock sticks. You just keep the blade edge facing down and the blade straight and make slicing passes down either side until you have an edge. Stupid simple, works great, cheap, and the angles should be perfectly fine for most factory edges.
If you can get good at a wet stone i think it is the most effective but for myself i have a hard time getting a even edge. I really like to use "crock sticks" myself. This lansky is inexpensive and works great for all of my knifes.
I use the Lansky Turn Box . It’s basically a poor mans Spyderco Sharpmaker, but it does it’s job extremely well. For $15 you can’t really go wrong!
This. Do NOT get a carbide sharpener where you run the knife through a V in a piece of plastic.
I found it difficult to get a sharp knife from japanese sharpening stones, but I could cut paper on the first try with
this.
When you do end up needing a sharpener, these are good https://www.amazon.com/gp/aw/d/B000B8FW0E/ref=mp_s_a_1_2?ie=UTF8&qid=1523064182&sr=8-2&pi=AC_SX236_SY340_QL65&keywords=lansky+box&dpPl=1&dpID=31h2vrVubXL&ref=plSrch
And these are great https://www.amazon.com/gp/aw/d/B000B8L6LS/ref=mp_s_a_1_sc_1?ie=UTF8&qid=1523064172&sr=8-1-spell&pi=AC_SX236_SY340_FMwebp_QL65&keywords=lansky+diamomd+guided
Here's a list of suggestions ordered by cost and required effort:
I use several different approaches.
For small parts (screws, bolts, etc) I keep one of these in my kit:
http://www.amazon.com/Ace-Trading-General-2198760-Magnetic/dp/B0029586ZK/ref=sr_1_1?ie=UTF8&s=home-garden&qid=1300729892&sr=8-1
I also keep one attached to the outside of my tool box that I grab if I know I'm going to be pulling parts (I mostly use it for working on my car) so that I can attach it somewhere inside the car and toss the bolts in it.
I also line all my tool boxes with this (I have one smaller one for the car and one big one I keep in the apt):
http://www.amazon.com/Grip--Shelf-Drawer-Liner-Black/dp/B000KFSOFI/ref=sr_1_3?s=home-garden&ie=UTF8&qid=1300729917&sr=1-3
It may not seem like an organizer, but it has enough grip that all the tools stay in position when placed on it, which is surprisingly helpful.
I use this for all my shallow and deep sockets:
http://www.sears.com/shc/s/p_10153_12605_00933932000P?prdNo=5&blockNo=5&blockType=G5
I have one for metric and one for standard. I like this one over the others because the top of each spike is cut at an angle and printed with the size, making it really easy to see when looking from above (like you would be when looking in a tool kit).
I put all of my specialty sockets (Allen, torque, triple-square, etc) in the older version of the device below (I like the new one more and will probably switch to it eventually):
http://www.sears.com/shc/s/p_10153_12605_00942331000P?prdNo=6&blockNo=6&blockType=G6
I keep my wrenches in their own drawer in one of these:
http://www.sears.com/shc/s/p_10153_12605_00965223000P?prdNo=2&blockNo=2&blockType=G2
I've tried the foam that others have suggested, but I can never get it cut right to fit everything correctly. Also, you buy one new tool and all of a sudden the spacing etc. is all wrong. The top of my tool kit I pretty much keep all of my pliars etc, they only get semi-organized on the best of days :) There's just so many of them that they can't really be easily organized, which discourages doing any organization.
It looks lame, but trust me, you'll be happy you got one.
If you have an Iphone 4 or 4S
A little big, but can store a lot
For when friends come over
Because sometimes you need to take a break
For whipping up healthy drinks
The obvious accessory to most college dorms
Retractable extension cord
A little expensive, but c'mon...
Make lots of friends in the most childish way possible
And finally, the most important thing of all...
Would you like a falafel with that?
yes it could be too tight -
I think it could be that the frame isn't square - I has a similar issue when I first put on the z-brace - I managed to twist the entire frame by going too tight on one side - photos / video will help diagnose
I also found using a mat like this helped generally with ghosting / ringing - https://www.amazon.com/Tact-Premium-Non-Adhesive-Non-Slip-12-Inches/dp/B001AH8PLI
One of the best mods i made to my Majestouch 2 is putting shelf liner under the pcb. It requires voiding your warranty however, as you have to remove a sticker to get to a screw on the bottom of the case but I had to open my case anyway to swap in the custom cable I ordered for mine. This is pretty much what you want, just put a layer or two in the bottom of the case once you remove the pcb, then just put the pcb and top case back on and screw back together.
Our gym just has a bunch of shelf liners laying around that you can put on the bench and it makes it way grippier.
Ah! I have an answer for this! And I'm pretty sure it's easier/less craft-intensive than the other option I saw linked.
So I used a 3 ring binder and 3 different types of plastic sheet protectors: trading card organizers (Avery 76016), 4x6 photo pages (Avery 13401), and regular 8.5x11 sheet protectors (any ones that aren't too thin along the edge with the holes should do.) The only other thing you need is a roll of shelf grip liner like this, and some reasonably sharp scissors.
Using the shelf grip liner, I held my differently sized plates up to it and figured out about how big they were. It doesn't have to be exact, I tend to err on the slightly smaller side, it shouldn't hang off the edges too much (although I just do squares for the little circle plates because I'm lazy and squares are easier.) The shelf liner makes it easy because it is made of little "squares" that you can count if necessary. Then, I cut the correct size liner for one of every plate at every corresponding size. You could use some kind of spray adhesive to attach them to the back of the plates, but because of the "grip" functionality it's naturally a little sticky, so I just kind of press it onto the back of the plate, carefully slide it into the sheet protector, and close it and let the weight of all the plates in the binder apply pressure over time, so by the next time I open the binder to use the plate, they've sort of been fused together and I don't have to worry about it falling off.
Small circle plates go in the trading card pages, medium square & rectangle plates go in the photo pages, and huge plates like the Cheeky Jumbos go in the full size pages. Be sure not to store it vertically like you normally would with a binder—the weight of the metal pulls on the holes and causes them to break. I store mine flat now (ever since figuring out this design flaw and having to replace a bunch of pages, lolsob) and haven't had any problems.
If you need any pictures to illustrate what I mean, just lmk! I'm dogsitting at a friend's house for the holiday weekend, but can get you pics of mine when I get back home Tuesday :)
ETA: I can't tell if the grip liner link is working properly so here's another one.
It's very early, and I may be wrong, but I've used this in the past, and it has worked very well. Non affiliate link to what I got.
https://www.amazon.com/gp/aw/d/B001AH8PLI?psc=1&ref=ppx_pop_mob_b_pd_title
https://www.amazon.com/InterDesign-Organizer-Kitchen-Cabinet-Countertops/dp/B001KOTJTS
I haven't used them personally, but I've heard that spice racks like this:
http://www.amazon.com/InterDesign-Linus-Spice-3-Tier-Organizer/dp/B001KOTJTS/ref=sr_1_18?s=kitchen&ie=UTF8&qid=1418979758&sr=1-18&keywords=plastic
work pretty well for displaying amiibo.
EDIT: http://www.reddit.com/r/amiibo/comments/2obq6t/cheap_easy_amiibo_display/ Yup! I remembered I saw some people on here using spice racks, wasn't that one, but it's a good example of what to expect.
Those are from IKEA. There's a single and a double in white or black.
Glass Shelf
Then I use these for the risers & stands
[stands](http://iDesign Linus Linus Plastic 3-Tier Spice Rack, Stadium Organizer Rack for Kitchen Pantry, Cabinet, Countertops, Bathroom, Desk, Clear https://www.amazon.com/dp/B001KOTJTS/ref=cm_sw_r_cp_apa_i_-082DbJP7W3AG)
It might not be as cute, but something like this would be really functional if you have the space for it.
I have a similar cabinet next to my stove that I use for spices. I have metal risers on the top and middle shelves and a turn table on the bottom. Works great! https://www.amazon.com/InterDesign-Linus-Cabinet-Organizer-Rack/dp/B001KOTJTS/ref=sr_1_7?keywords=risers+pantry&qid=1554917219&s=gateway&sr=8-7
I use these and they fit perfectly
https://www.amazon.com/gp/product/B001KOTJTS/ref=ppx_yo_dt_b_search_asin_title?ie=UTF8&psc=1
If you're going for cheapest
Each of these displays a decent number (9-15 crowded) of Pops depending on your comfort level with blocking ones directly behind another and costs 8 and change
https://www.amazon.com/gp/aw/d/B0036OQU56/ (8-12 Pops, opaque, but the black has a pseudo industrial look)
https://www.amazon.com/gp/aw/d/B001KOTJTS/ (5-9 pops, clear)
https://www.amazon.com/gp/aw/d/B001E2864K/ (5-15 Pops bamboo, 13$, expands)
All 3 show review photos with Pops if you want to see em in action.
Edited this a couple times to get the Pop display numbers right for curious folks.
This works better than a moist towel under the board.
http://www.amazon.com/Duck-1100731-Non-Adhesive-12-Inch-20-Feet/dp/B002AS9NAI/ref=sr_1_1?ie=UTF8&qid=1408071638&sr=8-1&keywords=non-slip+shelf+liner
Some pictures can help with the identification of the species, though I hear that the Chinese mantis (T. Sinensis) is commonly given out to kids in some elementary schools.
In the likely case that you are housing T. Sinensis nymphs, it is important to note how prone this species is to mismolts when they are young. Nevertheless, a lot of people will still tell you they are a beginner specie (though certainly manageable). Since yours are still feeding off of fruit flies, they are still in the early instars and you should pay particular attention to humidity and the enclosure itself.
Humidity should be around 50% for these guys. Some members of the mantidforum suggest misting just enough so that any visible moisture on the walls evaporates within 30 minutes, but do not let the paper towel completely dry out. Anymore and you risk oversaturation. I have had a ghost nymph straight up drop dead from this (possibly due to fungal infection caused by excess moisture). As for how often, some people like to do it once every morning or once before bed time. It's up to preference, but I spray very lightly once in the morning and regularly at night. If I had to spray once a day, I would do it at night because that's when most will shed. Important thing is to keep the paper towel moist (but not soggy)!
As for your stick woes - never put outdoor collected wood in a pet's enclosure without sanitizing it either by oven baking at 200-250 degrees F for 2-3 hours or by using a bleach solution. You might not want what hatches out to get into your home, nevermind your mantis enclosure!
What I like to do is glue the netting that people often put on their lids onto the side of the 32oz cups. This way, the mantis get all around climbing surface and you eliminate the need for sticks that can potentially get in the way during an important molt.
These work well:
http://m.homedepot.com/p/Phifer-36-in-x-84-in-Black-Pet-Screen-Kit-with-Spline-and-Roller-3025886/205001783
http://www.amazon.com/Duck-1100731-Non-Adhesive-12-Inch-20-Feet/dp/B002AS9NAI
The black netting can usually be found in very large rolls for under $10 in most hardware stores.
That said, fake plants are okay as long as there is plenty of room for molting.
*Edit: As they get larger, newer enclosures must accommodate their size. T. Sinensis grow pretty large (around 4"). The general rule for every mantis enclosure is twice it's length in width, and three times its length in height. This means that by adulthood, you are looking at an enclosure that is a rectangle of dimensions 8"x8"x12" or a cylinder with a radius of 4" by a height of 12", or of course another container of similar dimensions.
This link has a lot of helpful information about this specie:
http://mantidforum.net/forums/index.php?/topic/31349-tenodera-sinensis-chinese-mantis/
You could use kitchen cabinet liner likethis underneath it. I got mine in black from Walmart for $4. I put some under my keyboard and it keeps it stuck to my desk perfectly.
Here's my setup.
I picked up a $10 3-drawer organizer and lined it with some grippy shelf liner. So far it has worked out pretty well. Much more accessible than stuffing them in a display case, but also a lot neater than randomly throwing them in a drawer. It just looks clean and tidy.
Fuck yeah.
It's not plastic wrap, it's drawer liner. e.g.
how about getting a roll of the thin, foam shelf liner like this:
http://smile.amazon.com/Duck-1100731-Non-Adhesive-12-Inch-20-Feet/dp/B002AS9NAI?ie=UTF8&keywords=shelf%20liner&qid=1459357798&ref_=sr_1_1&s=kitchen&sr=1-1
I've seen it at the dollar store. You could try putting a large piece of liner on the seat, then the blanket. It's worth a try! Good luck!
I use rubberized shelf liner It's this sort of rubbery/grippy type material that you can buy almost anywhere (Target/K-Mart/Wal-Mart, probably hardware stores, maybe grocery stores) You can cut it into whatever size you want. Not only does it prevent slippery things like phones and tablets from sliding around, it also does a great job of dampening noises from vibrating things. I have some USB hard drives on my desk that are stacked on top of each other but the spinning hard drives cause the cases to vibrate together and make a really annoying (not very loud, but VERY annoying/distracting) buzzing noise. I cut a couple pieces of shelf liner to the same size as the hard drive cases and inserted a piece in between each drive, and now the vibration noises are gone!
I knew someone who would keep a long leather strap around his neck. He'd hook a curve of the strap to the waist of his fiddle. It's been a number of years, but I think it was the right lower sweep of the waist or beak. He could wander festivals this way and play at any moment without worrying about securing a shoulder rest. It worked well enough for him (he stayed in first position, used no vibrato), that he'd use it even in concerts and sessions.
I wouldn't recommend that over elastics and a cushion maybe covered with grippy material, since it offers no support, but your post reminded me of it.
Get some shelf liner and put that underneath it. If you're still pulling it, clamp it to one edge of the table (still with the shelf liner under it) and braid from the opposite edge.
We put ours on top of a chest of drawers. I'd recommend putting a shelf liner (like this one) between the pad and dresser to keep it from moving around. As others have stated, never leave baby more than an arm's reach away or unattended.
http://www.amazon.com/Duck-1100731-Non-Adhesive-12-Inch-20-Feet/dp/B002AS9NAI
We use this stuff between our dogs' bed and the kennel floor. It works perfectly even in the moving car.
The commercial gym I train at has slippery benches as well. Here are some solutions that have helped me not fly off the bench:
The liner is sold in a roll (link below), but you only need a piece long enough for the bench.
https://www.amazon.com/gp/aw/d/B002AS9NAI/ref=pd_aw_sim_201_3?ie=UTF8&psc=1&refRID=Y8ZFN4WHEN3VNNZ6BDD9&dpPl=1&dpID=91V8hWHWKlL
Hope this helps! HAPPY BENCHING!
Nice video, quick & too the point but gives a decent understanding of the steps you went through! I dig the finished product, Sky Dolch represent! ;) Can't go wrong with that colorway IMO! How you enjoying it so far? I have yet to do a build with Zealios but love my 2 boards with MOD tactiles (the linked pic is one of them) so I'm gonna go out on a limb & assume you're loving it, LOL!
Also I seen in the comments someone recommended a sound dampening material. If you've got some shelf liner laying around the house a layer or 2 of it at the bottom of a case will do a pretty good job of quieting a board down also. Probably not as good as Isolate It!, but if you already have shelf liner I doubt the differences are big enough to justify spending money for them. I could be wrong though, although I've used shelf liner to great effect in all of my boards that have bottom case + plate design.
Anyways enjoy the new board & thanks for putting the video up!
I have the Alex drawers with the desk on top. I find that the little support things didn't really prevent my desk from sliding. They actually moved from where I stuck them. I use shelf liners as a secondary grip to keep things in place. Not sure if that helps.
I put the stones on an old lunch tray to keep the mess contained. To keep things from shifting, I put grippy shelf liner below the stones.
You could get a high-sided "liner pan" for that expensive cat box (it's beautiful!). Like this one. That may be a temporary solution to your long term problem. You could also cover the inside with a liner similar to the liner you put on cabinets like this? Basically you want to prevent that urine from touching the wood!
This works great for a plant platform with space underneath to slide a bowl for drainage.
I leave a spool on a spinning 'lazy susan' like this one:
http://smile.amazon.com/Copco-2555-0191-Non-Skid-Cabinet-Turntable/dp/B0036OQU1U/ref=sr_1_1?ie=UTF8&qid=1396788304&sr=8-1&keywords=lazy+susan
Works great. I've done at least a dozen spools that way.
I bought this in 2013 for 4.99 and it was the best purchase I've ever made:
Copco 2555-0191 Non-Skid Cabinet Turntable, 9-Inch https://www.amazon.com/dp/B0036OQU1U/ref=cm_sw_r_awd_VCiVub00S3TXT
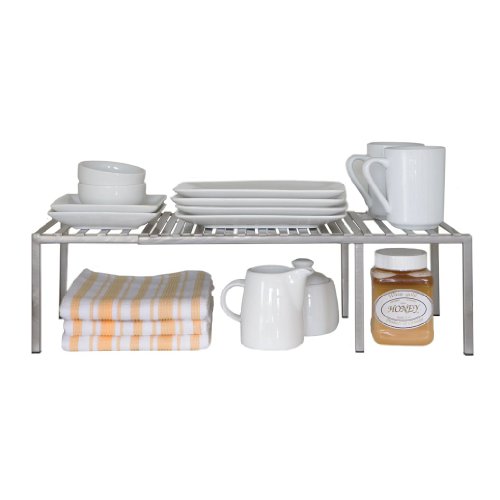
I found that the little wire shelves that you can get to double your pantry or shelving area are nice. https://www.amazon.com/ClosetMaid-3456-Large-Shelf-White/dp/B00AES2XB2/ref=sxin_0_ac_d_rm?ac_md=0-0-c2hlbGYgZXh0ZW5kZXI%3D-ac_d_rm&keywords=shelf+extender&pd_rd_i=B00AES2XB2&pd_rd_r=9e863b24-afce-4f4c-b042-dad654d80771&pd_rd_w=Fvxud&pd_rd_wg=jLiMQ&pf_rd_p=983984df-2ad2-4c97-ba7f-4c5a90291c2b&pf_rd_r=QBSJYQSPZW1V99XPX4NY&psc=1&qid=1569685004&s=gateway
Lazy susans for canned good, spices, medications, you can get lazy susans with two shelves, and those are nice for smaller items. https://www.amazon.com/dp/B0036OQWT0?aaxitk=C04aQKaeELS.5S8eGrb3QA&pd_rd_i=B0036OQWT0&pf_rd_p=44fc3e0f-4b9e-4ed8-b33b-363a7257163d&hsa_cr_id=4348174040901&sb-ci-n=productDescription&sb-ci-v=Copco%202555-0187%20Non-Skid%202-Tier%20Pantry%20Cabinet%20Lazy%20Susan%20Turntable%2C%2012-Inch%2C%20White%2FGray&sb-ci-a=B0036OQWT0
Guaranteed if you have a lot of dishes, there are some you really never use. Pack those up and put them in storage somewhere, that way you are not throwing them away, if the wife is worried about that. You don't need 24 coffee cups, or bowls, for 3 people for daily use. Put stuff you only use once a year (christmas turkey roasting pan) in a plastic tote, and put it in the garage or basement. Better yet, if you have a kid who will be moving out in the next few years, start putting extra items in a tote for them to take when they move.
I recently moved, and like a nerd I mapped out my kitchen cupboards before I unpacked. Having things where you need them makes putting them away and finding them so much easier. Keep the coffee cups close to the coffee maker, the glasses near the sink, the spices close to the stove.
This post made me want to post my collection on /r/makeuporganization so I did let me know if you want a link to that.
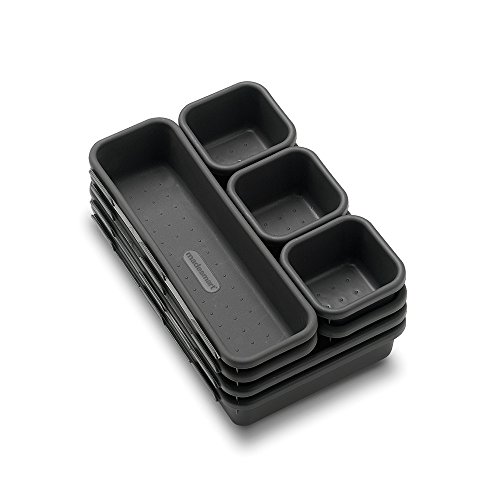
I tried to be basic and cheap. Nothing was over $22 when I bought it. When I first started buying makeup senior year of high school I just used a Caboodle, by sophomore year of college I needed more room and I got a plastic set of drawers from Wal-Mart and expanded from there.
I have a set of plastic drawers I got from Wal-Mart for like maybe $10. I found some drawer organizers at Dollar General that were like $5 that look like this but they're white and not as expensive. Each of the three drawers has a different item like lip products, eye products, and then cheek products. There isn't a lot happening in the eye drawer other than random mini mascaras and colourpop SS shadows, and my brow pomade because most of it was WNW 8 pan palettes that I cluttered.
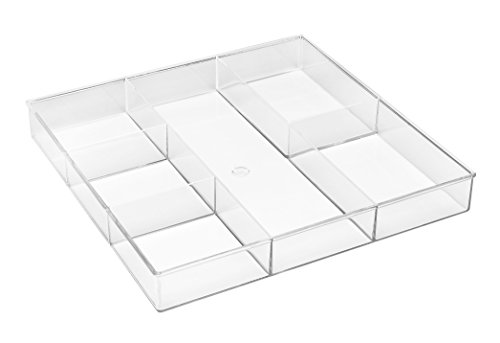
Then I have an acrylic organizer that I got at At Home that holds my everyday concealers, mascaras, eyeliners, and some lip products. It looks like the top of this. I coudn't find the exact one though.
Then I have another acrylic organizer that holds all of my palettes and it's my favorite makeup organization purchase I've made. You can find it here
Lastly I have a container with five sections that holds my foundations, brushes, and liquid lipsticks. It can be found here
I'm autistic. Here's the key. Work on one area at a time.
I have a monthly calendar on the wall to remind me of things and I use it.
This thing is a life saver. I have a lot of my files separated in that thing. It is very helpful.
I have a couple of these to keep my important files in. If I need to keep an important paper, I put it in a file in there.
Don't use a file cabinet. Out of sight, out of mind. Totally bad. Get a file cart. This is the one I have and its great.
I have these in my desk drawers
I have this thing on my desk to organize supplies on my desk
I have this thing on my desk to organize files
​
Basically I've spent a shit ton of money to keep me organized. I don't put a lot of things in cabinets because out of site, out of mind. I forget where they are if I can't see them. If they are in a drawer, I keep it organized. I straighten off my desk every other day so I don't get buried. I live by post it notes. They are my life. They are my everything. If I need to remember something, it goes on a sticky note and the sticky note goes on my computer.
As for stress and anxiety. Practice self-care. Get into therapy. You may want to consider meds. Know your limits. Yeah its good to be social but you will need your lunch to recharge. That becomes really important. Yeah you can try to go with staff two times a week but you need the recharge time.
You also need a letter from your doctor and submit it to personnel and talk to your principal. I have a good relationship with my principal right now and haven't talked to the district yet. I just told my principal that it effects my communication with others. Sometimes I have a hard time communicating what I really want to say or people may misinterpret what I say because of tone or I don't say it right. I have a hard time with eye contact. I also have slow processing so it takes a second and people take that as ignoring. I don't need any accommodations, I just need her to understand my communication difficulties and my social awkwardness. Fortunately for me, I am a SPED teacher who teaches the self-contained autism class and she thinks that will be a good connection with parents. I have asked for a 10 minute break off campus break (to smoke, she know I do) after a bad IEP and she gives it to me. But its rare that I do. If it starts to become a problem, I'll inform my union and then inform the district.
If you come up with systems and learn to be more organized, it will help with the stress. If you learn self-care it will help.
This was an amazing review and was very professional. I subscribed and will definitely will be watching out for your new content. I have literally nothing bad to say about the video. One cool thing I think might make the video even better would be a rotating turntable to but the products on, like this: https://www.amazon.com/Bluecell-Rotating-Bearings-Monitor-Turntable/dp/B009NPJ0RW/ref=sr_1_1?ie=UTF8&qid=1483051945&sr=8-1&keywords=rotating+table Keep up the work
Bluecell 12” Inch Heavy Duty Rotating Swivel Steel Ball Bearings Stand for Monitor/TV/Turntable/Lazy Susan + Bluecell Cable Tie https://www.amazon.com/dp/B009NPJ0RW/ref=cm_sw_r_cp_apa_i_BNO.Ab35AYJX8
I am going to guess Contact Paper?
One thing I actually miss on electronics is that faux wood paneling that was on things like TVs and receivers in the 80s to early 90s. So I actually really like what OP has done here, and might do it myself one day to a computer build.
That was it. Con-Tact Brand Clear Matte
Nice video, definitely ambitious for a beginner! The curl highlights are an example of a look I would approach without masking fluid. It might take a little more time but with an accurate sketch and some careful dry brush technique you can preserve enough white to maintain that shiny look. While I encourage you to challenge yourself to improve brush technique, I realize this strategy might not appeal to everyone. It can be difficult to avoid the white areas — especially if you're still getting the feel for your brushes.
 
You have good instincts for the alternatives! White crayon works great as a wax resist. I have also seen people use candles and other waxes to do this. There are some drawbacks. You can't manipulate or remove the wax once it is on the paper and it keeps resisting so you can't easily paint over the top of it. Also, white wax is difficult to see on white paper (it does catch the light differently) — you can of course use other colors but the example you gave had page-white highlights. This technique is good for adding texture.
 
White gouache is also a good thought. Unless applied very thickly, white gouache won't be as bright as the original paper and can move around some when painted over. White watercolors also exist but tend to be less bright and more ready to mix and run after drying. There are also "liquid paper" products that come in a variety of different whites to match most watercolor papers, these dry permanent. A similar option is watercolor ground which is essentially a porous gesso that absorbs watercolor. The drawbacks are that these processes will take the paint a little differently than regular paper — Colors can seem more washed out and almost pastel though results will vary between methods, paints, brands. These are best for finishing touches or "oh shit" emergencies.
 
You can also use acrylics with watercolor. White acrylic over the top or acrylic medium as a resist before painting. I suggest using matte medium. Keep in mind that acrylic is basically plastic so it wont absorb water and has a tendency to stand out when used with watercolor.
 
The above techniques are the ones I would recommend for the specific challenge you mentioned, go with whatever makes you most comfortable but definitely try with only brushwork if you're at all inclined. I'll go ahead and list more of the resist & whitening methods I'm familiar with because one of them might appeal more to you.
 
/u/rulenumber303 mentioned gel pens. I think they work great for fine detail but aren't good for large areas. Most artists use Gelly Roll pens — many gel pen brands wont work well over watercolor.
 
You can also use tapes as a resist. This RollerBond product dispenses removable tape in thin lines. You can use some
Scotch 'Magic' Tape which forms a very hard line or masking tape/painters tape which has a slightly different line quality. For large areas you could try Frisket Film which is basically a friendlier form of Contact Paper. You can cut complex shapes out of most of these using an Exacto knife if needed. Remember to burnish (push down & rub smooth) for best results. These are good for straight lines, hard lines, or large areas.
 
Speaking of exacto knives, you can use them to scrape or scratch the paper to reveal the white beneath. Make sure you're using a thicker paper (e.g. 140lb, 300lb) and be careful not to paint over that area again because the paint will appear even darker than usual. This is a good technique for fine hairs or stars.
 
White watercolor pencils can be used but this tends to be faint and doesn't offer many advantages. It could be nice for a light texture somewhere.
 
There is a lot you can do with stencils. (cheesecloth, leaves, coins, w/e)
 
I've seen people use a lot of other random techniques involving things like white out or oil pastels. I haven't tried them but they're out there.
 
You've got a good attitude about creative limitations and as you can see there is no shortage of alternatives. I'm sure you've encountered many of these options in your searching but I thought I'd give you my opinions and you can decide what suits you best. I left out some wet resist techniques like adding water or alcohol because if you've made it this far you must be getting tired of reading by now. Let me know if you have any questions and if you want more specific recommendations just ask. Good luck!
I use clear plastic film like this. It's easy to draw the pattern on with a permanent marker and cut out and it sticks to the shirt really well.
Not travel stickers, but a buddy of mine covers his laptop with stickers. He also replaces his laptop from time to time, and doesn't want to lose them. His solution is that when he gets a new laptop, he covers the back with a clear sticky covering (something like this). When he covers the laptop or gets a new one, he can peel off all the stickers, put them on the wall and start again.
As for me, I like to use stickers as a cheap way to remember that everything in life is impermanent. It's OK to put it on a water bottle that I'll eventually lose. It's just stuff.
I just got a couple rolls of anti-slip cabinet liner and put down a layer of that between my table and a tablecloth. Works a treat, makes getting cards up a breeze, and keeps the cloth from sliding around.
This kinda stuff: https://www.amazon.com/Non-Skid-Drawer-Cabinet-Shelves-Non-Slip/dp/B00IXYIWC8
hot glue gun these to underside of a rag rug and enjoy
Some people add little bits of velcro to the battery themselves. I don't love this as I just don't like sticking stuff to my batteries. However, this probably the most secure way of holding a battery in during a crash. Personally I use the anti-slip cabinet liner stuff since I had a bunch of that on hand. It works well(get the thicker stuff) but depending on your battery strap and the severity of the crash the battery can still pop out.
It is sort of like that. Maybe thinner. This is the stuff (sells locally everywhere).
A much better bang for your buck is to get a roll of non-skid shelf liner and cut to size. All sorts of things you can do with the leftovers, as well!
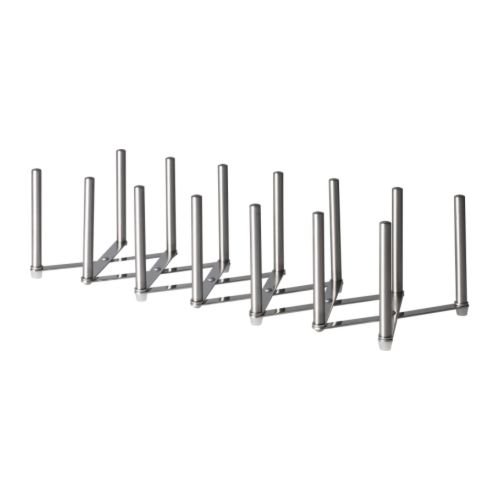
This is a great alternative to an expensive rack for your sous vide container. Its a $12 pot lid organizer, stainless steel from IKEA and the prongs are removable so you can customize to the spacing you desire.
https://www.amazon.com/Ikea-VARIERA-701-548-00-Organizer-Stainless/dp/B00TJTWR04/ref=sr_1_1?ie=UTF8&qid=1469563173&sr=8-1&keywords=ikea+pot+lid+organizer
IKEA lid organizers! I love mine so much, and use them for palettes. I keep one for eye palettes and a second one for face palettes. They can be stretched or squished to whatever size your collection needs. You won't need to replace the organizers if you run out of room for palettes, just stretch them so you'll be able to put 2 palettes per "slot". They also are very minimal in the sense that your items won't be blocked by a piece of plastic so you can see them better and reach for them easily.
You can get really creative and fit a lot of meat on a 18" WSM. I bought this last summer and used it to get 4 racks of ribs sideways on a single rack.
https://www.amazon.com/gp/product/B00TJTWR04/ref=oh_aui_detailpage_o09_s01?ie=UTF8&psc=1
You can also buy vertical chicken roasters to fit 2 or 3 chickens on a single rack.
https://www.amazon.com/Fox-Run-5667-Vertical-Non-Stick/dp/B000I1X4RC/
To make a full packer brisket fit on my 18" rack, I will wrap a brick in aluminium foil and put it under the brisket to arch it up in the middle. It doesn't affect the bark or the cooking time and is easy to find.
There are infinite options for setup so I'll simply provide what I use:
I have a cambro food container I cook in. Rubbermaid works well but I needed something bigger. I use an IKEA lid organizer to hold my bags in place (this didn't fit in the rubbermaid). I only put foil or lids on the top for extremely long cooks (18-24 hours), you won't lose much water in a basic dinner cook. I have a rubber mat on my counter for hotter cooks to protect it. I also use a vacuum sealer for my food and found that placing a pyrex dish in the water helps keep them from floating. Here are some links to what I have purchased
https://www.amazon.com/Cambro-12189CW135-Polycarbonate-Storage-Camwear/dp/B002NQB63E/ref=sr_1_8?ie=UTF8&qid=1492527700&sr=8-8&keywords=cambro+food
https://www.amazon.com/Ikea-VARIERA-701-548-00-Organizer-Stainless/dp/B00TJTWR04/ref=pd_bxgy_79_img_2?_encoding=UTF8&pd_rd_i=B00TJTWR04&pd_rd_r=F9YJ15R2DKR95RQBYK3R&pd_rd_w=TH4K1&pd_rd_wg=oNXkw&psc=1&refRID=F9YJ15R2DKR95RQBYK3R
https://www.amazon.com/Countertops-Antibacterial-Dishwasher-Grey-XL/dp/B01MYV1O16/ref=sr_1_1?ie=UTF8&qid=1492527763&sr=8-1&keywords=rubber+mat+counter
https://www.amazon.com/dp/B000R8JOUC/ref=twister_B01FXRJ34I?_encoding=UTF8&psc=1
I use this for my rack
http://www.amazon.com/Ikea-Stainless-Steel-Organizer-701-548-00/dp/B00TJTWR04/ref=sr_1_3?ie=UTF8&qid=1450295340&sr=8-3&keywords=sous+vide+rack
Amazon link for the lazier - also cheaper if you're just wanting one and don't have an IKEA nearby.
Grab one of these to separate your food, or as a weight on top for larger cuts.
They rust after a while, but for the price they're great.
If you don't have an Ikea near you, they do sell them on amazon but for about twice the price.
I use this pot lid rack to stand up and separate steaks. For stuff that tends to float, I flip it upside down, trapping the bags underneath (and the posts can still be used to keep bags separated for good water flow).
So to piggy back on this topic, I have a 3 gallon container and was having a hard time finding a good rack. I finally went with the Ikea variera pot lid holder which is adjustable in length. I was a little worried about the plastic feet but they have held up including one 2 hour cook at 176 F.
Here is an amazon link which shoes what it looks like, the Ikea item number, and would allow someone without an Ikea to purchase (I think it is only $6 at Ikea though).
http://www.amazon.com/Ikea-701-548-00-Variera-Organizer-Stainless/dp/B00TJTWR04/ref=zg_bs_13750001_3
It is super simple. Anova even has an app so you can monitor your cooker while you are in another room. They are on sale right now which is why I pulled the trigger.
anova precision $155 w the code SPRING25
12 qt container $24.95
container lid $11.08
apparently you can also just float ping pong balls on the top as well - having a lid insulates and slows the water evaporation
cheap adjustable rack to keep the meat in place $13.21
vacuum sealer $69.99
but for this you can just use freezer bags and water displacement to get a similar outcome
Lansky makes a nice sharpening kit for under $20.
Lansky 4-rod Turn Box Knife Sharpener https://www.amazon.com/dp/B000B8FW0E/ref=cm_sw_r_cp_apa_VCa2AbP54WVGM
If you buy a crock stick sharpener (one example), you can sharpen them yourself. The steel Victorinox uses takes an edge really well. You can get them sharp enough to shave with in maybe five minutes, tops.
If it is only for regular maintenance i.e. that the edge is only slightly dull the sharpmaker as is is ok. But if it ever gets really dull or a chip it will take forever and a day with s110v to get the edge back.
A cheaper alternative but with more obtuse angle options that works the same way is available here from lansky https://www.amazon.co.uk/Lansky-Unisexs-4-Rod-Deluxe-Sharpener-Yellow/dp/B000B8FW0E.
And I have just seen there is also a diamond version https://www.amazon.co.uk/Lansky-4-Rod-Diamond-Ceramic-Sharpener/dp/B008EKY5OA/.
> when you put the global in there it sticks out further and decreases your angle significantly
I'm not sure I follow you here. The rod is at an angle, provided you hold the blade fairly vertical what difference does it make how much it 'sticks out'? I'm talking about the turn box here, not a clamped system.
http://www.amazon.com/Lansky-4-rod-Crock-Sharpener-LCD5D/dp/B000B8FW0E/ref=cm_cr_pr_product_top
https://www.amazon.com/dp/B000B8FW0E
Cheap but excellent knife sharpener to go with the knife.
Is this the one?
If you're not interested in the price, Lansky makes a very similar setup for about $15-20
It's a great looking sharpener I haven't picked up yet myself, but everything I've heard about it is good.
Here's another one that says it's the same thing in the description, but is labelled 'Crock Stik'. Not sure of the differences but it looks very similar and is $10 less.
You can't go wrong with the Spyderco Tenacious. Only $35 but it performs like a $100 knife. When I got mine I was very impressed by the quality. The handle has good ergonomics and the blade is a decent steel. It is a great slicer and workhorse!
A good entry-level sharpening kit is the Lansky TurnBox. It was my first sharpening system and it will keep your knife razor sharp. It only has medium and fine grit ceramic rods, but as long as you don't let your knife get too dull you can easily maintain it. There is a slightly more expensive turnbox that has coarse diamond rods that would be better for bringing very dull knives back to life.
http://www.amazon.com/Lansky-4-rod-Crock-Sharpener-LCD5D/dp/B000B8FW0E
You can't get any easier or cheaper than a Lansky Turnbox.
Ive got the same system, and it works well enough, though a bit of a pain for frequent touch ups. Its very simple to use.
though, for your purposes, the Lansky Croc sticks might be better. its very cheap only 20 bucks or so.
The spyderco sharpmaker is the same sort of thing, though higher quality. of course it costs a few times more, at 60-70 bucks.
those hold the rod/stones at the right angles to sharpen at, and you just hold the knife vertical and draw them down, swapping sides. its very possible with both to get extremely sharp edges quickly.
Easiest way, but it's a bit over 15, is to get a cheap angled rod set-up. Cheaper than that is buying a small sharpening stone or diamond pad.
For a buck or two more you can get a much better edge on your steel. If you've spent any serious money on your knives, don't ruin them on a pull-through sharpener like that. Here's a basic 2-stone kit for about the same price as the big one. Or this Lansky 4-rod crock box if you want a "pull-through" style. For a few bucks more ($20 or so) you can get a slightly better Japanese stone set. If you want something more "pull-through" style you can get the [WorkSharp Field sharpener](http://www.amazon.com/gp/product/B009YKHZ96/ref=s9_al_bw_g469_i4} for $30 that will get you consistent angles.
Do yourself a favor and pick up a decent sharpening system. That two weeks could have been 5 minutes!
You don't have to spend a ton, here's a good one for under $20. Or there is the Spyderco Sharpmaker for around $60. No skill required for either to put a nice edge on your blade.
Does anyone have any experience with this kit?
http://www.amazon.com/Lansky-4-rod-Crock-Sharpener-LCD5D/dp/B000B8FW0E/ref=sr_1_8?ie=UTF8&qid=1420399705&sr=8-8&keywords=lansky+sharpener
I'm wondering if some crock sticks would work well for a hawkbill blade?
https://www.amazon.com/gp/aw/d/B000B8FW0E/ref=mp_s_a_1_1?ie=UTF8&qid=1467999946&sr=8-1&pi=SX200_QL40&keywords=lansky+turn+box&dpPl=1&dpID=31Di3Tb2fhL&ref=plSrch
This?
I know you said you don't have the money for the Spyderco set, but have you seen this sharpener from Landsky? It's really inexpensive and functions the same way as the Sharpmaker.
I feel like I should point out that there are so many ways to go wrong with knife sharpeners. The pull-through ones are garbage. Get a crock stick sharpener like this if you're going that route.
Like the sypderco but cheaper, love mine.
http://www.amazon.com/gp/product/B000B8FW0E/ref=oh_aui_detailpage_o04_s00?ie=UTF8&psc=1
I don't even suggest freehand sharpening to a beginner if it's a knife they even remotely care about or want to actually be able to use, because that's a fast way for someone to fuck up a knife, and beginner sharpeners usually really fuck it up.
I'm suggesting that at the minimum, go with a semi-guided setup. Lansky's Crock Stick sharpener is only $17, and using it is literally just "hold knife so it is straight up and down, and then push down and pull back against the sticks". It's very little effort, and is the stepping stone towards freehand sharpening by building up the muscle memory to hold a knife in place.
If there is something you do or use every single day, to me, it is worth spending at least a little extra time/money/effort at some point to make the experience less begrudging to do.
I have sharpened many, many knives for people. People that are very much the "average" home cook. No crazy edges, either. Just something that is easily achievable and maintainable by a casual person. Every time, they have told me that it's a better edge than what they have had before ever, and that they don't feel like they're fighting to cut the food they're cutting/prepping, and because of that, it lets them enjoy the process of cooking more. Needing less effort and fewer strokes to cut something cleanly goes a long way towards making people not dread meal preparation.
Is there a point of diminishing returns on sharpening a knife? Of course. You can sharpen a knife to the point where it will want to cut straight in and through everything it touches, which is bad. But it doesn't mean that you should just be satisfied with a barely-serviceable edge just because it's easy to do and does the bare minimum.
It's not about being obsessed, it's about wanting to do something properly.
http://www.amazon.com/gp/product/B000B8FW0E/ref=oh_aui_detailpage_o00_s00?ie=UTF8&psc=1
Go with something from Kershaw. I would buy the chill. And get yourself an inexpensive ceramic sharpening kit as well. I recommend this one for your needs.
Rubberized mesh The tool chest came lined in it, but I bought a bunch at Walmart to line all the other shelves in the vault. Stuff is cheap, but does the job!
It's generally found as kitchen shelf or drawer liner.
http://www.amazon.com/Grip-Shelf-Drawer-Liner-Black/dp/B000KFSOFI
I love it! I will say that you will want this though for the drawers! I currently am using felt, but when I have the extra money I'll be buying it too! Without it polish moves too much. Just sayin'.
I've used a rubber gripping kitchen shelf liner to do the same. Benefit is that it can be cut to any size and used as a grip for opening stubborn jar lids too.
(http://www.amazon.com/Grip-Shelf-Drawer-Liner-Black/dp/B000KFSOFI/ref=sr_1_3?ie=UTF8&qid=1377810776&sr=8-3&keywords=rubber+kitchen+shelf+liner)
What about something like this? I know we use it under our cutlery rack in the kitchen to keep it from sliding in the drawer.
http://www.amazon.com/Grip-Shelf-Drawer-Liner-Black/dp/B000KFSOFI
Try cutting and using a piece of shelf and drawer liner. It'll help with the smell, and save your hands.
grab something like this rubber grip mat and put a chunk/strip of it on the passenger seat. Its small enough to fit under the seat for when you're riding solo and cheap enough to replace if you end up losing it.
Here's a nice little set to help organize cabinets!
Little boxes on the hillside.
Thanks for the contest!
I found several articles about decluttering but it seems like you're interested in something physical, so I found this [kitchen cabinet organizer set] (http://www.amazon.com/Grayline-457101-Piece-Cabinet-organizer/dp/B000LNV4ZG/ref=sr_1_1?s=home-garden&ie=UTF8&qid=1372399792&sr=1-1&keywords=organizer) that looks like it could be handy.
Little boxes on the hillside.
(If you or others are interested, the articles I found were [1] (http://women.webmd.com/home-health-and-safety-9/10-ways-to-cut-clutter-in-your-home), [2] (http://organizedhome.com/cut-clutter/declutter-101-strategies-cut-clutter), and [3] (http://unclutterer.com).)
ok here we go:
I just moved and regret all the stuff i brought along! one thing that drives me crazy is I went from a large kitchen to a smaller one with less space...so these would be really useful!
.
I also love over the door hooks when bathrooms do not have enough towel rods. (they have other ones that are single hook or double hook if you need less).
.
And last but not least, i shall suggest /r/DIY a lot of the projects are bigger in nature but they have a lot of small ones too! might be good to search for something specific you need (like a garden? or dvd/game/cd holder)
.
I hope you find a home for all of your Little boxes on the hillside! And I am another day closer to going back home so I shall def enjoy my Friday!! :)
I'm sad you have to leave your kitties behind but at least someone is taking care of them. As someone who has lived in small apartments before here are some good organizational products: closet space doubler, keep those kitchen cabinets neat and clean, and my favorite is storing things under the bed.
Also if you put a lazy susan in the fridge or food pantry it helps keep things organized.
Little boxes on the hillside
I would say get something like this. it will keep you dishes and whatnot organized!
cabinet storage racks - to maximize your kitchen space ORRRRR A pot rack
Pot racks are stupid handy (and stylish!) if you dont have a lot of storage space!
I have something like this in my room, which is good for storage and pretty cheap. Look at the customer review images for some good ideas and inspiration!
This is good for organizing stuff in your kitchen cabinets.
Same problem. I have a coffee nook and it's getting crowded. Thinking about going this route.
I like the vertical space it creates. Will put some brew devices and unused gear on top and can put coffee etc below.
Oh, duh! Sorry, I'm an idiot, I was thinking of a screen topper.
That tank is definitely big enough without a cage topper!
If you think you'll need a platform of some kind to keep them from burying their wheel and food bowl (though neither of those is strictly required for gerbs) I use a shelf riser like this one, but bare metal with no rubber coating, and I put cardboard on top for a chewable flat surface.
If for some reason down the road you want to add a cage topper, I've heard good things about the custom ones you can get from this site but they're pretty pricy, and, again, definitely not needed at all with the space a 40 gallon breeder already provides.
Best of luck with your gerbils and good on you for doing your research beforehand!
I got them on Amazon, they’re just cabinet shelves. Sorry I’m on mobile but the url is below:
Grayline 40710
https://www.amazon.com/dp/B000LNVXIY/ref=cm_sw_r_cp_api_e4S.BbDCJCK3F
I have 4311b, and temporarily I am actually using dish stackers from target - the little wire stands they sell so you can stack a second set of dishes separated from the first set.
Like this
https://www.amazon.com/Grayline-40710-Jumbo-Kitchen-Helper/dp/B000LNVXIY/ref=br_lf_m_28xxgz87tkyv85f_ttl?_encoding=UTF8&s=home-garden
Don't laugh at me....
This is what I'm using.
http://www.amazon.com/Grayline-40710-Jumbo-Kitchen-Helper/dp/B000LNVXIY/ref=sr_1_2?ie=UTF8&qid=1425504759&sr=8-2&keywords=shelf+rack
Works great and just cable tie it and adjust as they get bigger
if you don't want it to slide, you could get some Non-Slip Shelf and Drawer Liner and attach it to the bottom of the print. I love this stuff.
Those are the EXACT rubber mats that I was talking about. My current kitchen uses those. I have a similar one, also, but I prefer using the wet towel.
I've used this type of rubber shelf liner, before. To clean it, all you really need to do is rinse it under hot water. If you're really worried about it, dunk it in some hot, soapy water, swish it around, then rinse and dry it. That stuff's not all that expensive, so even if you replace the piece that you use every other week, or once a month, a single $5 roll will last you the entire year.
Still using that laptop desk and love it. I bought this stuff and it works very well to keep the hotas from moving around. The velcro might be better though.
a sheet of this non-slip drawer liner adhered to the top of the box.
I'm a thumb player but I've seen others on this subreddit suggest something similar to this.
I also recall someone suggesting what looked like a microfiber cloth.
Maybe something like this. Or if you don't want to stick anything to your wrist rest, maybe a layer of shelf liner undernearth.
Cut a square of this stuff and put it under your stand. Won't go anywhere.
Without a doubt, but the effects are surprisingly minimal when typing normally and not utilizing the F1-F6 keys and numpad simultaneously. Id been using the keyboard (like I do with all my keyboards) on padded non-slip drawer mats (like this one from amazon) so I didn't even notice the pad was missing until I already left my old office (and the footpad) behind.
https://www.amazon.com/dp/B001KOTJTS/?coliid=I1IBRQ39KI1N3K&colid=27ZG8U57ERQ71&psc=1&ref_=lv_ov_lig_dp_it
I use these for other figs
https://www.amazon.com/dp/B001KOTJTS/ref=cm_sw_r_cp_apa_BFJdzbS95XEHS
Have used for amiibo in the past and think you can get 4 or 5 comfortably on each tier. Plus they're only $8 a piece
Hello and thank you for the contest! I think you should add some mini-steps to the bookcase shelf, so the bells can be displayed better. Something like these could work.
Fact: bears eat beets. Bears. Beets. Battlestar Gallactica
I will guess that you have at least 120 bells!
I use 4 of these,with a row of short characters in front of them. https://www.amazon.com/InterDesign-Organizer-Kitchen-Cabinet-Countertops/dp/B001KOTJTS/ref=pd_cp_469_3?_encoding=UTF8&pd_rd_i=B001KOTJTS&pd_rd_r=TKX601QW1WDA6D4DVD4B&pd_rd_w=XeGzV&pd_rd_wg=vJIs1&psc=1&refRID=TKX601QW1WDA6D4DVD4B
Something like:
https://www.amazon.com/DecoBros-Expandable-Cabinet-Organizer-12-5-25/dp/B00OLH0TGI/ref=sr_1_7?keywords=3-Tier+Spice+Rack&qid=1558838046&s=home-garden&sr=1-7
​
or
https://www.amazon.com/InterDesign-Linus-Cabinet-Organizer-Rack/dp/B001KOTJTS/ref=sr_1_8?keywords=3-Tier+Spice+Rack&qid=1558838046&s=home-garden&sr=1-8
Cool display, but how come you keep your bobbleheads in the box for display purposes?
Also, I think if you got some clear acrylic risers (also can search for acrylic spice racks), you can get some levels to the display to give everything good visibility.
Go grab you one of these: https://www.ikea.com/us/en/p/detolf-glass-door-cabinet-black-brown-10119206/
And some of these: https://smile.amazon.com/dp/B001KOTJTS/ref=cm_sw_r_cp_apa_i_m-gXDbCKE5XR3
Wow, it's actually a better deal to get two of them than it is to get a single one.
24.99 for one, 37.99 for two.
This one also looks rather cool but VERY expensive.
Here's a cheaper one that looks nice enough to display amiibo.
A small piece of non-adhesive shelf liner (something like this) works better than a wet towel at keeping the cutting board from sliding around. It also cleans more easily and dries more quickly and takes up less space when it's not being used.
This: http://www.amazon.com/Duck-1100731-Non-Adhesive-12-Inch-20-Feet/dp/B002AS9NAI/ref=sr_1_2?s=kitchen&ie=UTF8&qid=1464040165&sr=1-2&keywords=shelf+liner
Only this.
Cut a small square that's the size of your keyboard, and you'll forget it's even there. Plus, it's relatively cheap and you get a shitload of it. I use it in my drawers, on my desk, and even under my PC case for extra grip without scratching up my desk. Shit is the best yo.
Sure, you can buy a mouse mat or something for it. But they get dirty or they're bigger than you want. With this you just cut it and forget it. Need another one? Cut another one. No problem bro, you've got a huge-ass roll of it.
Get some drawer grippy liners. You should be able to find something in the kitchen aisle of most department stores. Cut it to fit and it should help everything from sliding around. If you slide the whole helmer around, or close a drawer really rough, you will probably still knock things over, but it will be cushioned. I haven't had any problems with mine over the last 8 months or so, and no broken polishes!
So sorry about your lost ones, hopefully they are replaced quickly. Good luck!
Do you have any kind of mat between the board and your desk? In my experience, a lot of the most unpleasant mechanical keyboard sounds actually come from keystrokes resonating/vibrating through the desk. I have a sheet of this under my board, cut perfectly so you can't even see it. Also, I'm not sure how much room there is between the TADA68 PCB and the bottom of the plastic case, but with most boards, there's enough room to throw a sheet of this on the bottom of the inside of the case, which will dampen some of the hollow vibrations you get when typing.
Thanks! If you decide to give it a try I used shelf liner like this. https://www.amazon.com/dp/B002AS9NAI/ref=cm_sw_r_cp_apa_i_iDCUCbWDHVSKD
I cut a rectangle so that it was almost as long as the battery and wide enough that it goes about three-quarters of the way around.... I insert the shelf liner into the battery compartment making sure to slide it underneath the spring, then insert the battery and try to force it up away from the spring as much as possible.
I am keeping my fingers crossed that the new touch controller is coming out they learn from their mistake and have the battery face the opposite direction so that the centrifical force works WITH the spring rather than against it.
I think you're referring to the smaller holes within the larger holes? The only 5/8" drill bit I had was a spade bit so I just went with it. The smaller holes are very narrow and I'd considered puttying them before staining but decided they make for good drains to keep stray juice from puddling up. The padding I'm putting on the bottom is actually coming from some Easy-Shelf liner so any liquid can just drip straight through. Everything is a pretty loose fit so the eGos actually sit at a very slight angle.
All that makes it sound like a lot of thought went into this. Actually, I was grabbing some stuff from Lowe's, saw a bunch of these blocks on an end cap, and thought they'd work better than a coffee mug.
If it didn't come out right away, don't rush things. It's not impossible to break the feed. Check out, for instance, this video. You may want to use a piece of the rubber shelf liner, like this or a needle grabber for better grip.
On a serious note to this comment. If you have carpet and have to use pedals because your hotas doesn't have a twist yaw then https://www.amazon.com/dp/B002AS9NAI that stuff will keep your pedals put.
I taped it to the underside of my joystick, throttle, and pedals. My pedals don't slide on the carpet, and my joystick and throttle won't slide on my desk.
Thanks for details. I bet if you added some adhesive velcro to your PFD cushion and to the top of your cooler you might be able to fix that sliding problem. Another option might be to put down bit of non slip shelf liner between the cooler and cushion.
As for the brace digging in, try pieces of the foamy-style of shelf liner to ease hot spots. http://amzn.com/B002AS9NAI
It will provide some padding and also help the brace from sliding around.
Well, someone will inevitably point out to you all the guides on the sidebar. But having said that, it's a tricky thing to advise on because everyone likes different things.
Since it's your first keyboard, you'll want to really improve the quality of life. A few tricks I recommend:
1 - Lube your switches. This requires you to disassemble them (not difficult), which you can attempt to do with a small screwdriver, but you risk damaging them. A switch opening tool ($7 USD and free shipping) will make all the difference in the world. There's certainly more detailed guides for this, and I'll try to limit the scope of this thread, but regardless of what switches you've got, you want to lube them. If you're not sure what lube to use, this is a good starting point.
2 - LUBE YOUR STABILIZERS. This will be different from lubing your switches. You want to use a thick material, such as dielectric grease, as it is safe for plastics, won't dry out or shrink, and lasts a long time. Crappy/wrong lube will break down over time, and then before you know it you'll have rattling stabilizers. Dielectric grease is not expensive - do it right. If you're not sure how to clip and lube your stabilizers, watch this video. On that note:
3 - Get better stabilizers. If I remember right from my KBD75 kit, the stabilizers they include are Chinese clones. Don't use these. They will rattle no matter how well you lube them, and the feet aren't capable of being clipped like genuine Cherry ones. Don't make the mistake of thinking it won't be that big of a deal. Once you've assembled the board, you'll only be able to change them by desoldering the entire thing. I've made the mistake - so have plenty of others. Get the right stabilizers. Get these (you will want PCB mount stabilizers).
4 - Band-aid mod. Put little strips of fabric band-aid in the space that will be underneath the stabilizer housings. This will make it so the stabilizer stems don't clack down hard onto the PCB. Here is a visual example of what I mean.
5 - Practice soldering first, or watch some videos (or both). Don't risk melting a switch or burning out your PCB. If you've not done some soldering before, start practicing now. It can be done with a really cheap soldering iron, but make sure you know what you're doing.
6 - Only use leaded solder. Don't go with lead-free solder. It flows like crap, and is a huge pain in the ass to desolder later if you have issues. And rosin core is essential. If you need a suggestion, this stuff (in 0.8mm width) is great.
7 - Clean the flux off your board when you're done soldering. Get a cheap, soft bristled brush, and some 70% isopropyl alcohol. Dip the brush in the alcohol and gently scrub all the brown gooey stuff off the back once you're done soldering. This stuff can oxidize easily, and will lead to corrosion down the line if you don't take care of it. It's not water-soluble, so that's why we use alcohol. The alcohol will also dry residue free. Win-win.
8 - Put some cheap dampening agent in the case. Since it's a KBD75, you're gonna want that underglow visible so you don't want to use a thick foam. But something cheap like this will do wonders to absorb some of the ping and clack from the keys that is common with an aluminum case. Just line the bottom of the case and cut out the holes for the standoffs.
That's about all I can think of off the top of my head. You do this business, and you'll have a near endgame board right out of the gate. If you've got any additional questions, feel free to lob them my way.
do you mean something like this?
You could get some of that no slip plastic mesh stuff
Drawer liner? Thats probably the easiest thing to google.
http://www.amazon.com/Duck-1359572-Non-Adhesive-12-Inch-20-Feet/dp/B002AS9NB2/ref=sr_1_2?ie=UTF8&qid=1457102064&sr=8-2&keywords=anti+slip+drawer+liner
Since I only really use the one side and it's hardly ever moved I've only got one of the rubber things coming off. And I've kept track of it so I just need to glue it down again.
Whenever I need something to stay put on my desk I use this stuff:
http://www.amazon.com/Duck-1100733-Non-Adhesive-12-Inch-20-Square-Feet/dp/B002AS9NB2/ref=pd_sim_sbs_hg_6
You can easily cut it to whatever shape you want. You could use a large piece of it to set under the whole mouse pad or just cut some small pieces for the corners.
You can buy little rubber feet but they would have to be really small ones so it doesn't raise it off the desk too much. For rubber feet I guess I'd try radio shack.
Pick up some of this stuff.
Or this https://www.amazon.com/gp/aw/d/B002AS9NB2/ref=mp_s_a_1_4?ie=UTF8&qid=1467434163&sr=8-4&pi=AC_SX236_SY340_QL65&keywords=non+slip+mat&dpPl=1&dpID=41ydL5IOP2L&ref=plSrch
Just cut it to size and roll it out under your keyboard. Can find them cheap at some hardware stores.
Drawer/shelf liner (the stuff that is like a soft foam netting) works.
-
I used:
https://www.amazon.com/gp/product/B002AS9NB2/ref=oh_aui_search_detailpage?ie=UTF8&psc=1
I had the best success cutting several custom fit layers of it and cramming as many layers as possible. 3 layers was the limit in my Fjell
This stuff is even cooler. You can stick it on both sides of the map and voila - it is water proof and you can write on it with dry-erase markers. Also, you don't destroy the map with pins.
My last groups DM used a few of those in a quadratic handy format (I think 30x30cm) and put them next or onto each other as needed.
Edit: I just saw that you're using mount tabs - I didn't know such stuff existed, pretty cool.
Something like this?
http://www.amazon.com/Duck-1115496-Laminate-Adhesive-12-Inch/dp/B002AS9NC6/ref=pd_sim_op_4
Wonder if some self laminating rolls would be better.
Maybe you can look up a small independent shelving unit that can sit on the floor so they're not stacked on top of each other but still is compact.
On a very quick search there is the following. They may not work for you specifically but could give you an idea...
https://www.amazon.com/Atlantic-Gaming-Not-Machine-Specific-630490063057006304300/dp/B003GB15EK
Or
https://www.amazon.com/Seville-Classics-Expandable-Kitchen-Counter/dp/B002ZNJHZE
Hi! First I’m thinking one or two floating shelves above the sink that would match the one above the stove. Or a shelf/hook duo for pots and pans like this or this.
And for on top of the fridge maybe something like a singular drawer? There are a few options here. Although that might make it a bit stuffed. That space is super tricky! Maybe some basic racks ? Or no rack and you could put cereal, dry pasta, and other loose foods in some jars (like the ones already on your counter) and stick em up there, which would also free up that space on your counter for other things.
It’s a small space, but very cute!! Best of luck to you guys!!
Edit: formatting and more ideas
Thanks!
Seville Classics Expandable Kitchen Counter and Cabinet Shelf https://www.amazon.com/dp/B002ZNJHZE/ref=cm_sw_r_cp_apa_-mOAyb5A41CP1
Yeah that would do nicely. I'm thinking if you wanted heavier stuff to go over the peripherals you could mod something like this to go in the box too:
http://www.amazon.com/Seville-Classics-SHE14052-Expandable-Kitchen/dp/B002ZNJHZE/ref=sr_1_1?ie=UTF8&qid=1343233275&sr=8-1&keywords=kitchen+shelf
Cool tricks I use:
Use a cheap pop-up laundry basket for a cheap drying rack you can buy any where.
These racks are my solution to getting pots off the ground. They stretch across my 4ft tents and hold up 5gal Smart-pots. 3 of them will cover the base of a 4x4. Super Sturdy & I really like how it looks.
I have to agree that the solution would be either an accurate software measurement or a scale based solution. I have two thoughts here. If your printer is properly calibrated then you should in theory be able to track exactly how much filament is used. That means that if you extrude 100mm of filament and your printer is actually calibrated to do that then it should be know problem to do a quick n=n+100; in a logfile somewhere.
My other suggestion to a solution would be to have a lazy susan setup. Just like this guy: http://i.imgur.com/JfMsdas.jpg, using one of these: http://www.amazon.com/gp/product/B0036OQU1U?ref_=sr_1_1&qid=1396788304&sr=8-1&keywords=lazy%20susan&pldnSite=1. That way you could zero the scale with the lazy susan and empty spool on it and have an exact measurement of the filament left. Yeah, the weight would vary but I'm sure that will a digital scale hooked up to an arduino that somebody could program something pretty slick.
I think that there is a solution here that somebody really should work on. It wouldn't be that hard to implement and would help a lot of people.
mathematical
IT SPINS
wow, everything is so much easier to do on a laptop
I purchased this from Amazon, and placed it on the top shelf of the KALLAX IKEA shelf I have next to my TV stand. Still missing the 3 rares from Wave 1, DK, Pit & Little Mac (the latter 2 of which I got online, but are still shipping).
I use a Copco 12" 2-Tier Non-Skid Lazy Susan Turntable.
It's available from Amazon (here) for ~$12 plus shipping. And if it doesn't work for your nail polishes, you can use it in the kitchen for a space rack or in a bathroom cabinet or just about anywhere else for random stuff.
It holds about 75 bottles per tier, so about 150 bottles total if it were exclusively for nail polishes.
You don't see all your colours laid out like you would with a shelf, but it works well for me. I find that I just know where things are. The fact that it's all packed together means it takes up less space than if everything were spread out.
If you hunt hard enough, you may be able to find a 3-tier, but those are more rare.
If you are a power user, consider one or two Cat5 outlets from your home network. Perhaps coaxial if your want a TV somewhere in there for the cook.
In wall speakers for tunes; extra points if they are Bluetooth.
Under cabinet lighting everywhere you can put it.
For the mixer, one of these:
https://www.amazon.com/Rev-Shelf-RAS-ML-HDCR-Height-Cabinet/dp/B0042QB6M4
Matter of fact, look at the Rev-a-shelf website. You will not believe all the kitchen cool stuff they've got.
BIG ass pantry. You can never have enough space........
The biggest, deepest kitchen sink you can afford. So much more useful.
A pot filler at the stove.
R.O. water available at both the main and prep sinks. Do not put the filters under the sinks. Run the plumbing to a utility room and install the whole filter assembly out there. Crawling under the sink to change them truly sucks. You will thank me for this as you get older.
For the kitchen cabinets...for the lowers; try to order big deep drawers instead of cabinet doors. Much easier to load and unload.
For the plumbing, try to avoid 90 degree bends as much as possible. At some point, some time, you will have to snake it. And 45 degree bends are MUCH easier to run the snake through. Trust me on this. And plumbing clean-outs. Put them in while you can.
And lastly, a night light. My SIL gave us a canvas print from HobbyLobby that states "Best coffee in town - always good. 5 cents" I mounted an outlet up high on one wall, and mounted a soft white frosted LED light. Hung the print over it. This glows gently 24/7. So I can hit the kitchen at 2 AM without having to turn on any lights. Brilliant!
Hahah oh dear. My stupid thumbs apparently can't copy properly in my phone... that was from a comment in a whole other sub. Lol (also forgive my inability to post a clean, succinct link...)
https://www.amazon.com/gp/aw/d/B0042QB6M4/ref=mp_s_a_1_8?ie=UTF8&qid=1503419492&sr=1-8&pi=AC_SX236_SY340_QL65&keywords=Rev-A-Shelf&dpPl=1&dpID=51jf91TiAuL&ref=plSrch
Use a drawerorganizer, like this one: https://smile.amazon.com/Made-Smart-Madesmart-Interlocking-Organizer/dp/B004GSQLQE/ref=sr_1_4?crid=134BT29UL8QXJ&keywords=drawer+organizer&qid=1569204010&sprefix=drawer+org%2Caps%2C205&sr=8-4
Just search "drawer organizers" on Amazon, there's tons of options,and even ones meant for silverware can be useful for other things.
I bought this one via Amazon Prime, http://smile.amazon.com/Bluecell-Rotating-Bearings-Monitor-Turntable/dp/B009NPJ0RW?ie=UTF8&psc=1&redirect=true&ref_=oh_aui_detailpage_o03_s00
$8.65 , Bluecell 12" Inch Heavy Duty Rotating Swivel Steel Ball Bearings Stand for Monitor/TV/Turntable/Lazy Susan . It handles my heaviest in-progress tree (about 30-40 lbs while wet with a huge rootball). I've only had it for 2 weeks. ymmv
If I had known it were possible I would have tried to rig that first. Might work pretty well with a lazy susan bearing now that I'm thinking about it.
https://www.amazon.com/dp/B009NPJ0RW/ref=cm_sw_r_cp_api_8f64ybSN9RQ88
I have, and am happy with, this one. However, some people I know buy heavy duty bearing rings from Home Depot and use those, but I don't need to be able to support four hundred pounds on the wheel.
No, but it is this one
Hmmm...
Drawers
Lipstick Organizer
Nail Polish Organizer
White tower and apothecary jars from Walmart, garbage can and napkin/palette holder at Dollar Tree, green brush cup is from Pier 1, pitcher is from ceramics class, smallest brush container is actually a hair spray top. The narrow acrylic tray is actually a dip dish from Walgreens a few years back, and the big one with the bottles is this.
For anyone dealing with reflections from picture frames, or possibly windows, try con-tact shelf liner: https://www.amazon.com/Con-Tact-Covering-Self-Adhesive-Privacy-18-Inches/dp/B00D8GBO2G
I had a couple frames with glass in my room and was getting bad tracking jumps, so I took the glass and covered it with the liner. No more tracking issues! Works great. I can still see the pictures fine, just a very slight frosted look to the glass, but no more reflections.
roor has several different ways they do it.
for labels you're basically sketching/drawing out a stencil on contact paper with a sharpie. then just cut out the parts you want frosted.
A permanent solution could be to use something like this clear contact paper. Not sure if it is specifically compatible with dry erase markers, but you could probably find out with some research. Keep in mind that this would permanently stick to your mats.
i dunno. ...
EDIT: This is what the person that inspired me used, and it comes in up to a 75' roll, so you could theoretically do this with any snake so long as its not more than 18" in diameter
http://www.amazon.com/Con-Tact-Brand-Self-Adhesive-Shelf-Liner/dp/B00D8GBO2G
maybe this??? https://www.amazon.com/Tact-Covering-Self-Adhesive-Privacy-18-Inches/dp/B00D8GBO2G
Is this it? https://www.amazon.com/Tact-Brand-Covering-Self-Adhesive-Semi-Transparent/dp/B00D8GBO2G/ref=sr_1_3_acs_ac_1?ie=UTF8&qid=1542402609&sr=8-3-acs&keywords=clear+shelf+liner
Contact paper like this? Never used it for this purpose (I would have thought the plastic might melt), but I have used parchment paper like this with a clothes iron to cure plastisol ink. It was my first big run, something like 180 white prints on black shirts. Took forever. Got a heatpress with the money from that job, and still recoil at the sight of an iron.
I've put this on my frequently played board games to protect the graphics and be able to use dry-wipe pens (because I don't care about any resale value): Clear Con-Tac Paper
Clear contact paper. Thing is, it really isn't clear, but more of a matte frost when applied to windows. It comes off easily, and you can trim it easily. Plus it's inexpensive. You won't need shades at all, and they will let in a lot of light.
Well I've only purchased each once. Im pretty new to Vinyl cuts.
This was the liner that I bought
https://www.amazon.ca/gp/product/B00D8GBO2G/ref=oh_aui_detailpage_o06_s00?ie=UTF8&psc=1
This was the Vinyl
https://www.amazon.ca/gp/product/B01N1PYCWT/ref=oh_aui_detailpage_o09_s00?ie=UTF8&psc=1
For under my rug, I just used the "don't slip around" mat for drawers underneath. It does pad it somewhat too and was super cheap at the dollar store. I saw some at Walmart too.
I use some of that rolled matting that is meant to go inside cabinets and drawers. I think I paid 4 bucks for an entire roll. Like this stuff https://www.amazon.com/Non-Skid-Cabinet-Shelves-Non-Slip-12-Inch/dp/B00IXYIWC8 but I picked it up in the home goods section at wal mart
There is a type of drawer/shelf liner that is non-skid and grippy. Maybe you can use a strip of that for the bottom of the pipe? this is the stuff I'm taking about
If you are still having trouble after following some of the advice in this thread, you might consider using a heavy object to weigh the bag down in the water.
www.amazon.com/Ikea-VARIERA-701-548-00-Organizer-Stainless/dp/B00TJTWR04
This is a good (cheap) product that will do the job for multiple items at once. Obviously that is not it's intended use, but it seems to work just fine.
A lid organizer like this Ikea VARIERA 701.548.00 Pot Lid Organizer, Stainless Steel https://www.amazon.ca/dp/B00TJTWR04/ref=cm_sw_r_cp_apa_i_ZlqqDb4QVR751 and get glasslock containers instead.
this one is very popular here. . It’s great because it accordions in and out to fit different sized containers and food. I have 2, one that put on the bottom to space things out and one to put on top of the bags to stop floaters.
If you have an IKEA near you, they’re way cheaper in the store.
This is what you want. Look at the reviews, they’re all from sous viders. Works great.
Generally you want good water circulation all around the meat. It looks like your steaks are making contact with the bottom of the pot. It'll still work because the pot also heats up, but it's sub-optimal.
I bought this thing to have a fully configurable rack to place bags in:
https://www.amazon.com/gp/product/B00TJTWR04/ref=oh_aui_detailpage_o05_s01?ie=UTF8&psc=1
You can install/remove any of the stands, they screw in. No plastic parts, all stainless steel. Pretty cheap compared to other options.
In your case, I would have arranged the steaks 90 degrees rotated in the bag so you get good space between them, and then each steak can sit in it's own part of the rack, with the space between them helping bridge the gap. That would still only use one bag, and you get excellent water flow around each steak.
Yeah, it's the Ikea one, but I bought from Amazon for more money and free shipping here: https://www.amazon.com/gp/product/B00TJTWR04
For the rack? Here you go
The pot lid separator is a great idea. Here's the Ikea version on Amazon for those of us without an Ikea:
http://amzn.com/B00TJTWR04
If you have Prime you'll save on shipping vs buying it on Ikea's site.
I found them here on Amazon: https://www.amazon.com/gp/product/B001KOTJTS/ref=oh_aui_detailpage_o00_s00?ie=UTF8&psc=1
They have a few other styles - some a more fancy with metal sides and what not - but I appreciated the simple and fully-transparent look of the ones above.... plus the price didn't hurt
Rubber shelf liner (e.g. https://www.amazon.com/dp/B002AS9NAI ) on top of the glass, then layer something flat/rigid over top of the liner that will stay put & provide a smooth surface for the pad, then put the mouse pad on top of that. Just an idea, and it may add too much thickness to work.
You could also try different types of tape. Some will stick to surfaces that others will not. Some basic 3M/Scotch double-sided tape may do the trick and it wouldn't add any thickness at all.
The best solution functionally--but also the most expensive--would be to buy a new desk that isn't glass.
I'm pretty sure kbd67 PCB would work in the tofu 65 case. The split backspace I don't really like. And youd have to get a plate that allows for the space in the bottom row. (you could Dremel out a tada68 plate)
The stock tada68 plate is steel and I imagine aftermarket ones are steel also.
KPrepublic also just released a 65% board(not hotswapable) but they do have a steel plate that would work with either the lkf or the kbd67pcb (if the holes are line up properly.... Which they look like they are but I cant say for sure unless I got one).
The thing I don't like about the lfk65 is the 3 keys to the right of the space bar. I like 2 keys there. Either 2x 1.5u or 2x1.25u +.5 u spacer)
As for sound dampening just get some cheap drawer liner at Walmart or dollar store. (I feel that this is too expensive and can be found cheaper locally but some tlike this would work https://www.amazon.com/Duck-Select-Drawer-12-Inch-20-Feet/dp/B002AS9NAS/ref=mp_s_a_1_10_sspa?keywords=shelf+liner&qid=1555375109&s=gateway&sr=8-10-spons&psc=1)
Maybe add a little electrical tape to dampen the noise between the top/bottom/plate on the kbd67 also.
I've got a pair of these in my cabinet for all of my spices. Most are purchased in glass jars and just stored in those containers.: https://www.amazon.com/dp/B0036OQU1U/ref=cm_sw_r_awd_PeH-tb13013VS