Best sanding sheets according to redditors
We found 210 Reddit comments discussing the best sanding sheets. We ranked the 82 resulting products by number of redditors who mentioned them. Here are the top 20.
We found 210 Reddit comments discussing the best sanding sheets. We ranked the 82 resulting products by number of redditors who mentioned them. Here are the top 20.


most definitely possible. you can either use an EF-E mount adapter like metabones or sigma, OR my preferred method to get the best quality (requires some DIY), is to get a set of these, lightly and i do mean LIGHTLY taper out the mount to the right shape of the lens mount. Tapping the end of the tool with one of these, for stubborn spots. Don't worry if you slip a bit and hit the sensor. Anything that shows up in your images, you can crop out in post.
Clean it up and polish it down with this. Best stuff in the business.
​
You'll be 🔪🔪☠KILLING IT 🔪🔪☠ in the photography game afterwards. All you pics will be 🔥🔥LIT🧯🧯!
Try this
Meh, you'd probably be better off with some jeweler grade sandpaper. Plus that seems pretty specific to countries that use monopoly money for currency.
My PC:
I built this PC back in 2017 and the CPU temps have been terrible since day 1.
With my daily driver overclock of 4.8 Ghz, 100% utilization for more than 10 minutes would push CPU temps into the mid 90's. Heavy gaming (~50% utilization) would regularly cause temps in the upper 70's or low 80's.
After browsing around here and Youtube I found that the problem was likely Intel's thermal paste under the IHS, so for just over $30 I bought:
I then delidded my CPU, spent over an hour sanding down my IHS, then applied liquid metal under the IHS and Artic MX-4 above (which I had laying around). I chose not to re-seal the IHS after reading some comments here.
Now my CPU temps idle in the 30's, stay in the 40's while gaming and rarely ever hit the 50's.
For CPU temps to break into the 60's, I have to run 100% utilization for over 15 minutes (as shown), which doesn't even happen in my day-to-day use.
So pretty happy overall.
Hand saw . $31.66
Dovetail saw / fine saw $26.97
Japanese hand plane $55.35
Chisels $39.99
Combo Square $9.98
stropping compound $12.95
Sharpening Sandpaper $8.99
$185.89 total (excluding taxes). And you still have some left over for some coffee -- you're going to need some b/c learning to sharpen blades/chisels and turning/using a japanese plane is fairly uphill battle for a beginner. But this list is unquestionably your best bang for your buck.
There is always an unanodized option
With a piece of 1-micron lapping film and a piece of polished granite tile (or a scrap of slab) (total cost $5-10) you can touch up your own blade. For another $5 or so you can get a full progression of films and hone razors you find in the wild.
Edited to make sense and add link.
Found an old Ping Anser 3 at a thrift shop for $2.49. So why not!
Materials used:
20 oz Coke $1.75
Pack of assorted wet/dry sandpaper $8 All the grits are packed together, so the sheets all need rinsing before use.
3M scrubby dremel tips. Used a couple of these for hard-to-get areas, but the sandpaper worked much better for the large surfaces.
Brass Black $8
First step was to see how it was under 30+ years of oxidation. 24 hour soak in coke, then hit with a scrubby.
Next came the sanding. LOTS of sanding.
Started with 220, so I didn't take off too much material, and moved up from there - 400/800/1000/1500/2000. A good rinse and dry with an old t-shirt between each grit keeps from scratching up all the hard work.
I was going to go up to 3000 grit, but couldn't keep from scratching it up after 2000. Yeah, I could have buffed it to a mirror shine, but that had a good chance of softening all the edges. I didn't want a 'blobby' putter.
A bit of acetone on a q-tip removed the old sight line.
Next step was an alcohol bath. 99% isopropyl because that's what I had lying around. A hot water rinse and a good shake dry followed.
Into a ziplock bag it went with some of the Brass Black. Squished it around to get even coverage. Rinsed, dried, and left for 24 hours. Then repeat.
In reality, the next step was to sit the putter on my desk and forget to send it back to Ping. But we're gonna skip that step here.The putter was shipped back to Ping on a Friday. The rep who called was super cool, and said it wouldn't take to long to put a new shaft and grip on and ship it back. Total cost about $61.
This putter is awesome. First round with it and I scored my lowest ever with an 82* (Par 64 course, so it's only bogey golf. But still lowest score for 18!)
Cheers
Go to a model/hobby store and get some plastic polishing paper, it's like 3000 grit sandpaper, but shines up plastic model parts.
Also online
https://www.amazon.com/Zona-37-948-Polishing-11-Inch-Assortment/dp/B001BHGC7G
Depending on how poor you are and how perfect of a job you want done, you might want to consider some DIY body work. Depending on the depth of the scratch, you might be able to fix it with just some automotive sandpaper (NOT hardware store sandpaper), some polishing compound, and a microfiber cloth.
If the scratches are deep enough that they've gouged out the paint, you'd need to sand, prime, and paint. I'd suggest talking to the good folks over at Bloomington Autocolor - they can fill a spray can with a custom matched color for your car. They can tell you what you need to do, and there are plenty of good Youtube videos as well.
For the dents, sometimes you can pop them out if they're rounded, otherwise you might have to replace the part. You can try a junkyard, or just order online. Depending on how the mirror broke you might be able to do a temp fix with some 2-stage epoxy, otherwise you'll probably want to order a replacement part for that as well.
Also, just because I'm a tutor, the word is "exorbitant", not "absorbent" ;-)
OK.... so in roughly the same order you asked (and I know this will be a long response)....
To me, the paint ratio is more a guide than a formula. I'm looking more for the right consistency than number of drops. Some paints require more thinning than others. Yawningangle mentions Alclad - their paint is formulated for airbrushing, so you don't need to thin it out at all. If the paint in the cup has about the same consistency as milk, it will spray.
I generally use 20-30 PSI, more often the lower values. I like to spray a bit thinner and at lower PSI so that I get thin, even coats with less chance of runs, drips, etc.. The higher PSI values can dry the paint out faster, leading to a pebbly texture on the model.
Masking - I use Tamiya's tape for detail work:
6mm Tape dispenser
10mm Tape dispenser
18mm Tape dispenser
40mm Tape roll
It's a thin rice paper that has more flex than plastic scotch tape and is much thinner than most masking tapes. Good stuff. It will still bubble and ripple over compound curves, but you can work around this by cutting it into thin strips and layering it - see this article for examples.
A dremel works too fast for polishing car models; you'll go through the paint at that speed. It's better to work by hand with some fine polishing clothes. I'm a big fan of Micro-Mesh and you can get starter kits fairly inexpensively that will work great on a project like this.
With regards to the dash - generally, if you're not happy the best thing to do is either live with it or strip it off and start over. It's a big enough pain in the butt that I will sometimes just live with it and leave the windows up or canopy down. ;)
When I make dice I polished my masters with these. https://www.amazon.com/SANDING-SHEETS-INTRODUCTORY-Peachtree-Woodworking/dp/B000H6HIK2
And when the dice come out of the mold I use them on the sprue marks as well. For the final polish I use headlight restoring polishing with an harbor freight version of a Dremel and a budding attachment.
Ok, I'll try my best to explain here. It's a long and labor intensive process, but there's no thought involved, and nothing to screw up like with some methods.
First, you're going to need a few supplies
-----
Now, for the chamber sanding
-----
Now your chamber is sanded to be perpendicular with the driveshaft. But your carrier does not perfectly match, not yet.
Now, for the carrier sanding
-----
Your carrier now has a parallel surface to your chamber. Which is also perpendicular to the driveshaft! Congratulations, your grinder is aligned the best it can be this side of a machine shop!
Final steps and notes
-----
> Terrible factory milspec trigger though.
A few minutes with this plus some white lithium grease can reallllly help out mil-spec triggers.
Once you clean them up, a generic mil-spec trigger is probably your best trigger for the money.
personally i think the best course of actions is to just buy new keycaps, unless you really want to keep them. light sanding should work best, sanding stick
Replied to a similar post recently:
> I did this to a windshield once. Researching fix options was how I learned this technique. Use Micro-mesh sanding pads in this order:
> That should get it transparent, and looking close to glass. Sometimes I then polish with Novus if needed.
3M Micron Papers are my personal preference - they are much more consistent than regular sandpapers and achieve much finer finishes - best used with some patience, going stepwise from the larger micron sizes and working through the finer papers (in one direction, of course with the grain of the finish) until you've reached what you're happy with (a set of 6, each color is a finer and finer abrasive down to 1 micron) -
With one big caveat:
Practice first, understand that literally nothing you can do at home will ever exactly match the factory finish without knowing which wheels/abrasives/techniques they use, and if you're too aggressive you'll turn one scratch in an otherwise nice finish into a complete mess.
Or just live with it... or take it to a good jeweler/watchmaker. Even they may not be able to exactly match a given watch' factory finish since there are so many different variables for brushed finishes...
Here is the Paul Sellers video I'm referring to.
The 750 grit diamond stone, and the 1000/4000 grit water stone.
Also, here's the sandpaper I uses for those interested.
Thanks to /u/stalemunchies and /u/respighi who recommended to use a hand plane on my hard-headed end-grain piece - inspired me to go hand-plane hunting!
I used this pack.
https://www.amazon.com/dp/B01MZALAD9/ref=cm_sw_r_cp_apip_eFlQOZv7B25tE
I believe I started with a course grit around 400ish, and went all the way down to 3000
I'm not an expert, by any means, when it comes to SRs, but I believe a 12K-15K stone is all you need to maintain a razor.
I use lapping film to maintain the two vintage straights I have. Both were dull when I got them. I had to set the bevel, using the film, to make them them shave-ready. It worked well.
This vendor sells it, but you'll need a ,3m to ,5m for finishing.
It really depends on what you planning on sharpening. The stone you listed is a 5 in. medium and a 4 in. fine which you will come to find out if you buy it just isn't big enough. Also it really depends on how sharp you want your knives to be. The system you listed has a 400 grit medium and a approximately 1,000 - 1,200 grit fine. However if you don't mind not using a stone you could also use higher grit sandpaper or Polishing Paper but don't just cut into it like the guy did in the video. I like you experiment with different ways of sharpening my knives, my system is as follows; 800 sandpaper, 1,200 stone, 4,000 polishing paper, 6,000 stone, and finish with 2 different leather strop with compound approx. 8,000 - 12,000 grit. Find out what works best for you, Hoped this helped!
I'll start with the basics.
First - decide on what you actually want to do. Plan out your mods and your paint job. If you're having trouble getting inspiration, Google image search the name of your blaster + "paint job" for ideas. That what I did, and I saw this among the images.
It's Coop772's steampunk DoubleStrike. I decided to base my paintjob off of that one, but using a heavy helping of bright cobalt blue.
Next - Open up your blaster. I like this guy's method of sketching out the blaster and placing the screws approximately where they were, so they don't get mixed up or lost. You can tape any internal parts that aren't getting modded or painted to this sketch as well, to keep them safe.
I suggest either taking detailed pictures of the dis-assembly, or finding some photos online so that you will be able to put your blaster back together correctly later.
Then - Do any modding you are going to do, and sand off the warning text and logos if you want to. You will also need to sand off any paint that is on the blaster that you want to paint over! The base coat we are going to use will NOT stick well to painted surfaces.
Nerf blasters are made of a fairly soft plastic, so I started by using a pocketknife to scrape off the mold lines and much of the text & logos, then moved to sandpaper. Don't use anything coarser than 120 grit. My process was 120 grit - 160 grit - 200 grit - 240 grit - 300 grit - 600 grit polishing paper. I highly recommend the 3M polishing paper; it’s way more flexible than normal sandpaper. You can probably skip the 160 and 240 grit if you don't have them.
After that - Wash all of the parts that are going to be painted. Use hot water and dish soap, and let them dry completely. This is really important, don't skip it. It gets off all of the mold release chemicals, sanding dust, and any grease from the interior of the plunger or from your fingers. If you're in a big rush you can wipe down your parts with 99% rubbing alcohol instead, but be sure to do it outside.
Lastly - Tape off any areas you don't want painted. Blue painter's tape is best here tho regular masking tape will also work, it will just be harder to remove afterward. You don't want paint on the insides of the blaster or any moving parts if you can help it. You can also use the tape to mask out simple designs with the original colors. just be sure to pay attention to where the edges of your tape are and press them down firmly.
FINALLY ON TO THE ACTUAL PAINTING!
The base/primer coat I used is Duplicolor Vinyl Dye. This stuff is amazing, it has solvents that allow for a penetrating bond with the sort of plastic that Nerf uses for their blasters, and it dries to a paper-thin, rock-hard but flexible finish. It's hard to go wrong with the flat black, but if your paintjob is going to be close to one of the other colors then get that one instead. You can find the paint at most auto part stores.
The downsides to vinyl dye are that it is pretty expensive, it will not adhere well to painted surfaces, and it will only work on vinyl-type plastics. The harder plastics - usually ABS - that Buzz Bee and other knock-off use won't work with it. For those I recommend sanding the whole blaster with 600 grit and using a Rustoleum primer.
You want to do this on a warm, dry day. Apply the primer in very, very thin coats. By that I mean that my first coat was just a layer of speckles. Wait a couple of minutes for it to dry between coats. Yes, this will take a while but this paint runs like crazy if you try to put down a solid coat. If you rush it's going to look awful.
When you have good coverage over most of the pieces, concentrate on hitting the areas that are not solidly covered. Once you have full coverage, let the parts dry for a few hours.
If you are going to use any other colors of spray paint, re-tape as necessary for your design, and paint similarly to the basecoat. Drying times will depend on the paint you are using. Once the paint is dry, carefully pull off the tape from anywhere you want to be painted metallic.
Now for the beauty coat! I use acrylic paints in a number of different brands. Generally it's whatever I happen to have around the house (Which as a 34-year old with an art degree, is quite a lot). Despite that, I'll try to give some suggestions for what to buy.
Liquitex are the big boys of the acrylic paint world, and I recommend their paints above anything else. They literally invented the modern water-based acrylic paint. Keep in mind that different colors are made with different pigment substances, so prices may vary by color. If you can't afford their professional-grade paints, the BASICS line are still quite good - for the purposes of painting blasters I recommend the BASICS Matte if you can find it, since it dries to a flat, matte consistency while the Satin stuff tends to hold its texture as it dries. That's useful for fake wood handles but not much else. You should be able to find Liquitex paints at craft/hobby stores as well as dedicated art supply stores.
If you're really too broke for Liquitex, craft paints like Folk Art or Americana are alright, but you are more likely to need many coats or have inconsistencies. Don't buy anything cheaper than that - you'll regret it.
Some general painting tips: For solid colors, paint thin coats and let dry before re-coating. Red and yellow are going to need multiple coats, no matter what. The best bright red and yellow pigments aren't opaque, so it takes several layers to reach opacity.
Keep in mind that mixed colors are always going to be muddier than pure colors out of the tube. You can make a color lighter by adding white but it will lose saturation, becoming more pastel. Likewise, adding black will make it darker but also duller. I suggest small amounts of the complementary color as an alternative to black.
The main painting technique I used here was drybrushing. Drybrushing is great for creating a metallic look. Here are two very good guides to the technique.
The three most important tips - Don't use your favorite brush - drybrushing has a tendency to ruin brushes. Make sure your brush doesn't have any water in it. And if you can still see paint while you are wiping your brush off on the paper towel, you have too much paint on the brush. Keep wiping. Just remember, you can always drybrush more, but once you've done too much, you have to completely repaint the base color and start over.
Drybrushing is messy, so do those parts first. Use metallic paints over your black base coat for "metal" parts of your design. You can do a very light drybrushing of edges for a worn black oxide look, or you can drybrush several layers of metallic paint to get more of a dirty metal effect. (I'm not a huge fan of the mixed-metal steampunk look but it's a good example.)
Let the paint dry. It shouldn't take long since drybrushing uses very thin layers of paint.
After drybrushing your metallics, wash out your brushes, dump out your water, wash out your water cup and get a new palette (or wash it if you're using something reusable). Metallic flake gets into EVERYTHING.
Now pull off the rest of the tape, and lay down a layer of solid color for any other areas. You can also drybrush them to bring out the detail; just use a lighter color than the rest of the area. I don't suggest using white unless the color of that area is very light.
You can also use washes of diluted paint in dark colors to increase the contrast in spots that should be in shadow. I tend to apply it with a brush, and then smear it around and wipe it away from the places it shouldn't be with my fingertips. This is pretty messy, and you might prefer to use a clean, dry brush or a scrap of paper towel.
After all that messy painting, if there are any raised motifs you want to paint, or designs like vines or flames or lettering, it's now time for that. Go ahead and use a good brush - one that can hold a nice flat edge or sharp point - to carefully paint your designs.
Once you are happy with your paintjob - or just sick of messing with it - let it dry overnight.
LAST STEPS! Now that your blaster has a beautiful paintjob, you need to protect it! Once again, I want to suggest Liquitex for this. They have varnishes in both gloss and matte, in both brush-on and spray varieties. In any case, I DON'T recommend Krylon. Their clear coat always has an awful pebbly texture.
Go ahead and give the whole blaster several layers of gloss varnish. Once again, thin layers and patience in letting them dry between coats will ensure a good finish.
If you are using a brush-on varnish, apply it slowly, and just a little at a time. If you notice bubbles, rinse your brush out, dry it off on paper towels, wipe the bubbles off, rinse and dry again, and then get a fresh brushful of varnish to keep going.
Once there is 2-3 coats of gloss varnish on the whole blaster, use a matte or satin varnish on any parts you don't want to be shiny.
Let the blaster dry overnight again.
You're done painting! Use a razor or exacto blade to carefully scrape paint off places it shouldn't be - like the mating edges of the shell - and reassemble your blaster. Don't forget to re-lube the plunger.
Any questions?
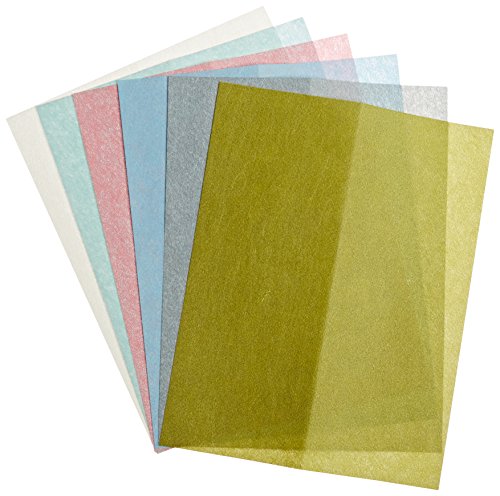
Zona 37-948 3M Wet/Dry Polishing Paper, 8-1/2-Inch X 11-Inch, Assortment Pack One Each 1, 2, 3, 9, 15, and 30 Micron https://www.amazon.com/dp/B001BHGC7G/ref=cm_sw_r_cp_api_29AYxb62FZ12A
I used them all that came in the pack. That's probably not necessary. Just keep going until you're happy with the look. I may take it back to a brushed look someday. Can always polish it back to shiny.
Try these, I use them on my refinishing projects. It's basically very fine sandpaper and will definitely accomplish what you're after.
You can use this to clean out the chip.
You might also consider steel wool, if the above doesn't work, but be gentle. It's possible that you might mar what looks like an otherwise nice finish, and it would be a shame to have to re-polish the area.
Keep a really close eye on those sections in the near future, too, once the rust has been removed: it's possible that the rust may come back quickly in those spots now, since there's probably more surface area (and thus more chances for oxidation) under the rust spots now.
If that happens, it may be in your best interest to pick up some polishing paper and run the finer grades (I find the 30 micron paper leaves small scratches that I can see - start with the 15) over the area to help even things out.
You can get small granite surface plates for not too much money. My initial thought was blanchard ground steel.
Out of everything suggested I'd vote tungsten though, purely because it would be awesome. Stupidly expensive, and massively heavy, but I think tungsten's just neat.
Are they painted Blue or are they Molded Blue?
If they are painted, some rubbing combound and a lot of elbow grease might do it.
If they are molded, then get a pack of ultra fine wet/dry sandpaper and polish it back smooth.
Order yourself some sandpaper. I bought this set off of Amazon. Polish the black parts off of your picks and round off the corners on the hooks (leave the rough edges on the rakes, you want them to grab & catch).
Sandpaper I bought For reference , also i kinda suggest even getting higher grit sandpaper as i still see some scratches on the mouse (barely).
2 pack
assorted pack sand paper
lifetime supply of oxiclean
obsidian oil
edit:
paragon wax for hand polishing smooth pipes
halcyon II for hand polishing rusticated pipes[https://www.ebay.com/itm/Halcyon-II-Wax-for-the-Pipe/323134732335]
just have plenty of pipe cleaners, qtips, and either vodka, rubbing alcohol, or grain alcohol
Try a [fiberglass pen](KTI (KTI-70550) Sanding Pen https://www.amazon.com/dp/B000FN8H52/ref=cm_sw_r_cp_api_0-fNAbT6MCGJ4) go really easy as you can easily go too far. Tape off around the switches to keep the broken bits of fiberglass and dust from getting in your keyboard.
He is referring to the fact that aluminum almost instantaneously forms aluminum oxide at its surface from an oxygen atmosphere.
Aluminum oxide, Al2O3, in its most common form also known as corundum, has a mohs hardness of 9, close to diamond, and it can readily scratch glass, which has a much, much lower hardness. Alumina is therefore a common material used in sandpaper, which you can easily buy on Amazon. If you had heard of it you would have probably asked the same question as him.
The layer of alumina that forms may not be thick enough (it's very thin) or of the right composition to form corundum, but if enough of the aluminum is rubbed off and oxidized, he is proposing that it's possible the aluminum will form into particles of corundum, which can scratch glass.
I have no data to say that this actually happens, but it's not just a crazy idea where he is questioning the wisdom of the materials science gods and their table of things that will absolutely never scratch other things.
If that is all the actual rust, I dealt with rust spots about that size on my NB. I first used a sanding pen to sand the rust down. Then I applied some OEM Touchup paint. Last thing, I used Langka blob eliminator to form it to the rest of the paint. You can't tell its been touched up from about 10 feet away, any closer than that and you can tell. Better than leaving rust to sit. Here are links for all of those things.
Sanding Pen
https://www.amazon.com/gp/product/B000FN8H52/ref=oh_aui_detailpage_o08_s00?ie=UTF8&psc=1
Blob Eliminator
https://www.amazon.com/gp/product/B0074BMB0U/ref=oh_aui_detailpage_o09_s00?ie=UTF8&psc=1
Micro Brush (Helps with touchup, sometimes)
https://www.amazon.com/gp/product/B01N6D0207/ref=oh_aui_detailpage_o07_s00?ie=UTF8&psc=1
The best part about the blob eliminator, if you mess it up you can use it to completely remove any touchup paint, and not damage the OEM Paint. The stuff is magical for small touchup spots, work on it until you are happy with the results. Will be much cheaper than 450$
One piece of advice, whether you find sandpaper or end up using something equivalent to a much higher grit paper, is to never skip grits. For example, if you want to bring them to a mirror finish it might seem like going from 400 to 2000 would save time over doing 400, 600, 800, 1000, 1200, 1500, and 2000, but the more intermediate grits you use, the faster things will go even counting the time to change paper. You'll only need a few swipes with each one. And if 400 doesn't seem to be doing anything at first, don't be afraid to start lower.
Something like this 36 piece incremental set from Amazon for $8 will give you all the grits you'll need.
I use this stuff if you want to give it a try. The price is right.
3M Polishing Papers. What everyone else here is recommending is graduated in "grits" but 3M Polishing Papers are graduated in microns.
I'm assuming you're talking about the paint chip below the Toyota emblem. Dr. Colorchip will do just fine. If you want to make it near perfect, invest in an ultra fine grade sanding kit like this: http://www.amazon.com/SANDING-SHEETS-INTRODUCTORY-Peachtree-Woodworking/dp/B000H6HIK2
Ignore the part about woodworking... sand paper is sand paper. This will allow you to really flatten and polish the surface so that the touch up paint blends as seamlessly as possible with the factory paint.
Here's what I sent to the couple of PMs I got asking similar questions...
I ordered these from Amazon:
Dupli-Color BFM0360 Dark Shadow Gray Ford Exact-Match Automotive Paint - 8 oz. Aerosol https://www.amazon.com/dp/B00407TU5U/ref=cm_sw_r_cp_api_i_4DxwDbP62JVFE
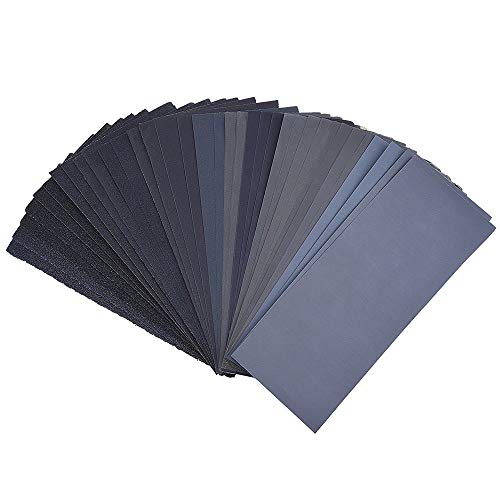
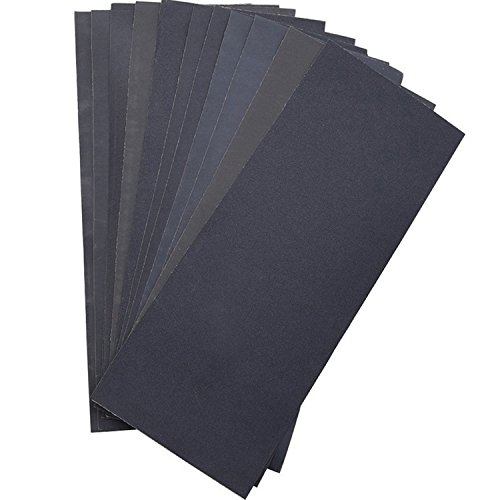
Sandpaper, Premium Wet Dry Waterproof Sand Paper, 45PCS 120 to 5000 Assorted Grit Sanding Paper for Wood Furniture Finishing, Metal Sanding and Automotive Polishing, 9 x 3.6 Inches. https://www.amazon.com/dp/B07KV3VX97/ref=cm_sw_r_cp_api_i_NHxwDb65VSTCX
From there I started off using a 1/4 piece of one of the 240 grit pieces of sandpaper and spent about 5 minutes sanding off all the jagged edges of the curb rash. (Side note for your question: Pressure was about what you'd use with a scrubby sponge to get some stuck on food off a plate for all the sandpaper sheets, regardless of grit.)
Next I tore off a similar sized piece of 400 grit sandpaper and spent another 5 minutes sanding it down further to smooth out some of the larger damaged area into smaller issues.
Repeat another 5 minutes with 600 grit. Then 5 minutes with 1000, and finally 5 minutes with 1500.
Once you are done the damaged area should be shiny bare metal that should feel smooth to a light touch with your finger. (And leveling out the area is not really a problem. As bad as curb rash looks, it's mostly just jagged metal sticking up that gets sanded off. It's really not that deep that you end up with valleys and craters once you are done sanding. Technically, yes, the rim is "thinner" where you sanded, but it's a fraction of a millimeter so, and not really visible to the eye unless you get down real close and look for it.)
Next I cleaned it all off using nothing more than some Windex and a soft rag.
I then used a new small piece of 600 grit and lightly went over the whole area to make some tiny rough areas to help the paint stick to the metal better, and wiped clean the dust.
I then taped the tire and undamaged area of the rim to keep the paint off those parts, and sprayed on the paint using the instructions on the can. (Three light coats 10 minutes apart)
That's pretty much it. Someone else mentioned clear coat but I didn't use it. I though the result I got was pretty dead-on and didn't want to risk a clear coat make it look off or too shiny, then have to do the rest of the wheel to make it uniform - which would have made me then have to do the other three tires in clear coat to make them match as well. But if I down the road I change my mind, adding clear coat is as easy as the painting.
Anyway, it's time and labor intensive, but it's easy. Good luck!
Instead of sandpaper try 3m Sanding sponges. I use fine and superfine grade pads before I prime or paint. They really shine on curved or irregular surfaces.
http://www.amazon.com/3M-916DCNA-Contour-Surface-Sanding/dp/B00004Z49L/ref=sr_1_1?ie=UTF8&qid=1313506209&sr=8-1
http://www.amazon.com/3M-Contour-Surface-Sanding-Sponge/dp/B00004Z49M/ref=pd_bxgy_hi_text_b
Ah, an egg strike. I hate people. Anywho, you can use one of these fiberglass prep pens. They are made to get into tight spots that you can't with sandpaper and are often used for touch up prep. They are sometimes called "scratch pens" as well. That said, with that much rust and damage, you are better off having a body shop respray the panel or at least do a spot prep and respray.
There is a method used in woodworking... its called Scary Sharp and really just amounts to getting NICE FLAT surface (usually glass) and affixing higher and higher sandpaper grit sheets. I'm not referring to what you can find at your home improvement center (they usually top out at 400). You need a few sheets that go well into the thousands for a mirror edge.
Method: https://www.google.com/search?q=scary+sharp+method&rlz=1C1CHBF_enUS755US755&oq=scary+shap+m&aqs=chrome.1.69i57j0l5.6864j1j7&sourceid=chrome&ie=UTF-8
High grit paper options: https://www.amazon.com/Paxcoo-3000-5000-Sandpaper-Assortment/dp/B075H8KSHJ/ref=sr_1_3?ie=UTF8&qid=1522769712&sr=8-3&keywords=high+grit+sandpaper
Glass nail files. They do not give like metal files so you can get real control over your nail shapes.
Some kind of super-high grit sandpaper or micro mesh. I got this in 2016 and have used less than half of the sanding surface of each pad. By the time you get to the last sheet your nails come away like glass.
Some will point you towards getting the tamiya knife, and here's a similar style olfa art knife. Note the replacement blades for the olfa. I also happen to use snap off blades, in addition to xacto and the tamiya knife. I have an olfa one. I happen to not use exacto knives for gundam anymore though. The tamiya model knife and olfa snap off meet my needs just fine due to the angles of cuts I tend to make and angle of the cutting edges of the knives.
And some sand paper, since you included putty.
And lastly, some cheap ass brushes to go along with good paint brushes; decent tooth pics (if you snap it off, the thin layers of wood can be a cheap fine detail brush)... etc.
You should be able to fix it with some wet sanding (go 400-600-800-1000-2000-3000-polishing compound). You should be able to buy an assortment pack that'll get you the above or similar combination. For example: https://www.amazon.com/Sandpaper-Furniture-Finishing-Automotive-Polishing/dp/B01LZ6TG05/ This is a random one, read reviews and pick a good kit.
Make sure to buy sandpaper designed for wet sanding. Let the sand paper do the work, don't push too hard on to the surface. Keep the surface wet with water. The water acts as a lubricant to keep the sandpaper from clogging up as well as controlling the dust.
edit:
Use tape to mask off the edges of the body work so you don't scratch it. I've found electrical tape to work extremely well for this. Once it's sanded and polished, apply a UV sealant or else your lights will start to yellow/haze after a while.
yes but i would use a sanding pen if you are trying to do small spots.
That's the honing guide, I filed mine down just google for "Larson guide modification" and follow the instructions using a guide. If you don't have a file they are like 6$ for ,4, but whatever, it will still work.
As high as you want to go. Here is an example, but it's just the first result for "wet dry assortment sandpaper" and it will last a while but there are only 3 sheets of each so you will go through lower grits fast. WINDEX
Is for the sandpaper to help clear the metal shavings from the grit.
42 Pcs Wet Dry Sandpaper 120 to 3000 Grit Assortment 9 3.6 Inches Abrasive Paper Sheets for Automotive Sanding, Wood Furniture Finishing, Wood Turing Finishing https://www.amazon.com/dp/B01K22Q9R8
Sandpaper, I went up to 320. Then I went down to 1 micron with these
If you want to recreate the picture, paint with thinned (you can use water or alcohol) mr.hobby gloss black, silver, and dip the windows in acrylic floor wax. Then you'll need to polish that with some super fine sandpaper, 15,000 grit.
Shopping list:
Tamiya Extra Thin Cement: 5$
Mr. Hobby Gloss Black 4$
Mr. Hobby Silver 4$
Paintbrush set 5$
Sandpaper 25$
• Never get your glue on the windows.
Use something washable for attatching windows like Elmer's Glue.
• Do not paint everything and assemble rather paint as you assemble. Don't get paint on the attatchment points because that will make the cement useless.
Edit: I got the prices on the Mr. Hobby wrong.
Is this better? https://www.amazon.co.uk/dp/B01B2SWZ9W/ref=cm_sw_r_fm_apa_u6dGzbVBHXEK0 nothing below 400 but slightly cheaper than the other deal
3000 is excessively high. Like, higher end of polishing work high. Heres my general rule for spinners.
100 grit-Large ammounts of material removal, requires smoothing out later.
200 grit-Moderate ammount of material removal, good for brushed finishes, but likely will require some smoothing out after.
400 grit-Small material removal. Requires minimal smoothing afterwards.
800 grit-Moderate smoothing, good for just getting the job done. Not the finest finish, but it gets the job done.
1600 grit-Fine smoothing/finishing. Pretty much the last step, unless you want a mirror finish really.
(edit) That pack of sandpaper has way too much difference inbetween the grits. You want relatively small steps, going from low grit to higher gradually. This package here should have everything you could ever need. https://www.amazon.co.uk/dp/B01HBJ8Y00?psc=1
you can just wet sandpaper you have already but here is the variety pack i mentioned on Amazon. You're definitely gonna need higher grit as you go along, start at like 240 and then end with either 400 or 600 grit to polish. Good luck!
Here is an actual answer instead of condescending replies you seem to be getting. I actually just did this to my 5° case! I have a silver one and recently saw some pictures of white cerakoted cases and really liked how nice and simple they looked. Got in touch with some local auto shops but the quotes all came back in the ~$100 range. I got a pack of assorted grit sand paper, Aluminum Primer, and some White Enamel from my local Lowes. I sanded my case, cleaned it with a microfiber cloth, applied a few of coats of the aluminum primer, waited a day and sanded that with 800 grit to get rid of any weird bumps the primer left. Then I started coating it with the white enamel. I would do a few light coats 1 hour apart, wait a day, sand it with 800/1000 and repeat that process for like 3 days (3ish light coats, wait a day, sand). I got a nice, even, and very white finish on it now. I'll send you some pics once I get home
This is about as affordable as it gets.
I actually just went through this, I'm certain I'll regret my choices later on when I buy something nice but this is what I did just to see if I'd like using chisels.
harbor freight chisel set. multi-pack of wet automotive sandpaper. 2 of the flatest granite tiles I could find at menards. The cheapest honing guide I could find.
spray adhesive the paper to the stone, mount the chisel in the guide and go to town. Use water liberally. I did maybe 20 swipes on each and flattened the back. Maybe 25 bucks spent in total and I have 4 pretty darn sharp chisels.
I would recommend a better honing guide, that 5 buck one sucks.
Sorry, I was trying to trim out all the referral data and other annoying garbage. It's fixed now.
The stuff is called lapping film, polishing paper, crocus cloth, or probably a dozen other things but it's essentially high quality superfine sandpaper.
http://www.amazon.com/gp/product/B001BHGC7G
3M Assorted.
1000-2500 grit.
Thing is its usually an Add-on item on Amazon
https://www.amazon.com/gp/aw/d/B005JPGTNI/ref=pd_aw_fbt_263_img_2?ie=UTF8&refRID=ANS6PKY1W1HB0F7SC93A
For sanding I think I’m using this one, and also this one. For the hammer, I use this one, gently.
Hi Fezz
I think I'm in a really similar position to yourself - I've just bought a bunch of tools and I'm now at that point of getting some good(ish) leather to properly work on. I've been reading books and blogs and forums like there's no tomorrow, and posted a question or two here.
My advice from what I've found in response to each question and what I would personally do is:
Came out very well. I am a little picky about it all but considering I spent about an hour doing it (one headlight). I could have easily done another round though and it would have been slightly better but it was getting dark. I would highly recommend sticking with wet sanding all around because dry sanding it will clog up the sandpaper.
I 3d print so I had a bunch of sandpaper, unfortunately not enough of certain grits, but here is a link to the sandpaper I used. One sheet was good for one head light. Cheap and reasonable.
I actually only used polishing paper! Amazon Link
Cutting the basic shape out of a fence panel or 2x8 is pretty simple. Then clean the edges with a hand-planer then sand it down and finish with linseed oil. Keep it simple. Your local lumber yard will have tons of scrap wood you can mess with (ask for a harder wood like oak, maple or darkwood). needed tools;
I had a tiny spot on my hood that I left about 5 years ago thats slowly progressed from a dot to circle about an inch wide. I kept saying I was going to find a new hood from the junk yard, but I have yet to find one in good condition & the right color. I should've taken care of it before it grew.
Touch up paint is what you want, I've used that in other areas in the past. Focus your sanding right where its rusted only, try not to sand past it thinking you can blend the paint in. That's only possible if you use a full spray setup and respray the entire area over.
The trouble with touch up is it will never match or look original. So do it while its small to minimize the impact. Check with your dealer to see if they sell a small jar or pen of original factory paint in your color -- if not many places sell it online (color matched / mixed). They should give you a jar of color plus a jar of clear, and you may need to buy your own sandpaper and polish. 3M sells a small sandpaper kit like this: link. Heres the polish I have: link. That will take out any sanding marks after.
If the paint is chipped and there's a difference in thickness between normal paint and the metal, you'll need to sand it down. Which you should do anyway to get the paint to properly adhere.
But if the panel isn't smooth (i.e. your fingernail catches on the edge of the chip) the damage will show up even after you paint.
Get a wet sand kit (cheap on amazon) and work your way through most of the grits until the surface is smooth. And if you're OCD about this, you can wet sand after applying the base coat, and then after applying the clear. Probably the proper way to do it, but it's more or less necessary depending on how much paint spatter/runs you get.
As for spraying- it's better to do multiple light coats, rather than a single heavy one (reduces runs, which are time consuming to sand down).
I usually buy Sandpaper with assorted grits like these and Wood craft sticks that you can also find in Walmart/Targets (if you're in the US) with some superglue. Just cut the sandpaper to the size that I can wrap it around the wooden stick, superglue it, and go nuts. I can usually go through a whole MG kit with one set of sticks (400/600/800/1200/2000/2400/3000 - I make all of those grits, but most of the time I will only use 800/1200/2000 for most builds) and just make a new set with a new kit.
get a 3m super smooth sanding pad and sand them down
https://www.amazon.com/3M-Contour-4-5-Inch-5-5-Inch-1875-Inch/dp/B00004Z49L/ref=pd_lpo_vtph_60_lp_t_2?_encoding=UTF8&psc=1&refRID=3M64W5NEH9FSMGH0KR8Y
there are some SUPER fine grit papers. SO fine that you can barely even tell they're sandpaper. You can use these to smooth out nibs that just aren't quite right on the paper yet. I have some 362L 9 micron that I picked up somewhere, but this looks like it may be a good assortment on Amazon Although I have no idea: I've never used these.
You can make it effectively solid, which will make it a lot more comfortable on your skin, especially if you want to wear for a while. Look for a product called instamorph. It's basically just little plastic beads that melt when put in hot water.
Melt a bunch of it and roll it into a cylinder about the diameter of a pencil. This way you can easily remelt it if necessary. Also put your ring in hot water so that it warms up a bit. Once both are good and hot, work the instamorph liberally into the groove; you want to have it spilling a little out of the groove. Be sure to push plastic into any air gaps.
Do one side, then melt more plastic and do the other side. Then put the whole thing in cold water for a while to cool.
All that's left now is to sand away the excess plastic and then polish it smooth. Start with a coarse grit, like 60 or 80, and get it pretty close to the shape you want. Then just use finer and finer grits to do your successive shaping and smoothing. A pack of different fine grits like this should be pretty good for what you need.
A few other thoughts:
I did this modification to my ring and it was like a whole different product. I couldn't go more than a day or so before my skin got pressed into the groove and became really tender. Now with a little lotion I don't have any problems down there from the ring.
The paint is not adhering to the bumper. Please keep in mind that I'm not an expert, but I've got some experience with putting paint on plastic surfaces (aka scale model nerd, lol).
Here's what I would do: lightly rough up the bumper's surface with a spot sanding pen (LINK) and clean the surface with some isopropyl alcohol. Usually there's specialized prep involved with painting plastic on cars, but those two steps should help your touch up paint "grab on" to the bumper.
As with all painting, most of the work is in the prep. Good luck!
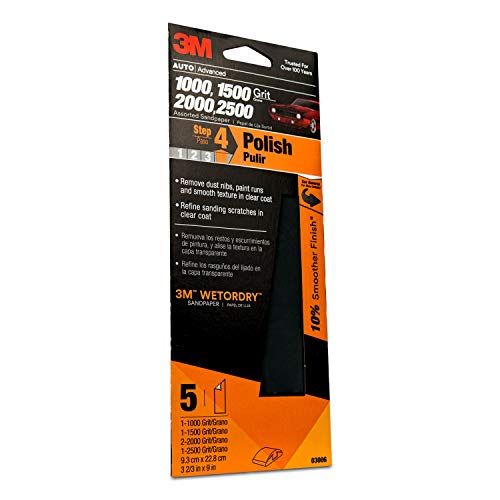
More like this pack:
https://www.amazon.com/3M-Wetordry-Sandpaper-03006-Assorted/dp/B005JPGTNI
Polishing sheets
www.amazon.com/dp/B001BHGC7G/ref=cm_sw_r_udp_awd_oJMttb14VTZ9R
Simichrome
http://www.amazon.com/dp/B0002YUQ4E/ref=cm_sw_r_udp_awd_jKMttb1EX6ENW
Renaissance Wax Polish 65ml
http://www.amazon.com/dp/B003AJWN62/ref=cm_sw_r_udp_awd_RKMttb1YM5YXC
arnauba Wax
http://www.amazon.com/dp/B0009IQXCM/ref=cm_sw_r_udp_awd_NMMttb1MPHYVW
Sandpaper.
You can get a set of decent sized sheets for 20 dollars, and it'll have all the grit progression to take you from safety-scissors dull to scary sharp.
Try these
I'm relatively new in building Gunpla so can you guys please help me in giving your thoughts and suggestion? I've built a variety of 1/144 HG Gundams which i completely turned it into crap ... So I'm planing on buying sandpaper , paneling pen and a snipper in approving the quality. These are some of the things that i found on Amazon.
Snipper:http://www.amazon.com/Tamiya-74035-Sharp-Pointed-Cutter/dp/B0131XZ92G/ref=sr_1_sc_2?ie=UTF8&qid=1463094875&sr=8-2-spell&keywords=tamyia+snipper
Sandpaper :http://www.amazon.com/Abrasive-Waterproof-Sandpaper-Furniture-Improvement/dp/B01B2SWZ9W/ref=sr_1_2?ie=UTF8&qid=1463094900&sr=8-2&keywords=1000+grit+sandpaper
Panel Lining Pen : Uhm i need help in finding a gray and black panel lining pen.
I used a black & decker sander with this sand paper. Then I spray painted it with flat black rustoleum. Thanks!
Yeah its probably stupid of me to help people play more comfortably if I ever want to get top 25% in Agendastats2.
Maybe I should autograph/get the GA logo printed on these...mousepads and sell them:
http://www.amazon.com/3M-Wetordry-Sandpaper-11-Inch-Assorted/dp/B001449TPS/ref=sr_1_5?ie=UTF8&qid=1409346251&sr=8-5&keywords=sandpaper+sheets
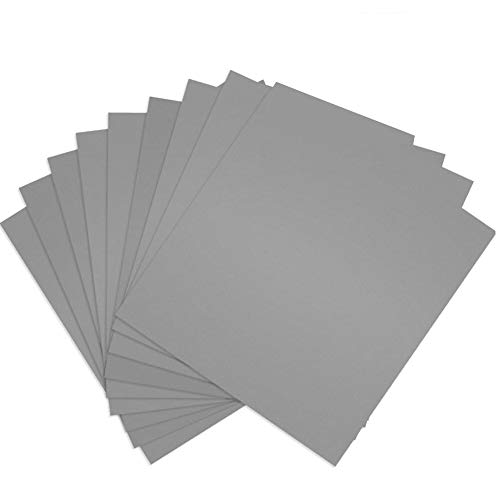
28 Pcs 120 to 3000 Grit Wet Dry Sandpaper 9 3.6 Inches for Automotive Sanding, Wood Furniture Finishing, Wood Turing Finishing by Paxcoo https://www.amazon.ca/dp/B01HBJ8Y00/ref=cm_sw_r_cp_apa_i_jh7oDb2EHE59Q
That set, plus some scraps my dad had around in 80 and 100 grits (his were 3M brand).
Would this 3K-5K SiC sandpaper work for the CC4 and this 7K to 15K SiC sandpaper work for a Spyderco ceramic or maybe 2?
So for the ScarySharp method, would these work?
There only a couple dollars cheaper than the stone, 3 sheets per grit. How long do you think that would last? I don't mind putting in the work to learn how to use a whetstone or keeping it flat (I've read you can do it on the sidewalk?)
Went to home depot with a metal ruler and grabbed one of these. Think it was like $1.39 or something like that. You need to go there and see the flatness of the tile and the thick/thinness of the tile.
Did the scary sharp process for a little while using a multipack of sandpapers from amazon. Got some stones to do my sharpening in more durable manner, but this tile is still useful for flattening the soles of older planes I'm restoring. Recommend having a small amount of self adhesive sandpaper if you're doing the sole flattening like I am.
If you're interested in having a truly flat stone like Paul has for his shop, you might look into the ones he has like this. They are only $50ish after shipping, and $35-40 if you buy them from a local Woodriver or woodworking supply shop.
Not terribly cheap, but this is the best. You can buy a granite tile or something similar from a big box for much cheaper, but it won't be truly flat. I have the the one I linked above and it is worth it. Can also be used as a weighted clamp!!
SECTION | CONTENT
:--|:--
Title | Mirror Polish Your Spinner: Level 2
Description | Today we try our hand a little more involved spinner polishing. We aren't just polishing flat surfaces y'all! Want to get in on the action? Quick links down below. Assorted set of Sandpaper: https://www.amazon.com/dp/B01LZVWBT0/ref=cm_sw_r_cp_tai_pbTlzb65TH4NK Higher grit sandpaper: https://www.amazon.com/dp/B013W44ESY/ref=cm_sw_r_cp_tai_vcTlzbJ5S0QN3 Flitz Metal Polish: https://www.amazon.com/dp/B00MUG95UI/ref=cm_sw_r_cp_tai_yGkpzbNPZ3GRY
Length | 0:11:58
****
^(I am a bot, this is an auto-generated reply | )^Info ^| ^Feedback ^| ^(Reply STOP to opt out permanently)
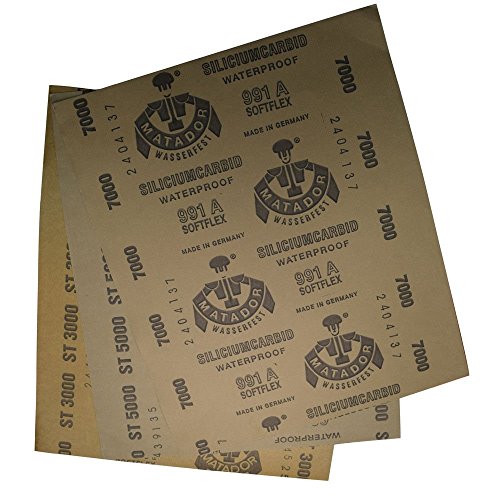
You can use Puma metal polish paste, rub it with a clot and it should be fine, you have to rub quite hard because it is steel, this polishing paste works well for shiny metals too. Maybe try some fine sandpaper first then go to stropping or polishing (the black dots in the blade are pits, you can't really remove them, polish the blade then maybe dip in in some vinegar to get a new uniform patina on all the blade. https://www.amazon.com/Precision-Polishing-3000-5000-7000/dp/B013W44ESY/ref=mp_s_a_1_5?keywords=7000+sandpaper&qid=1558612593&s=gateway&sr=8-5
https://www.amazon.com/Zona-37-948-Polishing-11-Inch-Assortment/dp/B001BHGC7G/ref=sr_1_4?ie=UTF8&qid=1546215593&sr=8-4&keywords=flexible+polishing+papers
$13 for an assortment of all the grits. I've done everything on this entire guitar and have used less than a quarter of any given single sheet. The coarser grits tend to gunk up a bit with the finish I'm using (which is just some consumer-grade water based poly, not catalyzed).
I haven't used any rubbing or polishing compound at all and it still reflects wonderfully. If you need something cheap and easy, it's the way to go. Definitely cheaper than buying all the grits of sandpaper that you'd need to achieve the same result. Works both dry and wet.
Also, they are incredible for polishing frets.
Build list:
Zev Dragonfly Slide
Trijicon RMR 06 Type 2
Zev Glock 19 Dimpled Bronze Match Barrel
AmeriGlo GL-429 Suppressor Sights
TTI Spring Kit
SSVi Tyr Trigger
Glock OEM Minus Connector
​
Tools used:
Wood Burner
Dremel Micro Max 8050
Dremel Bit 108 Engraving Cutter
Dremel Polishing Kit
Sand Paper Assortment
Flitz Polish
If you don't go too far and cut into the actual part with the file, then not really. It will leave some small scratches, because that's basically how the file removes the nubs, but you can clear those up with a few passes of some really fine grit sandpaper. Something in the 1000+ grit range should do, because it's fine enough that it's basically polishing the piece. Automotive sandpaper usually ranges from 1000-3000 grit, and you can find it at any auto parts store in small multi-grit packages that sell for like $5. Something like this.
Cut with these
Sand with this
Fill in stressed plastic with these
Step 1:
https://www.amazon.com/Sandpaper-Furniture-Finishing-Automotive-Polishing/dp/B01LZ6TG05/ref=sr_1_4?keywords=sandpaper&qid=1570513551&refinements=p_85%3A2470955011&rnid=2470954011&rps=1&sr=8-4
Step 2:
https://www.amazon.com/Dupli-Color-EFP101007-General-Purpose-Sandable/dp/B000B6DG7C/ref=sr_1_3?keywords=primer+filler&qid=1570513585&refinements=p_85%3A2470955011&rnid=2470954011&rps=1&sr=8-3
🙄
When it's time to polish the metal, head to your local version of Walmart or Amazon and pick up some aluminum polish. I use Mother's. It's strong enough to work on the metals harmonicas use, but also pretty gentle. Just rub that on and if your cloth starts going black it's working. Get that elbow grease going and every few minutes wipe it off so you can see your progress. Repeat until fine scratches are gone and it's shiny new.
If you have deeper scratches, then you'll need to use sandpaper in increasingly finer grades first. 120 -> 220 -> 400 -> 1000 -> aluminum polish will take a seriously messed up cover plate to shiny new in about 15 minutes total. It's pretty easy to do.
This pack of sandpaperwill do hundreds of harps
Mother's polish
Hi all,
So I have a few small paint chips on the roof of my truck that have rusted over time. I bought a kit from Dr. ColorChip after hearing such good things about them and thought I would give it a shot.
I purchased this sanding pen from Amazon, because from my understanding you need to sand off the rust first before applying the paint. The rust was much harder to get off than I thought, and since the sanding pen was a little wider than the chip I think I took off too much paint.
I cleaned everything up and continued on with the Dr. ColorChip kit. After following the instructions and applying two coats this is what I ended up with.
Where did I go wrong here? Did I wipe on the blending solution too early? I waited at least five minutes after I applied the paint before using it. Also, it looks like the rust is still there underneath even though I sanded a majority it off before painting?
Pretty disappointed with how it came out, looks worse than before I started. Any help here is appreciated.
Thanks.
This build will be able to play anything at 1080p 60fps high settings:
PCPartPicker part list / Price breakdown by merchant
Type|Item|Price
:----|:----|:----
CPU | Intel - Pentium G4560 3.5GHz Dual-Core Processor | $79.44 @ OutletPC
Motherboard | MSI - B250M PRO-VD Micro ATX LGA1151 Motherboard | $54.89 @ OutletPC
Memory | G.Skill - Ripjaws V Series 8GB (1 x 8GB) DDR4-2800 Memory | $65.99 @ Newegg
Storage | Crucial - MX300 275GB 2.5" Solid State Drive | $97.88 @ OutletPC
Video Card | Gigabyte - GeForce GTX 1060 3GB 3GB Windforce OC Video Card | $216.89 @ SuperBiiz
Case | Fractal Design - Focus G (White) ATX Mid Tower Case | $44.99 @ Newegg
Power Supply | EVGA - 450W 80+ Bronze Certified ATX Power Supply | $34.97 @ Amazon
| Prices include shipping, taxes, rebates, and discounts |
| Total (before mail-in rebates) | $605.05
| Mail-in rebates | -$10.00
| Total | $595.05
| Generated by PCPartPicker 2017-08-07 00:58 EDT-0400 |
If you want 4k 60fps high settings, you're going to have to significantly increase your budget:
PCPartPicker part list / Price breakdown by merchant
Type|Item|Price
:----|:----|:----
CPU | AMD - Ryzen 5 1600 3.2GHz 6-Core Processor | $197.88 @ OutletPC
Motherboard | ASRock - AB350M Micro ATX AM4 Motherboard | $59.99 @ Newegg
Memory | G.Skill - Ripjaws V Series 16GB (2 x 8GB) DDR4-3000 Memory | $124.99 @ Newegg
Storage | Crucial - MX300 275GB 2.5" Solid State Drive | $97.88 @ OutletPC
Video Card | Gigabyte - GeForce GTX 1080 8GB WINDFORCE OC 8G Video Card | $514.98 @ Newegg
Case | Fractal Design - Define Mini C with Window MicroATX Mid Tower Case | $69.99 @ Newegg
Power Supply | EVGA - SuperNOVA G2 550W 80+ Gold Certified Fully-Modular ATX Power Supply | $72.98 @ Newegg
| Prices include shipping, taxes, rebates, and discounts |
| Total (before mail-in rebates) | $1148.69
| Mail-in rebates | -$10.00
| Total | $1138.69
| Generated by PCPartPicker 2017-08-07 01:01 EDT-0400 |
Edit: Here is the stuff you'll need to paint your case orange:
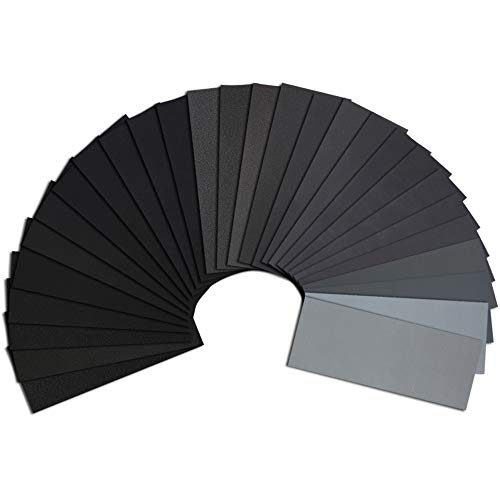
https://www.amazon.com/Sandpaper-Assortment-Automotive-Furniture-Finishing/dp/B01MZALAD9/ref=sr_1_5?ie=UTF8&qid=1502082191&sr=8-5&keywords=sandpaper
https://www.amazon.com/Rust-Oleum-280715-Primer-American-Accents/dp/B00KZ6LLZW/ref=sr_1_1?s=hi&ie=UTF8&qid=1502082223&sr=1-1&keywords=white+primer+spray+paint
https://www.amazon.com/280698-American-Accents-Orange-12-Ounce/dp/B00KZ6LVUW/ref=sr_1_2?s=hi&ie=UTF8&qid=1502082246&sr=1-2&keywords=orange+spray+paint
https://www.amazon.com/Oleum-280702-American-Accents-12-Ounce/dp/B00KZ6LYMM/ref=sr_1_1?s=hi&ie=UTF8&qid=1502082271&sr=1-1&keywords=spray+paint+gloss+finish
Figured I'd also mention if you're all about the fine sanding you should give these a try. They can supposedly polish watch crystal. - http://www.amazon.com/Zona-37-948-Polishing-11-Inch-Assortment/dp/B001BHGC7G/ref=sr_1_1?ie=UTF8&qid=1450485387&sr=8-1&keywords=micron+sanding
Thanks! :-)
The micro mesh can be a bit hard to find...any specialty wood working store should carry it, but it's available online.
http://www.amazon.com/MICRO-MESH-SOFT-TOUCH-SANDING/dp/B000H6EC4C
http://www.amazon.com/MICRO-MESH-SANDING-SHEETS-INTRODUCTORY/dp/B000H6HIK2
http://www.leevalley.com/en/wood/page.aspx?p=62127&cat=1,42500
A cheaper method would be to start with a very fine steel wool, and then use a nail buffer, which is essentially a nail file with micro mesh on it...the "shine" side will be the finest. Both of these could likely be found in Walmart, etc.
This is what I ordered:
https://www.amazon.com/dp/B01HBJ8Y00/ref=cm_sw_r_other_apap_2udr9Pp9HO69T
I use hard Wave sticks too and love them. They sand very flat (something I liked files for) but are quite gentle on the plastic in terms of deap scratches. BUT for some reason the 800 grit is disconnected like in your link. Anyone know where else you can get it?
In terms of files I have the Tamiya basic , Tamiya fine basic , and a (hopefully) nicer plastic hobby file on order just to try. Files are nice for larger jobs like serious molding flaws (not common in Bandai kits) and the fine ones are OK for nubs but still quite rough compared to any sanding stick. Although, as you know I'm sure, files last forever and require much less effort and time to chew through plastic. I'm hoping the plastic file is the Holy grail and is a good balance. I bought a set of needle files and diamond files from harbor freight and they blow. The trash just don't grip or cut don't waste your $3.
And as a reference I own Revell, squadron , nail buff sticks, and have made my own sticks from automotive sand paper. The nail files are way too rough imo, making my own is a pain, and while the squadron sticks are nice I mainly only used the tri-grit while I used all the Revell except the roughest and are probably the best value imo. I still use the other more flexible kinds but dramatically prefer wave. Wish the 800 grit still were available.
Long post sorry. Hope it helps
Edits: spelling, phrasing, and lots of links
Hardware or hobby stores might have it in your area. Here it is on Amazon
The 3k I've found is this one. It works fairly well, but is a bit of a pain on account of the thicker sheet and the texture of the paper itself, which gets caught up sometimes on the surface.
I used to use a micro mesh progression of sanding sheets, which worked great, but my girlfriend threw them out accidentally a couple of months ago and I have yet to replace. The kit I used was this. I definitely start to see a difference the further up in the grit I go, but strictly speaking, you can get a very presentable razor with 600 grit and some metal polish. It won't have a mirror finish, but will still look clean and nice!
Let me start by saying that this would be the bare minimum. This is assuming that you have all the experience to use these tools effectively as someone who has the appropriate skill and knows to do things like not bear down on a saw when cutting, keeping everything square, how to mill boards by hand, how to not kill sandpaper in a few strokes, how to tune and sharpen a hand plane, ETC.
2x$8.69Vise grips Two vise grip clamps. Clamps can be universally adjusted and clamped in almost any direction with some quick thinking. One is never enough.
$9.99Cheap set of chisels Everyone needs a chisel. These will be made from a milder steel, but it's better than nothing.
$22.00Generic ryoba saw A ryoba saw will double for crosscuts and ripcuts. They go as far as you can take them provided you treat them right.
$18.62Bench Plane You need to be able to take down material in terms of thickness. A simple bench plane will due for now.
$20.61Block Plane A block plane will help slightly with end grain smoothing where the bench plane cannot.
$3.47Bundled Sandpaper You need to finish your products somehow. I would get a generic bundle of sandpaper and use it sparingly and tenderly.
$12.85Square Keeping things square is vital.
$6.79Mallet Hammering your chisels is going to be very important since you cannot use a 2x4 reliably.
$3.47Wood Glue Need to be able to glue things together.
$11.80A set of card scrapers Remove material smoother and faster. You don't want to waste sandpaper if you don't have to, and these are quite versatile.
$8.06A bastard file A bastard file will do for now when it comes to heavier shaping and sharpening your card scrapers.
$15.92A small drill viseKeeping something secure in place is very important. A small vise will accommodate small and narrow pieces of lumber and can be bolted to a bench.
$3.97Assorted finer sandpapers You need something to keep your chisels constantly sharp, especially when it is such a mild steel as a set of 9.99 chisels.
$15.59Wipe on polyurethane You need to be able to finish your products somehow.
Comes to $170.52 I would use the rest to make a bench and two sawhorses out of some 2x4's.
Just spots but there are a lot of them. I got the squeegee version because I have so many. I have never done any chip repair on my car before. I got a sanding pen (https://www.amazon.com/gp/aw/d/B000FN8H52) to try to clean out any rust and I suppose rough them up.
If they're super smooth and you can cut them smaller you could attach sand paper to it for sharpening planes/chisels. Similar to this http://www.amazon.com/gp/aw/d/B0035Y7OPC/ref=redir_mdp_mobile/185-6928646-5477669 I could also be completely wrong and this type of granite is not smooth enough without being specifically made for this purpose.
These are amazing, but essentially the same thing as micromesh. I usually start on the 9 micron and work my way down to the 1 micron. If you are opposed to any abrasive "removal" smoothing, I have also had some luck with glass... I use an old Galaxy S3's screen, but I've also heard of people just using a window pane.
I'm about to buy a Color N Drive touch up paint set so I could touch up all the paint chips before I give my new-to-me vehicle a wash/clay/wax. Now, the vehicle is about 10 years old, so I don't expect the paint to match exactly, but I think it'll be close enough. I have a couple questions about repairing paint chips that go down to the metal.
Thanks for reading.
I use sandpaper on a granite stone and am usually sharpening chisels and plane irons. Once you invest the time in getting them scary sharp the first time, maintenance isn't so bad.
My advice on the sandpaper method is:
Here is an article by Rollie Johnson on the subject: https://www.finewoodworking.com/2017/02/27/simple-sharpening-cart. You don't need four stones, and you don't need a cart. I do find the camellia oil helpful, but I have also had good success with water and with Windex.
How do you plan on maintaining those stones?
Why not start with a smaller investment?
$6
$5
$6