Best drill bits according to redditors
We found 698 Reddit comments discussing the best drill bits. We ranked the 406 resulting products by number of redditors who mentioned them. Here are the top 20.
We found 698 Reddit comments discussing the best drill bits. We ranked the 406 resulting products by number of redditors who mentioned them. Here are the top 20.


How to make a bong out of a Hennessy bottle:
1/5th bottles seem to work best. Get a bottle, wash it out, and set aside.
Go to a smoke shop and ask for a downstem and bowl piece. Ideally the down stem will be about 6” long. You can go longer/shorter depending on the angle your hole is made at.
Once you have your downstem, take a tape measure and measure the OSD of the glass. (Outside diameter. In my case the OSD was a hair over 1/2”, so I used a 5/8” drill bit)
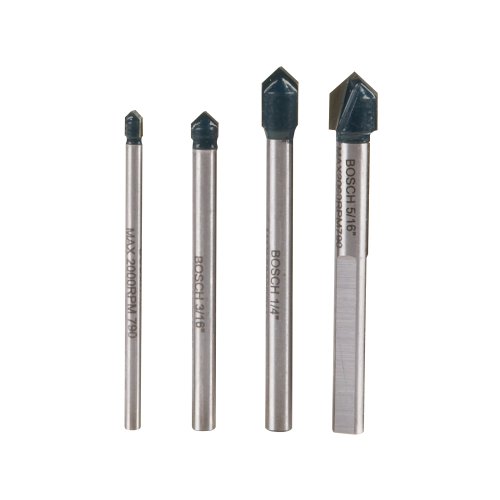
Once you know the OSD of the downstem, you’ll need to go to the hardware store and get a drill bit that is at least 1mm larger than the OSD of your downstem. You need a special carbide (or diamond in some cases, ymmv depending on where you go to get the bit) drill bit that is intended for going through glass. They look a bit like this.
Drill your hole. ALWAYS WET DRILL GLASS. Always. Do it in your sink with the water running, and drill at about half-speed. It will take some time to get through the glass. The angle you hold your drill at will determine where and how the downstem sits in the bottle. About a 45 degree angle on the glass where I put my downstem works well.
Once the hole is made, rise the bottle out very well, and dry the outside. Put your downstem in the hole, and use some putty to make the air seal.
Pack a bowl, and enjoy 🙂
Can you not use a pin vice? Pretty much all hobby shops sell them, and they're used for drilling super the super tiny holes needed to pin modified models, etc., with bits available in all sorts of sizes.
https://www.amazon.com/gp/aw/d/B001RJE3X8/ref=mp_s_a_1_2?ie=UTF8&qid=1474249537&sr=8-2&pi=SX200_QL40&keywords=mini+pin+vise&dpPl=1&dpID=51qOueQLNmL&ref=plSrch
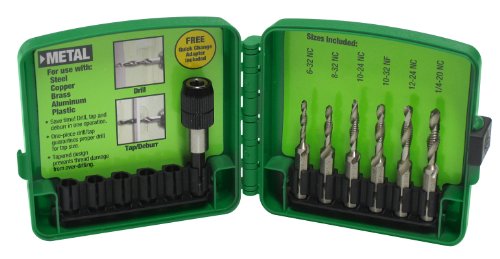
Greenlee DTAPKIT 6-32 to 1/4-20 6-Piece Combination Drill and Tap Set https://www.amazon.com/dp/B0041FIR1E/ref=cm_sw_r_cp_apa_KAXHAbSZCPCY3
Same here. My best gift so far has been this:
http://www.amazon.com/Makita-LCT200W-18-Volt-Lithium-Ion-Cordless/dp/B000V2DSE2
Awesome. Just awesome.
Do you mean the deck screws? If so, just get a countersink bit (available at any hardware store), unscrew and discard your current screws, use the countersink bit in the wholes you have already made and screw in new screws.
If you mean the other screws (the pan head sheet metal screws), unscrew them and use the other type of screws.
TL;DR Unscrew screws, countersink, screw new screws.
Edit: Linked to correct product. I had the wrong type.
Only $10!
https://www.amazon.com/dp/B0751893Y2/
Cool stuff!
Here's one thing- when stacking them improves the sound, I'm wondering if that's just due to having more resonant coupled mass. Try not stacking them but instead put something heavy and rigid (old HDDs, cordless drill battery, a brick, etc) on top of the drives. See if you get a similar effect. Also try putting something heavy on top of the stack...
By resonant coupled mass I mean material that gets the vibrations of the drive transferred to it, and thus helps with putting those vibrations into the air. Thus bolting the drives down to the board will help a lot. But let's come back to that.
-----
To build your box, you really only need a couple of tools and parts, which I'll link you to now.
Cordless Drill
Cheap Drill Bits
Circular Saw (a jigsaw is also OK)
Set of 4 clamps
Carpenter's Square
Angle Brackets
Wood Screws (probably want some 1/2 inch screws too for the brackets)
A piece of 1x2 wood moulding or similar
A piece of quality 1/2" plywood or MDF
Feel free to substitute whatever's on offer at your local big box home improvement store, it's the concepts that matter not the specific models of things. With that stuff you can build almost anything, your little box will be a snap.
The key with all that- use two of the clamps to clamp the board you're cutting down to the table. Then use the other two clamps to clamp a 2-4' piece of moulding down to the board. The moulding then serves two purposes: Along with the square and a pencil, it lets you draw a very straight and very long line along where you want to cut, and then when you move the molding back a bit (by the exact distance between the edge of the saw's skid plate and the sawblade), it forms a guide for the edge of the circular saw skid plate to slide against, giving you a perfectly straight cut even from a handheld saw.
Note: always cut with the saw facing away from you or your body, and keep your fingers away from the path of the blade! Let the tool do the cutting, don't force it. When you drill a hole for a screw, pick the drill bit that's as wide as the screw shaft (not the screw teeth).
I suggest using more angle brackets to rigidly mount the floppy drives to the casing itself. Obviously brackets that have the hole in a place which holds the drive flush against the casing are preferred. Angle brackets come in all different sizes, and you can always just drill another hole through the bracket if you need to. A larger angle bracket could hold both the upper and lower drive. Or for a stack of two drives, mount one to the inside of the main casing, and the other to the outside of the HDD casing.
-----
Now back on audio. A box like you designed might really help, especially if the back is closed as you're creating a cavity which focuses all the sound forward.
However you should also get a better microphone. If as you say it sounds great in person, well, that isn't being captured well on your video. The video is seriously lacking in bass- floppys make a great raspy bass and that doesn't come over well in the video. :(
I suggest an external mic, something which will stay right next to the drives and enclosure. There are also portable audio recording gadgets which have a good mic built in, I'm thinking something like this.
(Random sidenote- that's why the clapper slate exists, seeing the clap on film and hearing it on a separately-recorded audio track is used to sync up the video with the audio...)
For reference, consider how What is Love has really strong bass, but has a good quality mic right there.
Also production wise- what that guy sometimes does is first record half the drives with the mic right next to them, then record the other half of the drives with the mic right next to them, then sync the recordings and make the two (mono) recordings into the L and R of a stereo track and lay it over the video of the drives moving which is recorded without any microphone...
Hope that helps!
here's one of the higher rated sets on amazon and seems like a good place to start
Edit-fixed the link! 😊
For starters, what condition are the miniatures in? Are they packaged still? Assembled but not painted? Are they painted already? Depending on where they're at will determine what you need to do first, so let's assume the worst and go on to the better.
If a figure is already assembled, you'll want to disassemble it. The best way to get the glue off in my experience is to soak the figure over night in acetone. When you pull it out, the glue should be easy to get off. You can generally find acetone in large volumes at hardware stores in the paint section. You can store the acetone and figures in a glass jar or any plastic container that has the recycling logo on it with a number 5 in it and PP underneath it.
If a figure is already painted, you'll then need to get the paint off, without damaging the figures. The best way I've found to do this is with Purple Power, which you can generally find at automotive stores: http://www.clean-rite.com/purplepower_industrial_strength_cleaner_degreaser.html. You can use the same type of container for this as the one mentioned above. Let the figures soak for a day or so, and use a junk toothbrush to get any leftover paint off.
Now that you've got the figures cleaned, you need to prime them. You don't need anything special for this, as long as it's good for metal, however, I recommend a spray on primer. My personal preference is Krylon's general purpose primer, and I prefer gray as opposed to white. You can usually get this in the same place you get your acetone, or you can get it at a hobby shop. http://www.hobbylobby.com/Crafts-Hobbies/Stencils-Craft-Paints/Spray-Paint/Gray-Krylon-Indoor/Outdoor-Spray-Primer/p/1357
The next step is to get the rest of your supplies:
Super Glue: Can't put minis together without glue! I just use a bottle of Gorilla Super Glue. http://www.gorillatough.com/gorilla-super-glue
Painting palette: My preference is to use a wet palette for painting but there's definitely a benefit for having a dry palette available as well. Here's a link to a video on making a wet palette and the benefits of it: https://www.youtube.com/watch?v=5FmxJdZdKdc. In here, they use one from a manufacturer, and it's nice because it's easily closed, but you can just as easily and super cheap with a plastic plate (dollar store), and using a paper towel instead of a sponge. Just cut the paper towel to size, soak it, have a little extra water in there and put the parchment paper down, then add more water. This is what I personally do, and just stick it in the fridge when I'm not using it. If you have an option to make one that you can put a cover on though, that'd be best. For a dry palette, you can just get something like a ceramic tile from the hardware store for like, a dollar or less, and it's super easy to clean.
Brushes: You probably don't want/need to spend a lot on brushes, especially starting out. I'd recommend a few cheap brushes, generally you want the brush sizes to probably be between 20/0 to 2, and also get a small flat brush, preferably with a cat's tongue tip, but it's not necessary, as long as it's flat. It'll be very useful for dry brushing. My recommendation would probably be to get a variety of brushes from Atlas Brush Company: http://www.atlasbrush.com/brush-sets. I'd recommend Style 255-3PS, Style 55, and Style 58A. When your brushes start getting hard to work with, you can usually stick the tips in boiling water for a bit to get them back to shape.
Paints, Washes and Varnish: A lot of people prefer either Vallejo paints or Citadel paints by Games Workshop. My preference, especially since I use a wet palette, is to use Vallejo, though I use some Games Workshop paint as well.
In addition to this, you'll probably want some washes. I don't actually have experience with Vallejo washes - I've only used Games Workshop, but I prefer the washes in the type of container that Citadel uses as opposed to droppers, since I apply them direct from the container. I'd recommend at least Nuln Oil from them if you go with Citadel Games, though I'm sure a black wash from Vallejo is perfectly fine.
Citadel also has Dry paints, which are supposed to be good for dry brushing, but I've not had any experience with them. They may be a good idea for you as a beginner, since you'll probably not have very good technique when you first try to dry brush (I found myself, and still do a lot of times, using too much paint). You can usually find these paints at hobby stores, but at the worst case, you can pick them up cheap on eBay. There are sellers on eBay that have pick-your-selection listings, just search Vallejo Pick and you'll have results.
You'll also want a varnish to seal your piece when you're done. I prefer to use two coats - the first one glossy, then the second one matte.
I recommend you get at least the following: White, Black, Red, Blue, Yellow, Green, Brown, Silver, Matt Varnish, Gloss Varnish, Black Wash
Flocking and Turf: Far from necessary, but if you want to make your bases have that grassy look to them, you'll need this. I use Coarse Turf - Yellow Grass, and then just soak it in the appropriate watered down paint, dry it out, and glue it on with Elmer's Glue. This stuff is generally available at hobby stores. http://www.sceneryexpress.com/YELLOW-GRASS-COARSE-TURF/productinfo/WD0061/
Antennas: A lot of BattleTech minis, especially older ones, should have antennas on them. If you have loose figures, the odds are they have been lost and you'll need to replace them. I've found staples work very well for this. If they're still in the package, you'll see a thin metal piece in there that looks like mechanical pencil lead; you'll just need to cut it to size for your mini. Additionally, these are pretty fragile once you glue them onto the mini unless you put a hole in the mini for it to go in. The best thing for this is to use a Pin Vise and drill bits http://www.amazon.com/CML-Supply-Micro-Drill-Chuck/dp/B001RJE3X8. However, I've gotten by just fine using a safety pin and thumb tack.
Files and razor blades: You may need some files and razor blades to get rid of flash (pieces of metal from the vent holes in the mold that may be attached to the figure still) and seam lines. http://www.amazon.com/ELMERS-X-Acto-Knife-Silver-X3602/dp/B000V1QV7O. Personally, I've gotten by with just the piece on my nail clippers that's there to clean and file your nails with.
Water dish: You'll need something to put your paint water in. I use 3 dishes: One for clean water, one for paint water, and one with water and dish soap in it.
Mini stand: You'll generally want to have something to put your mini on while you work with it. If you don't, you'll end up rubbing the paint and primer off of it while you hold it to turn it while you paint. This can be just about anything. My preference is to use something about the diameter of a hex that's a couple inches tall and use Velcro.
Now, you need to figure out what the hell you're doing with all this stuff. I'm far from an expert painter, and I've learned most of my techniques watching videos. You can find a lot of information on YouTube. Here is some good stuff to start off with: https://www.youtube.com/playlist?list=PL10C32CB2CD611E84
Hopefully this helps!
EDIT: I'm not the best best painter, in fact I'm still pretty new to this myself, having painted probably just under a dozen minis myself. However, I figured that'd probably put me in a good position to answer your questions as someone who's coming from the same place you're coming. That being said, this is my most recent piece - I just finished the base and varnishing it yesterday: https://imgur.com/a/Vj6fI (Unseen Battlemaster)
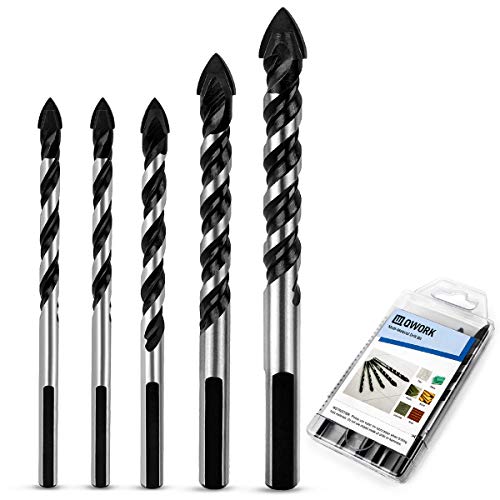
Surely you use one of these then!
I bought these and they work great. QWORK 5 Pcs Set (6, 6, 8, 10, 12mm) Multi-Material Drill Bit Set for Tile,Concrete, Brick, Glass, Plastic and Wood Tungsten Carbide Tip Best for Wall Mirror and Ceramic Tile on Concrete and Brick Wall https://www.amazon.com/dp/B0751893Y2/ref=cm_sw_r_cp_apa_i_5LqJDbYK679T1
Just take it nice and slow without applying too much pressure. I've drilled into ceramic and glass without any problems.
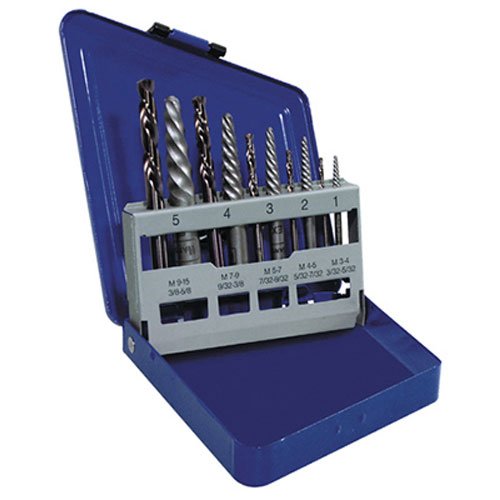
Just go but an easy out set.
IRWIN Screw Extractor/ Drill Bit Set, 10-Piece (11119) https://www.amazon.com/dp/B0002NYBH8/ref=cm_sw_r_cp_api_i_GK.BDb32A3JAT
This might be a better set.
8 piece Screw Extractor Set,Damaged Screw Broken Bolt Water Pipe Remover Set By Nizzco https://www.amazon.com/dp/B075TY8Y87/ref=cm_sw_r_cp_api_i_m0.BDbDKJD770
First: That filament is on amazon for a couple bucks less:
https://smile.amazon.com/Filabot-T6451-Taulman-Nylon-Filament/dp/B00TOOBUA2/
Second, I'd ask your sister for more information on what printer he has. But I'll make a few wild speculations based on the filament linked and the brief description.
Hobbyist, 1.75 mm nylon, possibly no heated bed, probably 0.4 mm nozzle,
https://smile.amazon.com/0-4mm-MakerBot-Printer-Nozzle-Cleaning/dp/B00MQKW230/ - Good for cleaning 0.4 mm nozzles
https://smile.amazon.com/HATCHBOX-3D-Filament-Dimension-Accuracy/dp/B01DWMMJTW/ - Everybody wants to try GitD at least once. Some people have shown that printing with it can reduce the lifetime of the nozzle.
https://smile.amazon.com/MG-Chemicals-Printer-Filament-1-75mm/dp/B018MG4SFQ/ - same thing with wood filament
https://smile.amazon.com/10-100pcs-Neodymium-Strong-Magnets-MarbellStore/dp/B01LYFG2F3 - You can usually find a reason to throw a magnet inside a 3D print. This particular one won't ship before Christmas, but you can probably find some locally.
https://www.adafruit.com/products/3055 - Raspberry Pi can always be thrown into a project of some sort.
-----
Finally, some older links:
https://www.reddit.com/r/3Dprinting/comments/22hh2q/i_have_a_rostock_kit_on_the_waywhat_accessories/
https://www.reddit.com/r/3Dprinting/comments/3u3v3h/3d_printing_holiday_gift_guide_what_3d_printers/
https://www.reddit.com/r/3Dprinting/comments/3bmpam/what_accessories_should_every_3d_printing_maker/
https://www.reddit.com/r/3Dprinting/comments/3w1r7q/just_bought_a_printer_heres_a_list_of_the_tools/
Get the tools in the picture. They're great, and relatively cheap.
Don't listen to /u/Brian373k, unless you want to put a huge hole in your wall that you have to patch. They make drill bits specifically for doing this sort of work. The bit is long (72 inches in this case) and flexible so you can feed it into your existing hole, down the wall cavity, and drill though the cross member while keeping the drill outside the hole. You can get a handle for the bit that help you keep it bent and hold it without chewing up your hand. These are available at Home Depot or Lowes in the electrical section with the fish tapes, often for less than amazon is asking. Check out the pictures and videos here for a demonstration on how they work. The handle isn't necessary, but does make it easier.
Just aim to buy drill bits the same size as the magnets you plan to use. I've been using K&J and picked this set up and I've not been having any problems, it's also nice for drilling out gun barrels and the like thanks to the variety of sizes it has.
You don't need an adapter when the drill bits are formed like these
I have all of the resources booked marked and ready to go. Plan on starting this project when Spring rolls in. Hope these helps!
Hand drill I purchased:
http://www.amazon.com/Mini-Micro-Drill-Vise-Chuck/dp/B001RJE3X8/ref=sr_1_3?ie=UTF8&qid=1451452019&sr=8-3&keywords=pin+vise
Magnetizing guides:
http://macharianthunderguard.blogspot.com/2015/09/kingdom-death-monster-unboxing-and.html
http://roguepainter.com/kingdom-death-survivor-magnetization-tutorial/
Magnets I plan on purchasing (also used in the guides):
1x1mm
^ Woops the 1x1mm I linked are sold out. But you can look up and buy any 1x1mm neodymium magnets on ebay.
1x2mm
2x2mm
Yup.
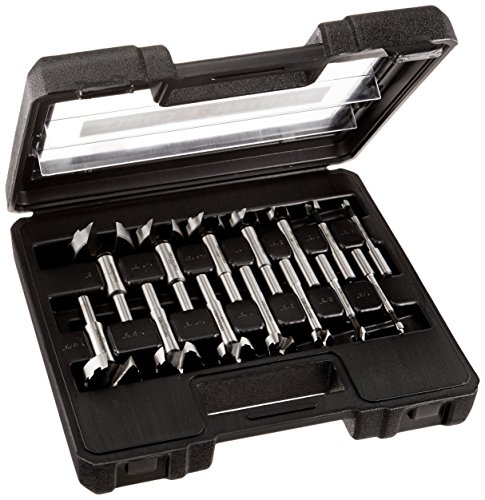
Porter Cable
Freud
CMT
Mibro
I own the Mibro set and have used a Freud set. They both worked well. The other two were just highly rated on Amazon so I stuck them in there for options. Read the reviews and decide what you want.
I've never had a situation where I've needed anything more specific than a 1/8" increment with a Forstner bit (or perhaps more accurately, I design my projects so that I don't need anything more specific than 1/8" increments) so I'm not sure how useful having tons of different sizes, such as with the PC pack, would be.
I use a set like this: https://www.amazon.com/gp/aw/d/B0000302Z3/ref=mp_s_a_1_1?qid=1465749577&sr=8-1&pi=SX200_QL40&keywords=dremel+drill+bits&dpPl=1&dpID=413x6KLCXBL&ref=plSrch
Yeah that hole doesn't look too good TBH. Hopefully it didn't damage the threads. The smallest one in the kit I showed you has a minimum of 2.5mm but it should still work on the 2mm screw. You can also find a spare 2mm allen key you don't need and use the strongest Gorilla glue you can find and glue it onto the screw. Slowly try to unscrew it after an hour or so. Take it to your LBS and see if they can help. There's also this which goes as low as M3
Edit. Just looked at the other angle pic you posted. Screw extractor most likely won't work. Try the allen key method.
General outline straight cuts using a wet tile saw, then use tile snippers for countouring.
There's a lot of options for drilling the holes.
Turbo charged: https://www.amazon.com/Planet-Waves-Drill-Bit-Winder/dp/B008BPI2OW
I use 1/8" magnets for my Crisis Suit weapons. They are basically the maximum size that will fit in the weapons. You could probably go a bit smaller and use 3/32" magnets and have some more wiggle room.
​
100 1/8" for $14 with prime shipping: https://smile.amazon.com/MagNetSol-Magnets-Drill-Combo-100pcs/dp/B0753M1ZYQ
​
3/32" for $15 with prime: https://smile.amazon.com/Primal-Horizon-Magnets-Drill-Combo/dp/B00CA58RJY
Get an installer bit that's 54 in or 72 in, you'll make way fewer holes. https://www.amazon.com/Eagle-Tool-EA56254-Installer-16-Inch/dp/B00DNEEYFW/
Also a boroscope is great to make sure you don't hit any electrical wiring.
https://www.amazon.com/ANWA-Professional-Inspection-Megapixels-Smartphone/dp/B075FGMW6T/
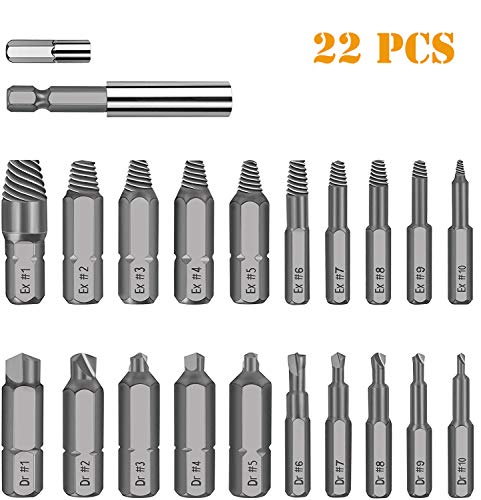
Werkzeug Damaged Stripped Screw Extractor Set for Broken Screw, All-Purpose HSS Broken Bolt Extractor Screw Remover Set with Magnetic Extension Bit Holder & Socket Adapter (22 PCS ) https://www.amazon.com/dp/B07VFM3Q5Y/ref=cm_sw_r_cp_api_i_QzLtDbZ749E3P
These seem to get pretty good reviews from a bunch of frustrated people
I'll grab a couple of these that I've learned in the past several months, as I'm also quite new here.
I'm going to stop there and hope others will finish the rest and also give their own answers to the first 4, since, as I mentioned, I'm new myself!
If you have a walmart nearby they should have some. Amazon should have them too. This Kit would work, and you could have different sizes for coils or making air holes bigger.
Edit: Just noticed the reviews, looks like they might suck for drilling air holes. But they would work fine for wrapping on.
You drill into it with a reverse (left handed) drillbit, running your drill in reverse. That will probably bring the bolt out, but if it doesn't you use an Easy Out screw extractor to screw it out. Here is a kit with both left handed bits and extractors. You can get individual tools at a local hardware store. Soak it well wit PB Blaster first.
I've used these to drill through glass and tile. Take your time and they get the job done. Its only four holes after all.
Super awesome mini! I still have my Deathguard guys to paint so I'm going to save the picture for reference use;)
A little tip for improvement maybe: Get one of those tiny hand drills with tiny drillbits and gift it to your husband. He can drill a little barrel into the front of the gun which looks even more amazing ;)
Edit:I just checked. It is called a Pin Vice
I think maybe it's this one
I’m like you, just a guy doing his own cabling at home. So not professional advice, just my experience.
Like others have said the fibreglass push rods are amazing. Could also look at the magnetic pullers; one magnet goes on cable inside wall, dragged down by magnet on outside. If firechecks turn to an issue this may help.
You don’t need a $100 punchdown tool, but if you have the money it’s up to you. I just got a $30ish (AUD) one, so not the $10 Asian one but a step up. Super cheap ones more often then not will do shit punches. I’d recommend going one with a 110 blade rather then krone, but that’s up to you.
For crimps I’m super suuuuuper happy I swapped to using one that worked with pass-thru style jacks.
I’d highly recommend getting a fairly decent stripper though, just makes life so much easier when it comes to not nicking conductors.
A nice trick for multiple runs, run something like clothes line first. Then tape your cable along side the line letting the line and drag through. Once that cables done, tape off to that same end and pull back the opposite way. Means you only have to fish the wall once and the line is being dragged back and forth not the cable.
Last but not least, always test your cables when you’re done.
You could probably drill it out by hand with just a drill bit if you don't want to spend the money on a complete drill / dremel. Or there's always a hand drill kit, like this. Hardware would probably have one.
It's worth it to support it, though. The position of the break means there will be maximum shear stress on the join. Without a support it's much more likely to fall off. If the contact area was bigger I wouldn't worry about it, but in this case it's quite small compared to the weight it's supporting, so I'd really recommend an internal pin.
Planet Waves make one. http://www.amazon.com/Planet-Waves-Drill-Bit-Winder/dp/B008BPI2OW
So I posted in /r/woodworking and got a pretty good suggestion that is going to work.
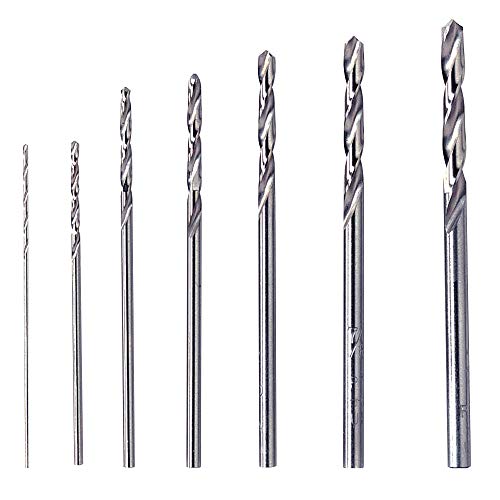
For drilling the holes, I ordered a micro drill set that allows me to drill my pilot holes with a small finger drill. This is effective and gives me much more control than attempting to use a power drill (and works just fine).
Then just another note for aligning the sections - in the same woodworking thread they recommend using transfer points. This is a good technique that I was familiar with but will mention. Basically once you have your pilot, you put a specialized plug into the hole where the the plug is built with a sharp tip pointing out of its center. After I've drilled my two pilots in the railing top and bottom rails, I'll put a transfer point into each of those pilot holes, then lightly use the transfer points to "poke" and leave a small target mark in the end newel post. Then I know exactly where to drill my second pilot so that my support dowel will line up.
Thanks for the comments!
What metal, and how thick?
Mild steels and softer (Copper, aluminum, tin, etc) can be drilled with a standard hand drill and drill bit.
Unless you're drilling holes in tool-steel or tungsten or the like you can use standard off-the-shelf drill bits.
TL;DR - Unless it's something extremely hard, you can get a set of drill bits that will do the job for $5
I apologize... I mis-remembered the cost of the kit. It was actually $16. Sorry.
https://www.amazon.com/gp/product/B00CA58RJY/ref=oh_aui_detailpage_o01_s01?ie=UTF8&psc=1
yeah, if I had to guess, for a chain lock on a door, I suspect those screws would be quite beefy, which would make them difficult to turn by hand.
If I were doing this task, I would certainly grab my drill, Id drill a 1/8" pilot hole, than screw the screws in.
For that you would need this as well https://www.amazon.com/Black-Decker-15557-Drill-10-Piece/dp/B000RH22WA/ref=pd_sim_469_1?ie=UTF8&pd_rd_i=B000RH22WA&pd_rd_r=65QE3ETZGVR6A835WKD2&pd_rd_w=W1W87&pd_rd_wg=XC81C&psc=1&refRID=65QE3ETZGVR6A835WKD2
good point, it does come with 2 bits, so your covered on that side.
This is what you're looking for, screw extractors. Cut the head flat, center punch, drill out, then use the left handed extractor bit to remove the bolt
I did this to a valve cover bolt or two, over tightening them to avoid leaks. It sucks, but it happens. These solve the problem.
Note: some WD-40/penetrating oil and heat can make the process go easier, as mentioned elsewhere in this thread.
> how do you run wire through something like a 2x4 perpendicular to the framing in the middle of a wall? I can't imagine having a 5' long drill bit would help... Would it?
There actually is a long flexible drill bit designed just for that:
https://www.amazon.com/MAGBIT-777-72-0816-2-Inch-72-Inch-Fish/dp/B005M29JN0/ref=sr_1_2?ie=UTF8&qid=1469277163&sr=8-2&keywords=flexible+drill+bit
There is a bit of an art to using those, which I have never done, but if you Google around I am sure you can find some tips, videos, etc.
I have a stripped screw remover for these situations.
https://smile.amazon.com/dp/B07VFM3Q5Y
They bite into the metal and remove the screw. Slightly safer than drilling out the screw... but still some potential to damage the device if done wrong.
Good luck!
This isn't exactly mine, but I have one like this and I love it.
http://www.amazon.com/Dremel-628-01-Piece-Drill-Bit/dp/B0000302Z3
Check out this pin vice at hobby lobby for 8 bucks, you can even combo the daily 40% off coupon and get it for dirt cheap:
pin vice: http://shop.hobbylobby.com/products/swivel-head-pin-vise-618991/
nice set of bits: http://www.amazon.com/Dremel-628-01-Piece-Drill-Bit/dp/B0000302Z3/ref=sr_1_1?ie=UTF8&qid=1398360531&sr=8-1&keywords=dremel+drill+bits
coupon: https://m.hobbylobby.com/coupon
Yeah, probably. I typically used an impact driver (similar to this one http://www.amazon.com/Makita-LCT200W-18-Volt-Lithium-Ion-Cordless/dp/B000V2DSE2/ref=sr_1_2?s=power-hand-tools&ie=UTF8&qid=1398885605&sr=1-2) anyway, and it's rare that the bit comes out of the head with that. Stripping the wood is much more common.
hardware stores around me didnt carry the small drill bit that i needed. so i bought this from amazon ----->>>>> link
I don't know what to tell you with specifics for Spain, but I can give you some general info that may or may not be helpful to you.
First off, there's this link in the sidebar. It'll give you a bunch of options.
Your hobby knife and mouldline remover will be the same thing. The handles all function the same way. However, I'd recommend picking up some kind of hobby knife set so you get a variety of blade shapes to try and multiple handles to use. #11 blades are the standard, and I prefer X-acto brand, but your mileage may vary. Some larger blade sizes won't fit into smaller handles. Buy in bulk to save money. You can remove mouldlines with the back of a blade, rather than a separate tool.
Any kind of cheap and well-reviewed wax tool / clay tool / dental tool set will work for scupting. Same deal with needle file sets. And with your pin vise. The drill bits will break (for any set), though, and bits can be problematic to replace if you're not sure of exact sizing.
My current set the compact set from Makita: http://www.amazon.com/Makita-LCT200W-18-Volt-Lithium-Ion-Cordless/dp/B000V2DSE2/ref=sr_1_6?s=power-hand-tools&ie=UTF8&qid=1310495108&sr=1-6
They can be had cheaper during black-friday sales and the like.
The biggest win vs. a NiCad is first weight. LiIon is far, far lighter for the same power load.
Second, LiIon have a more usable power. NiCad degrades rather linearly. Ie, the more you use it, the less power it puts out. LiIon will hold on and produce roughly the same output until you've used about 90% of the charge.
Third, LiIon can (and SHOULD) be charged before you use them all the way to zero. They don't suffer the "charge memory" thing that NiCad does.
Specific benefit to that Makita set: Charge time from almost 0 to 100% full is 15 minutes. 15 minutes.
The "My First RDA" Mechanical Mod Kit
Nemesis Clone Mechanical Mod - Great price, great features, an awesome place to start without breaking the bank.
Green Sony VTC4's - I would suggest at least 2, I prefer 4.
Nitecore Intellicharger i4 (Or the i2 if you only have 2 batteries) - Great premium safe charger. What's worth more? The few bucks you save on a cheapo charger, or your house which you burned down by overcharging your batteries on a cheapo charger.
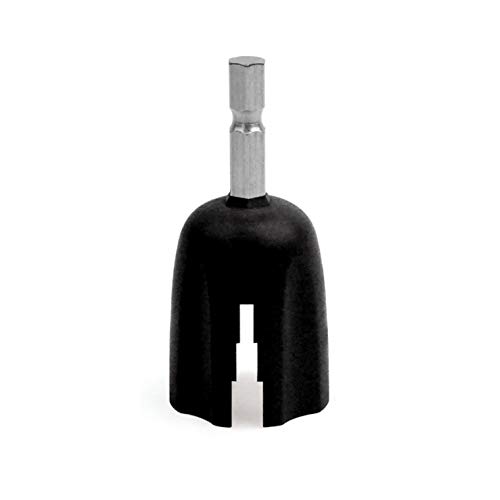
IGO-W2 or IGO-W - The IGO-W is a go-to for many, however it will likely require drilling the air holes out. The W2 costs a few more bucks, and has a different pin configuration internally, but has adjustable airflow. If you go with the IGO-W, you will also need some kind of mini screwdriver. Here's a super cheap kit
A Drip Tip - You'll need one to go with your IGO, style is up to you. You can get them pretty much anywhere, I just linked to this store because if you are putting in an order there anyway, you may as well save on shipping.
That will get you setup with your mod/RDA. Now you are going to need your building materials. Here's what I suggest.
Rebuilding Materials
An Ohm Reader - Do not skip out on this. Knowing the resistance of your coils keeps you out of harms way.
28ga Kanthal - This seems to be the preferred gauge for RDA's.
Chefs torch - This isn't necessary, but is hugely helpful for making microcoils
This cheap grooming kit - What you need from this are the nail clippers, tweezers, and scissors (also the pouch it comes with is handy for keeping your rebuilding tools in)
Cotton Balls - You can get sterilized cotton from most pharmacies. I use plain old 100% cotton balls. Just make sure to read the package and check of additives. You don't want any makeup-remover or anything like that. Just pure cotton.
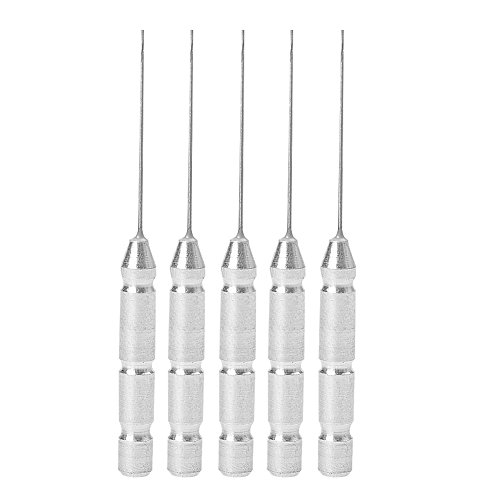
Drill Bit Kit - For wrapping your coils. 1/16th seems to be everybody's favorite standard, so if you're prone to losing small things this might be a better kit for you.
If you have a drill, there's a drill bit you can order online that makes the process really easy.
http://www.amazon.com/Planet-Waves-Drill-Bit-Winder/dp/B008BPI2OW
I would use this.
​
https://www.amazon.com/Eagle-Tool-EA56254-Installer-16-Inch/dp/B00DNEEYFW/ref=sr_1_4?crid=J5EGT9THD1RC&keywords=klein+drill+bit+extension&qid=1563999563&s=gateway&sprefix=klein+drill+%2Caps%2C462&sr=8-4#customerReviews
​
Then not have to mess with any drywall.
Close.
Cut the hole in the wall and use a long flex bit to drill through the bottom of the wall from the top down.
Then just clip the wire to the end (these bits have holes in) and pull it up. This is called an 'installation' drill bit, it's exactly what the pros would use for this.
These are the bits I got from Amazon, I haven’t broken anything yet! ;)
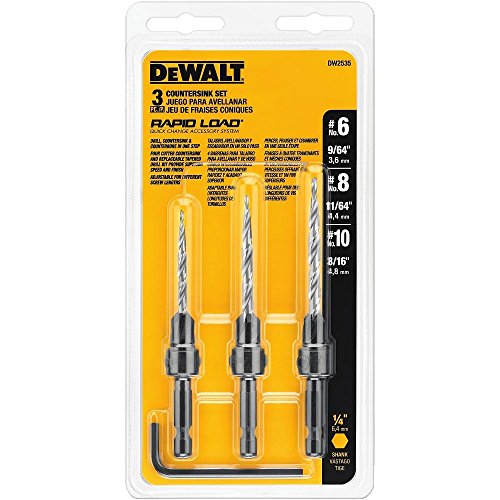
Like the other guys said, its a pilot bit+drill bit+countersink.
I have the modern, replaceable bit, version set from Dewalt for prepping decking for screws. I love them
This has come in handy more than a few times...
http://www.amazon.com/gp/aw/d/B0041FIR1E/ref=mp_s_a_1_2?qid=1416195164&sr=8-2&pi=AC_SX200_QL40
And my everyday carry Kershaw knife.......http://www.amazon.com/gp/aw/d/B00AU6NWP4/ref=mp_s_a_1_3?qid=1416195515&sr=8-3&pi=AC_SY200_QL40
Off the job...... http://www.amazon.com/Klein-Tools-98002BT-Bottle-Opener/dp/B00093GENU
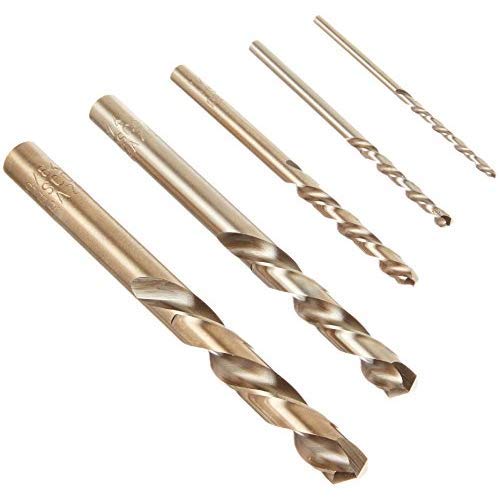
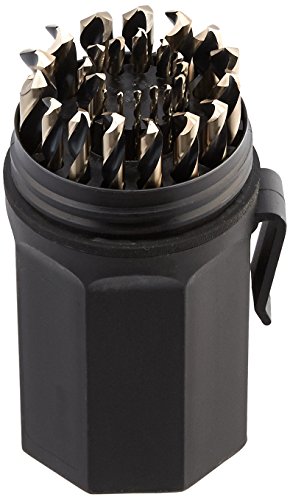
Yes, HSS is fine for the majority of materials. If you hit up local hardware stores, stay away from any of the coated junk, it's useless. If you want good quality at a good price, pick up either a Norseman or Drill Hog 29pc set in whatever composition you prefer (M2, M7 hi-moly, M35 Cobalt, M42 cobalt hi-moly). The prices don't vary too much in that range so it probably comes down to preference. If you're in a production environment and will be drilling thousands of holes, yeah, go with cobalt. If not, go with an M7 set.
https://www.amazon.com/Norseman-44170-240-UB-Degree-Premium/dp/B00627C8ZU/
http://www.ebay.com/itm/Drill-Hog-29-Pc-Drill-Bit-Set-Index-Molybdenum-M7-MADE-IN-USA-Lifetime-Warranty-/181651567209
If the 29pc set doesn't suit your needs or you just want individual sizes
http://www.norsemandrill.com/
http://stores.ebay.com/Drill-Hog
Note: My guess is that both Norseman and Drill Hog are identical and manufactured at the Norseman facility in St. Paul, Minnesota. (oh and Viking are probably also the same drill bits)*
Splitting the wood -- other than pilot holes being too small, you might also try to countersink the wood to suit the screw heads, too.
Something like this:
https://www.amazon.com/DEWALT-DW2535-Piece-Countersink-Assortment/dp/B0000225OU/
Yeah everything looks right in there. I still think its a clog. If turning up the heat made the quality better, that indicates a flow issue. I would bet if you turned the speed to like 30, it would be better as well. Clog can be a misnomer, as you can still have decent flow, but not perfect flow with a clog. Get a set of these to help if needed. I used the lead on a resistor for a while but its not exactly .4mm.
I had a pesky clog that wouldn't come out. What I ended up doing was heat up the machine, push a bit of filament, ream the drill bit in and out and twisting the whole time. I felt something come loose but it still wasn't 100%, even after pulling the filament. So then I put the drill bit in about 1-2mm and cooled down the hot end while spinning the bit the whole time so the plastic wouldn't catch it. Then at around 100C I pulled out the drill bit and pulled the filament out. This was so I could be sure that the clogging element didn't seat itself in the exit and resist coming out with the rest of the filament. Since then, i've been golden.
I love my makitas. The LCT set is good for most people. The LXT 211 or 218 are slightly more powerful for people who use their tools every day. I own the 211 set and love it.
You could use something like this kit, i have one and it very useful. Just make sure you measure your binding post size and cross check to see if this kit comes with the size you need.
IRWIN Tools Hanson Spiral Extractor and Drill Bit Set, 10 Piece, 11119 https://www.amazon.com/dp/B0002NYBH8/ref=cm_sw_r_cp_apa_CPgQBb1RK76C6
It is This
Yes it acts as a pilot hole too, except the bit at the top bores a hole for the head of a screw.
What brand are they? The easiest method I have found for hollow Ever-Readys is:
If you want to keep the knot, try the steam method.
I can't vouch for your particular situation, but these puppies have punched through anything I've thrown them at. Toughest I've used them on was stainless industrial kitchen equipment and they went through like butter.
https://www.amazon.ca/Norseman-44170-240-UB-Degree-Premium/dp/B00627C8ZU
They are Primal Horizon 3/32” x 1/16”. I got mine at my FLGS. Amazon has them with drill bits. Mine didn’t come with the bits. https://www.amazon.com/Magnets-Drill-Bits-Combo-Pack/dp/B00CA58RJY
I glued one into the head of the AT-RT where the guns would be glued. I used my hand drill to put a hole in the peg for each gun. I then used some picture hanging nails and clippers to cut a little metal post I could glue into the gun pegs.
If you only have one guitar and restring it once a year, no. That said, they are so cheap that even then, I would have one. I think I own about 5 by now, though I don't have one of the powered ones yet.
I love my string winders and would never be without one.
Cheap one
Mid-priced
Fancy with cutter (but kind of unwieldy)
Drill attachment
Power winder
There are cheaper ones than I listed and more expensive ones. But this is a decent representation.
I've got a set of Norsemen that are great. http://www.amazon.com/Norseman-29pc-16-1-Black-Gold/dp/B00627C8ZU the cheapy big box store bits don't last long enough
> Acastus Knight Porphyrion
I'm not sure about that one. It's a mighty big model, but it's leg assembly seems to be more like a knight titan, than a cerestus or warhound. It doesn't have the inverted knee like the other knights do. No idea what cabin assembly is like either. The warhound cabin is a bunch of huge pieces, I don't know of anything that can prepare you for it. I used about 20 rubber bands while I was building, to make sure it all held together and looked good before gluing. There is a pic of my warhound WIP below, you can see how it's legs have 3 segments, making a forward joint, and reverse joint. Standard Knights and the porphyrion only have a forward, and Cerestus only have a reverse. The only non +warhound models I know of with similar 3 segment opposite joint style assembly are the decimator and I believe the kytan daemon engine.
For pinning big ass models, I still use paperclips. However instead of pinning straight across a joint, like you might on infantry, I go through the joint from the outside. You can see some paperclips under the warhounds foot. There is one in each toe that goes all the way through, so if the warhound wants to move, the pin must be pulled out. That is the only place I pinned the warhound though. I used big ass magnets on the head, torso, and arms so I could do this to transport it.
My knight titan has 3mm neodymium magnets in each arm. They are the same ones I use on marines, dreadnoughts and just about everything. They hold knight weaponry up decently, but some people prefer larger ones. You can get bulk magnets on ebay much cheaper than the hobby store, but if you don't want to wait, go to a hardware store, as they are still cheaper than hobby store.
I believe this dremel is the new version of the one I have. The flex shaft attachment makes life so much easier. A basic drill bit set is good for getting started, but make sure it has the same size as the magnets you use. I've started using jewelry bits for mine, and they are insane good. However the larger ones (1.5mm-3mm set) are difficult to use, as they cut more than bore. Just last night I couldn't keep a handle on the arm bit I was drilling, ended up flying across the room. On resin they are easier though. I bought a set of cutter bits from the hardware store. It was all spherical tip and tube tip of various sizes. It has been very useful for battle damage, and the tube tip is how I widen holes for giant ass magnets.
The real MVP of a dremel for hobby conversions and building has been the circular saw bits I got mine from a wood carving magazine, and they are paper thin. Not 100% about these ones, but they are great for precision cuts and removing chunks of resin.
usually a hole in the headers, drilled with a long drill bit
https://www.amazon.com/Eagle-Tool-EA56254-Installer-16-Inch/dp/B00DNEEYFW
or, if you have access to the attic, drill down and fish the wire with a fish tape
Got a picture? Maybe a left hand drill bit along with a screw extractor bit, if you have room?
Something like this: http://www.amazon.com/Irwin-Industrial-11119-Extractors-10-Piece/dp/B0002NYBH8 (but they do make better ones out there too)
Assuming the head is stripped (rounded) and it's not the threads, I'd use this style of broken bold extractor. That is assuming you can fit it on.
If you've got nothing at all to work with, then you can use a spiral-flute type broken bolt extractor
These are basically like big reverse-threaded screws that screw in counterclockwise (so lefty-tighty, unlike normal bolts/screws) that let you put enough torque on the bolt to remove. No sawing is necessary, you just have to drill a hole into the stripped bolt more or less on center.
If it's the nut on the hinge pin, I'd just use a small drill bit and drill several holes vertically and then crack it with a chisel (protect the door when you do this.)
Practically everyone carries door hinge pins and mounting hardware. Jeep dealers will have them, as will the major online parts places (4WD, quadratec, etc.)
In mechanics, I'd use a drill bit that spins counter to tight. So, in the typical case that's a left-hand bit. These are fairly specialized and aren't the kind of thing you'll find at Home Depot. Amazon can help.
Use cutting fluid to keep the bits cool. Start with a bit that's smaller than the broken screw shaft and drill slow and successively use larger bits until you either drill out the broken screw or the screw rotates out.
Most of the time, the bits loosen the shaft and eventually just spin out the screw without having to drill it all the way out. Thing is, with the head off the screw, there's no tension holding the threads in place. Just need to spin it free.
These are what I'm used to.
http://www.amazon.com/gp/aw/d/B0000225OU/ref=mp_s_a_1_1?qid=1407665594&sr=1-1
I don't think metric/imperial is much of an issue of you're working with wood. You can always look up a conversion chart to make sure.
I'd also suggest getting a Pin Vise to hold together the parts. I'm not a fan of depending solely on glue with metal parts.
In case you don't know what a Pin Vice is, it's a small, pen shaped, manual drill that you use to drill a hole, big enough to insert a pin into your model. This way you can add a firm set to where your model pieces join together.
https://www.amazon.com/gp/aw/d/B0751893Y2/ref=mp_s_a_1_2?ie=UTF8&qid=1523296808&sr=8-2&pi=AC_SX236_SY340_FMwebp_QL65&keywords=6mm+glass+drill+bit&dpPl=1&dpID=417He%2BJmkoL&ref=plSrch
Assuming you have a drill, these aren't hard to use. Keep it flooded with water while cutting and go slow.
I got one of these for my electric screwdriver.
It's a godsend when I'm restringing a few guitars and basses at the same time.
http://www.amazon.com/gp/aw/d/B005M29JN0/ref=mp_s_a_1_1?qid=1420153393&sr=8-1&pi=AC_SY200_QL40&dpPl=1&dpID=11Gy7Qi7O2L&ref=plSrch
"Flex Bits" might get you a bit more results. They also sell them in Home Depot with the electrical tools in the electrical section as opposed to the standard hardware area.
An easier solution would be to check out wire mold that you can mount to the wall and run the wire in. Alternatively you could simply paint the wire.
I use Kamo 5PCS 0.4mm Drill Bits for 3D MakerBot Printer Nozzle Cleaning Kit $7.00 always when the hot end was hot. But since I started removing the filament when I was done with the printer for the next few hours, I've not had any need to use them. Not a single clog.
I'm looking to get some forstner bits; I'm just a new hobby woodworker so they won't see excessive abuse. With that said I'm wondering if it is worth spending more for Fisch, Freud, or Lee Valley offerings or something like this Porter Cable set that gets really good reviews will be sufficient ( https://www.amazon.com/gp/product/B004TSZEB4/ref=ox_sc_saved_title_3?smid=ATVPDKIKX0DER&psc=1 )?
Also, looking for some brad point bits as well. Any brand recommendations there? And is it worth getting a full set or will something like 1/8-1/2" in 1/16 increments be enough? I have a full set of non-brad point bits already.
Thanks!
The holes were made with forstner bits and a drill press. The corners were chamfered with a #4 1/2 smooth plane.
Forstner bits make flat bottom holes: http://www.amazon.com/gp/aw/d/B004TSZEB4/ref=mp_s_a_1_1?qid=1373367265&sr=1-1&pi=AC_SX112_SY192
Hand plane used:
http://www.lie-nielsen.com/catalog.php?sku=4_5
I use this and this to cover my barrel sizes, start small adjust as needed, always start a pilot hole with an xacto or similar.
http://www.amazon.com/gp/product/B000V2DSE2/ref=oh_details_o04_s00_i00
Lightweight, compact, and powerful. Battery lasts for a long time and recharges fast. Don't waste any money on cheaper cordless drills.
Drill bits: our Canadian leader has good things to say about: Norseman bits. https://www.amazon.com/dp/B00627C8ZU/
There are special drill bits designed to drill through ceramic. I bought these: https://www.amazon.com/dp/B001GNC8RI/ref=cm_sw_r_cp_api_Ev8FybXJ3YC1D
Kk
https://www.amazon.com/QWORK-Multi-Material-Concrete-Plastic-Tungsten/dp/B0751893Y2
Ha. That's not a bad idea. Amazon.us btw.
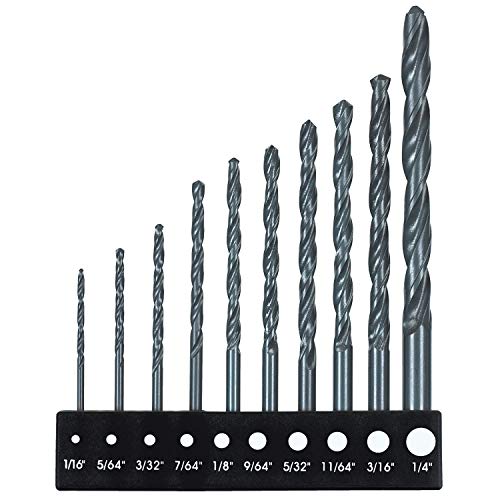
How's this for common sizes? But then that isn't bits for all -- wood, masonry, metal.
Use a counter sink and tapered head screws, like drywall screws to install the tub.
counter sink will make the screw heads flush with the surface on the tiling flange.
Counter sink example
http://www.amazon.com/DEWALT-DW2535-Piece-Countersink-Assortment/dp/B0000225OU/ref=sr_1_1?ie=UTF8&qid=1408325845&sr=8-1&keywords=drill+bit+with+countersink
Careful tightening the screws, if you use a drill to drive them in set the clutch so you don't over tighten and crack the flange, might be best to do the final tighten by hand.
You can shim gaps under the screws with cedar shims. ( flange does not touch the stud ) then cut the shims off.
http://www.hardwarestore.com/36-count-16-red-cedar-shims-656434.aspx?utm_source=pla&utm_medium=cpc&utm_term=brand=nelson%20wood%20shims%20and%20adwords_labels=hardware&utm_campaign=rkg&device=c&network=g&matchtype=&creative=20650488858&adpos=1o4
You can probably get them out pretty easy with a left handed drill bit. These Irwin bits are pretty baller. Just use a self centering punch or a small pointy punch and mark the center, then start with the smallest or second smallest one.
The idea is that the bit will catch the bolt and spin it out.
They also make this set that has spiral flute extractors, just in case the left handed bit doesn't catch.
You should use a torque wrench if you're not (I've totes broken bolts when torquing to spec before, so no hate if you are), a small 3/8" wrench that does inch lbs. Those bolts are probably supposed to be between 80 in lbs and 110 in lbs. Torque wrench will a) ensure you're not over-torquing and breaking bolts, and b) it's even all the way around, so you're not pinching the gasket weird in some spot.
I just installed 4 spikes on my banjo. Placed them at the A, B, C and D frets on the fifth string. I installed the spikes facing inward (opening towards the other strings). I used this set of drill bits to drill the holes to set the spikes in:
http://www.amazon.com/Dremel-628-01-Piece-Drill-Bit/dp/B0000302Z3
I used the 1/32" (.03125") bit, which was very close to the diameter of the spikes, drilling the holes with the drill bit just touching the string and 3/8" back from the fret. I put a dab of Elmer's glue on the spike and inserted them with needle nose pliers. I used a .015 feeler gauge under the spike as I pressed them into place (no hammering). Then I masked off the fret board and filed the sharp edges away from the tops and sides of the RR spikes.
They work great, and only pull the string slightly sharp, but a quick retune is no big deal. I can still fret the string if I want to, barely being able to tell they are there.
It only took about 30 minutes. The longest part was the drilling, using a hand drill and being careful not to press to hard and break the tiny bit. Here are two links which helped me out:
http://www.deeringbanjos.com/blogs/faqs/10318861-how-to-install-spikes
http://zeppmusic.com/banjo/spikes.htm
I used these Dremel Drill bits on a regular drill to make the holes bigger on my IGO-L Cap. I didn't use the first one because it was the same size as the stock hole. I used the second one and tested after I cleaned it up. It wasn't enough for me so I went with the next size up, 1/16th I believe and that worked out for me. I've since used that bit to drill out an RSST and a mini DID clone.
It happens. Pin vises aren't too bad, and neither are brushes depending on what you are looking for. Army painter brushes are good, but they are probably not the best bang for your buck, I just like them because they work for me and I am comfortable with the sizes.
This is one of the two pin vises that I have and the same bit collection. There are plenty of options for everything, though, and if you take it slowly you will amass quite a collection of models and tools. I think limiting your warhammer budget is a good idea too- that way you actually PAINT the models you get and they don't just sit around.
Where I previously worked, all the techs were equipped with the following before going out in the field:
We also experimented with carrying compressed air cans but that stuff gets used too much. Where I currently work, we use this electronics duster/blower and even though it is quite loud, it works really well.
Most of it (except for the spart parts of switch, router, power supply, ethernet card and USB wireless card) fit into a tool bag. I don't think I forgot anything. If I remember, I'll add it to the list.
Get a set of left handed drill bits (Amazon link) then take the smallest one from this kit, press it against the screw head, and turn the drill counter clock wise slowly.
You're trying to get the bit to bite into the head, grab a hold and unscrew it. You can apply a bit of presure.
i've got this picked out for my Mr. for father's day.
Thanks for hosting a contest!!
fortissimo !!
Does what you link totally replace the stock assembly? The nozzle goes up into some kind of block that appears to have tape around it. Will I need to rethread everything through that? I was unable to get the nozzle out of that block (I tried). Is there a trick to that?
And would these work to get the piece of metal out? https://www.amazon.com/0-4mm-MakerBot-Printer-Nozzle-Cleaning/dp/B00MQKW230/ref=pd_bxgy_328_2?ie=UTF8&psc=1&refRID=7BCEZ83W2VV756AWMCFZ or are they too thick?
I have a makita drill and impact set and it's been flawless for 5 years. http://www.amazon.com/Makita-LCT200W-18-Volt-Lithium-Ion-Cordless/dp/B000V2DSE2/ref=pd_sxp_grid_pt_0_1
Two years ago I built a privacy fence and wanted another impact driver with out the expense. I purchased the Ryobi bundle for $99.
I have had no issues with either, but as a home owner, Ryobi has so many other great affordable tools that the batteries work with.
https://www.ryobitools.com/power-tools/products/details/540
Something like this might help. I know how small that roll pin must be, but I am not certain one of these tools will be small enough for the job. Might be worth it, though. Otherwise, a trip to a professional gunsmith might be in order. Good luck!
I purchased the Makita 18V Lithium Ion set linked earlier (http://amzn.com/B000V2DSE2). I love them, they work great and the batteries charge fast. One thing I wish I did was get the LXT version, which has a larger battery. I don't want this for longer run time, although that would also be nice, but it would run the rest of the cordless tools that Makita sells. Things like a circular saw, sawzall, shoot even a friggin leaf blower can all run on the same batteries. So I find my self now wishing I had originally bought the bigger battery set.
This one specifically: Makita LXT 18V
Reason being, it has the compact impact driver that everyone loves, and the hammer drill (which can switch between hammer function or normal drill function).
TL;DR: I wish I bought Makita LXT 18V over the Maktita 18V
Bosch GT2000 Glass and Tile Set, 4-Piece https://www.amazon.com/dp/B001GNC8RI/ref=cm_sw_r_udp_awd_v3S2tb0A3PR1RZD3
OK, I think the one I have like this is "carbide". I guess they mean tungsten carbide?
My house was all Cat 3 6 home runs to the exterior. I replaced it all with solid core Cat 6 and added two runs for wireless access points in the ceiling. It was a PITA. I home ran the new stuff to a network enclosure box I added.
Cat 3 is junk I've seen it send 100Mb or more inside a house but if you ever have to troubleshoot issues your wires will always be the unknown.
As others have said you can never plan on just pulling new cat 6 behind the cat 3 it works like 10% of the time thanks to staples. So if you accept that you are cutting drywall and learning to fix those numerous holes then it's a much more realistic job. Basically everytime I got a snag I got the drywall saw out. Transitioning floors can be tricky but not impossible again cut the drywall.
Here are the best tools for the job. Flexibile long drill bit was a major cheat once I started using it. Fishing tape is a waste of the time except for conduit in my opinion use the fiberglass sticks I linked below.
https://www.amazon.com/Eagle-Tool-EA56254-Installer-16-Inch/dp/B00DNEEYFW/ref=sr_1_7?keywords=drill+extension+wire&qid=1564611470&s=gateway&sr=8-7
https://www.amazon.com/dp/B005LW4CFG/ref=psdc_6396129011_t3_B07F2LWVDV
https://www.amazon.com/Stanley-15-556-Jab-Cushion-Grip/dp/B00002X21W/ref=sr_1_4?crid=12ICHMNHKXEGF&keywords=drywall+saw&qid=1564611505&s=gateway&sprefix=drywall+saw%2Caps%2C125&sr=8-4
Get a screw extractor set from Amazon. Just make sure to get one that comes with left hand drill bits. You can often get the screw out just with the left hand bits before even needing to use the extractor.
This is a good kit if you want a variety of sizes for anything like this in the future:
https://www.amazon.com/dp/B0002NYBH8/
What I was thinking about doing is superimposing the G10 plate over the intel bracket and making markings through the C holes.
I found this Dremel drill bit set on amazon.com, do you think any of these bits will be the correct size and do you think a Dremel tool has enough torque to drill through the Intel bracket?
Although costly (total outlay $30 for Dremel tool and bits) this approach would allow me to cut the corners and drill the Intel bracket.
https://www.amazon.com/Dremel-628-01-Piece-Drill-Bit/dp/B0000302Z3
Seriously though, you should fabricate these brackets and sell them for $30. People would buy them. You can purchase them in bulk from Corsair for $10-15, make a few holes, turn around and sell them for $25-30. You sell 2-3 a day that's some money for not a whole lot of work.
Adding the required shim and these would sell with the demand exceeding supply of the EVGA Hybrid kits.
Pay less for vastly superior performance (with x41, H100i)
EVGA wants $120 for their H55 rebrand.
$60 for an H55 and $25-30 for your kit that's a no brainer.
Here is the non-mobile link from the comment above
***
This bot is supported by the referral link above. If you wish to not use a referral link, you may use this link instead.
What about the bits with the counter sink built into the top?
http://www.amazon.com/Dremel-628-01-Piece-Drill-Bit/dp/B0000302Z3
This kit is only $27 shipped and has all the magnets you'll need unless you really go nuts - then you might have to get some more of the middle size eventually.
You also need a pin vice drill
But if you really can't wait, just go really easy with super glue on the arm joints - as that is typically where you magnetize. I'll get some pics here in a sec and update this post.
EDIT Ok here's a quick and dirty magnet album so you can get a good idea of which spots to magnetize. On the Thunderwolves I magnetized the rider in the ass so I can transport them easier. The arms are magnetized for weapon swapping. I also magnetized the backpack of any dude that might ever equip a Jump Pack (blood claws can quickly become sky claws, rune priests are great with jump packs so they can deep strike and psych). Dreadnought arms are pretty obvious. I also magnetized the hand on my battle leader using the smallest magnet size so I could give him a plasma pistol or a combi weapon.
Treat yourself to a set of left hand drill bits. The bits usually start drilling and end up catching and un-threading the stripped/stuck screw.
I got this set of multi-material droll bits from Amazon for less than $10, and use them to drill holes for planters all the time! 😊
https://www.amazon.com/dp/B0002NYBH8/ref=cm_sw_r_cp_apa_i_eCy4Cb467MDW6
I like these kinds of kits, I have one like this (not sure which brand). Those reverse drill bits sometimes work better than the extractors.
I use the following(links below). I've seen them all available at walmart for not too much more.
Using the drill press you wont break any bits, at least I havent. If you size your holes correctly the lack of copper in the middle of the hole will guide your drill bit automatically so you can be off center by a small amount. I've made about 40 boards all with a crapton of holes and still havent worn out my smallest drill "1/32" bit which I use constantly.
The smallest drill bit I've been able to find is 1/32 which works for chips that fit into a breadboard. I haven't found smaller but if you see something smaller get it because even 1/32 is a pretty big hole for the majority of leads. Its about 2x too big for most chip feet.
http://www.amazon.com/Dremel-628-01-Piece-Drill-Bit/dp/B0000302Z3/ref=sr_1_1?s=industrial&ie=UTF8&qid=1414792230&sr=1-1&keywords=dremel+drill+bits
http://www.amazon.com/Dremel-4486-MultiPro-Keyless-Chuck/dp/B0000302ZV/ref=sr_1_2?s=industrial&ie=UTF8&qid=1414792230&sr=1-2&keywords=dremel+drill+bits
http://www.amazon.com/Dremel-Workstation-Drill-Press-Holder/dp/B008F6HLS0/ref=sr_1_4?s=industrial&ie=UTF8&qid=1414792250&sr=1-4&keywords=dremel+drill+press
I Love This Greenlee Drill/Tap set!
And of course my Wera Screwdriver Set. Makes dealing with terminals a breeze.
Everyone here seems to like Milwaukee power tools, but I have a Milwaukee drill/driver, but seriously, I prefer the 12V Bosch drill and impact driver. I was trying to use the brand new Milwaukee to drive a 1/4" lag bolt into my dock, and it stalled about 4 threads in. Grabbed the 8 year old Bosch, and drove it all 3 inches down without a sweat.
ETA: Something I only pull out once in a blue moon, but when I do need it, a good Fox and Hound is an absolute bloody necessity! I have that one for general wires, and my Fluke network test kit one for Coax/Copper Ethernet. I wish there was some way for someone to make one for fiber, but oh well, that's next generation physics.
I guess I should also say, the GreenLee Slug-Buster knockout set is amazing. No time spent trying to pop out slugs from the punches.
Oh, lord, I could go on...
Okay, one last one, sitting on my desk: a Brady printer. I can use that to print wire labels FAST (Real Fast), directly importing from a wire run list in a CSV format, but it also does legend plates, and pushbutton/switch plates. Godly.
Okay, I'm done.
No wait.. .One more, for instrumentation guys: Fluke 4-20mA Clamp on... LOVE IT
Okay, I'm really, REALLY Done
QWORK 5 Pcs Set (6, 6, 8, 10,... https://www.amazon.com/dp/B0751893Y2?ref=ppx_pop_mob_ap_share
I just got these yesterday. I’ve only tested them on one planter, but they went through it nice and clean.
QWORK 5 Pcs Set (6, 6, 8, 10, 12mm) Multi-Material Drill Bit Set for Tile,Concrete, Brick, Glass, Plastic and Wood Tungsten Carbide Tip Best for Wall Mirror and Ceramic Tile on Concrete and Brick Wall https://www.amazon.com/dp/B0751893Y2/ref=cm_sw_r_cp_apa_i_vjEDCb016R0RX
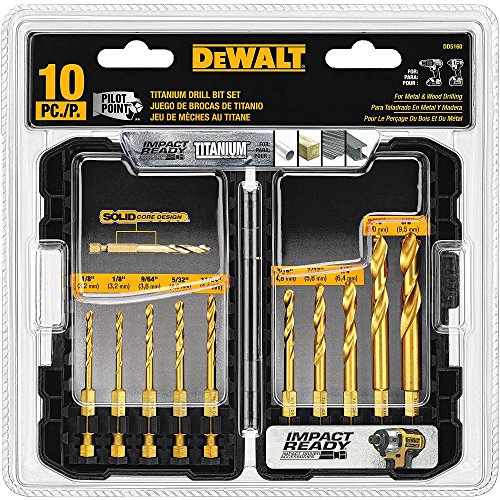
Make sure the bit is fully seated into the chuck--with small bits, this is a particular problem because sometimes you need a longer drill depth. I prefer to use hex shank drill bits like, say, these: https://www.amazon.com/DEWALT-DD5160-Impact-Ready-Titanium/dp/B017KUENH8/ -- they'll never slip.
As a carpenter, this is the set that I prefer. The charge time and battery life is great and they both work very well.
http://www.amazon.com/Makita-LCT200W-18-Volt-Lithium-Ion-Cordless/dp/B000V2DSE2/ref=sr_1_1?ie=UTF8&qid=1419307247&sr=8-1&keywords=makita+impact+driver+drill+set+18v
Use left handed drill bits, it’ll pull it out.
A little more expensive than some, but good tools are their own reward.
www.amazon.com/dp/B0002NYBJG/ref=cm_sw_r_cp_api_i_IXsPDbX4H7CPB
The main application is putting in self tappers. Using the impact for drilling is just an efficient/lazy compromise. Here. Look.
Extractor kit
Werkzeug Damaged Stripped Screw Extractor Set for Broken Screw, All-Purpose HSS Broken Bolt Extractor Screw Remover Set with Magnetic Extension Bit Holder & Socket Adapter (22 PCS ) https://www.amazon.com/dp/B07VFM3Q5Y/ref=cm_sw_r_sms_apa_i_OzJLDbEN7DKMD
I've used a drill bit like this one before (Amazon.com Magbit) and been able to get up most walls with it. I have cut out the hole where the wall jack will do and then drill down with this and run that cable through the newly created hole.
​
Obviously stay away from any wall that might have electrical in it unless you know exactly where it is.
I own this set, http://www.irwin.com/tools/screw-bolt-extractors/10-pc-spiral-extractor-drill-bit-set-in-metal-index / https://www.amazon.com/Irwin-HANSON-Spiral-Extractor-11119/dp/B0002NYBH8/ref=sr_1_3?ie=UTF8&qid=1521322834&sr=8-3&keywords=irwin+screw+extractor+set&dpID=410DHljAW2L&preST=_SY300_QL70_&dpSrc=srch
and have used it once or twice. What I like about this one is the left handed drill bits. When you use the drill bit to round out the screw head, the left handed drill bits might just grab the screw and unscrew it for you.
Who said it has to be more?
Even ones like these? https://www.amazon.com/0-4mm-MakerBot-Printer-Nozzle-Cleaning/dp/B00MQKW230
https://www.amazon.com/Norseman-44170-240-UB-Degree-Premium/dp/B00627C8ZU/
>I don't have a star-shaped allen-wrench
Those are usually called Torx (actually a brand name) or Star bits. If you don't have some I'd recommend getting a precision screwdriver kit. It's well worth the $12 investment.
This is the kit I have. The smaller impact driver is phenomenal for about 99% of jobs, and lighter and more compact (as well as having a better heft or balance, IMHO) than most others.
https://www.amazon.ca/Irwin-Industrial-11119-Extractors-10-Piece/dp/B0002NYBH8/ref=asc_df_B0002NYBH8/?tag=googlemobshop-20&linkCode=df0&hvadid=292995173425&hvpos=1o2&hvnetw=g&hvrand=13370702493849758587&hvpone=&hvptwo=&hvqmt=&hvdev=m&hvdvcmdl=&hvlocint=&hvlocphy=9000649&hvtargid=pla-613176131032&psc=1
You need a damaged screw extractor. Something like this: https://www.amazon.com/Werkzeug-Stripped-Extractor-All-Purpose-Extension/dp/B07VFM3Q5Y
I haven't used that set personally, so I can't speak to their quality, but they are well reviewed and go pretty small.
Just some background – my sister asked me if I could repair her young daughters glasses since the new ones will take weeks to arrive. I took a look at them and told her that I would give it a try.
I noticed that the hinge was broken like this so I came up with what I showed in the pictures. Basically the pin is acting as a dowel.
Just though I would share since this is very very easy to do if you are handy with tools.
The small drills and chuck can be found online. Example: https://www.amazon.com/CML-Supply-Micro-Drill-Chuck/dp/B001RJE3X8/ref=redir_mobile_desktop/161-7421479-4802204?ie=UTF8&psc=1&refRID=H9VB2SA2D97TJHZ7KSDR&ref_=pd_aw_sbs_469_3
These are the one's I used: http://www.micromark.com/the-rogers-drill-bit-set-61-80-set-of-20,8027.html
I would love these because I'm hoping to buy the drill soon and want to be able to use it for some home projects.
I'm thrilled you are happy and your username is very inspiring.
I use left handed drill bits to extract broken bolts, usually works really well and doesn't require multiple steps
Cheap drill bits are absolute crap. A lot of the odd fractional sizes aren't even properly hardened because they don't expect them to see much use. Buy them from people who actually make drill bits, not just companies that slap their name on whatever products they can rebrand (Millfuckee and Default do this shit too). Cry once by spending some money, or cry every time you use the cheap shit.
both have been linked in this thread.
you yourself found the hex shank bits:
> I’m assuming my only option is impact ready like this DEWALT DD5160 Impact Ready 10 Piece Titanium Drill Bit Set https://www.amazon.com/dp/B017KUENH8/ref=cm_sw_r_cp_api_i_BH57AbSDWFX1B
and the top comment linked you to the keyless adapter:
> That chuck only accepts 1/4" hex bits. You'll need something like this in order to use twist drills, or you can buy 1/4" hex/"impact ready" drill bits like these.. The other style you are used to is called a keyless chuck.
I’m assuming my only option is impact ready like this DEWALT DD5160 Impact Ready 10 Piece Titanium Drill Bit Set https://www.amazon.com/dp/B017KUENH8/ref=cm_sw_r_cp_api_i_BH57AbSDWFX1B
Definitely magnets. Not just so that you can switch out weapon configurations to allow your units to adapt and change roles as you add more units to your army, but also to future-proof your collection.
GW likes to do things like make a certain weapon loadout stomp face in one codex, and then be mediocre in the next update. The most notable time that this happened to me, I had recently finished building four broods of tyranid termigants with fleshborers. 60 models. There was no other way to go in that codex; if you built your 'gants any other way, you were wasting points. The new 'dex came out, the weapons didn't work the same anymore, and you were a fool not to take devourers. That was a bad day.
Magnets don't take much time (I spend less time magnetizing parts than I do scraping mold lines), and they don't really take a substantial investment, either. Here are the tools I use: pin vice with different sized collets (in the handle), $9.95USD; Dremel bits to gradually increase the size of the hole, important to start with a guide hole and gradually work up to the size of your magnet, $6.21, 200x 3mmx1mm magnets, 4.01. For $20.17, you can make your units super versatile, and know that you won't have to buy a new squad if GW changes the rules.
Although you're new to the game, magnetizing is a cool skill set to have. You have a lot more latitude when you make army lists (especially important for players that are developing a feel for the game, army, or local metagame), you can make dual-purpose squads (need jump troops? Good thing there are magnets on those backpacks!), and you can keep GW from making you choose whether to buy 60 more 'gants or try to pry off all of their stupid little arms and replace them.
I've had success extracting a broken bolt with this kit: https://www.amazon.com/gp/product/B0002NYBH8/
I'm sure any similar product will work.
wow thanks! and uh would this drill set work ? http://www.amazon.com/gp/product/B0000302Z3/ref=gno_cart_title_1?ie=UTF8&psc=1&smid=ATVPDKIKX0DER and are there anything different with magnets found on amazon? i would prefer to order everything from amazon since i have a prime membership, if not no biggie just wondering.
I just use normal torx bits in my mini grip. I have this screw driver kit and it works fine: http://www.amazon.com/gp/product/B000MF754W
Quick question as I want to get a basic toolset, would one of the following be good for novice-level car maintenance (the things you listed above), and what additional things?
Stanley 60-piece toolset vs. Maxtech 32-piece toolset
Hello friend,
I just got into magnetizing and have done all my research and my models came out great. The best magnets to get are made by "Primal Horizon".
My final note, and this is my BEST piece of advice! ALWAYS CHECK POLARITY! I cannot tell you how many times I had everything set, magnets on both ends of what I was trying to adhere together and then arrrggghhh.... wrong polarity. The best approach to this I found is keeping the magnets stacked and stuck together... kinda like this > [[[[] I hope that crude picture helps haha. What I would do is keep them stuck to a piece of metal that has a good surface area, place my first magnet into the arm socket of the model while they are still stacked and then let the first magnet settle and dry. After that, remove the tool in which the magnets are stuck to and with the other piece you are trying to attach, just simply put the magnet on the opposite end into the hole on the piece in which you are attaching. This will ensure polarity is correct. I am sorry if that was a crude way of explaining it, but I would be happy to take photos and link them to explain this process.
Most of all, have fun! There is no better feeling being able to swap out all my Dread weapons, melee weapons on squads etc... I also put some magnets on the torso of my Dreads to give it some nice movement and rotation (almost makes it feel like a ball bearing). If you have anymore questions or need any clarification please let me know and I would be happy to help ya out, upload photos etc..
Good luck, have fun!!
Use a small drill bit- http://www.amazon.com/Mini-Micro-Drill-Vise-Chuck/sim/B001RJE3X8/2
and kill the leds one by one.
I like this set, all the extractors come with a matching left handed drill bit.
http://www.amazon.com/gp/product/B0002NYBH8/
I have the same year MBP and did the swap like you mentioned. Looked around on Amazon and ended up buying this set...it has both screwdrivers needed to tear apart the lid and dock.
http://www.amazon.com/gp/product/B000MF754W
Wiki is: http://mpselectmini.com/
Some items I bought from Amazon (don't buy the hot end pieces if you have a V2. They changed the hot end to an all metal one):
https://www.amazon.com/gp/product/B00WE1A3D2/ref=oh_aui_detailpage_o00_s00?ie=UTF8&psc=1
https://www.amazon.com/gp/product/B00T2DNKJY/ref=oh_aui_detailpage_o01_s00?ie=UTF8&psc=1
https://smile.amazon.com/gp/product/B01LAYCRAA/ref=oh_aui_detailpage_o07_s00?ie=UTF8&psc=1
https://smile.amazon.com/gp/product/B00L4UXQ42/ref=oh_aui_detailpage_o08_s00?ie=UTF8&psc=1
V
https://smile.amazon.com/gp/product/B00MQKW230/ref=oh_aui_detailpage_o09_s01?ie=UTF8&psc=1
https://smile.amazon.com/gp/product/B01A81FXMK/ref=oh_aui_detailpage_o05_s00?ie=UTF8&psc=1
https://smile.amazon.com/gp/product/B01ACIFPYA/ref=oh_aui_detailpage_o00_s00?ie=UTF8&psc=1
Pin the SA...
Use a small drill bit with a hand chuck and drill up into the hooves. Then drill corresponding holes in the base. Clip off sections of a paperclip, inject glue into holes, insert paperclips, attach model to base and let sit.
Suggest doing the same for the Phoenix model.
It all sounds hard, but takes literally 5 minutes. And here's a decent [hand drill set] (http://www.amazon.com/gp/product/B001RJE3X8) that would work fine.
These ones?
>Should I call an electrician to install an ethernet port?
Why not do it yourself and save hundreds of dollars?
Is there a basement or attic? Use that for horizontal runs.
For the walls, if you have a typical twigs and plywood house, getting between floors will be a bit tricky, but not super hard. Cut a small hole at the floor and ceiling along the wall in the 1st floor, using a long, flexible drill bit drill down into the basement from the hole near the floor. Drill up to the second floor the same way. Try to keep the bit centered on the sole plate/top plate.
If you have to use the attic to run from one side of the house to the other, you'll need to repeat the above process on the second floor to get to the attic, then once you're in the attic above the bedroom, drill up from a hole near the ceiling to get into the attic from the bedroom, then cut a hole where you want your wall plate.
Then you'll have a few small holes to patch and paint.
Narex Chisels
Porter Cable Forstner Bit Set
Eclipse Coping Saw
Countersink Wood Drill Bits
Narex Marking Knife
Bessey F-Clamps from Home Depot. 4 pack for like $20.
Bessey 3/4" pipe clamps from Home Depot. $12-ish. Black pipe is about $1 a foot.
You did a good job with fit and finish. One thing I like to do when using screws is to countersink... I think it really improves the project. Take a look at this link below. You can drill a pilot hole and countersink in one swoop:
https://www.amazon.com/gp/aw/d/B0000225OU/ref=mp_s_a_1_2?ie=UTF8&qid=1525891819&sr=1-2&pi=AC_SX236_SY340_QL65&dpPl=1&dpID=51QMLOynRSL&ref=plSrch
Ok so get a really thin sewing or hypodermic needle and carefully put it into the nozzles end, if it doesn’t fit, don’t force it. I’ll link a thing for that specifically in just a second.
Edit:ok here you go.
eBay: https://m.ebay.com/itm/8pcs-Nozzle-Cleaning-Needle-0-2-0-25-0-3-0-35mm-3D-printer-Cleaning-Needles-/222630788518
Amazon: https://www.amazon.com/gp/aw/d/B00MQKW230/ref=pd_aw_sim_229_1?ie=UTF8&psc=1&refRID=VV7QD5F4WX772BSX6J10&dpPl=1&dpID=617jklFtJDL
I think Makita is an excellent brand. But the batteries are very small and low-power on that kit. If I where you, I'd spend a little more and get this instead: http://amzn.com/B000V2DSE2 . I have an older version of that set and it has worked well for many years. Although even those batteries are small-ish for big projects (e.g. insufficient drilling holes and driving screws to deck small porch in one charge).
I can appreciate the criticism if you started with a solution first then moved onto that.
But for someone who had been doing machine work for years and has never seen left-handed bits "reverse bits" or whatever... Makes me suspect anyway. https://www.amazon.com/Tools-Cobalt-64-Inch-Assortment-30520/dp/B0002NYBJG
All that being said I appreciated his solution in the end.